I made a prototype in January when I got on the bra bandwagon. Things were going great, and then I got started sewing the Real Bra...I didn't know that lace requires some special sewing techniques, and I was still very nervous with the new sewing machine. I sewed the first cup together, and then on the second one the feed dogs ate the lace and then got indigestion. I had to take apart the innards of the machine and call the shop panicking...of course it was all fine after a rethreading! But that really threw this bra into the corner for awhile.

It was with some surprise that I pulled the bra pieces out of their bag and saw that, despite my whining, I had actually finished sewing all the lace bits! It still took me awhile to get up the nerve to finish it. Despite bra making being easy in some ways, it's fiddly and I have to refer to the directions at every step. Once I finally went for it, I finished this in a single sewing stint. I have been following Anne and paid a lot of attention to her fit issues with this bra because I thought I had a similar shape to her, so I was pretty curious how a non-foam version would fit (and I reckoned I would try some of her recommended bra patterns if the Marlborough wasn't a go for me.)
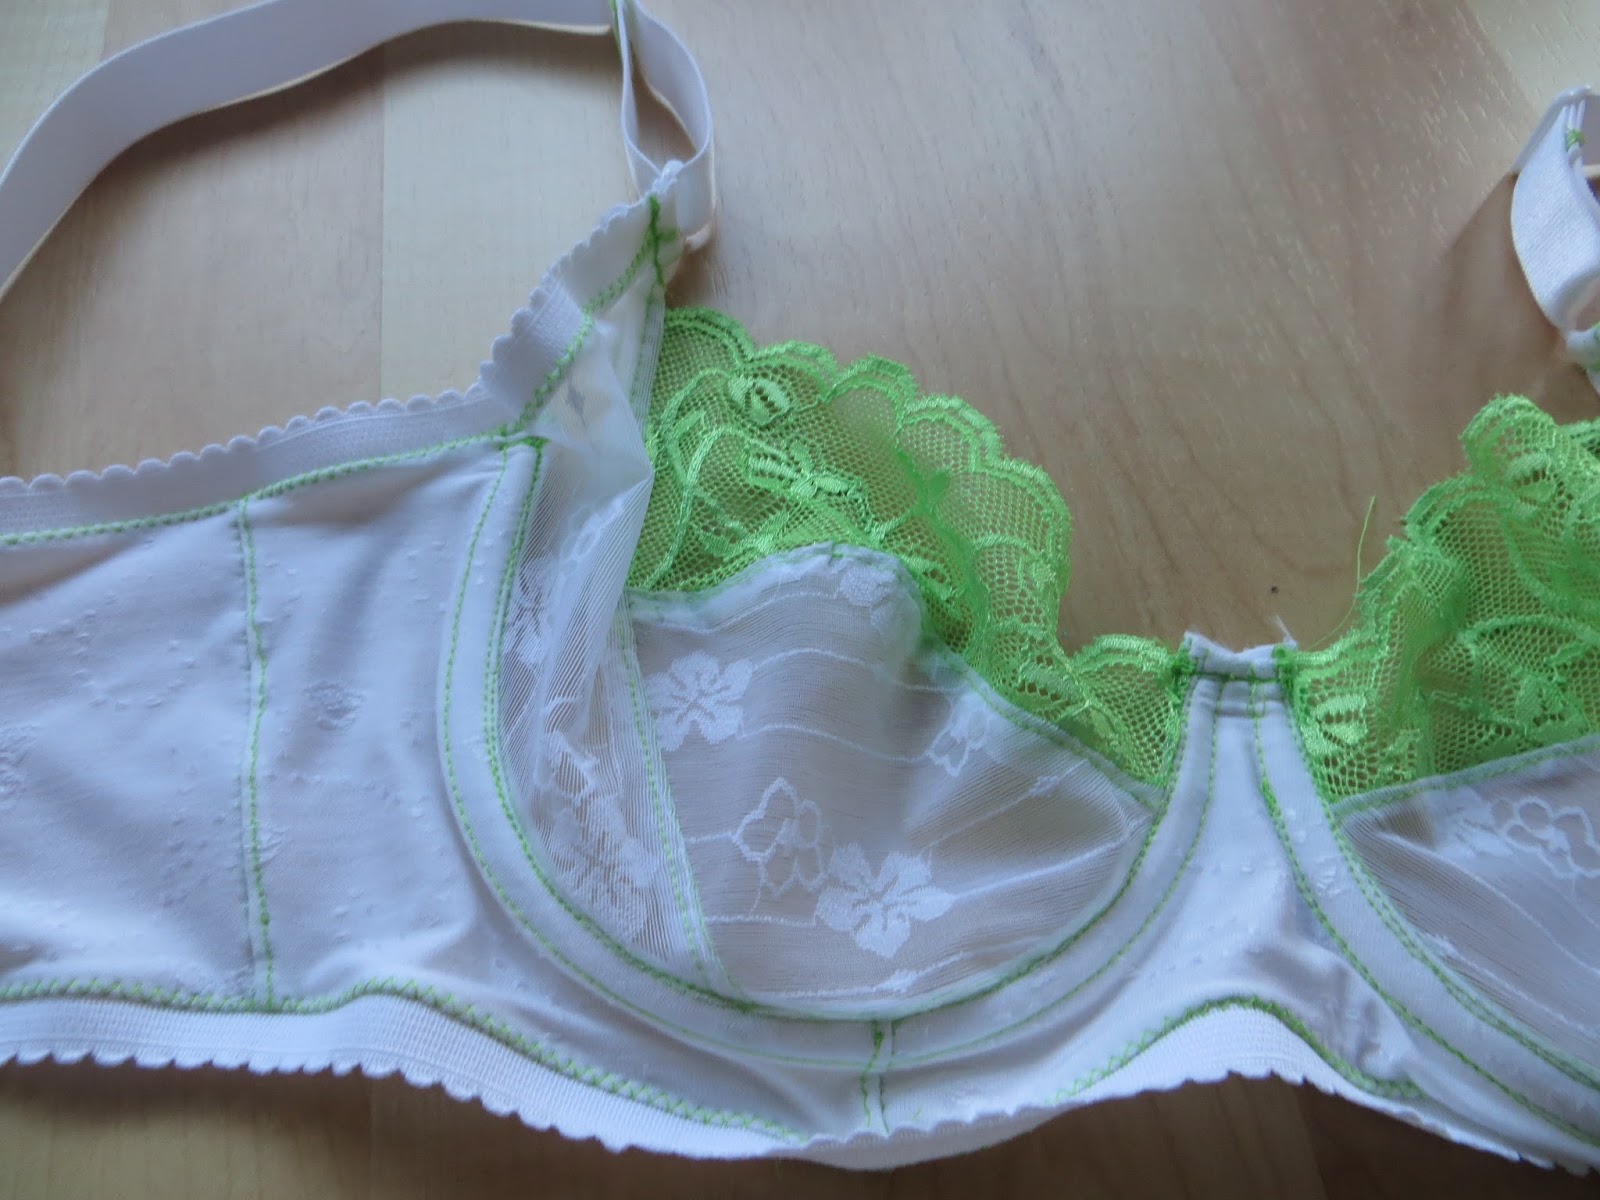
Regarding the pattern, I read Demystifying Bra Making, by Norma Loehr, prior to making my foam tester bra, and that gave me what felt like a solid foundation. The book has you make your own center bridge, and I have done that. Coming back to the theme after six months, a few of the terms were hazy but overall not difficult to understand. I continue to find that my Pfaff with its IDT is terrible to make bras. It doesn't go well over small, fiddly bits and my stitching is pretty horrendous. It didn't eat anything else, at least. And, shock of shocks, the bra fits! I did not use elastic over the green lace top, because on store-bought bras I find that anything tight on that edge creates double boob. I don't know if it will end up becoming too loose too quickly without that support, but for now it fits very well. I also didn't pull on the underarm elastic and it gapes a lot. My kit came with wide shoulder straps and plastic bits, which I don't like so much.


The changes I will make are to tighten the underarm elastic, to remove some of the height of the center bridge, and to sew on the bottom elastic with a bit more fabric, because it actually wrinkles a lot- I sewed it on with the tiniest of seam allowances but I think I don't need much bottom band more than the elastic itself. The fit of the bra seems correct. It doesn't give me a lot of lift or volume, but it is comparable to some of my store bought bras. I think that when I tighten the arm elastic, it will pull toward the center a bit more which I would prefer.
I also find it strange that the back piece is not the correct height for the hook and eye pieces. You have to cut it down quite a lot and the instructions don't mention this anywhere. Even with my hook and eye being big, I still had to snip a new curve to the back.
My bra kits are from Spitzenparadies. I got this one and this one. It took me quite awhile to find everything on the site because of how I still don't have much German sewing vocabulary. The green kit is quite see through, but has huge amounts of the flowered stretchy fabric. The brown kit is more like mud brown...oh well. I also bought a huge variety of wires, most of which weren't the right size. I think two sets are pretty decent and another one or two are maybe ok. I tried to compare by measuring current bras but that didn't produce great results. I will wear the two good ones around and see if they are good enough to buy more of.

It was with some surprise that I pulled the bra pieces out of their bag and saw that, despite my whining, I had actually finished sewing all the lace bits! It still took me awhile to get up the nerve to finish it. Despite bra making being easy in some ways, it's fiddly and I have to refer to the directions at every step. Once I finally went for it, I finished this in a single sewing stint. I have been following Anne and paid a lot of attention to her fit issues with this bra because I thought I had a similar shape to her, so I was pretty curious how a non-foam version would fit (and I reckoned I would try some of her recommended bra patterns if the Marlborough wasn't a go for me.)
Regarding the pattern, I read Demystifying Bra Making, by Norma Loehr, prior to making my foam tester bra, and that gave me what felt like a solid foundation. The book has you make your own center bridge, and I have done that. Coming back to the theme after six months, a few of the terms were hazy but overall not difficult to understand. I continue to find that my Pfaff with its IDT is terrible to make bras. It doesn't go well over small, fiddly bits and my stitching is pretty horrendous. It didn't eat anything else, at least. And, shock of shocks, the bra fits! I did not use elastic over the green lace top, because on store-bought bras I find that anything tight on that edge creates double boob. I don't know if it will end up becoming too loose too quickly without that support, but for now it fits very well. I also didn't pull on the underarm elastic and it gapes a lot. My kit came with wide shoulder straps and plastic bits, which I don't like so much.


The changes I will make are to tighten the underarm elastic, to remove some of the height of the center bridge, and to sew on the bottom elastic with a bit more fabric, because it actually wrinkles a lot- I sewed it on with the tiniest of seam allowances but I think I don't need much bottom band more than the elastic itself. The fit of the bra seems correct. It doesn't give me a lot of lift or volume, but it is comparable to some of my store bought bras. I think that when I tighten the arm elastic, it will pull toward the center a bit more which I would prefer.
I also find it strange that the back piece is not the correct height for the hook and eye pieces. You have to cut it down quite a lot and the instructions don't mention this anywhere. Even with my hook and eye being big, I still had to snip a new curve to the back.
My bra kits are from Spitzenparadies. I got this one and this one. It took me quite awhile to find everything on the site because of how I still don't have much German sewing vocabulary. The green kit is quite see through, but has huge amounts of the flowered stretchy fabric. The brown kit is more like mud brown...oh well. I also bought a huge variety of wires, most of which weren't the right size. I think two sets are pretty decent and another one or two are maybe ok. I tried to compare by measuring current bras but that didn't produce great results. I will wear the two good ones around and see if they are good enough to buy more of.
Thanks, that sounds great!
ReplyDelete