Showing posts with label Miss Maude. Show all posts

Monday, 10 November 2025

Les Lubies de Cadia Cosmique Jacket


What a pattern company name!  I discovered this company thanks to Me Made May.  I immediately fell in love with 3 jacket patterns and couldn't decide where to start.  So many exciting pockets!  I don't have a hankering after any of this designer's other patterns but oh, these jackets...

I finally chose Cosmique and only bought one to start so I wouldn't get overwhelmed.  

Then I had to decide on the fabric, I had a number of contenders, some pink twill...grey denim long hoarded...corduroy...but I recently bought a number of exciting denim blends from Miss Maude, and the most precious of the lot was 2m of linen denim.  It is clearly unique - has a cool and crispy feel like linen, and is shifty as well.  Drapes very differently to a normal cotton denim.  When I unfurled it after washing I knew this fabric had to be a jacket.  I also knew if I waited too long it would turn into one of those stash fabrics I'm afraid to touch.  So I u-turned away from the corduroy and went with denim.  

Sized down to 34 

No pattern mods 

But suddenly I'm making a denim jacket, replete with topstitching I had not bargained for. This turned into a full week project.  I used Guterman Mara topstitching thread in off white. It is a lighter topstitching thread than standard and is easier to work with - my machine will backstitch with it.

I found that the pieces came together very nicely but that the instructions didn't provide details that could improve the final garment.  I used a lot of instincts from jeansmaking.  The first big hitch was when the instructions say to double topstitch the horizontal line created by the pocket piece.  This is impossible if you are genuinely stitching down the seam (since you aren't going to sew the pocket shut). A decorative double topstitch could be done by flipping the pocket out of the way, but then the point of the stitching (to strengthen a seam) would be lost.  I mulled this over for a day then decided to stitch up to the pockets and put rivets at that spot for support and to cover the end of the stitching.  I was sad how much of the pocket depth is lost by the hem.  I would preferentially shorten the jacket an inch above the pockets and put that inch at the bottom, so the pockets would be deeper.  They also are a bit far back - they are only the back half of the bottom piece.  It's not too bad when wearing the jacket but my instincts would like them a bit further forward. 


The funny cut out notch at the top of the placket was puzzling when I was reading the instructions, but easy to do and made it much easier to put on the collar.  I LOVED the tower placket for the sleeves.  But I sewed on the sleeve cuffs and the placket as though I were doing jeans - I folded the back side under and topstitched.  I did this on the collar as well, accepting that there would be stitching in the ditch that shows on the back of the neck when the collar is up - it is faint as my thread is a good match, and also thread sinks into this fabric.  Even the top stitching is relatively subtle.  I also cut the undercollar a tiny bit smaller, and I sewed the collars together from the middle out, which helps it to sit better.

I mulled over my closure plan, but truthfully there was no choice.  I have a great snap setter and horrible buttonhole makers.  I had no problems setting all my snaps - youtube provides amazing straightforward videos for each option the Kam snap press has.  I also have new adorable mini rivets and I used those for the pocket support.  Once I finished them and put the jacket on I realised that I had done the snaps backwards...but actually I don't mind for once.  

I spent a lot of time on each step of this project (days!) thinking through the instructions and my goals, and it shows.  I LOVE this jacket.  I think the instructions are threadbare, but I was very happy with the drafting itself.  I look forward to my second jacket pattern by this company (and I already know which deep stashed fabric I'm using...exciting!) 


While making the Cosmique I realised I absolutely must have a pair of high waisted summer shorts out of this fabric, as I have a heap of cropped tops and nothing to wear them with - luckily my leftovers were easily enough for shorts, and my machines were already threaded with all the right threads...so I had no excuse but to move onto that right away.   

Friday, 19 March 2021

The Great Ruffle-off, a pattern review

 I'm not even sure how I discovered sew pony - I think it was a random instagram post about something else. But I was taken by the lovely ruffled tops.  I am still wary of gathering so though I know you can just pop a ruffle anywhere, I need some hand holding.  My friend Tessa also felt like ruffles this week and made the Kyoto top.  So all of a sudden I had three patterns to try out and I wanted to do it all *right now.*  So I did!  

Here's the comparison. 

Kyoto, by Papercut patterns

Previously had some dubious review due to the shape of the sleeve cap.  This has been changed, and now is rounded (it used to come to a sharp point.)  I cut a size 2 because I was using heavy sweatshirt material, and Tessa had told me she didn't size down and was happy.  Size 2, btw, seems to be a new system for Papercut, who have previously done an XS to XL kind of thing that offered a limited number of sizes at both extremes. The fabric is heavy sweatshirting from the Fabric Box in Auckland.  It has a high poly content and very little stretch, which makes me rate it rather low, but it is nice and fuzzy. 

I had zero expectations for this top.  Because there were previous fit problems I anticipated a crap fit and a dumb looking ruffle.  Instead, I produced a top which is adorable as fuck.  And I put it on right away and it is still adorable.   


I wanted to make a woven version right away!! I wore my sweatshirt version for the rest of the day.  Sadly my woven fabric of choice was too small a scrap so I have the idea on hold while I think about things.  

Sorella, by Sew Pony 

This pattern had two variations. One is a simple dolman tee, with the ruffle to finish the sleeves.  I cut a size 6 though my measurements put me in 8, because I noticed there is a lot of ease.  This has a nice shape despite being a single pattern piece for both front and back.  It does have drag lines at the shoulder to armpit, which I believe is a feature of dolman sleeves when you try to size down.


The other option doesn't really fit in my ruffle-off, but I'll keep it here anyway.  I had problems with this because the pattern calls for rib bands.  It is possible that the pattern *specifically* calls for rib bands. I have a problem with that.  I had more problems with it while trying to put my band onto my top (it wouldn't go.)  I made another band 30% wider.  


Problems: 

"Shorten pattern if you are under 160 cm.  Lengthen if you are over 170 cm."  Um, really?  So you drafted for everyone in a 10 cm range?  Not helpful.

One pattern piece for front and back is lazy when you pay money for a pattern. 

It was unclear whether the pieced option matches the unpieced option.  Like, can I piece the front and use the plain back?  Are they all mix and match?  (Yes, which I know because I put the pieces on top of each other.)

The pieced variant comes to a sharp end where 3 pieces are supposed to meet up.  I consider this lazy drafting.  There should be seam allowances added, that mean it comes to a kind of lopped off mountain shape, not a sharp point.  As it is you get quite a bulky spot there.

Issie, by Sew Pony 

Similarly to the Sorella, there are a number of potential options and variations, and it takes some head scratching to figure out what goes with what.  This pattern diagram doesn't show the back of the patterns so it also wasn't clear to me whether the front ruffle variation (vertical) is meant to continue on the back.  (No, I think.) 

I made the epaulets top first for a friend. 


 The bonus here is that my friend will love it and I could be pretty relaxed about a top that I knew wouldn't fit me well. It's very long.  (I used the size 6 again.)  VERY long.  The neck band is fine no matter what fabric you use, but for the cuffs I now had a great deal of suspicion and cut them all longer than the pattern by a good 30%.  Now, it's possible I don't even like epaulet ruffles.  They are pretty stupid looking on an adult piece of clothing.  But I got SO ANNOYED by the shitty drafting of the sleeve that before I knew it I was fixing the thing and committing to another version, which I then accidentally did in silk-merino and so now I'm stuck with an epaulet sleeved top.  At least it's one that fits me EXCEEDINGLY WELL.  

Basically, the sleeve is cut on the fold, which means the front and back are the same.  I ask you, is your front and back the same?  There's a lot of excess fabric in the front armpit, a loose upper sleeve, and a weird fit hiding under the epaulet.  I used the sleeve from the InstincTee by Sasha Secondo Piano, which is a free pattern and is drafted extremely well.  It created a HUGE change.  Whoa.  I narrowed the entire sleeve a bit too. 


On my second version I randomly shortened the sleeves, and then equally randomly made long cuffs.  I shortened the hem about 2" prior to adding the hem band.  So the epaulet ruffles still seem dumb but I have a certain affection for this top now after all that drama.  Also now I can go on to make the final version with ruffles up the front!  For this version to avoid total twee-ness I ordered rib so that I wouldn't have a ruffled AND flowered top unbroken by any relief.  That would be too much for me. 


I felt like this was pretty twee.  But of course, having already redrafted the sleevecap and the shoulder fit, having gotten ultra special rib from Miss Maude, and using unusually thrilling flowered fabric, I now sort of adore this ridiculous top. 
 

Final thoughts: 

The Kyoto totally surprised me.  I expected nothing and ended up really pleased with what is a simple pattern with a lot of potential variation. 

Sew Pony: I wasn't impressed by the drafting.  There are a lot of pattern companies which produce cute knit patterns that are not technically excellent, and I think some of those patterns can still be total winners and I would make them over and over again.  Here I felt like the designer was lazy, which made it hard to get a good outcome.  It doesn't take much to give a binding for both rib and normal fabrics - and most home sewists won't use rib because it's hard to get. Small things - like making clear what height you are drafting for - add to the quality and usability of a pattern. 

No matter how bad a pattern is, with some work, you can make it amazing.  It's so easy to keep buying more patterns!  But now I have a real affection for the Issie top because I made so many and put so much effort into getting the fit I wanted, and I have an affection for the version I really expected to find over the top...maybe because it is over the top, but also because I put in the most effort to make it come together.   I think I'll make more Kyoto tops as I'm keen to do it with lighter fabric, a long sleeved, and a woven version (probably not all at once!) and I'll probably use my Issie pattern to make some normal tshirts without any ruffles.

I am really happy that I spent a few days ruffling like mad.  I got over some of my fear of adding ruffles to everything indiscriminately!

Sunday, 5 July 2020

Elizabeth Suzann Florence pants

As she is winding down her business Elizabeth Suzann has decided to make the patterns of her products available for free. (Fuck Capitalism!) This is with the help of @minimalistmachinist, @mombasics and @thestoryclubpdx. You can get the patterns via a link on the @minimalistmachinist instagram page.  An accompanying request is to make a donation to an indigenous rights or black rights group. 

The patterns are being made into pdfs and at present are available as 36" wide which you can print as A4 tiles by selecting the "poster" option to print.  I sent them to my printer who turned them sideways on A0 pages.  I know this is all a work in progress and may change, I think A0 will be available too.

Elizabeth Suzann's website is still up with the models wearing all the clothes, so that's how I selected my sizes for everything.

I started with the Florence pants because who can resist this amazing advertisement:

Also I had the perfect fabric: a slightly textured tencel rayon from Miss Maude.  It's available in other colourways here. 

I cut a size S short.  It fit neatly on 1.5 metre of fabric. The pattern is easy to understand without instructions. Seam allowances are the outer line for each size and the inner line is the sewing line.  My printer used colour to print, and that makes a HUGE difference as they were identifiable by colour.  It might be hard to differentiate all the lines on grey scale. 

I measured the hem: 2.5" so a 1/2" fold up then a 2" hem.
The waistband accommodates a 2" elastic.
I just finished the waistband before folding it over, sewed it down with a back gap and inserted the elastic. 

A very easy sew. 

Results:


Above my navel though I have so much crotch room I could hitch them to my ribs...


The fit is not as gathered as the model.  Thus I could have sized up to an M for more drapiness.  The crotch is excessively low. I forgot to get a picture with my legs actually in a walking stance, but there are about 3" hanging down in my crotch - fine in the summer for lounging and oddly fetching in my pictures, but a pain when trying to do anything.  I had fixed this before starting on the Free Range Slacks, and in fact the patterns feel very similar in terms of fit.  So I would probably remove about 2" from the rise if I repeat this pattern.  If I hitch the pants up to my ribs the problem is somewhat improved though I suppose I probably need a more curvy crotch curve as well, I don't really have much instinct on that yet. 

Also you know these ARE the short pattern.  But I am apparently shorter even than that.  To get the effect on the model I need to raise them another 2 inches, I think. (Might help to adjust the crotch as they would sit higher.)

These were exciting to make!  I have no idea why getting a pattern from a designer is so exciting, but it is.  Hope my notes help lots more people make swishy and awesome pants.

Monday, 25 May 2020

Stacker jacket by Papercut patterns

Well this has a dumb name and I keep wanting to call it the slacker jacket...that didn't stop me from wanting to make it.

I liked the simplicity. Didn't realise it was lined - I would have happily gone with it unlined but following the directions was easier so I found a nice lining for it which had been in my stash for ages. It's a quilting cotton from Hawaii. I used silk to line the sleeves.

This came together really easily. I knew from the start that I was making it for a friend.  I stopped before putting in the buttonholes because my sewing machine hates buttonholes.  It took me until lockdown to get on with it (also because I had no rush while I couldn't mail things...)

Fabric: beautiful corduroy from Miss Maude. I was a tiny bit sad to give this away, this fabric, I just can't think of what else I want made out of it.

I made this in size 3. That matched the size chart and the fit is exactly right.


I think I might have gone with too big buttons but I pulled them from my button stash and they were the perfect match.  When I finally did the buttonholes things went surprisingly well - two buttonholes were great, one was slightly messed up and the top one, where there's a nearby seam, was a hellish catastrophe.  About as expected.  I have become pretty skilled at using a bar tack to supplement all the bad buttonholes I've made lately. They look terrible but luckily are usually hidden by buttons (you know, as buttonholes are.)

I noticed that there's only like a cm between the buttonhole and the edge of the fabric, so hopefully they will hold up ok.


I keep being surprised by how beautiful this jacket is!

Few thoughts:

The sleeves are slightly dropped which makes them seem droopy to me, but definitely makes them easy to fit, because you don't need to worry much about the armscye fit like it a more closely fitting jacket.
Also, the pockets are similar to other things I've seen lately, for some reason tall skinny pockets are in vogue - they are good for storing objects, but they are bad for hands.  Just so you know.  

Tuesday, 21 April 2020

Merchant & Mills Top 64 review

I made a muslin first.
It's a really horrible muslin.
I used size 10, and shortened the sleeves to fit my fabric.
The fabric is all heavyweight knits!
But despite being kind of hugely long for me the furry cozy sweatshirt sleeves made it feel really nice on!  I finished it well enough that I can give to my local secondhand shops.  I will absolutely have a giggle if I see it on someone in town next year...


What I ascertained:
-shorten the body 6"
-sleeves about 5" longer than I made them (I think I shortened them about 12" due to fabric limitations.)
-Make the pockets as long as possible - in the pattern they are weird micropockets.

The photos were also really helpful, because though I feel like I'm swimming in this top I was completely shocked to see that it looks great on.  So if I wanted a long version I could do the pattern with no modifications (except extending the pockets.)

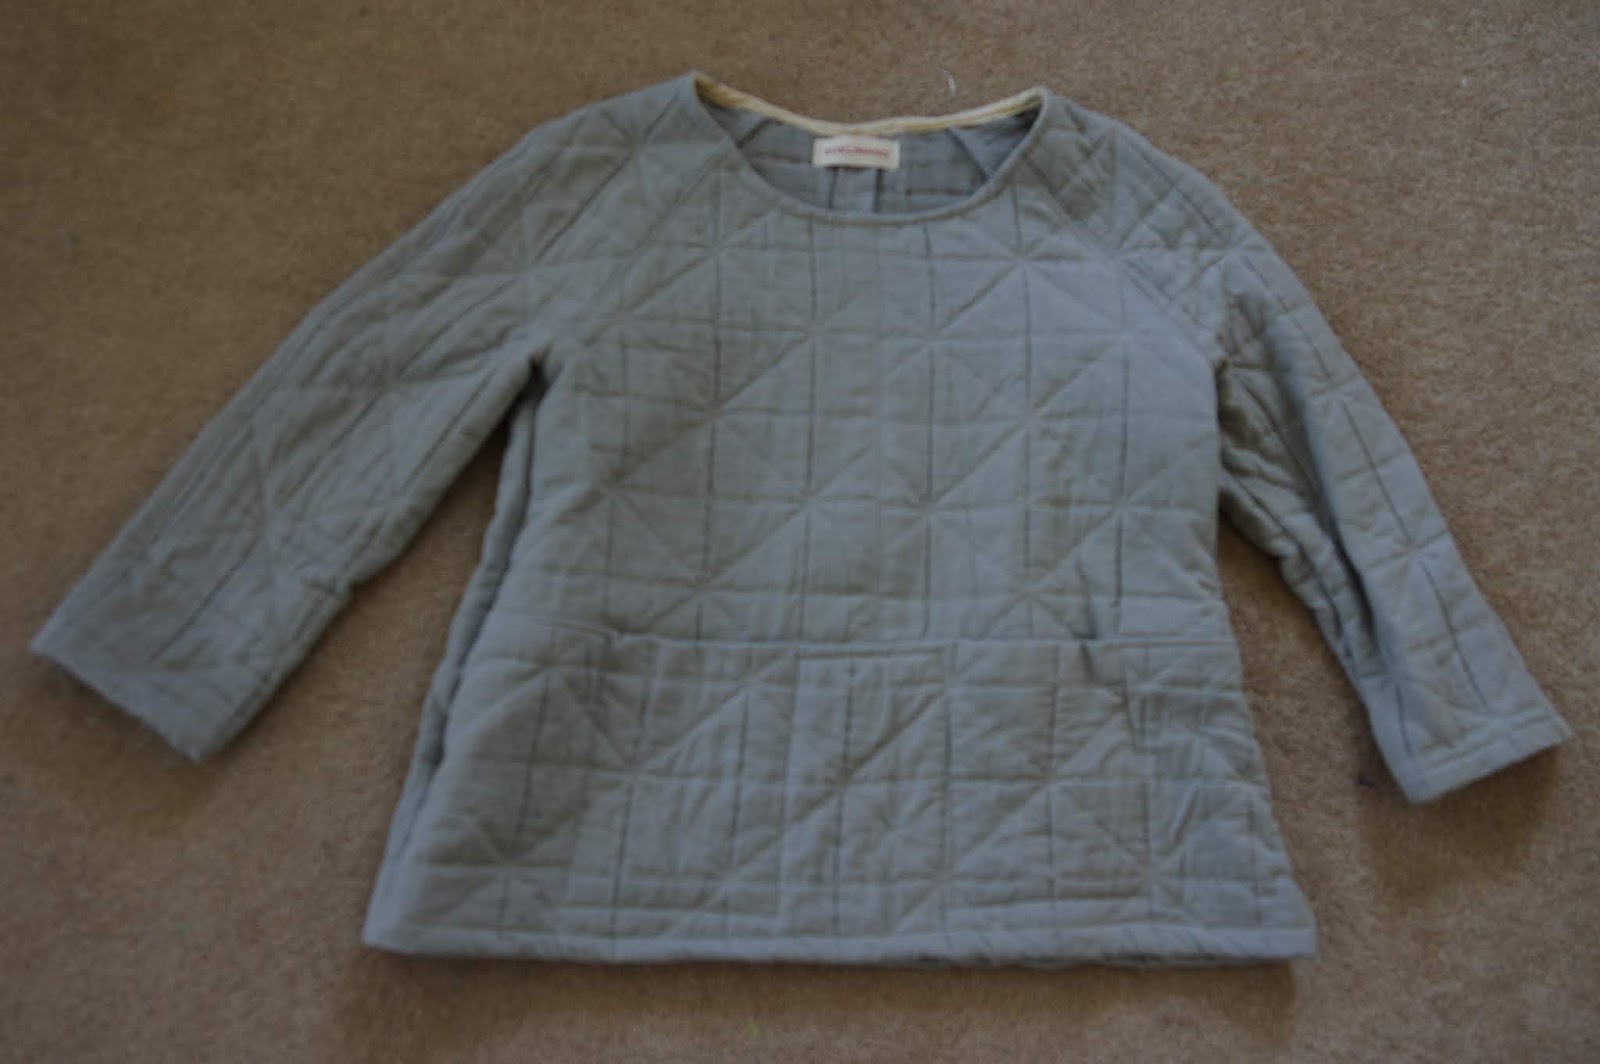
When I can buy fabric again I really want to do a leather and boiled wool version, but luckily I have some luxury cozy quilted layered gauze to tide me over!  Also quite good for layered lounging at home, I foresee.

I was happy with the pattern measurements in terms of size - it's pretty impressive that it fit over my hips with no need for swayback modifications. I would say that it's meant to be roomy and it matched my expectations that way.

For version 2 I really felt like removing 6" was changing the pattern too much, so I removed 4" below the narrowest part of the waist.  I lengthened the pockets 2" but didn't widen them at all.  I think my sleeves are now about 5" shorter than the pattern.


The weird shaped front pocket pieces and the two part sleeves make this pattern take up a lot of fabric!  Well, plus I always only buy 1.5 meters of everything.  This fabric is a multilayer quilted gauze, and it did start to fray and shed pretty quickly.  I overlocked and topstitched everything.  I did bias binding on the neck.  I didn't top stitch the pocket part of things, I sewed from the underside, which is probably a sign of laziness on my part and has resulted in wonkiness on one side.  The pockets are now a bit too narrow for their length, also.  


Overall I'd still like it a bit shorter, hah!  BUT I guess it's ok the way it is.  I'd widen the pockets a bit and make them not quite so much deeper, maybe 1" would be enough instead of 2".  My enthusiasm started to wane while I was sewing, which is characteristic of my current binge sew, I suppose. What's the NEXT EXCITING PROJECT?  Oh there are five.  Next week I'm back to work lots of days in a row so I'm allowing the wildness to run crazy for now.