Showing posts with label rayon. Show all posts

Sunday, 5 July 2020

Elizabeth Suzann Florence pants

As she is winding down her business Elizabeth Suzann has decided to make the patterns of her products available for free. (Fuck Capitalism!) This is with the help of @minimalistmachinist, @mombasics and @thestoryclubpdx. You can get the patterns via a link on the @minimalistmachinist instagram page.  An accompanying request is to make a donation to an indigenous rights or black rights group. 

The patterns are being made into pdfs and at present are available as 36" wide which you can print as A4 tiles by selecting the "poster" option to print.  I sent them to my printer who turned them sideways on A0 pages.  I know this is all a work in progress and may change, I think A0 will be available too.

Elizabeth Suzann's website is still up with the models wearing all the clothes, so that's how I selected my sizes for everything.

I started with the Florence pants because who can resist this amazing advertisement:

Also I had the perfect fabric: a slightly textured tencel rayon from Miss Maude.  It's available in other colourways here. 

I cut a size S short.  It fit neatly on 1.5 metre of fabric. The pattern is easy to understand without instructions. Seam allowances are the outer line for each size and the inner line is the sewing line.  My printer used colour to print, and that makes a HUGE difference as they were identifiable by colour.  It might be hard to differentiate all the lines on grey scale. 

I measured the hem: 2.5" so a 1/2" fold up then a 2" hem.
The waistband accommodates a 2" elastic.
I just finished the waistband before folding it over, sewed it down with a back gap and inserted the elastic. 

A very easy sew. 

Results:


Above my navel though I have so much crotch room I could hitch them to my ribs...


The fit is not as gathered as the model.  Thus I could have sized up to an M for more drapiness.  The crotch is excessively low. I forgot to get a picture with my legs actually in a walking stance, but there are about 3" hanging down in my crotch - fine in the summer for lounging and oddly fetching in my pictures, but a pain when trying to do anything.  I had fixed this before starting on the Free Range Slacks, and in fact the patterns feel very similar in terms of fit.  So I would probably remove about 2" from the rise if I repeat this pattern.  If I hitch the pants up to my ribs the problem is somewhat improved though I suppose I probably need a more curvy crotch curve as well, I don't really have much instinct on that yet. 

Also you know these ARE the short pattern.  But I am apparently shorter even than that.  To get the effect on the model I need to raise them another 2 inches, I think. (Might help to adjust the crotch as they would sit higher.)

These were exciting to make!  I have no idea why getting a pattern from a designer is so exciting, but it is.  Hope my notes help lots more people make swishy and awesome pants.

Sunday, 10 May 2020

Halfmoon Atelier Strand dress in cherries

I was a pattern tester for this dress pattern.  I made the size 3, and it was consistent with other patterns by Halfmoon Atelier.  My measurements are 33-27-37. I'm 5'4" and I didn't change the length.

My dress is the first iteration of the pattern. The shoulder straps were adjusted afterwards to be slightly narrower.  The wide fit is fantastic on me.

This pattern has a v-shaped bodice which is in 2 layers, sandwiched between two shoulder straps that work as facings, and then gathers down from there in 2 layers.  

Initially I thought I would stop before the hem ruffle. But in the end I made the full length dress and I love it. The length is not quite full maxidress, which makes it more versatile (I bicycle!)  The bodice straps as facing are supportive for a variety of fabrics and they make a nice clean finish, though they are quite a bit of work.

I keep thinking I would most like to put elastic in the waist, but the tie, loosely done, doesn't bother me and so it has stayed. Usually I don't like a lot of ties around my waist, but I only put the bow on one side instead of having one on each side, and since it's loose, it doesn't need adjusting for me to pull it on.  Having the dress tied at the waist creates a really different silhouette, so it's nice to be able to go from loose to gathered.


I am lucky I got to make this dress in September and wear it for the hottest part of the year before the Making zine came out!  The fabric is rayon from Cotton & Steel, and rayon was a great match for this pattern.

Other notes are that it's important at the front V to baste each side - I did them separately, in order to have the best control.

I really love clean finishes and though you have to work for this one - you fold over the SA on the inside shoulder straps and then topstitch it down - it's really worth it.  I like how this, as a dress, gives you waistband options - it looks quite different to me when it's loose (maxidress!!) and when the waist ties are tied tighter.

The neckline reminds me a bit of the Peppermint magazine free maxidress pattern, though the fit of the dresses is quite different below there.  Here's my version.  I like both patterns - the Peppermint dress is obviously more of a shapeless sack, which can be really nice when it's hot outside. This dress takes a bit more work to make, but I think the result is more refined. 

Thursday, 2 March 2017

I am Cupidon rayon top

Browsing Anna ka Bazaar I discovered a new pattern company and immediately snapped up a few patterns.  I decided to sew up this Cupidon nice and quick in some rayon jersey.

It became quickly apparent that the pattern is better suited to heavier knits.  This is a super fast sew, and reminds me of the Coppelia top by Papercut patterns, although it overlaps rather than having a tie.


I made a size 38 and I wouldn't necessarily go down, but in this loose rayon it really is big, and I could take some fabric off the sides and underarms.  I think this size works out in a bulkier fabric.  The bindings are very small and I had trouble getting them to lay flat - they are supposed to be a bit tight, but not really tight, as you don't want the bottom to pull inward, and so I had to press quite a bit for them to look as desired.  This is another issue that would be better in a more stable fabric.

This was a nice muslin attempt and I liked the instructions, which are cute and efficient.  They are available in English, which is a definite plus, and the seam allowances are included, although a bit funny: it says if you are using a serger, the allowances are added, and if you aren't using a serger, to add some specified amount and then use 3/8" SA.  But I think it said to add 1/2" and that the final SA is 3/8" so obviously confusing.

To get around all this I ignored it and just used a 2/8" SA on my sewing machine.

I don't adore the fit of this but my friend Dana, who's a totally different size and shape to me, ends up loving it.  I can see coming back to it with a heftier fabric though, and the other reviews are by people who did just that.  

Wednesday, 27 April 2016

Sallie Jumpsuit by Closet Case patterns

I prepared this pdf pattern while deep in my sewing preparations, and went for a size 8 based on so many people saying to go by your measurements.  I'm sort of a 6-8, because I have been exercising and my already square torso has become more square.  Nobody mentions that when you get ab muscles you lose your waistline for them!! Hah! So, I forgot that I should really size down for knits and in fact being both shortwaisted and short, I think I might have best been suited to a size 4.  Because of that I disagree that you can cut exactly according to your size.

I used a drapey rayon.  It's heavy, as rayon tends to be, in this great saturated red, and I really was dreaming of a Sallie short dress and I kind of wish I had just done that straightaway, because I ran out of time and couldn't do it at all : (

There were a few moments of irritation - when you sew the underarm together it looks like a snaggly mess, but a snip into the seam allowance and some ironing makes it look great on the outside.  I really really adore this top.  It's substantial with the two layers of fabric and so comfortable!!


I took about 3 hours to make this - a concentrated morning.  It came together with no mishaps, although I had not checked what elastic I needed so I used the 1/4" elastic I had, and something a bit thicker would hold the heavy legs better.  I cut off 5" from the bottoms.

If I made this again, other than using a size 4, I'd probably raise the crotch a few inches.  I'm not completely sure it's a success - it's comfortable but is too low cut to feel right at work, and because it's red it's very attention grabbing and I'm not sure I like how I look in it enough for that.

I would love to make another one, but the dress is probably more of a priority; I think this would be an absolute staple in my wardrobe as a short dress.  I will probably go with a less flashy colour when I made the jumpsuit again, because it's already quite unique looking.   

It was my first Closet Case patterns and I did enjoy it!  I'm looking forward to eventually having the time to work on this pattern because I adore the top half, and of course I'll eventually make some Ginger jeans, but sadly the sewing vacation is over, so not any time soon.

The final good news is that one of my coworkers looks amazing in this jumpsuit!  So it got a new home!  Everyone is happy.

Tuesday, 28 July 2015

Megan Nielsen Tania Culottes in coral rayon

Another project that I planned last summer, but the fabric, a rayon from Anna ka Bazaar, was not the drapey rayon that I expected and eventually turned into my Lucie dress.  I knew that I specifically wanted to use drapey rayon and until I found it I had to be patient...

When I walked into a shop in Paris this April, this bolt of coral woven rayon was schmoozing with some sparkly knits in the corner.  I couldn't resist it and it was already saying Tania! Tania!  I wasn't even too concerned about how it is transparent. I got so excited about this project as the temperature rose.  It makes such a huge difference to make projects now that I plan now for now!  I am always playing catch up with the past, with projects planned last summer (luckily I am pretty sure I don't have any that I planned in New Zealand...) I don't have a lot of enthusiasm for those things.  Unlike culottes which seem like exactly what I need right now.  Especially coral ones.

Cutting was pretty easy.  I cut a S as most reviews said that it is true to size.   It was a bit scary to sew the pleats but construction was actually very simple - only I got done with the zip and put them on and had a moment of panic thinking I had skipped the culotte step! (it's near the end.)  My rayon was slippery and made me nervous, especially as my sewing machine has a tendency to chew up things anytime I backstitch or anytime the bobbin gets low. I stabilised the zip and I sewed the bottom together first, although then you have to be careful not to get a bubble at the zip's bottom. I actually took a bit of time with these...I wanted them to be amazing!  I did sew one piece of the waistband upside down.  I think it was the inside back.  But I am not sure.  I am dyslexic with facings and seems like it extends to waistbands...anything that involves a bunch of strips. I was surprised how long the culottes were initially but once I had the hem evened out they got shorter.  Definitely not too short though, I would say they are just right.  I am 5'4''. 

That's about it.  They are amazing!  I let them hang for two days then had a friend trim them.  And then I practiced long and hard with the micro rolly hem thing.  This is the first time I have used it.  Ahem, I mean the rolled hem foot.  It works out pretty good but it is still a long process...I sewed a line of stitching first which made a huge difference in being able to feed the fabric into the curl of the foot. The learning curve is evident, one side is better than the other but any other hem would have been a tragic nightmare so I am ecstatic.

My friend Pädde took the photos when I visited him last weekend in Luzern.  We are on top of the Museggmauer, the city rampart wall, in one of the towers.  It was very windy so I can attest that the culottes do blow up rather far...the Japanese tourists were having a laugh at our photo session in the wind.  I will spare you some of those windblown pictures! 


Sunday, 28 December 2014

Named patterns Ama Cowl Neck Frock

This fabric was a present.  In fact - the first sewing present I've ever gotten, which made it special.  It is a lightweight woven rayon, and was the end of the roll so when I finally got around to cutting it I noticed it was not all on grain.   I wanted to keep the fabric design intact so I hit on the idea of making a maxi dress.  I searched for some options and found a very basic old McCall's pattern, and the Named Ama Cowl neck, which had just come out and had no reviews.  I really liked the racerback of the Ama dress so I settled on that pattern.  I had a number of concerns - whether the armpits would be as loose as they look in the model, and whether the elastic waistband was strictly necessary.


Some Named patterns have seam allowances, and some don't.  I haven't completely figured out which - maybe PDFs don't.  But the need to put seam allowances on my pattern actually delayed the project dramatically, and I left Seattle in September without it done.  I finally started sewing it before a vacation in the States, hoping to wear it in San Diego, but I didn't quite get it done in time (and it rained, so really there wouldn't have been a great chance to wear it!)

I made the Kielo on purpose before this in order to get a feel for Named sizing.  I found it true to my measurements when I cut a 38 for both patterns.  The fabric was a shifty pain.  If I had wanted the stripes to line up perfectly, I needed to cut it on one layer, which I did not do.  It lined up ok, except for one piece - the back!  The pattern places it on the opposite side fold to the front, which means that although I had it lined up perfectly, it was upside down.  I did not have enough fabric to cut another one, and as the main stripe crosses to the front, I decided I didn't care too much. (I can't see it!)

This was easy to put together, however Named has the disadvantage that they try to do some creative things, and they have really terrible translations of the instructions.  The most troublesome step was inserting the shoulder straps into the hexagon and sewing them in the correct orientation, without bits falling out.  I had to do that six times.  I advise heavy pinning and checking of work, or basting, prior to finalising this step, as it also determines the tension and the way the entire dress hangs based on the angle you use when inserting these straps. Next, I didn't understand -at all- what was being said about sewing the lining to the top.  I think you are supposed to sew it inside out and bag the lining.  Instead, I just finished the bottom of the lining and sewed it down, then sewed the elastic tunnel above it.  I did consider without the elastic but I determined that it actually breaks up the design nicely and adds more shape to the dress.

I only made knee high slits as I can't be bothered to make a skirt to go along with this dress.  I cut off about 6'' when I cut out the skirt as I recall Named makes very long patterns. That was exactly right (I am 5'4''.)

I am actually happy with this dress!  I think the challenge is finding a fabric fine and drapey enough - I lined the top with cotton voile, and I don't like how the cowl sits.  I considered sewing it into a pleat, but I just tucked it inside itself instead.  The fit is amazing for wide shoulders, and I am seriously considering making a tank top version for summer.  The dress is also really comfortable, despite the elastic waist. 

Thursday, 30 October 2014

Deer and Doe Datura

Hi everyone!

It was a rocky move, and most of my stuff is in limbo.  Luckily I ended up with a few projects still in close reach.

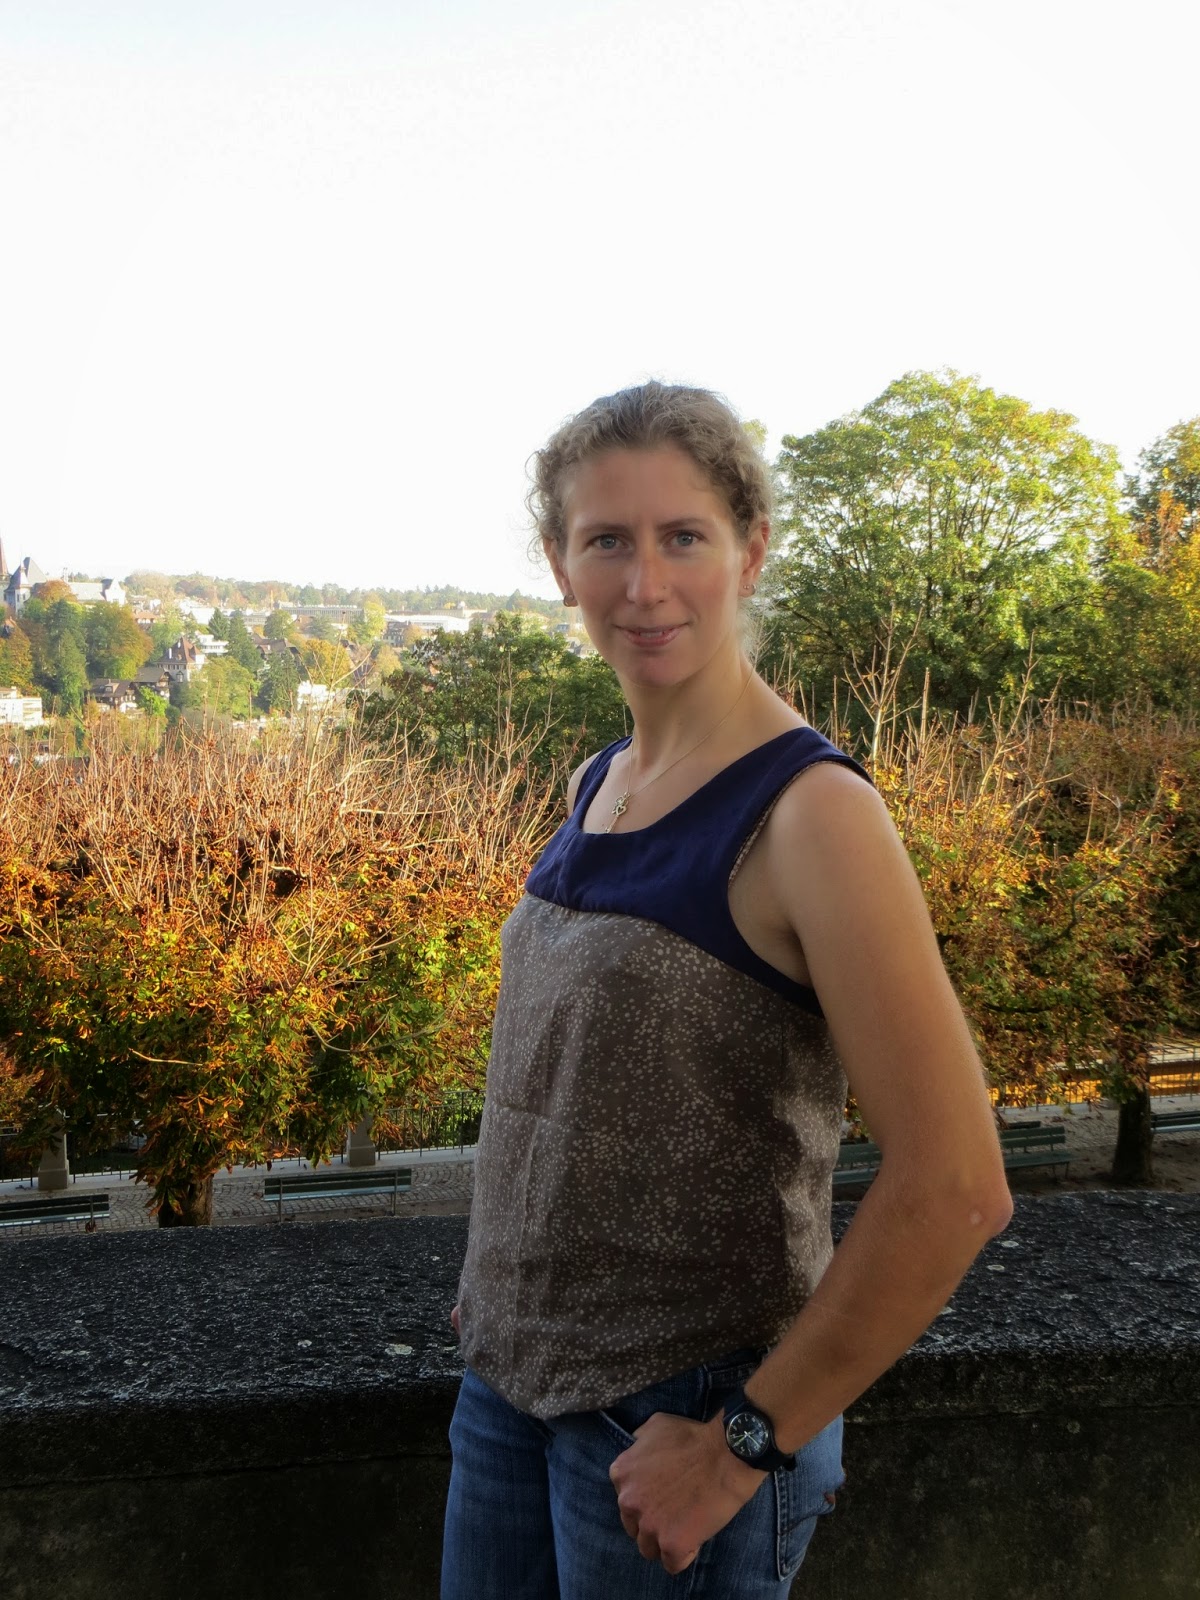
This one, however, makes me a bit sad.  I have a de facto stash because I have moved so much.  I spent the past nine months functionally homeless, and had a huge number of exciting projects lined up in New Zealand before I left.  This Datura blouse is one of those.  The fabric combo comes from The Fabric Store in Wellington, which I desperately miss.  The purple is a Marc Jacobs silk, probably a blend as it needed quite a hot iron.  The beige is rayon with the most delightful feel and drape.

The year I discovered sewing, I fell in love with projects every week.  I followed some blogs, and then I followed the people I discovered through following those blogs, in pyramid fashion (the sewing vortex!!!).  Every time I discovered a new thing I wanted to sew I spent weeks chasing down every version of it and reflecting on how mine would be.  This Datura was one that I was so so so excited about, and I feel embarrassed and sad that it's taken so long to make.  It could have been done in one day, but I was honestly so bored by it, that I took a few days, and treated it as a muslin, ie I didn't finish the side seams.

I used my trusty D&D size 38 and it fit perfectly.  I didn't topstitch or understitch the yoke, and I skipped the back panel altogether - just cut off the extra folds and sewed a centre back seam.  No sense bothering with buttons when they aren't functional.  I wanted this project to be brainless and it wasn't -- the technique for seamlessly lining the yoke was new to me and made me very grumpy.  I felt like the explanation was a bit confusing because I wasn't sure what part should be right side out and what part should be wrong side out when you slide the yoke front into the yoke back.  The diagram made it look like you topstitched it while it's inside out.  Eh??


Anyway, things worked out ok without too many lumps at the shoulders.  I also skipped the bias tape and made a foldover hem using the technique BHL use for the Polly top (my favourite technique!) Basically you make a line of stitching at the depth you want your hem, fold it in, iron it in place, and then fold one more time in and stitch that down.  On cotton, linen, or raw silk it usually works well.  On this rayon it was pretty terrible so I ironed it a whole lot and it looks ok if you don't look too close.

I suspect when I get over my initial grumpiness I will love this pattern and I'll start thinking up variations on it.  This tank is a great basic with just enough details to make it interesting.  My friend Joana took my pictures in Bern, and she was in love with this top, so she took lots of pictures!  I can see that it looks good but I am dissatisfied with how lumpy the yoke came out.  Probably the top stitching, and closer attention to alignment of the lining, would have helped with that.  Now that I see it from a distance I really like the look of it, and it was very comfortable to wear.