Showing posts with label ready to sew. Show all posts

Sunday, 26 June 2022

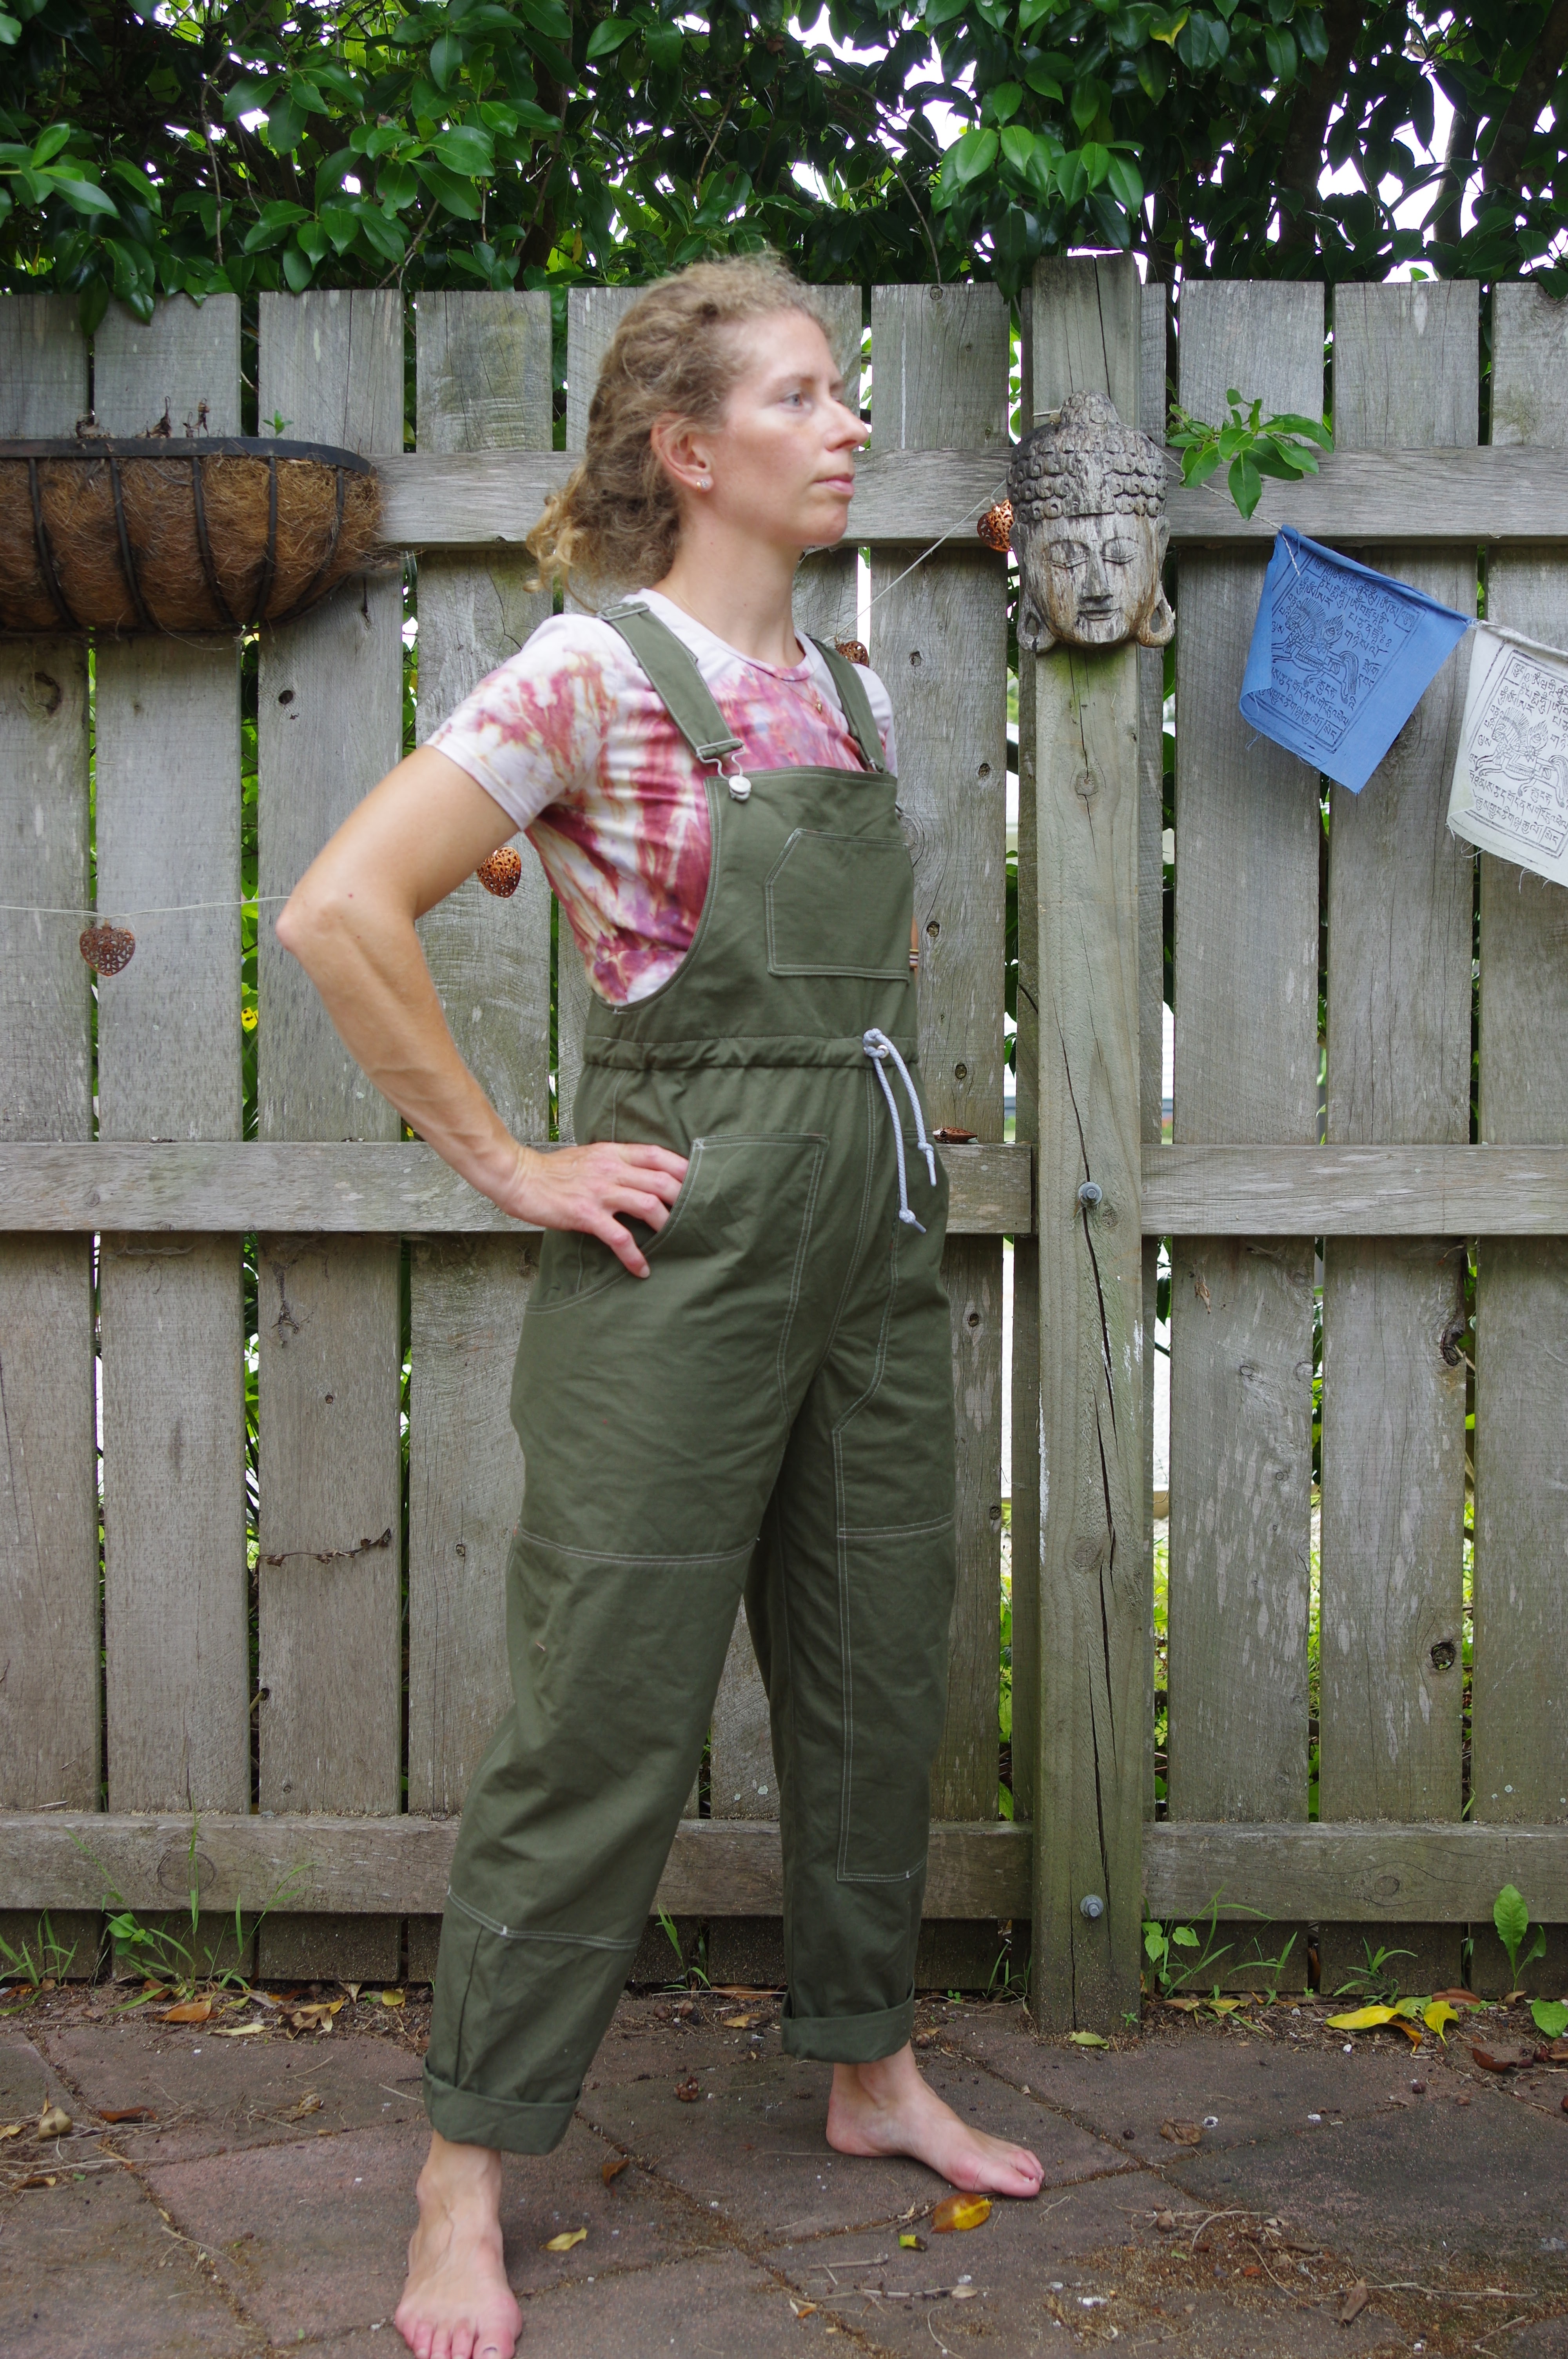
Partner overalls, by Ready to Sew, a review


So there are patterns that take a project which feels really complex and they baby sit you through every stage of it so you have these warm fuzzy feelings of security.  Nothing could go wrong!  

This pattern isn't like that.  It provides you enough info to make the overalls but the real nugget of truth is that overalls are easy.  They just look hard.  There is missing information (by missing information what I mean is that the Dawn Jeans instructions had it, and they are the Gold Standard for best instructions ever) about how you need to tie topstitching thread by hand on the back of your work rather than trying to backstitch to secure it.  Small details like that which just raise the quality of your result.

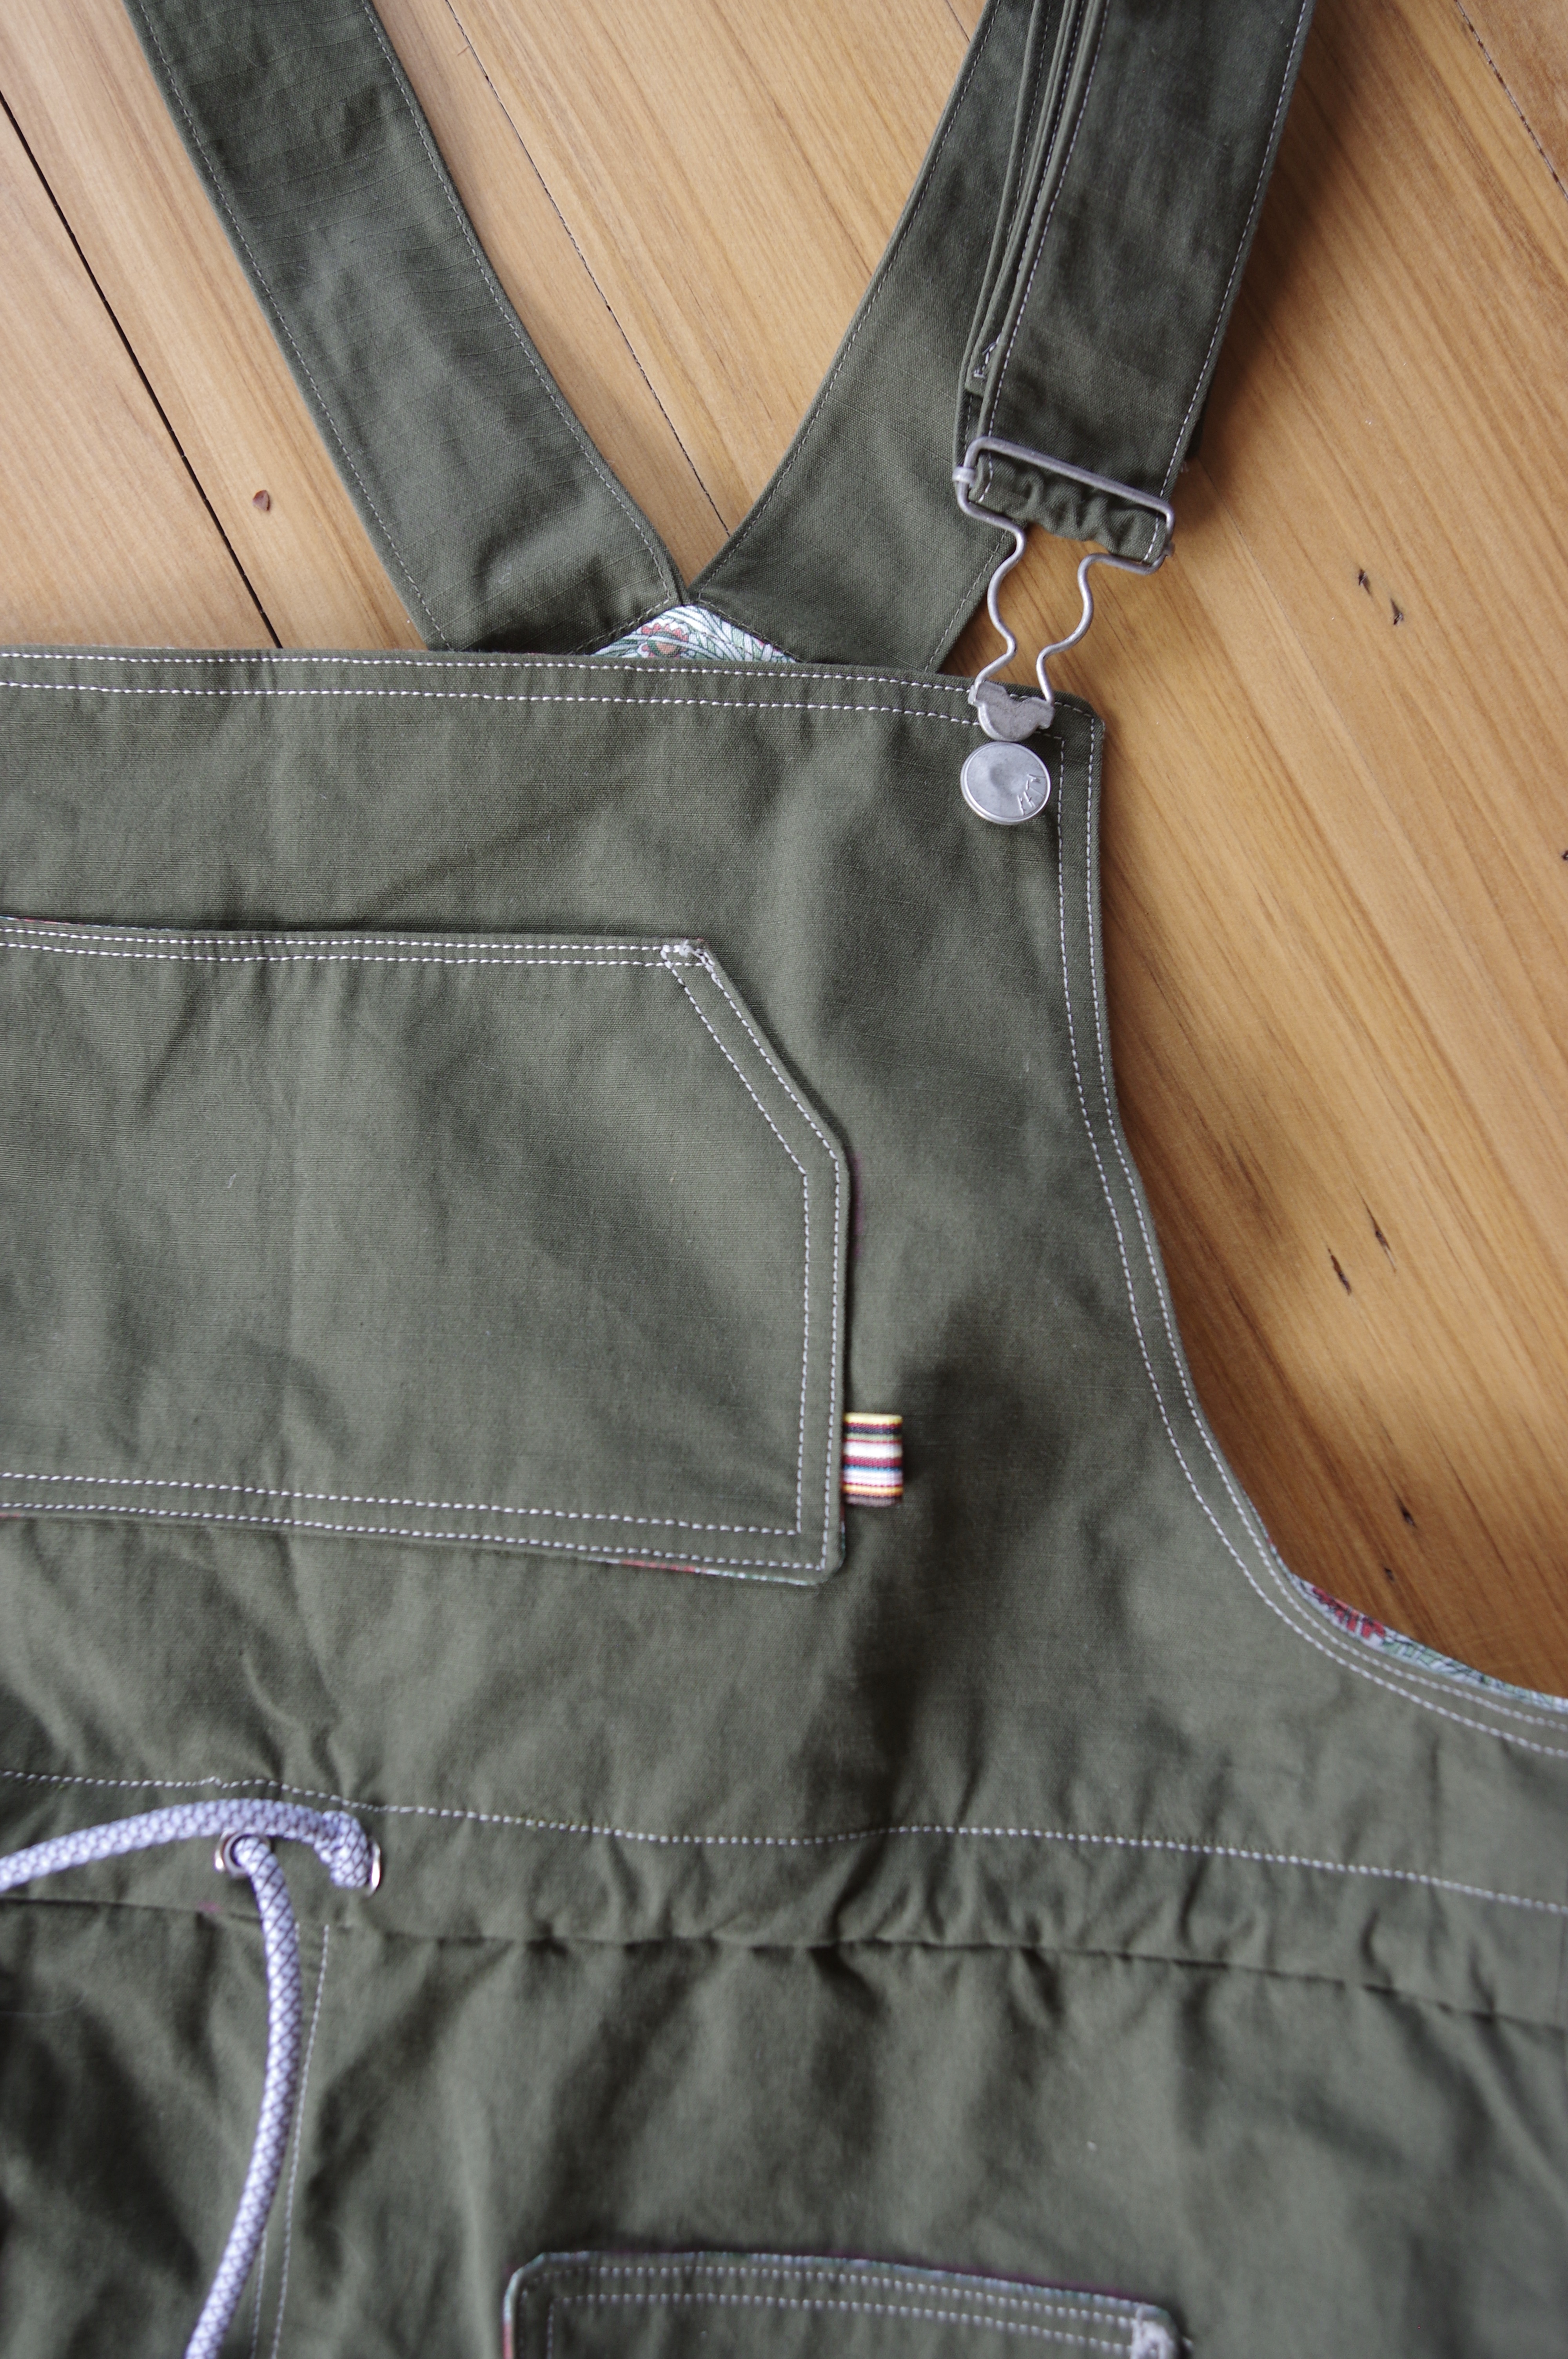
There are so many size choices that it's overwhelming to choose.  I think I could have gone bigger to get a baggier look, as it is they are in between baggy and fitted, kind of an uncomfortable lukewarm option.  I went with size 38. My hips are 37".  My fabric is a kind of windowpane poplin and I lined the bib with some liberty that I wanted to use up - same thing inside the pockets.  Ok so really you should use self fabric on the pockets because otherwise it peeks around the edges.  And I have no idea why the instructions have you do a partial bib lining instead of a full one - but I guess that's if you use self fabric and it is heavy...still I avoid partial facings whenever possible and it was simple enough to do a full one here.  I did the same thing lining my pocket then turning it right side out to topstitch it down.  

There were some kind of weird instructions about the pockets too.  A lot of the topstitching literally defines the space so it's kind of scary to start because you pick a spot and go!  I was using Mara 70 topstitching thread which is lighter than usual topstitching thread, allowing me to treat it as normal thread.  My metal bits are a KATM kit from Miss Maude NZ.  (These kits are excellent quality.  Do not hesitate!) 

I spontaneously shortened these by removing an inch off the waist.  The bodice is a bit short actually as a result, but I can fix this somewhat by lengthening the straps.  I would advise against shortening them because it's better for overalls to be baggy and have some extra lengthwise room.  That might be part of why I feel confined in them when I wear them.  I have a really short torso and I would say this pattern fit me pretty precisely.  Because of that if you are in doubt, size up on the very ridiculously precise size chart.  If you are long waisted consider lengthening the bodice.  The result of this though, is that now I have the sense that Ready to Sew is a block that fits me really well which might entice me to actually sew up other patterns of theirs I have loitering around somewhere.


I did these in a day because it was my last sewing day with my friend Tessa before moving far away and I was Going To Finish.  And I did!  Aided by how, as I have mentioned, overalls are actually easy.  There are no buttons, no buttonholes, no zips, no flies!  In this case also nearly no distractions, though poor Tessa didn't finish her project because she was under great stress to Entertain Children and their Friends, Fetch Stray Husbands, Buy Emergency Bias Tape etc while I just binge sewed (though in my defense I did supervise the children decorating cupcakes in her absence and I took the requisite number of photographs of the event).  And yes that means this was already six months ago, sorry, moving took all my attention!  It is now cold here and I am not going outside barefoot.

In the end I find these to be really kind of ok.  I feel weird in them like they are a trouser straitjacket.  I have been peer pressured to keep them and try harder to like them and they do look quite nice over my knitted cropped sweaters so I suppose they will have a place in my closet. 

Sunday, 28 July 2019

Ready to Sew Jimmy & Atelier Brunette

I made Jimmy just under a year ago, using scuba material that had a lot of body. (See it here.)
I found it oddly useless.  Not warm enough to be a warm layer, but long sleeved and thus not a great lightweight layer.  It's certainly pretty...

However this Jimmy was cut out before that.  It was from 2017 and I was so excited about it at the time. The fabric is Atelier Brunette and it was eye-wateringly expensive here in New Zealand. I did a practice version from merino, never managed to photograph it - for that I did the version with the hem band. It was overall too big and floppy, so I sized down to a 34. Now of course I know the 34 fit from my scuba version.

I think the fit is good and sewing was fine despite not having marked the pleats - I had to pull out the pattern pieces and mark them now.  I do love the idea of the 2 part sleeves.  However I don't really like the shape on me.  It's too fitted and then too loose.  I want either fitted or loose, not half of each!  I find it funny that I foresaw this with the scuba, noting that sweatshirting might not create the best fit.


It's cute and luckily I know a skinny teenager so I'm donating it on.  I have the tiniest bit of the fantastic fabric, maybe enough for the bands on a pair of Hudson pants.  Oh well, I guess there will always be more great fabric in life.

Sunday, 14 October 2018

Ready to sew Jimmy sweatshirt in scuba

This pattern is for yet another variation on a knit tshirt, by French company Ready to Sew.  The exciting features include raglan, 2 part sleeves, detail pintucks on the front sleeves, and two hem options both including godets.

The instructions are in English and are pretty decent as far as translation goes.   For some reason their theme for patterns is to use men's names starting with the letter J.  Though I see now they've expanded to a few female names too.

I made this in red merino last year, in version 2 with the hem band.  I made the size 36.  That seemed like a small size to me but it was way too big.  I gave it to a friend.   In a heavier weight material the size might have been ok but in the merino it was just very long and drapey. Seems like the sleeves were pretty long too.  I didn't take very good notes before I gave it away!

So I had few notes, no photos to inspect, and decided to take the leap and go for a size 34.
The pattern pieces are interesting.  You have the option to not cut off edges, but to abut them.  This is great.  I don't much like the cutting.  However the result is that there are wide margins without any lines on them - you have to extrapolate the lines there.

The first time I printed the 36 with all the layers, it was impossible to tell which were the pintuck lines and the marks for my size because they are only differentiated by colour not by the shape of the line.  For the 34 I only printed the layer for my size and although the pattern looked a bit naked, it seemed to have all the marks...except 1 of the 4 pintuck lines, which was lost in between pages!!  So these pdfs are not as straightforward as average and make me hesitate to consider this company for more complex patterns (I was in love with the Joseph coat when I discovered this company, but I've hesitated to make it.)

I was also really jumping in the deep end - I cut straight into this gorgeous scuba that I bought sometime last year.  It was a ridiculous purchase; I think I bought it while I was in Nepal because I saw it on somebody on Instagram.  It shipped to my parents and then I just petted it for awhile and thought of all the things I could make.  So now it's here, and soon I won't be sewing much, so now seemed like a good time!

I barely followed the instructions because anyway, it's like a tshirt.  My borrowed sewing machine seems to be generally miserable.  One entire bobbin was catching and not stitching well even after changing needles - magically fixed with the next bobbin of thread, but means that I flipped it over and redid every seam.  And I made this right before dinner and was both desperate to make a work of art, and desperate to hurry on to dinner!


So:
sleeves are a tiny bit short.  But ok
and otherwise I love it!!!
I top stitched the sleeves and the raglans.  I left the hem for now as I thought anything I did would mess it up - I was thinking of leaving it raw but after wearing it I think it would be better to have the weight of a hem.  I might still shorten it an additional inch or two.

The light weight fabric means that the godets kind of flow.  It would have a lot of volume in a heavier weight fabric and I can see why sweater knits are recommended.  I can actually see this being nice in a pretty heavy sweater knit.  I didn't like it in merino, though I think now that I have the correct size it would work better.  I think in sweatshirting or other fabric with a lot of body, I would find annoying how much it would stick out and create a bell shape. 

Of note, it has a high low hem, and if you want to shorten it, because of the godets, you have to use the lengthen-shorten lines (which are provided).  Version A is fine the way it is but I recall the version with the hem band was really really long - because you have the full length plus a band.  I would probably shorten it 3 inches.  I'd be tempted to do that above the godets.  I don't remember where the shorten lines are in the pattern, seems like they might be through the godets, which seems like too much work.

While I was obsessively trying it on I thought another very cool variation would be to not use the godets at all, but to add about 2" to the front and back at the sides and overlap them.  It would be a tunic with high cut sides - almost like a sari top....