Showing posts with label blazer. Show all posts

Tuesday, 27 February 2024

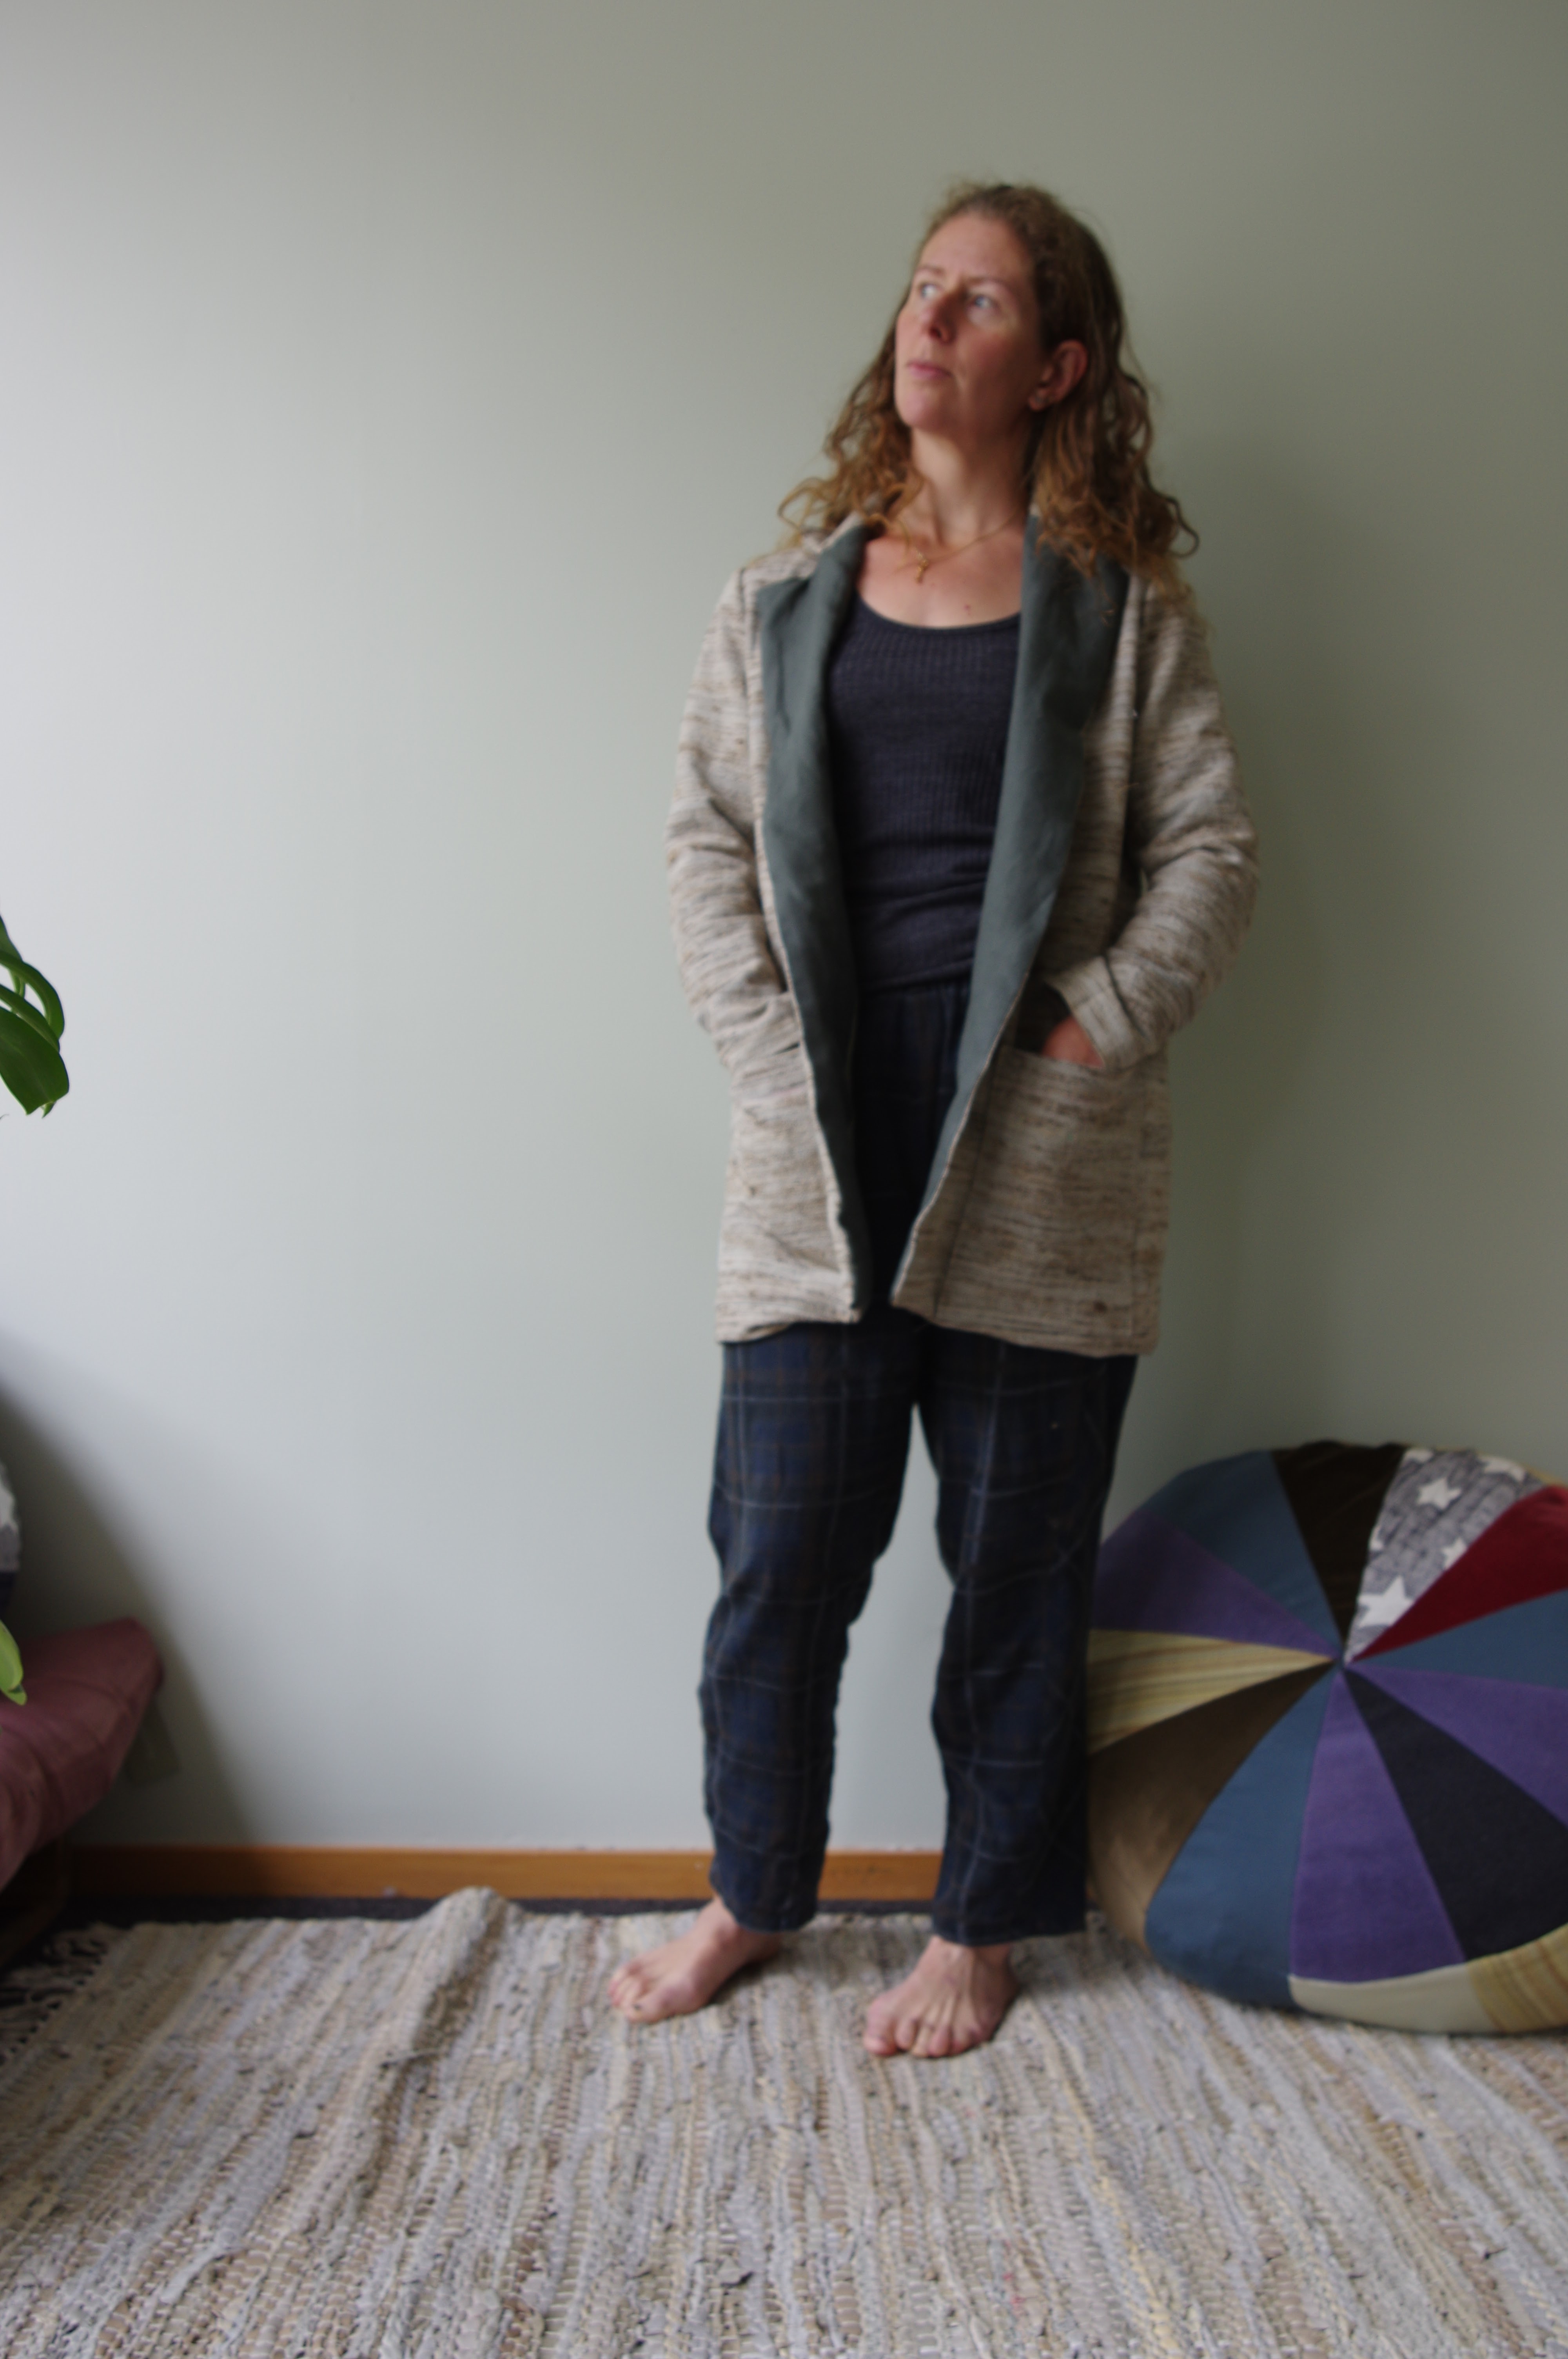
The Friday Pattern Co Victoria blazer review

My experience with the Friday Pattern Co has been intense in the past few months, and it has seriously been pretty checkered.  I knew ahead of time that this pattern has a rather tight sleeve - during our sewing weekend in Auckland I got to try on an XS in progress.  Thus I went with a size S.  I knew it would be long and so my vision was a kind of coat/blazer crossover.

I did not really anticipate how much fabric this needs. I'd considered a lot of different fabrics for it, but settled on a loose woven silk from Nepal, and it's a loomed width (110 cm) and it was not enough...so for the facing I went with a contrasting green linen.  I did NOT at any point think about how the facing of the front lapels would be actually so visible.  Once I realised that I committed this in my head to pretty solid muslin territory because I was not super enthused.  

Things started with some challenges.  The pocket placement is extremely and oddly low, the marks line up the pockets near the hem of the blazer, so I moved them up in order to have a hem in the end, this was still not really helpful as the pocket location meant I couldn't vary the hem upwards by much (unless I wanted to sew into the pocket).  The lining gap is in a strange location, and so I moved it a less obvious location.  Naturally I managed to octopus my sleeve hems into a mobius strip and had to undo the first one, ugh.  I did hand sew the seam allowance of the sleeve cuff together so it wouldn't flip out, and that small amount of extra work did seem to improve the sit of the lining in the cuff, and keep the cuff from unfolding outwards.  I'll keep that in mind for future makes.  I think there are recommendations to sew the lining of the hem like this as well and that makes sense because my hems of lined jackets always droop.

I was already pretty down on this because of the non-matching facing, and so when the hem went to hell in a handbasket I didn't fight too hard. Nothing lined up.  In order to create a semblance of closure I had to create a hem from nothing and the result is this totally horrible curve to the hems and some super dubious handstitching.  Far from finally learning a cool way to get that tragedy of hem, lining and front facing to meet in a friendly fashion, this was a ruin because the length of the facing, the amount of seam allowance of the facing towards the lining, and the lining/hem interface did not match as the instructions suggested they should.  It certainly could be due to interfacing the facing, so it was longer and pulled differently than the silk. Maybe it cut differently than the silk.  No idea.  

My final feeling was that although the fit of this isn't terrible - it does fit -  I never really like lapel things and I don't like this lapel thing, and I would never make it again and never try to figure out what has gone wrong with these instructions and placement of things.  I have previously mused that I will only be happy with a real coat or blazer when I commit to a serious one with layers, pad stitching, shoulder pads, and other tailoring realities that I only know about in a hazy vague way.  I think that's still the case.  I'm too picky to like an easy sew when I want the result of a complicated and well-designed project.  


This might suit someone who really wants that easy sew (which is most of Friday's market) but I don't have advice for the hems except to say maybe it was just me.  I recommend putting on the pockets late in the process when you can double check you are happy with the location.  I don't like the way it fits across my back - maybe I need some kind of wide back or muscled neck adjustment, but overall the fit is not the problem with this pattern.


Sunday, 23 October 2016

Myopic Mountain Morris (by Grainline patterns)

Grainline Morris, of course.  And the fabric looks to me like the view from my tent on a sunny morning in the mountains, before I've put in my contacts. 

I cut this in a size 4 back in Ukraine.  I considered making various fit changes but I thought I should first test it out in a muslin kind of way.  A wearable muslin, but the fabric I wanted to use actually had no stretch - I remembered it wrong, so I put the pattern aside. 

The fabric here is from emmaonesock.  It's a lightweight stretch cotton.  This was definitely a wearable muslin.  I just get such bad fit from Grainline patterns in the shoulder, and so I didn't anticipate it to fit very well, but I needed to do it and see it to believe it.  I'm also not in love with open front things.  The Morris looks awesome on other people and that made me want to test it out - another reason is that I thought (initially) it would be a good place to make modifications if I needed to, but actually the collar is kind of confounding and so made me hesitate.

The collar reminds me a lot of the Marfy free jacket pattern...another one I muslined and then left behind as too confusing to fit to my shoulder/upper back axis.


Anyway I guess I got mixed up on step 15 because my bottom ends didn't match up, and when I went to do the stitching of the facings to the jacket, I had to go by the bottom of the facing, since the bottom of the jacket was longer.  So that changed the shape of the bottom by about 1cm.  Otherwise it went smoothly.  It actually fits, dare I say? ...fine.  But I don't like it because I can't close it in the front.  And I was thinking of making a second one but the fact that I was sooo lukewarm about it actually was enough to change my mind, I think I'll make some Safran pants instead...

Wednesday, 26 August 2015

Schnittchen Coco in silk

The version I made for my friend was a straight size 36. The length was ok on me, as was the shape, but the shoulders and arms were way too tight.  I decided it was time to take the plunge (muslins never help me much.  All my projects are, like, a muslin for the next project.  Like life!) and I cut a size 38 on the top, merging to a 36 below the armholes.

Then this project sat around a bit because I didn't have a bobbin with black thread.  My bobbins run my sewing life.  Seriously.  The Coco is an easy project but it gives me the feel of a difficult one. I did make one change right away though - those darts, what is up with them? They are short and funny and actually make the fabric bag out.  I marked my real bust points and made proper darts.  First time changing darts, and hell didn't freeze over or anything. 


The left arm is twisted, and the left body apparently too.  But it could also do with an ironing...


Other than that, working with nubbly raw silk is always amazing, it presses nicely and eats up the stitches, and it is rough and stays put in the machine.  (I got this silk from the Scampoli in Milano, about 20euro/meter and too amazing to resist. I think I got the charmeuse at the same place because I couldn't leave without this beautiful colour in my life.) Unfortunately charmeuse is never totally amazing to cut and sew, but I do have to ask - it's normal to sew charmeuse without pins?  Or have I just forgotten what life was like without the IDT?  Never know...anyway -- crowning glory was inserted the first lining sleeve backwards.  Oh, ugh, worse than sewing charmeuse is taking it apart.  I use a 60 sharps needle when I sew with silk and fine things but it still leaves holes.  Continued in similar vein - I ended up sewing the sleeve lining a total of four times and one of them is still wrong.  Then of course my facing was on wrong and I had to undo that - also twice- I so absolutely have facing dyslexia. 

As previously, I referred to Jen's bagging tutorial because my brain is like a sieve.  I made the lining just like the exterior although I left the wonky darts out of laziness, added the facings, and then sewed around the edge and bagged it.  I did the weird octopus thing to sew the sleeves together.  It came together quite quickly other than all that undoing.

Unfortunately, I am still just not on board with the Coco.  The arm length is wrong, the left sleeve twists funny, I still don't like the fit in the underhalf of the sleeve, it hurts my pointy elbows.  I want to put a button but then the collar looks silly.  I am caving in.  I might try one more muslin of the Marfy pattern, but otherwise I am doing that 200 hour Chanel jacket seminar.  I am getting nowhere with jackets. 

Monday, 1 June 2015

Schnittchen Coco jacket

I have been on a fruitless hunt for a blazer pattern.  I guess I mean, a blazer pattern that fits without me making changes that I don't know how to make.  I know this is wishful thinking.  I made up the free Marfy blazer as a muslin.  Then I did all sorts of weird things to the armscye.  None of it was anywhere near improvement. 

I have been reading Fit for Real People.  Everyone loves this book.  I find the graphics and layout really difficult to make sense of. Also, I just don't know what changes I need to make, so it doesn't feel helpful to know HOW to make the changes.  One thing is says is that you should begin fitting at the shoulders, ie cut the size that fits your high bust and then adjust from there.  I am beginning to think this is worth a try.  Unlike all normal ladies (apparently) my bust is 35 and my high bust is something like 38.  More of that extra width is probably in my back. 

Anyway that was a lot of introduction for the Coco Blazer, which doesn't fit me at all but is luckily for my friend R!  Everyone talks about how great the arms fit.  What that translates into is skinny little arms not made for massive biceps.  I have no shoulder movement, no arm movement, and I can barely get the arms on.  The size is 38, which I would have also made for me.  I tapered to 36 because R isn't very hippy.  She is pretty narrow on top so I expect this will suit her just fine. 

Sorry my head got cut off, new ironing board/camera platform and I don't have the angle quite right...


The Coco blazer is easy to make, which is why I didn't even panic when I started cutting out this evil Marc Jacobs boucle from Mood Fabrics and it immediately started falling apart at every cut edge.  I was very hesitant with the iron, because the fabric is a bunch of different fibers including poly and melty metals.  I think that shows.  But not too badly...I sewed the outside of the blazer together in one quick go with few pins, since they became buried in the fabric and impossible to excavate. I sewed the lining and the rest of the blazer together the following day.  I had to look up how to attach the cuffs in a bagged lining.  (Grainline tutorial.) Otherwise I found the instructions brief but ok. 

Overall I still like the idea of the Coco blazer.  (More than Marfy even though I think with patience it would turn out amazing. Maybe when I find a sewing-fairy Godmother to help?) I have fabrics allll ready for a blazer!  Should I try cutting out a 42 in the shoulders/sleeves and taper to a 38 at the bust?  Does anyone else have fit advice for super wide shoulders and popeye biceps?