Showing posts with label gelatin for silk. Show all posts

Thursday, 3 February 2022

Ethel dress by PM patterns, a review

So, this dress is like a recipe!  So many options and very nice, tempting photography.  I bought it right away.  Don't be like me!  There are so many other designers creating similar designs, and I would not recommend this one. 

The pattern has no A0 option, instead it's a nonstandard size.  My print shop prints these weird shaped things sideways on A0 paper, which uses a lot of paper.  Then, the layout of this nonstandard size requires you to tape pieces together, and literally I mean tape a 2cm scrap from the bottom of one page to the top of the skirt piece!  It's really bad planning on the part of the designer.  The front and back skirt are the same, except that you tape a different scrap on for the front and back, oh but HOLD YOUR HORSES if you are using the empire waist you have to beware of all these scraps as you need a different set yet again. 

I'm not sure whether this tetris is hilarious and clever or just a pain. You be the judge. 

I cut size 38 instead of 36, erring on the side of just bigger rather than just smaller than my measurements.  And then for my first version I did the following recipe: 

-waist length

-crossover front, which I cut four of to self line

-short skirt

-with ruffle 


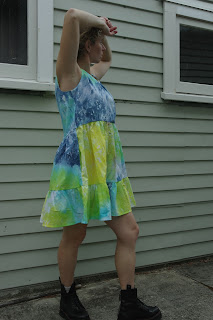
Fabric is Rag and Bone white windowpane cotton which I ice dyed!  Isn't it so pretty?

And I added the Bardon pockets which I have already made clear are the best pocket shape known to man.

AND it is huge.  I gave it to a friend who's breastfeeding because this dress with the crossover front is breastfeeding friendly.  That's how much access you have!  

Clearly I should have made the 36.  I was going to leave it at that but honestly I've gotten this far so I wanted to make a long diaphanous silk version.  Yes, cue the future high blood pressure from sewing diaphanous silk.  I know.  But then I realised this silk I have is still available in the shop (I'll need like 6 m to double the bodice and the skirt piece so it's not see thru)...and figured I should do it.  But after this?  Never again. 

I managed to cut the same pieces down to 36

This recipe:

-empire waist

-v neck

doubled front again, same story

long sleeves

long skirt

with ruffle 

Narrow silk chiffon

Gelatin

Blood pressure cuff for data collection purposes

Actually it wasn't that bad but I was kind of over it after all the excitement of planning.  Also it was apparent early on that the empire waist is A Mistake.  It ends at nipple level, creating a kind of french dressing gown look.  It was bad.  It was slightly better after I washed out the gelatin.  This crinkle chiffon actually behaves ok once it's had gelatin applied, it has some texture but irons flat.  I think only a few pieces cut off grain (as you can kind of tell since the stripes aren't uniformly horizontal in the bottom tier.)


Ah well, live and learn.  I sent this on to a friend and hoped she is less picky than I am. This was among the final cluster of stress projects before moving so I count it as a total success, because I finished it.  My interest would not have survived a move. Unfortunately I miscalculated something and ended up with still 2m of the fabric left over (which is how much I started with before buying more for this dress) so I suppose I'll still make the simple flowy top I was gonna make in the beginning...


Friday, 31 March 2017

stretch silk Sewaholic Davie

I planned, long ago, to make Davie out of a different fabric.
Plus I swear I had already written this blog post.  Or not?  I'm having deja vu as I write it, feels like again. 

I decided at some point that the initial fabric, which was a beautiful lilac merino, was too heavy and didn't have enough stretch so I changed my mind about using it.  I think also I didn't quite have enough fabric for the flare of the skirt.  This fabric is stretch silk from Ukraine.  I bathed it in gelatin thinking that would be a good idea.  And I decided I would make this for my cousin as the bright colours (as much as I love them) would suit her better than me.  Plus she lost a silk dress recently so it seemed apropos.  Luckily she is the same size as I am.

I cut a size 4 at the top tapering down to a 0 around the hips.  I just softened the hip line, and I did so only on the curved pieces, not on the straight ones.  I found as I was pulling the princess seams together that there was so little stretch and I blamed it on the silk, so I washed it to get the gelatin out but it didn't help.  So some seams were quite challenging.  I did keep the keyhole, although I debated leaving it out.

I made a standard jersey binding for the neck, but I folded over the arms to hem them.  This turned out pretty messy.  The hem is also my standard job and is a total mess, but the high low hem is in so I'm not too fussy.

End thoughts: stretch silk is too floppy for this pattern.  Because of the skirt flare, it needs a knit with some body.  As many have said it's quite large for its size too, and the top half is almost a bit too big.  It's not a very neat effort but it is wearable and the pattern distracts from a lot.

I'm not sure how much I referred to the instructions but I think they were ok.  This dress kind of represents the end of Sewaholic to me - right before Tasia left, when the amazingness of the early projects - the Lonsdale, Minoru, Cambie - just couldn't be reproduced. 

Sadly my father, who took these photos in the midst of packing hell, and who has been totally competent at taking vacation holiday photos good enough to frame and put on the wall, can't take focused pictures of me in a dress.  Sorry.  Maybe my cousin will provide.


Monday, 23 December 2013

Vogue Paris Original, V2323 - muslin

In love with this dress pattern!  Here is the cover of it.  It's my first seriously vintage pattern and I really had no idea how things would progress.  I decided to do a full muslin, underlined in silk, to see how (whether) it would fit and also to get the hang of using gelatin to make the silk easier to work with.  I made the muslin from a leftover piece of herringbone black wool with silver lurex threads in it.  The underlining was a silk chiffon.  I used this technique with gelatin prior to cutting and ironing the silk.

Because this was my first ever muslin, I mean an actual one, I did it in stages so it kind of felt like it took forever, although sewing the pieces together was easy.  I ignored a lot of the subtleties in the instructions and didn't do any gathering stitches except on the sleeves.

The pattern is slightly small for me according to the size chart, but came with all its pieces and they were in great shape.  It seemed like a relatively straightforward construction.  The puzzle piece on the front creates most of the three dimensional shape, and I love how clever it is (although after lots of pinning of Polly tops, I initially suspected it would be very tiresome to sew together!)  In actual fact you are supposed to gather the curves (which I didn't do on my muslin) and it is supposed to hang flat.  (Mine really doesn't since I didn't put much effort into that puzzle piece front.)  I had forgotten that in the 70's, dresses were shapeless sheaths.  Also I think it looks much better in 2 colours!


I was surprised how huge the dress ended up.  The silk underlining, which I sewed onto EVERY SINGLE piece, meant my pieces held their shape - the wool would have definitely started to stretch alone.  So there wasn't distortion increasing the size.  Seems that Vogue in 1970 already ran big!  I cut off 7 inches of the bottom (and I'm thinking of cutting off more), and I considered cutting a bit off the side seams but ended up leaving it.  On my final version I'll just cut my fabric shorter to start with.  Not sure what I will do with the side seams.

My final version is planned in silk velvet.  I was planning to underline as I did on my muslin, but my facings were really annoying and it has you hand sew down the wrist seams and such...so I think I'll just do a normal lining so I can have a neater inner finish.  I was also planning to use cotton voile for the underlining, and now I'm considering using silk or even bemberg, just to make sure it doesn't stick to me - since the velvet is quite heavy this won't be a summer dress!

I was really hoping that I wouldn't need to make any big modifications because I wasn't sure how I would face the puzzle front if I had to do an FBA, for instance.  Luckily I don't need to change anything.

Sunday, 15 December 2013

Rainbow lined Colette Crepe


This sat around for awhile and I read about it online quite a bit before I got annoyed with the pile of fabric and dove in.  I wasn't sure what to expect - both with the vertical striping and with the pattern itself.  I didn't make any effort at stripe-matching.  I also didn't know whether my silk lining would be solid enough to function as facings.  I played with the idea of ironing on the facing pieces to the top and armholes of the dress but then decided that was too much effort. It was my first Colette pattern and I have read a lot about people having fit troubles so I wasn't anticipating a perfect dress on the first go round.  On the other hand, my Vogue wrap dress just feels too big and I do not love having it open all the way up to the waist every time the wind blows.  So I thought the back wrap might be a nice change.

I cut a size 4 which matched my dimensions exactly. I do not like facings so I decided to line this dress with some lime green silk.  Also, I treated the silk with gelatin so it would behave (an example of how to do that is here, and this certainly made it less shifty.  That's currently my favourite method for dealing with lightweight silk.  Less shifty does not = zero shifty, so it was still a bit off, but I just made some little folds along the shoulder and that was taken care of.  The shoulders are funny shaped anyway!


 I followed this tutorial for the order to sew with a full lining.  What it neglects to point out is that the wrap belt also has to be done and attached prior to sewing the lining onto the bodice, but I remembered that from my Vogue wrap so it wasn't a problem.  Sewing a wrap dress is easy and the Vogue dress with lining had super instructions, so this time around felt a little bit like deja vu even though I was adding the lining myself.  I sewed it in by hand at the waist, and I have to say, this dress is gorgeous inside.  I did notice that my needle make little lines in the silk - even when I switched to a microtex needle.  I don't know what that's a sign of. 

As for fit...meh.  I don't actually like the loss of control that I get with the wrap in the back.  And I think wrap dresses just feel like too much fabric or something.  The bust of Colette patterns is bigger than in the big 4, and in this case it's too big for me.  The dress is cute and I really like the one piece sleeves.  It's possible that I would make it again, but I'm not totally sure.