Showing posts with label zippers. Show all posts

Sunday, 25 August 2024

Jalie 2679 jacket with some variations

 I made this jacket in some very lightweight softshell a few years ago.  Size R, up to S at the hips. There wasn't any reason I didn't like it, but it wasn't something I ever found a use for so it was dispatched off to a friend.  Thank god for friends!  I mean, I know I can offload unwanted makes to the secondhand shop but it's really a joy to pass things on to people who actually love to receive them.  

So anyway I had this fabric lying around.  It's been lying around for too long.  I love it so much and didn't want to mess it up, could obviously have made some snug legging style pants - it's something between a ponte and a scuba and I think I got it from Emma One Sock - just one m. 

I had a vision not too terribly long ago that actually this jacket pattern would be a good match for it, a win, because I wear my lightweight hoodies to work all the time so unlike 86% of my wardrobe, it would get used.  Also I adore my yellow non-hoodie which it really seems I never blogged (here's the first post on that pattern), but I stupidly gave away the pattern.  So this managed to move to the top of the winter queue!  I've been a sewing MACHINE on my week-long staycations in between work.  It's been so satisfying, I'm trying to mix up the projects that have sat in my queue for years, with new ideas, so the sewing juices can get creative again instead of feeling mired down in ideas I thought up in 2021.  

I did inspect the post from my previous jacket. Not liking how tight it was around my hips, I thought of some ways I could widen the bottom of the jacket - the way the pieces tetris together makes this less straightforward.  I ended up adding width to the side back and to the front bottom pieces, probably quite a bit, like 4cm total.  I made sure all the pieces lined up - added this to my actual pattern pieces before cutting out (shocking!) and then construction proceeded without dramas.  I didn't like the zipper method when I did this the first time, but this time I did follow the instructions and they were not actually terrible.  


I do find it has a lot of bagginess in the armpit and upper arm.  It's not an issue for work, but it's actually really a lot.  Enough that I think I wouldn't make this pattern again - it's not very flattering, exactly?  Maybe I'll even overlock it off? But anyway sewing with scuba is very satisfying, and this is one of those projects which is so pretty on the inside too, which is nice. 

Wednesday, 4 January 2017

By Hand London Kim dress

I suffered with the BHL Elisalex due to fit problems and honestly, the Kim pattern isn't that much different.  Initially I only noticed the purple version with the tulip skirt and so it didn't go on my radar at all.  But I started to see a number of versions this year that had me fixated on it.  Plus I really wanted to do a Kim-Zeena frankendress.  So I started with a Kim.  It was a Kim marathon actually - my last day in Seattle and I spent the evening trying in vain to sew the entire dress.  It was near midnight when I had to stop prior to zipper insertion. 

Putting in zips late at night and tired is never a good idea.  Also I could finally see the dress coming together, and to my total shock, it seemed to fit like magic.  No WAY!! 

The details:
Fabric is from Tessuti in Melbourne. And I have had it for awhile.
Lining is lime green bemberg.  The skirt is not lined.
Size is 6/10 with no changes. Oh yeah except one.  I prepared the pdf pattern in Ukraine, and I think that I cut some length off the skirt prophylactically, since BHL patterns are for very tall ladies.  I think I cut off like 6" or 10 cm.  And then...when I cut out the dress, I forgot I'd done that and again removed about 5"!!  I held it up to myself and neglected to take the little pintucks into consideration.  So I was looking at the need for a hem facing. 

So I moved, and I couldn't bring incomplete Kim with me due to the usual luggage mess, and it was so tantalising because it looked like it might be my dream dress in terms of the fit.  So I concocted another Kim in my head while I waited for my mum to send me my boxes of sewing supplies/unfinished projects.  (Which naturally arrived before I got around to the second Kim, oh well.) I got a grosgrain ribbon in Munich to use as a hem facing and finally got moving on the last, hm, hour of labor on this beautiful dress. 

No problems with the finish, and I think I might continue to use ribbons as hem bindings - I read that it will stick to tights less!  And it means my hem is even!  Hurrah!  However, when I got to pinning the lining down, I realized I would have to sew it by hand or it would make the dress bunch out funny.  Also, although it almost fit perfectly, the straps were too long.  Like, really too long.  So I realized after alllll this work, I was going to have to open the shoulder seam and cut it and then blind stitch it back together.  Blah.  This dress has been lying on my couch for SO long. 

I took a few vacations to gird myself. 
Finally I think I was tired of seeing it sitting there and so I finished it - I hand sewed the lining to the bodice.  To make the shoulder strap shorter I opened the seam...and just overlapped and sewed them down.  Design feature!  Yeah...it's not perfect but at this point enough is enough, right? 


Sorry my photos are blurry, I have discovered that with my remote I can do an endless series of pictures but I haven't gotten the focus to work yet.  This does mean you'll have to bear with endless ridiculous poses but it was so much more fun than the usual photo shoot.


I have already cut the second one out so in order to get around these fit problems, I decided to just cut the straps (about 3 cm), and to cut a sliver off both the front and back bodice piece, tapering down to nothing below the bust.  This would bring the straps closer together and shrink the bust a tiny bit.  We shall see...hopefully it won't take quite as long as the first one.

Thursday, 25 December 2014

Victory Chloe

This pattern got on my list while I was in Arizona and I was planning to make it in some rayon that I got from Anna Ka Bazaar.  However, when I left the States it hadn't happened yet and the fabric didn't make it.  I bought this yellow polyester in Germany with mixed feelings - it was cheap, and pretty, and spotted...but...polyester.  Ugh.  This is the first time I have ever sewn with polyester!  I lined it with cotton to balance out the yuck factor, but I am not sure whether that tilted the scales against me from the beginning.

I recalled that the size 4 Anouk had been just a touch small in the shoulders, and opted for the tank version of this dress.  With that same thought, when I chose the size to cut out, I went by the first set of measurements which pushed me toward a 6, instead of the finished measurements.  This was a huge error, and I'm kind of ashamed of it.  I recently discovered GOMI and feel like I'm one of those bloggers the older, serious sewists are complaining about (even though I have only 14 followers, and half of you are my best friends, and I love you all) because I am composing cheap fashion, and I am sure that I don't iron anything enough.

So, more about Chloe.  Construction is not challenging, including the fake welt pockets.  The instructions have you put the pieces together with the zip first, but I wanted to try the Cambie method so I put the zip in last.  With the Cambie method you really have to get the zipper against the seam allowance and then trim the extra seam allowance away, but I was pretty satisfied with how it came out.  I got lazy and just folded and sewed the armholes instead of using a facing, because at that point I knew the dress didn't fit and it was a challenge to finish it.


These pictures remind me that I need to start doing a swayback alteration.  I think I'm finally ready to take that step!  For some reason, although I have known for a long time that I need to do it, the swayback alteration has felt too difficult to actually attempt. 

Also, it's been awhile, somehow, since I've put in a non-invisible zipper.  It ends up that although I don't have trouble with the zip, I can't ever (and have never) escape the bubble at the bottom of the zip.  How to fix?

As you can see, the dress does not fit at all.  And I will admit that I am not going to try to size it down to fit (unfortunately I don't have any friends bigger than me that I can pass it on to!)  This has turned out disappointing as I was so very excited about Chloe, and in the end let down enough that it will be a long time until I try one again, but Chloe does have some features that make it interesting to try again - it has pockets!  And the panels provide some interesting opportunity to mix and match contrasting fabrics (I think many have done this.)  It's fully lined, which is now almost one of my criteria before making anything.   I am starting to push my summery projects (shock!) towards the spring, and I am slowly losing the need to sew every single pattern that my eye falls on.  Hopefully this means something crazy like a maturation of my sewing, but it's too early to tell.


Thursday, 6 November 2014

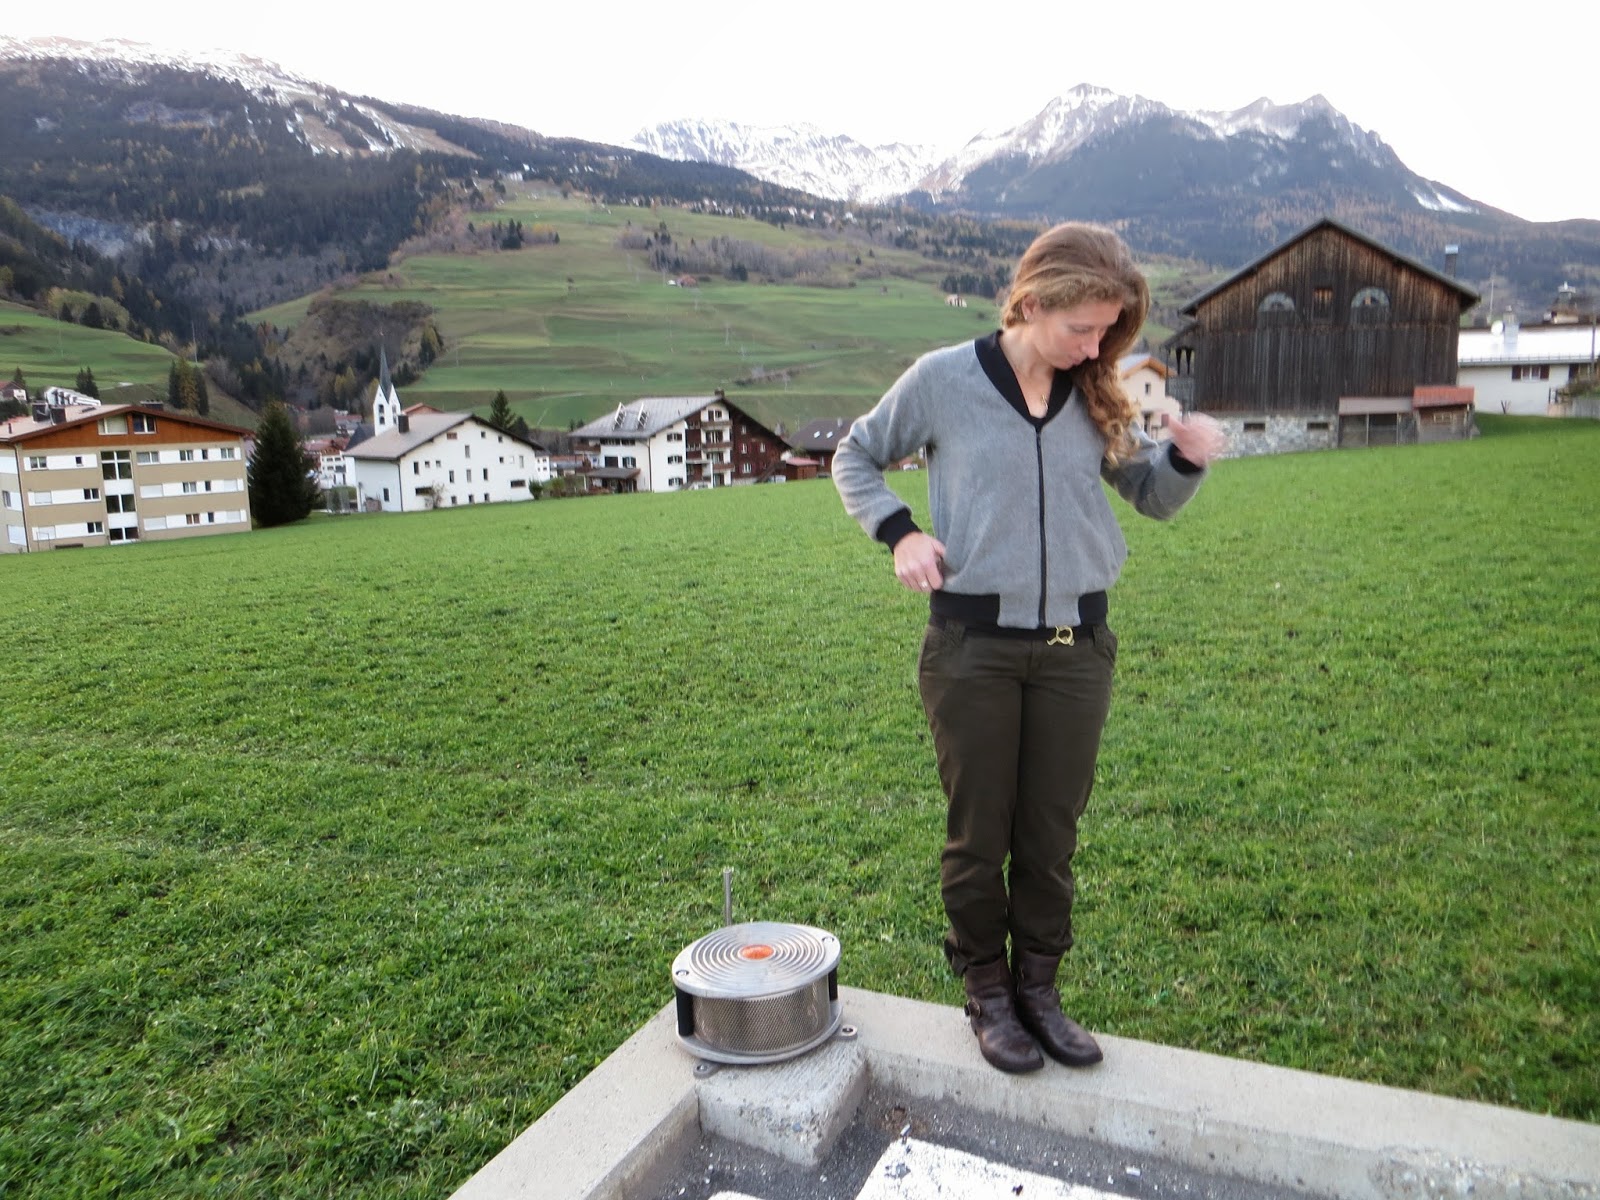
Papercut Rigel Bomber

This is the project that seemed doomed.  I had all these jacket plans for the summer, hatched on that bed in the hotel room in Arizona in May.  It looked, from that vantage point, like I'd have so much summer time to sew jackets!  You may note this is only the second jacket.  There is a third one still out there waiting to happen.

Fabric: Marc Jacobs grey wool tweed, from Mood.
Lining: silk from ramieandlinen on Etsy.
Bands: Pacific Fabrics in Seattle.
Zip: my new local shop 'Nählädeli', after the worst, longest hunt ever.  Who would ever believe that a shop open for about 12 hours a week in a village of 1000 people would be the one place I would find this zip?

Size: XS or XXS?
I sized down (XXS) after reading all the blogs.  I figured I wanted this jacket to fit pretty closely and I didn't want the bagginess issue many have had.  Also I thought wool would be relatively loose.  The blogs were very helpful regarding lining, but because I read so many I ended up confused.  Overall I followed Anna's lining recommendations, but I think I was confused by Kim, who drafted her own lining.  I assumed I had to do that, which made this project slow to begin as I was nervous about drafting anything. Not to mention it was unnecessary, and ended up complicating things later on.

I assumed that I would have no problem at alllll with the welt pockets, since no one else did.  I didn't do a lot of prior research.  Um, oops.  I had everything ready, including a US-purchased 35cm zip that has since vanished during the move.  I attacked my jacket front with scissors and installed my first ever welt pocket to discover...a huge honking hole, because you are not supposed to cut your hole longer than the welt covering bit.  Which the instructions, I must say, did not explicitly comment on!  (Don't tell me it's obvious...)

After that I took a break, read up on welt pockets, found out nothing useful, and anyway managed to do most of the second one successfully while trying to figure out what I was going to do to salvage my hopefully amazing jacket.  When I start a project I am always full of this zeal that it's going to be the best thing I've ever made, and whenever I make my inevitable first mistake, comes the sad downfall that it might not, after all.  That made me hesitate for a long time, because my expectations were so high and my huge mistake was so early.

Contrary to all other bloggers, I found ZERO useful resources on welt pockets.  Who knows - maybe I need scientific diagrams and words instead of pictures, but I did not return to my jacket edified.  So it sat.

And then I finally was ready to try again and...my sewing machine (the Necchi that I stole borrowed from my mother - divine retribution?) broke.

So I packed this baby up in plastic bags, assumed it was hopeless forever, and shipped it to myself, where in a new, leisurely mood and fully freed from any expectations, I faced down the big massive hole in the front of my jacket, and realised there was no way I was going to undo everything and make a new front.  The hole had to be hidden, and it was doable thanks to the loose weave of the tweed and well matching thread.  There's a bit of a fold where I had to pull the fabric around the hole, but I was saved by how the tweed eats the thread so it's invisible.  I sewed a zig zag over the remaining hole and then sewed the last bit by hand.  Salvaged!  And I still really have no clue how welt pockets work : /

The rest of this jacket went along in the same leisurely fashion.  Because of my self-drafted front lining, but normal back lining, I didn't know exactly where to attach the facing to the lining, since they didn't share a seam.  The bottom front where the binding, lining, facing, and front come together was also a puzzle that got pinned and repinned many times.  I sewed it only just before putting in the zip.


It is not as baggy as it looks in these pictures!


Thanks to my coworker Isabelle for the photos!  Many of them are taken at the side of the hospital heli-pad, which at least has a nice view.

I sewed it mostly like Anna, as I said above - normal jacket together, lining together, attached them by sandwiching the hem band in all layers.  After that I diverged slightly.  I sewed the facing and the lining together by pinning everything into place and approximating where they should overlap.  Next I sewed the sleeves in using the Sewaholic method from the Minoru, so my sleevebands were also fully enclosed.  I sewed in the zip and finally sewed the facing to the zip and all the way around the neck.  My technique maximised what I could do without a zip, since I didn't have it until the very end.  Also, my final seam ended up being along the zip and then the neckline, and therefore basically invisible, while sealing everything in.  The most finicky spot was the bottom of the facing/front beside the zip, which just had to be very well tucked together and ironed before I could sew it shut.  This worked nicely in my wool, but if you were planning less visible topstitching on finer fabric, it might not look as well.

What I would do better:
-the thin silk pockets, I would interface the silk.  They are important in a jacket like this and I feel like they are going to fall apart, especially since my welt pocket skills are still just about zero and I'm not totally sure how I attached the pockets to the jacket.

-On size and fit: If you are not short waisted, and if you don't have proportionally short arms, then make the arms longer.  I changed nothing, and this baby hits just above my hips, and the sleeves hit exactly at my wrists.  If I wanted it cozy, baggy, or to go over sweaters, I would need to size up.  To go over a tshirt, it's perfect.  The binding does make a blousy effect at the bottom, no matter what fabric you use.  If you don't want this, then make the binding longer than the instructions ask for.

Ok but, shockingly enough and despite everything, my jacket is totally amazing.  Of course, it snowed yesterday...