Showing posts with label Undercover Hood. Show all posts

Sunday, 16 July 2017

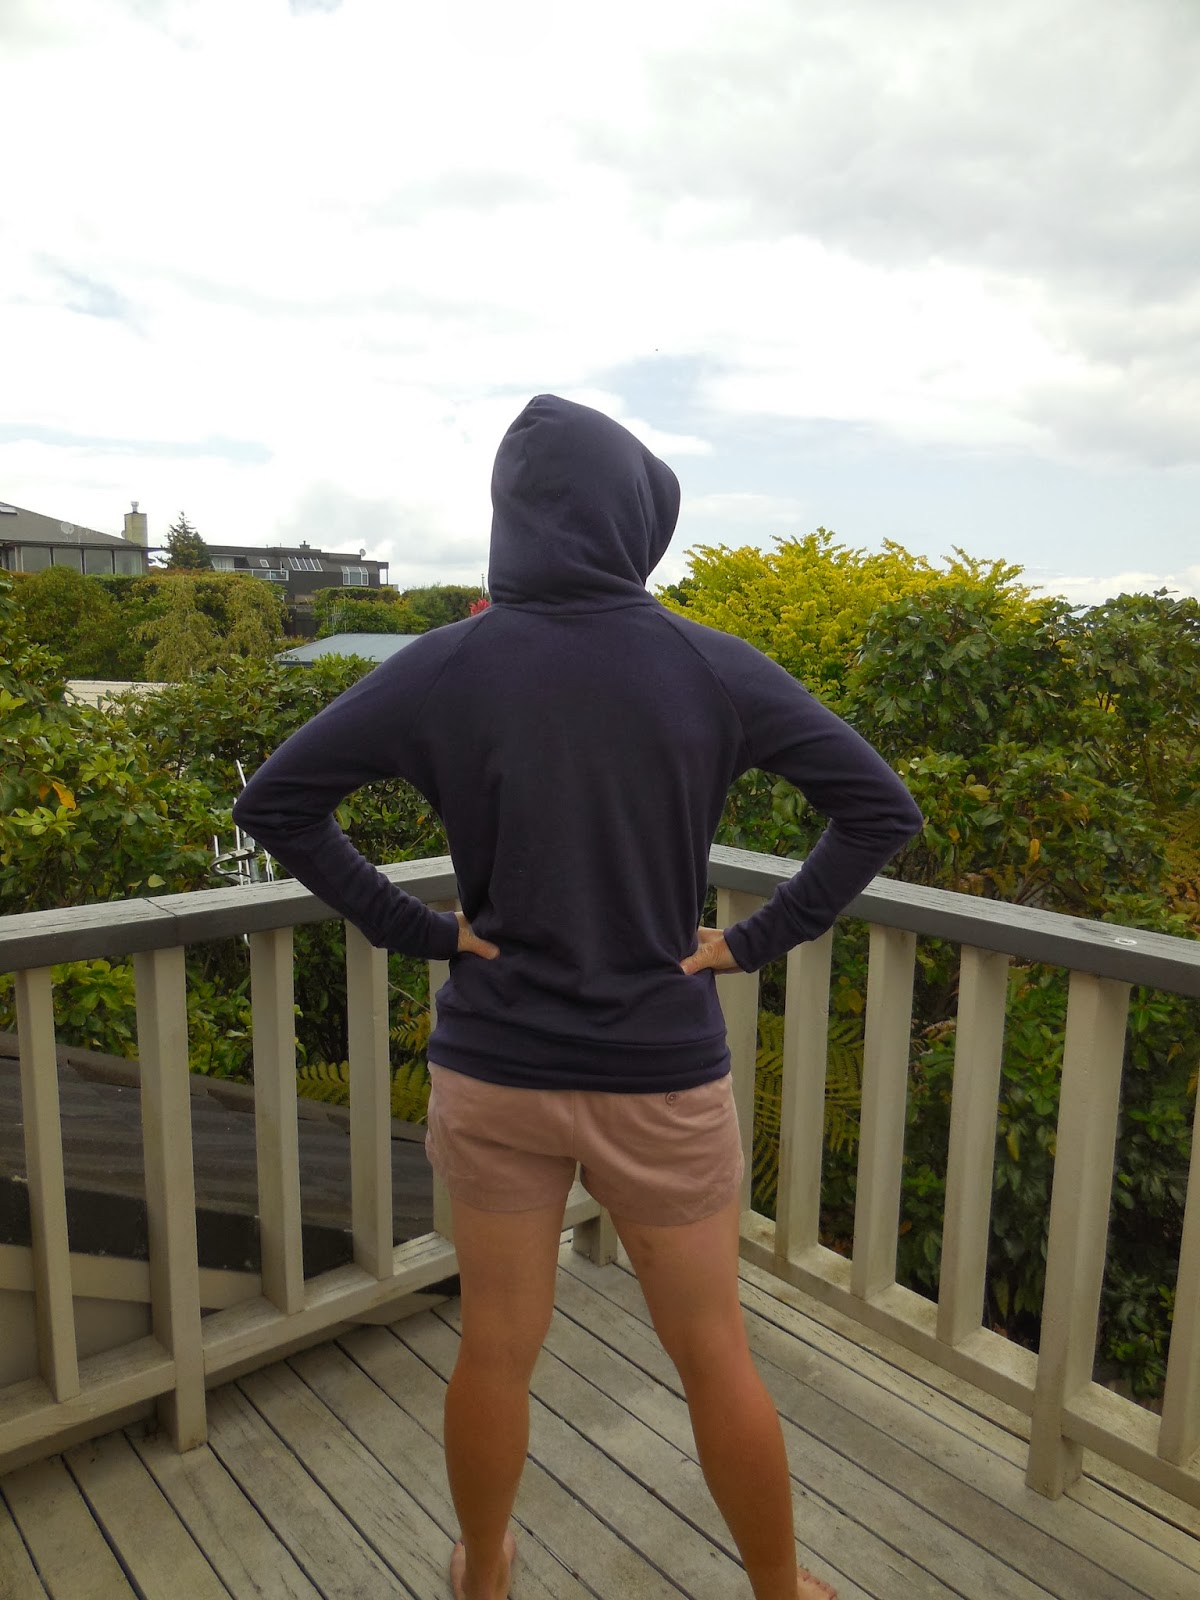
Most Amazing Papercut undercover hood & Named Geneva raglan tee

I'll just smash these into one post since I made them the same day!

First was a Geneva Raglan tee, by Named patterns.
Done here.
I wanted to see if the size I've been making, 36, would work for a more sweater-type feel.  I was even armed with wrist and hem bindings.  I used up some scraps, as you can see.  Unfortunately I wasn't paying close attention and the left arm fabric had a right and wrong side...which I flipped thinking that there was a notch when there wasn't.  The right arm is made of ribbing, and didn't have a right and wrong side, so I didn't notice until it was too late (I did wonder why I had to ease the arms in so much on a raglan tee!)


Ridiculously, this worked out really well.  I did have to take in the arm with the ribbing, as that ribbing has proven to be really loose and floppy.  (See my Geodesic).  I ended up cutting about 2 inches off the hem and the hem binding looked stupid so I took it off and just zig zagged the hem and the wrists.  I'm not sure how well that will hold because the left sleeve fabric is kind of terry cloth and sheds, but I will see.

Then I made my Undercover hood which I've been dreaming of for weeks!  I have to majorly thank the Fabric Store, as I ran in straight from the airport with ten minutes before closing time and dithered over the knits, (Ah plus the new patterns from Papercut!  Exciting!)

I had envisioned an orange hoody.  But the orange wasn't the right shade and right next to it was...this.  It's drapey, thin weave merino and basically is a sweater weave.  Heavier than usual merino.  It so happens that I adore this colour, which is a dusky terra cotta. This thin, but drapey fabric, I know from experience, is totally the wrong thing for the Undercover Hood, which works better with moderate structure...


So I doubled the front and back.  I lined the hood and the pocket with a leftover, also merino, also from the Fabric Store, that was more stable, and I used the changes that I have written on my pattern from ages ago.  It's XS, with 1 inch removed from the length and from the sleeve length.  I narrowed the front body by about 2 cm but not the back.  If I had read my notes I might have been encouraged to shorten it by 2 inches as I still think it's too long, especially as this drapey fabric pulls down.

Anyway I think despite the length this is the most fabulous undercover hood I have ever made.
Plus I have an embarrassing admission to make. Until now, I have always used a straight stitch for all my knits, all the time.

For some reason I thought I'd try a very narrow zig zag.  And my mind was totally bent.  I somehow had never realised that was the way to fix knits which are just too tight in the seams!  I thought any zig zag would show up and look silly. 

So I have stretchy cuffs and a fabulous hoody.  It's a bit sad to me that these unglamorous basics are the things I wear All.The.Time but that is my life...


Saturday, 16 May 2015

Knit Extravaganza: Ondee Sweater by Deer and Doe

I went fabric shopping in Paris.  Enough blogs have listed how to do this so I won't unnecessarily repeat.  I also happily got all the patterns on my list without having to order online, hurrah!  I found the fabric shop employees generally helpful and willing to speak English if one asked politely.

So after about two days of total sewing-planning-washing overload, I settled down to sew some easy projects.

A few Ondees! First in truly amazing, luxurious navy sweatshirting.  So fuzzy.  So soft.  I cut a 38.  No changes.  I read the instructions and then put them away.  This is an easy project.  My only gripe is that the neck binding has to be really tight - using self-fabric it was being pulled as tight as it could go.  I needed a center front snip.  I have added that to my pattern pieces now, but I think it should have been marked on the pattern.  The bottom binding is also that tight, which I am a bit self conscious about.  Do note: this sweatshirt hits at exactly the bottom of my ribs, about 1.5" above my waist, so in normal-length torso people it will barely cover the rib cage. I love this sweatshirt but I think something this short has truly limited utility in my life.  Despite that I notice that I pull it on every day after work because it's so soft and amazing.


Version 2: stripes. This is double knit but is still pretty light compared to the sweatshirting.  I added six big stripes in length (about 2") and widened the bottom band so it wouldn't be tight but would function like a shirt extension. I went crazy with the doubleness of the knit but hesitated before alternating the bottom bands - I think it would actually have looked great. As for the length, I'm on the fence!  I was so sure I wanted it longer but I think it becomes a bit more boring, like just any old knitwear.  Also it's really obvious I need to get on with that swayback fix.


You can see how the stretchier stripes made a much looser top


Tissue Jersey Renfrew:
The rules with such fine jersey seem to be to touch it as little as possible.  I might note here that, contrary to mainstream and despite various knit issues with my new Pfaff and its IDT, I have always sewn my knits with a straight stitch, and finished them with a zig zag.  I still find this to work out fine, even on this jersey.  On some machines (the cheap Singer) it didn't go so well but most of the time my stitches don't strain or break.  I use a microtex stretch needle.  So for this Renfrew I didn't sew on a bottom or sleeve bindings.  I also didn't measure the length very closely so it's not the same but I reckon for a distressed look item it doesn't matter.  I will cut it at least even soon!  


And to round out the knit craze, I pulled out the Undercover Hood and made another one.  The fabric is a nubbly outside and sweatshirt inside, super lush and warm - about 1 meter, the last piece from the Berlin market.  I cut a S, removed 1" from center front on the fold, 1cm from center back on the fold, and shortened it 2".  I put all the bindings on, and then put the sweatshirt on and chalked myself a new, lower neckline.  Once I was convinced I made a binding almost exactly the length of the neck, because I didn't want it to pull very much.  No Hood in this Undercover Hood : )  It is clearly much nicer than the blue version I made earlier this year but I still struggle to turn it into the magic perfect sweatshirt.  It's luckily perfect for Francesca though.

Tuesday, 6 January 2015

Papercut Undercover not-a-Hoody

This is another basic project.  I learned some neat things though - this was a hoodless version of the Papercut Undercover Hood. It's an XS with no modifications.  I forgot to pinch 1" out of the center front as I had done on the hood versions, and that makes it more baggy and a bit more batwing.  Luckily it's a lounging sweatshirt for a friend and she is curvier than I am so I think it will still work just fine.


My main experiment was with bindings.  I didn't realise until I made this sweatshirt how much stretchier and softer ribbing is compared to using self bindings.  Because I have made this sweatshirt a lot and always done self cuffs, I never had an equal comparison.  The ribbing is honestly so much softer and stretchier, and will make me reconsider using self binding on future projects.  However, I wasn't prepared for that and so I think I could have cut the neck binding a lot shorter.  I cut it about 3" shorter than the neck hole.  I used the pattern piece for the bottom binding and just cut it a bit shorter as well, and I used the pattern piece from the Style Arc Sharon sweatshirt because I was planning to use these cuffs on that sweatshirt and had already cut them out, so this is a shorter arm cuff than the pattern usually has.

I noticed while doing the Style Arc Sharon (blog post soon but it deserves nicer photos so I'm waiting for a camera operator...) how much topstitching added to the appearance of a sweatshirt, so I did lots of topstitching here to make it look nicer.  Added benefit - it holds the seam allowance down on the inside.  I'm still sewing everything with my cheap Singer, which means I straight stitch and then zig zag the seam allowance.  

I wouldn't consider this the perfect raglan sweatshirt quite yet but I will likely tweak a few more versions when tempting knits fall into my hands.  (Ginger has made a nice one.)

Thursday, 22 May 2014

The best undercover hood ever - in double face Italian wool

Me Made May was a brilliant idea for about 4 days while it was warm and sunny out...but then Seattle got all rainy.  It does that sometimes.  So in order to stave off the cold I was inspecting my me-made wardrobe for gaps.  That's what me-made-May is for, right?  Makes one reflect a bit on what things we ought to be making, instead of, say, dresses....

As I noted in my plans for the year, I need to make more cardigans.  I also have a weird jacket fetish, and probably I should make some jackets too, not because I need them per se but because it will distract me from buying them.  But anyway right this minute, the solution was a warm, fuzzy Undercover Hood by Papercut.  I've done it so many times that I couldn't go wrong, and now I know to use a heavier weight knit.  So I went off to Nancy's Sewing Basket, in the rain, to see what they had.  Naturally, what they had was exquisitely expensive double faced Italian wool, and after sucking in a breath and going for it, I rushed home to roll myself up in it for a day or so.  The outside is grey/heathered navy with a normal knit face, and the inside face is fleecy/almost felted soft navy.  I stuck a tiny square in the wash but I didn't like how it took away some of the fleeciness, so I washed this in the machine on 'ultra-delicate' and that seemed to do ok.  I air-dried it.

I made my usual alterations to the Undercover hood.  I cut an XS, 2" removed from the sleeve length, 1" from the middle front, and shortened the front pocket about 1" accordingly.  I cut two pockets, so that I could sew them together for a clean edge, but I kept the fleecy side facing in on the inside layer.  Same thing on the hood- I sewed them together so that I would have the woven outside and fleecy inside even though it's two layers.  

I was terrified to iron this, although ironing made it just shiny enough that I got worried, it flattened it out quite a bit and that might have made it easier to sew at times.  Overall the fabric was very well behaved.  It cut easily, shed only some bits of fluff everywhere, and it flattened as I sewed so even though I was sewing 4 layers, it didn't mess up the Necchi.  (We're on better terms now, since I stole him from my parent's house and took him home.)


What I didn't anticipate is how the thick wool makes this sweatshirt a lot smaller than in the stretchy past versions.  It fits me perfectly but if I start to warm up at all it gets really hot.  In this fabric I could have left it a bit larger just so it would air more.  I am already starting to dream of a version with a zip up the front...

Monday, 25 November 2013

Papercut Undercover Hoody marathon

Yes, I've already made two.
So now I made three more!


I did some minor fit changes to each one - they weren't all for me : )  Although I was perfectly happy to model them in the interests of a complete blog.  The cut is the size XS.  For me, in pink, I took out 1" of the centre front.  For my friend Sarah, in cotton purple knit with a terry inner finish, I took the same 1" out of the back.  I also left hers at the normal length, because she likes things long.  For Ellie, in ocean blue merino, I kept the size XS without any changes from the pattern. Except that I took about 2" out of the sleeves on all of them.  The sleeves on the pattern are looooong!

It was cool to see these small changes and the impact they had on the overall fit.  But I think the most important thing to see was how different fabric changed the design completely.  This hoody, in my opinion, is best in a heavyweight jersey or knit.  Both the blue and purple hoodies are heavier than the pink, and also much heavier than the lightweight green merino I used for the first two versions.  I like that a lot more.


It's me with the self timer again...we still aren't friends


On Sarah's, because the inside was a nubbly stuff that was getting everywhere, I decided to line the pocket.  There were so many benefits to that - no seam in the pocket, easier to sew on, and also it added structure to the knit.  I did the same with mine (and wanted to line my hood, but I didn't have enough cotton fabric left.)  I think that my pink hoody will still be a nice summerweight option but if I made this again I would stick to the heavy stuff, and probably just size down to an XXS.  And yes, enough hoodies for now!  On to some other Papercut patterns...