Thursday, 20 March 2014

Even I knitted a sweater!

Everyone is knitting!  And everyone is knitting lovely sweaters.  So...if you can sew yourself a wardrobe, you should be able to knit a few sweaters to go along with it?  Sounds convincing but although I can knit, the pair of socks that I started in 2002 are 3/4 finished, eg I have 1.5 socks.  I've finished legwarmers and scarves.  And definitely nervous at the idea of a knitting pattern as I have trouble remembering which is knitting and which is purling. 

I finally clued in that sweater making is actually supposed to take a month.  I definitely still have an issue with this and with a short attention span.  I'm also nervous at the idea of making sense of knitting patterns.  However, I love Gather, a knitting and yarn store in Napier, and every time I went to Napier I had to stop in and see what was new.  And one of the interesting projects on offer was a super simple sweater pattern to be done on huge needles with thick wool.  The wool is actually pretty cool - it's recycled wool and alpaca bits, so not as itchy as plain alpaca, and in pink how could I resist? Nikki, the owner, promised that it would take less than a month.  It's a pattern that she has made and that she gives out together with yarn purchases.  In fact, real knitters apparently can do it in a day...
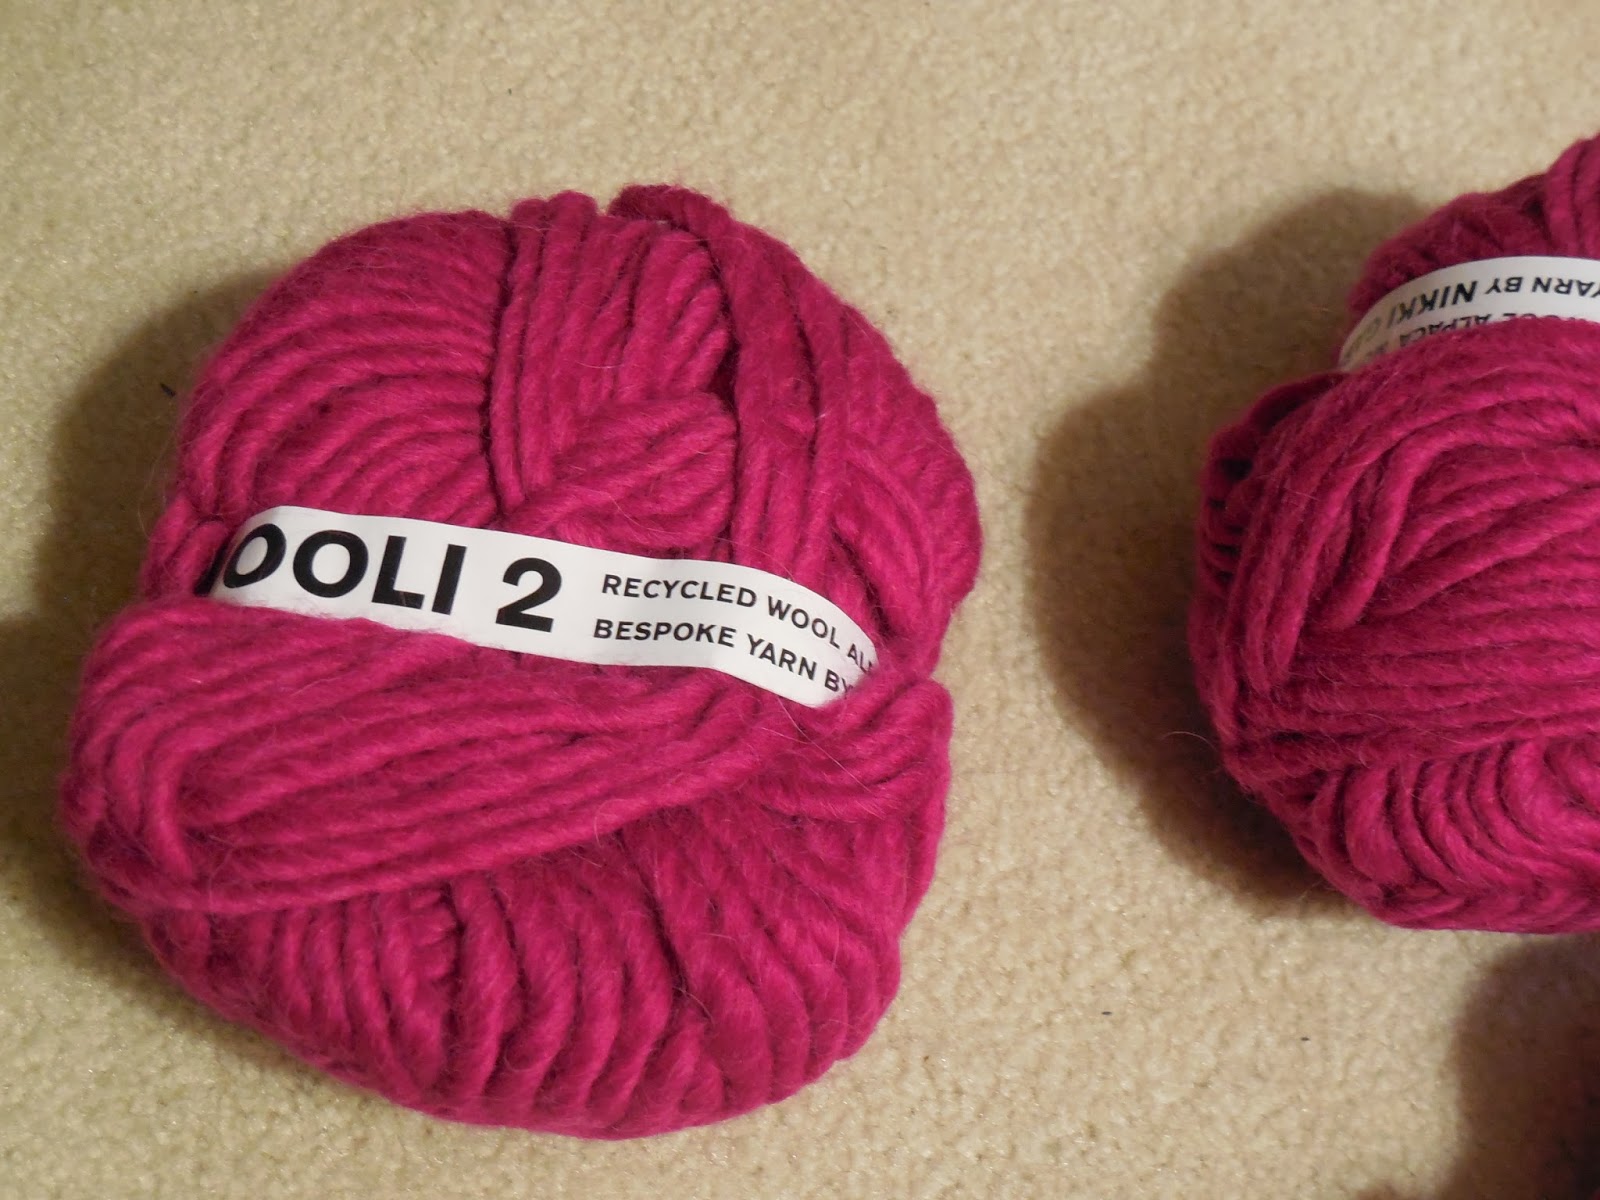


Finally I caved in and made it my travel project.  Nikki gave me a quick lesson on things like what is stocking stitch?  and made sure that I understood the directions.  The result: I carried this pile of wool and needles across most of New Zealand, half of Australia and to Seattle (it was halfway done on the 14-hr Mel-Sea flight!) before I finally finished it on my flight to Zurich!  Yesss!  Winter sweater, just in time.  (Well, anyway, still in time, since I was freezing the entire month I was in Seattle.)

I did a lot of emergency youtubing along the way.  How to add stitches?  How to remove them in the middle?  I didn't do a very good job of the neckline.  The basic pattern is to knit a rectangle, add stitches to the middle, cast off and then back on to make a head-hole, and then to cast the sleeve stitches off.  The entire thing is folded in half and makes a sweater.  I found the instructions straightforward and most of the time knew what to do in theory if not in practice.


The result is a big sweater!  It's warm and currently shedding everywhere, which I hope will improve when it has been washed.  Although it isn't my dream sweater (can't see having 5 of these in my wardrobe)  it has definitely given me a bit of confidence that another sweater is worth trying to knit.  Like, next winter. 

Sunday, 9 March 2014

Burda 7841: I made my dad some pants!

Well, I wasn't the one to plan this project.  My parents were at the Pendleton wool factory in Oregon state at some point because I had a cousin working there.  My dad, not long retired, picked out some wool and figured it would be "easy" to sew himself a pair of pants.  He was an aeroplane engineer and I guess he figured drafting and sewing by a pattern were the same, right?

So a month with nothing to do on my hands seemed like a good time to save him from this misconception and sew his pants.  He had already chosen the size.  I compared the pattern with his most recent pants (made by his tailor in Taiwan in 1998 for 1000$, he said.  Hm...not sure I'll compare.)  Anyway it looked like the crotch depth on his favourite pants was about 3" deeper than the more modern pattern but I warned my Dad of it and told him I wasn't going to make any changes.  After the tragic fitting of my Thurlows and my Peter and the Wolf pants (they are going to be lounge pants - no way to shrink them), I wasn't feeling up to pattern modifications.

The wool is an interesting pale blue and grey loose weave.  It didn't cause me too many problems although it was sometimes difficult to remove stitches because they sink deeply into the fabric.  For mostly my own entertainment I used an old scrap of my mother's flower fabric for the pockets but to save my dad's sanity I put the bright colour to the inside. I was making these at the same time as I made a pair of Grainline Maritime shorts, and it was strange how many different ways there are to put a fly together.  I think the Thurlow way made more sense than any of the others but I don't have my pattern anymore, and I was also wary of diverging from what Burda wanted me to do.  A few times the pattern seemed confusing but it was usually my reading of it, plus the general situational irritation of sewing at my parents house.  However at one point I was supposed to sew together 4 layers at the fly, and with the thick wool that wasn't happening.  I made do...


I think I now understand why it's so amazing to have your own sewing space!  I was switching between two sewing machines, in two rooms, with the iron in a third room, my cutting space the dining room floor (and that floor was also my sewing table...my back will never be the same.)  These pants took me nearly the entire month to make and it felt like they would never get done.  It was a huge difference from the calm environment I had in New Zealand where I commandeered the entire dining room, with two walls of windows and direct overhead lamps, to be my sewing room.  At the end the sewing machine bobbin became a thread snarling monster and I stopped trying to neaten up a few loose edges, but the pants were done by then.  This lack of machine-control was also annoying.  The Necchi downstairs didn't have any zipper feet, but it had the only semi-functional buttonholer.  (Until it turned to the dark side.)  The machine upstairs had a broken bobbin winder and I couldn't learn how to thread the stupid machine.  So I had to keep ferrying between the two and getting my mother to thread the sewing machine...sigh.

In the end the pants are done!  They are a little more modern than my 83-year old dad is used to but he professes to like them. 

Saturday, 15 February 2014

Deja vu: Grainline Scout, now in silk velvet

I couldn't part with my silk-velvet scraps when I left New Zealand so I quickly did the wide shoulder adjustment I'd been putting off and cut the project out.  It was my first thing to set up when I arrived at my parents and surveyed the Necchi.

Welllll, how did that go?
It ends up that velvet is made up of all these hair-like fibers that stick up.  Remembering to iron it with two layers of velvet stuck together - that was pretty easy.  But getting things to line up for sewing was tricky.  It ends up being nefariously shifty, not like silk, but like suddenly shifting a 1/4" as the fibers all simultaneously bend.

Put this together with some bias tape and I was screaming bloody murder and blaming it on the machine.  The poor plodding thing wasn't really at fault though...so I'm really glad I did a velvet practice project.

Moral of the story: don't sew with velvet.  Hah!


Luckily the Scout is easy and until I got to the bias binding I didn't have real trouble.  A walking foot would have been nice but the tin full of feet is full of weird feet (except for a rolled hem foot, I recognised that one, yippee!) and none looked like a seamonster-walking foot.  I zig-zagged my edges and then for the hem and sleeves I just folded that over and sewed it down.

In the end even the neck isn't too terrible, because once the bias tape was attached all the mess disappeared inside the shirt.  However I am really dissatisfied with the final fit.  My best friend, Dana, taking the pictures insists that it looks great but the sleeves seem to downright droop off my shoulders (was 1" too much?) and the usual shapeless Scout looks particularly shapeless in velvet.  Or is it just me?  This is the same size 2 that I have made for all the other versions, except that I idiosyncratically lengthened the hem, more in back than front for a bit of asymmetry. 

Not sure about this one yet, but it was a good practice project.  And I'm done with Scout tees for awhile!


Pattern: Grainline scout, size 2, slightly lengthened, 1" shoulder widening.
Fabric: silk velvet with a touch of nylon, from Global Fabrics in Wellington
 

Friday, 14 February 2014

silk-cotton Papercut Sigma

I spent all winter making summer dresses.  Hm, deja vu?  My excuse is that when I cut this out it was summer!  Stupid northern hemisphere.

This wasn't my first project to jump into this past week.  However, Necchi and velvet didn't get along so I moved onto this.  My mother finally dragged the Singer/not a Singer out of the closet and after some initial noise that sounded like a lawn mower, it is working pretty smoothly.  I don't know whether to blame the Necchi or my materials for my agony over the latest project, but more on that later.


Yeah...those are my awesome backward pockets...

This sewed up really quickly!  I was sooo excited for it and it's cute and of course will make a delightful spring or summer dress (arggg!  I'm NOT happy about winter!  It snowed today!  It never snows in Seattle!)  However I had some issues.  The first was about the pockets.  The instructions have you put some interfacing on the front of the skirt and attach the front pockets.  They then blithely tell you to attach the back of the skirt.  Um...what about the rest of the pockets?  Since this method was new to me and seemed really fiddly and stupid, I did the second pocket in a more intuitive way (I hear Lizzy saying now that intuition always wins over instructions!) which was to apply the front and the back pockets to their respective skirt pieces, and then sew one single seam from the top of the pocket to the bottom of the skirt.  The only thing that I totally missed in my irritation was regarding the floppy pocket tops, which have to be sewn into the waist seam...um, the front part of the waist seam...so yeah, I have two backward facing pockets.  And I'm not moving them!!


I also feel like the skirt poofs out a lot, it ends up reminding me of the Elisalex skirt.  Other people's don't look that way.  I am not sure if the version without gathers is the same, or if I did something to make it particularly puffy.  I only hemmed it about 1/2".  It feels a little silly but everyone else has said it looks good so I'm not sure.  Overall this dress is easy to wear and comfortable but it does seem a bit loose.  Next time I also might shorten the upper bust darts slightly. 

The silk-cotton was a joy to work with.  The sewing machine got quieter as I worked (oiling itself?) and after my struggles on the previous project it was quite a relief to be doing something trouble free.

Details:

Papercut Patterns Sigma from the Constellation collection.
Size XS, no alterations, view 2
Fabric: silk-cotton blend from global fabrics in Wellington.
outcome: I'll do it again, with some changes

Tuesday, 7 January 2014

Papercut Peter & the Wolf, take 2 & unfinished...


After my muslin version of these pants, I knew that they would fit in this incredible stretchy Marc Jacobs wool.  Very unseasonal, until I land in Seattle in two months...So, I knew they would fit but I didn't realise at all just how much more stretchy the wool is compared to that totally zero stretch hemp/tencel.  In the hemp pants, the bagginess at the butt was a positive thing because it made it possible to fit in the pants.  In these, hm. 

I left these at full length (hits perfectly at my ankle as a full length pant.) and cut an XS.  Construction was good, although it's the first time I've worked with such a loose weave.  Not easy to get stitches out of!  I didn't quite get my seams lined up for the zip....but then I noticed that I could get the pants on without the zip.  Oops.  Then I realised I had exactly 6 hours until I needed to pack up my sewing machine to go.  There went my concentration.

So lovely people, is there any way to fix this problem that you see below at this stage of sewing???  Otherwise I could call these my lounge sweatpants...I did manage to fit another scrap of this fabric into my luggage but I'm not sure it's enough to cut another leg (for example.)


Without the waistband, a problem is found


The front isn't too too terrible


With waistband - so much room that I could pull them on without the zip!

HELLLPP!  I'm DROWNING!

Monday, 6 January 2014

By Hand London Polly 2

For my second Polly top I had so many awesome scraps I wanted to use that it was hard to choose the best ones.  Finally I settled for the silk-linen that was leftover from my Lisette Jacket as I adored the drape of it, and I paired it with the never-ending silk that was my Victoria Blazer lining (and my Papercut Saiph!)

I used a size US 6.  I took 1 inch from the centre front and about 1 inch from the top of the shoulders.  I cut about 2 inches off the bottom.  French seamed, and in order to show off the very cool selvedges I left the back open at the bottom since I didn't have enough fabric to cut it on the fold.  That also helps get it on without a zip.

I adore my new Polly top!  The fit is magical and actually the horseshoe front went in more easily this time as both my fabrics had just enough give.  Unfortunately this was the project that got shunted to the very end so I was sewing my bindings with the wrong coloured thread and it shows some on the front...

Photo update!  Thanks Mum!


Thursday, 2 January 2014

Sewaholic Cambie

I cut this project ahead of time, but started it just upon returning from my Christmas holiday.  With one week left to go before I move, I was feeling pretty stressed and wanted Cambie to go really well, not cause trouble, and to look awesome at the end.  I have a beautiful second Cambie waiting...if if if this pattern didn't cause trouble.

The fabric is a silk-cotton jacquard that I got from ramie and linen on etsy.  They are a wonderful resource and I have bought many other fabrics there (notably my incredible to-die-for stretch silk.)  The outside has an incredible shimmer to it, and with the lining this is a really warm dress...too warm for summer...


I cut a size 4.  I didn't make any alterations to the pattern, and quickly realised I should have gone down to a size 0 at the hips.  I don't like how much the hips stick out.  For the lining I used Japanese cotton batiste for the bodice and black bemberg for the skirt.  That way it will be a good winter dress.

As has been my issue lately, I have no clue how to finish my seams.  I zigzagged the pockets and left everything else.  Eventually the skirt seams all got attacked by my pinking shears, but I suspect this is not a mature way to end things.  Probably it's another topic I'll have to tackle in a few month's time, but I do see that my sewing machine has some interesting stitches I could probably use to finish my seams.

But overall, this went exactly as I hoped!  I could have shortened the skirt by about 4 more inches, and I did go the lazy way out and just hemmed the skirt by machine.  I really don't like the hips sticking out so much, but by keeping this version of the dress a bit long it does balance out.  And the way the lining goes in, as everybody has mentioned so many times, is magical.  Utterly magical.  I'm in love with how beautifully this dress is finished and I want to do everything like this forever.  And my waist and neckline just about match up perfectly!

This dress fits exactly right, except for that 1 inch bodice shortening that I have not yet implemented.  Another fix for the next version...which won't be coming up soon, sadly.