Wednesday, 15 July 2015

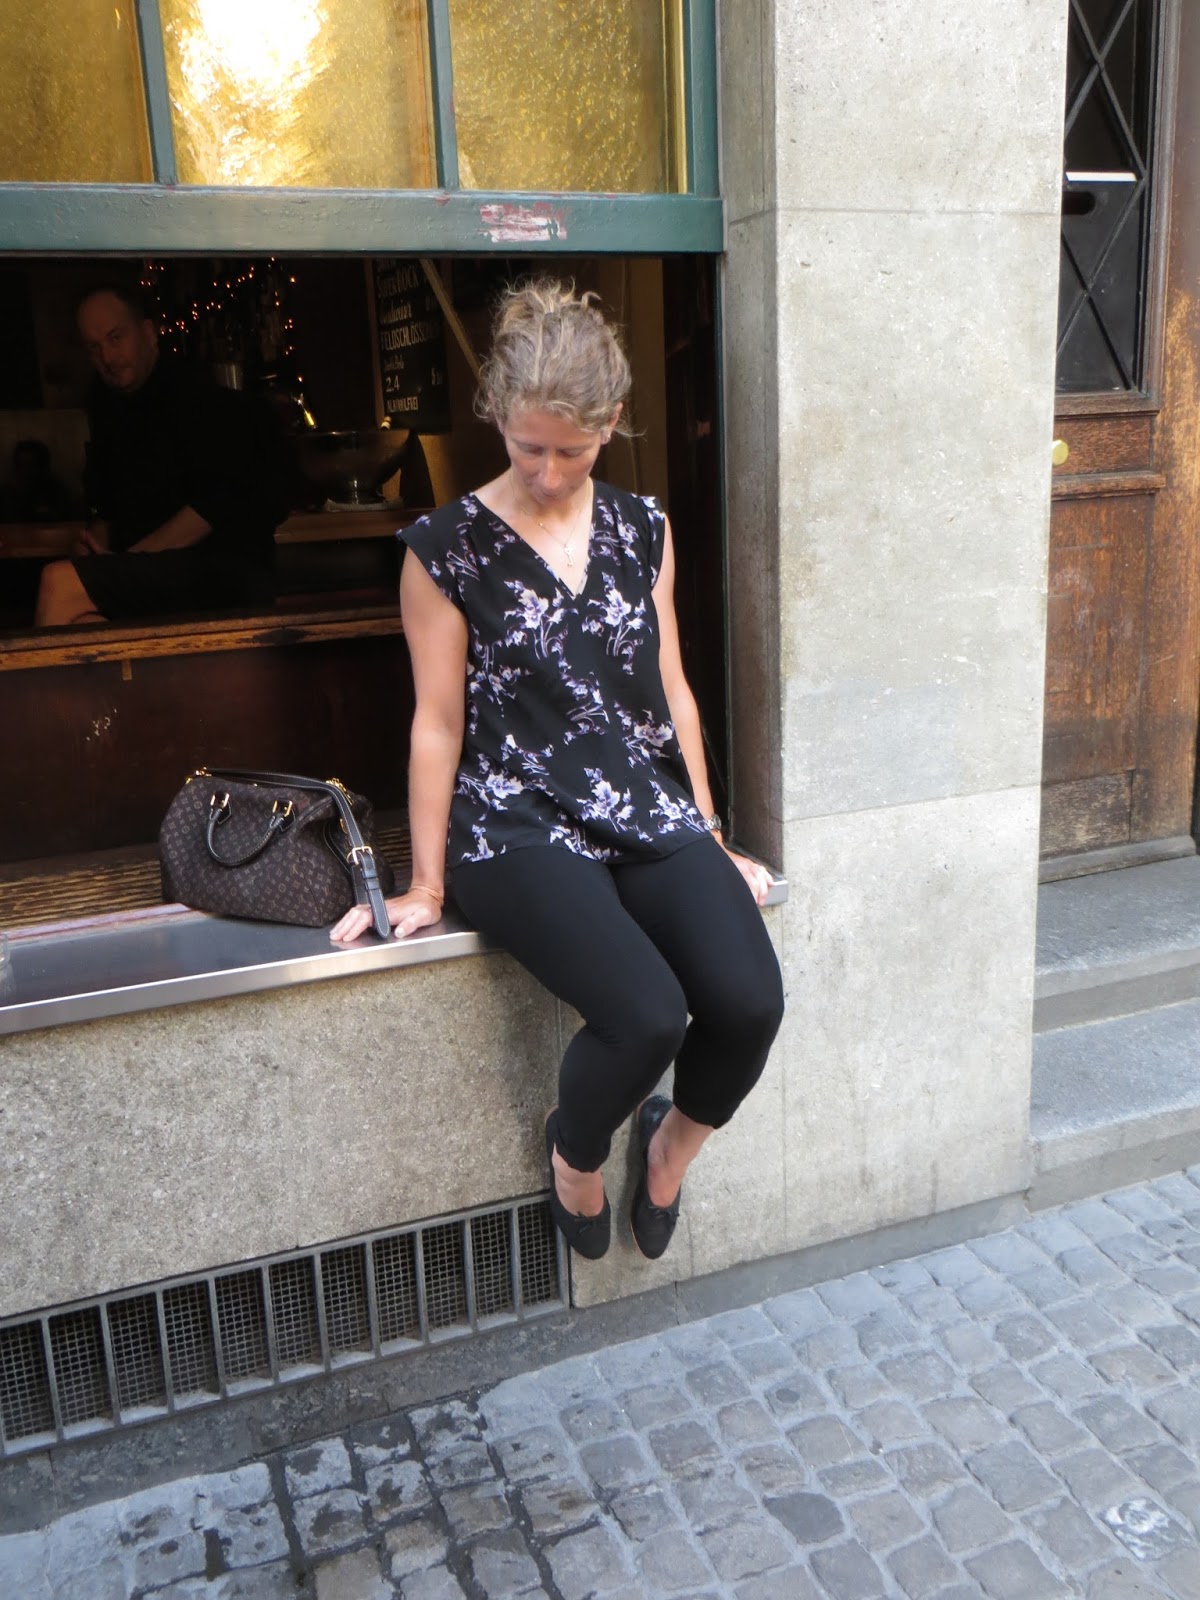
A simple kind of success: Ooh La leggings by Papercut Patterns

I had some small scraps left over after the v neck drape dress. (note: small.)  I also have been coveting black leggings to go with this amazing silk top I have which I don't wear because I don't have black leggings.

But ugh they are like 50 money units and I just didn't feeeel like it.  So I got out the ooh la leggings pattern one day while debating what I could do next.  The thinking went like this:
'Oh! perfect black legging pattern!'
'ugh but that pattern turned out SOOOO bad in thin viscose.'
'Eh but this thick jersey will be perfect.  Do I have enough?'
'No.'
'Too bad.  I think I'll make them anyway.'

Side note: don't make these out of very thin fabrics.  My thin viscose pair was terrible.  It was a pain to sew so much tissue thin jersey, it was awful to topstitch and they were see through and bad.  Thin leggings shouldn't be done with decorative seams, I think.  The best fabric for these is definitely a sturdy, relatively thick knit with lots of stretch.  I was remembering the problems I had previously with these leggings and it all comes down to use of the right materials.  Also, I used to always use a straight stitch on knits and I am finally coming round to using a zig zag sometimes, like on my waistband.


Size XS.  I am 5'4'', muscular, and I cut about 4'' off the bottom of these.  The bottoms are a touch loose. 

I cut out each top piece twice instead of on the fold and made a center seam.  The only off grain part is the front legs.  And I had to piece together one front leg.

I didn't topstitch the big u-of attaching the fronts and backs.  I remember from the first version that the U is right at the underside of my butt and the topstitching was very unflattering.  I put them on, recut the front waist (removed about 1cm) and then I used 2'' elastic to take advantage of the extra fabric at the waist.  They are very high cut if you only use 1'' elastic as indicated by the instructions.  Even with 2'' elastic they are still relatively modest, just about an inch below my belly button.

I love them!  And I so seldom sew sensible things, using cheap leftover materials, that I actually would have bought.  That makes this feel like an even tastier success. 

Thanks to Francesca who took the photos while we were in Zurich together!  

Sleeveless Plantain Dress, by deer and doe

I was planning to make an Ondee out of this quilted soft cotton jersey from Paris.  Bindings are a contrasting shade of lilac in organic jersey.  I wasn't sold on the combination, exactly...but that's what happens when you look at fabric for three days and go craaaazzzyyyy!!  And I couldn't think of any contrasting colour that would look better. And I do love my Ondee in Navy (the stripes went to a friend.)

But....still not sold on the combination, not to mention I think one Ondee is enough actually.  I guess I don't really really really love it.  So on a day dedicated to cutting out (I seem to work lately like this: one day of wild cutting craziness, followed by a few weeks of sewing,) I brainstormed making another long dress Plantain.  Except, of course, without sleeves because 1 meter fabric and it's hot outside.  I used the contrast fabric and thread after all and I reckon it matches much better than I had imagined. 


No big surprises.  I had actually made a pattern piece when I first turned the Plantain into a dress.  I just drew the line out into an A-line skirt.  The quilting, however, makes this into a warm, cozy dress.  Not what one really desires on a 38 degree day!  I love it though.  I think this is my perfect not-summer dress to wear with a cardigan at work.  In retrospect it would have made a nice Ondee too but I don't regret the change.

Thursday, 2 July 2015

Waver Jacket by Papercut Patterns

I have been hunting for a simple hooded rainjacket forever.  I have a dream fabric, which hasn't found its pattern match.  That's why I snapped this up immediately without a second though.  The fabric is wool tweed, and the lining is voile, with charmeuse sleeves.


I cut an XS after debating cutting the XXS. When Papercut added the XXS it seemed to fit me better, like the sizes were also shifted to a larger direction.  I actually took my time on this project and it does show.  The tweed was going to be my Dropje vest.  Then it was going to be my Marfy jacket (on hold until I become skilled at Chanel jackets, and wide shoulder management.)  I was getting impatient for this tweed to be something, because it is beautiful.  It has silver and teal flecks in it.

I followed the instructions and found them ok.  Unfortunately, when it came time to put buttonholes in the lining, I made a discovery.  My sewing machine does not make buttonholes.  It's a used machine and was serviced when I bought it.  The buttonholer was known to be finicky.  People, it is beyond finicky.  I tried the automatic buttonholer and the non automatic one.  NO chance, and unfortunately I doubt I can get my machine to the shop in Bern in the next three months. 

Luckily I have a new snap kit!!!  I made grommet holes instead!  I interfaced them because the voile is quite light, and I practiced on my dishtowels...they are quite grommety now.  Practice with these kits is key.  I put a few holes in myself somehow during the process, and I haven't done real snaps yet.  The cord is some emergency hiking stuff which is glow in the dark, just because why not, and I quite like the orange. 

I used the usual bagging method for sewing the sleeves instead of doing them by hand.  I got confused as to how to do the corners- the technique in the instructions has you pinch together the corner while the jacket is inside out, after sewing all the seams and leaving the last cm free.  The problem is that it's not clear where to pinch, and it's not clear how to bring this three-way open hole together.  I turned it right side out and marked the fold with a pin, however I still didn't quite know where to sew the lining and as a result it doesn't lay quite right. 


So as you see: I have no closures yet.  I first thought about snaps: Should I put just one snap at the top?  Or also a snap in the middle?  I don't tolerate things that don't close, so something is needed...and I can't do buttons.  Or maybe I should find someone with a functioning buttonholer?  This is possible too, and I have played with so many variations that it seems like buttons might be the way to go.  If so -- orange buttons? Or some dark colour?
Fit: good.  Sleeves are quite short.  People with long arms: lengthen the sleeves.  I do not have long arms.

Wednesday, 1 July 2015

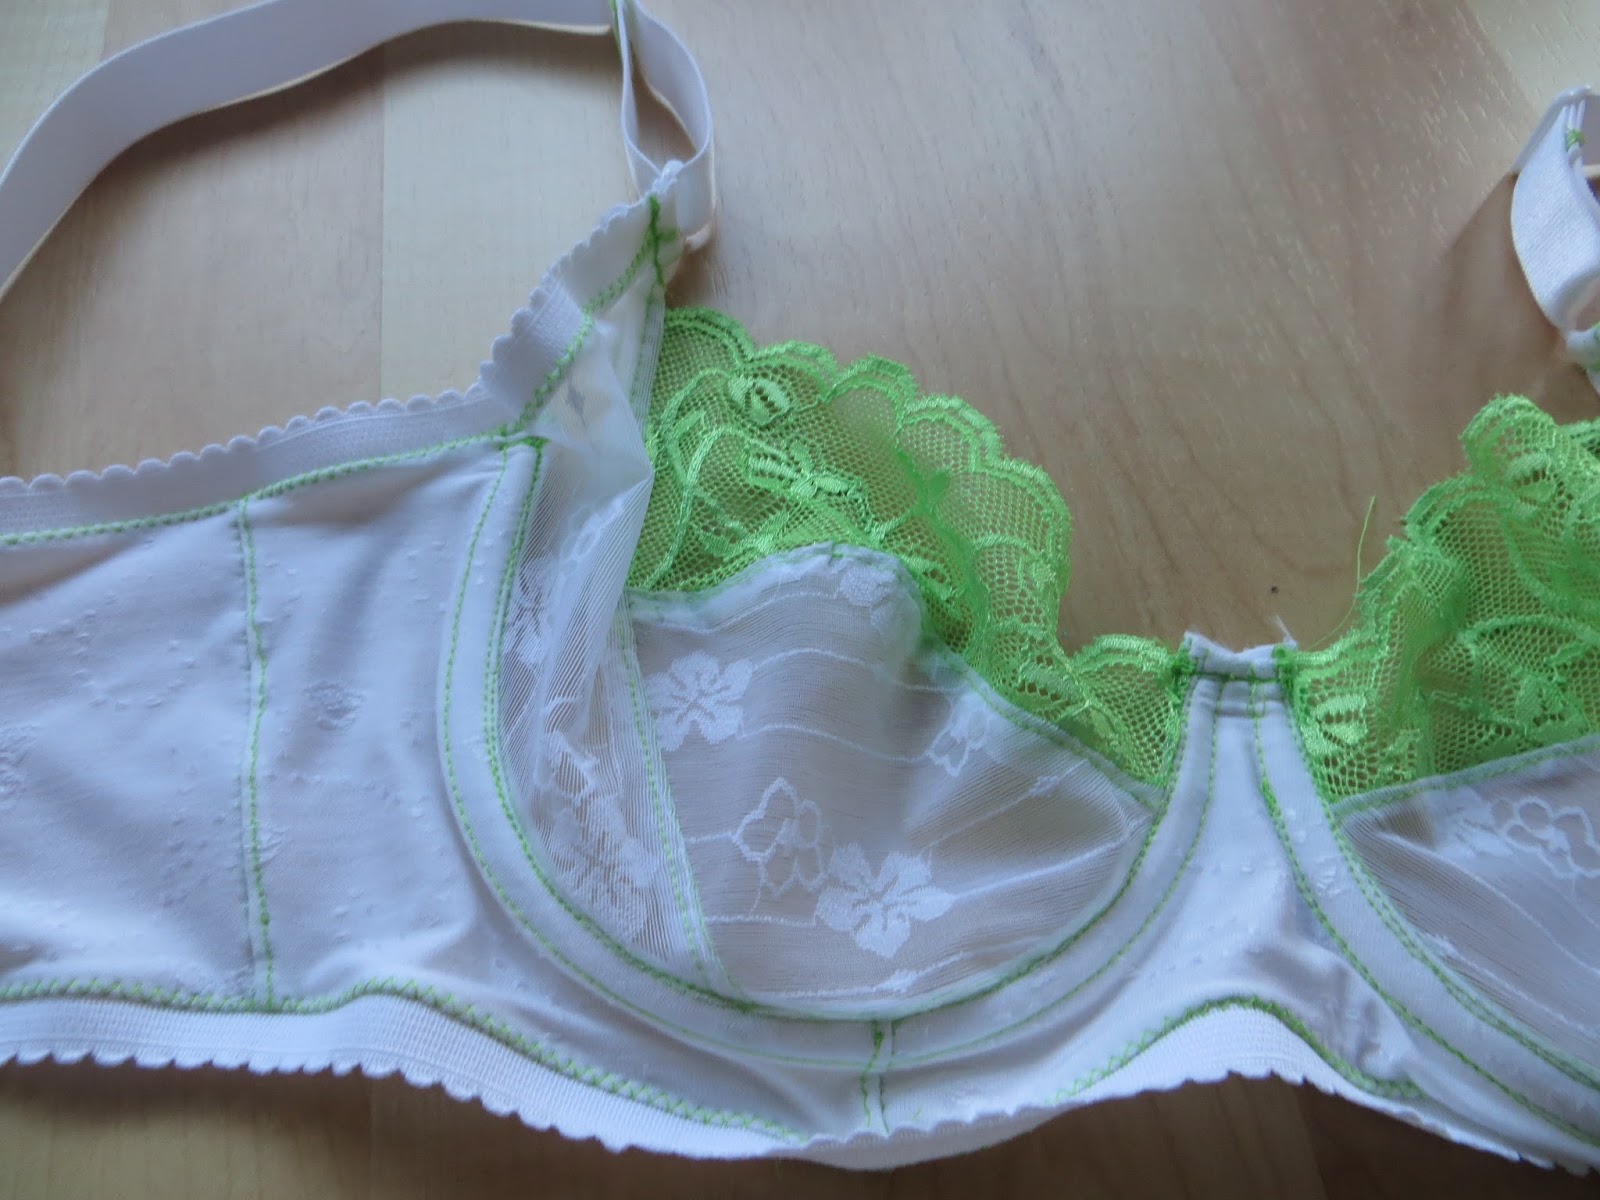
Marlborough Bra for real!

I made a prototype in January when I got on the bra bandwagon.  Things were going great, and then I got started sewing the Real Bra...I didn't know that lace requires some special sewing techniques, and I was still very nervous with the new sewing machine.  I sewed the first cup together, and then on the second one the feed dogs ate the lace and then got indigestion.  I had to take apart the innards of the machine and call the shop panicking...of course it was all fine after a rethreading!  But that really threw this bra into the corner for awhile.


It was with some surprise that I pulled the bra pieces out of their bag and saw that, despite my whining, I had actually finished sewing all the lace bits!  It still took me awhile to get up the nerve to finish it.  Despite bra making being easy in some ways, it's fiddly and I have to refer to the directions at every step.  Once I finally went for it, I finished this in a single sewing stint.  I have been following Anne and paid a lot of attention to her fit issues with this bra because I thought I had a similar shape to her, so I was pretty curious how a non-foam version would fit (and I reckoned I would try some of her recommended bra patterns if the Marlborough wasn't a go for me.)

Regarding the pattern, I read Demystifying Bra Making, by Norma Loehr, prior to making my foam tester bra, and that gave me what felt like a solid foundation.  The book has you make your own center bridge, and I have done that. Coming back to the theme after six months, a few of the terms were hazy but overall not difficult to understand.  I continue to find that my Pfaff with its IDT is terrible to make bras.  It doesn't go well over small, fiddly bits and my stitching is pretty horrendous.  It didn't eat anything else, at least.  And, shock of shocks, the bra fits! I did not use elastic over the green lace top, because on store-bought bras I find that anything tight on that edge creates double boob.  I don't know if it will end up becoming too loose too quickly without that support, but for now it fits very well.  I also didn't pull on the underarm elastic and it gapes a lot.  My kit came with wide shoulder straps and plastic bits, which I don't like so much. 


The changes I will make are to tighten the underarm elastic, to remove some of the height of the center bridge, and to sew on the bottom elastic with a bit more fabric, because it actually wrinkles a lot- I sewed it on with the tiniest of seam allowances but I think I don't need much bottom band more than the elastic itself.  The fit of the bra seems correct.  It doesn't give me a lot of lift or volume, but it is comparable to some of my store bought bras.  I think that when I tighten the arm elastic, it will pull toward the center a bit more which I would prefer.

I also find it strange that the back piece is not the correct height for the hook and eye pieces.  You have to cut it down quite a lot and the instructions don't mention this anywhere.  Even with my hook and eye being big, I still had to snip a new curve to the back.  

My bra kits are from Spitzenparadies.  I got this one and this one.  It took me quite awhile to find everything on the site because of how I still don't have much German sewing vocabulary.  The green kit is quite see through, but has huge amounts of the flowered stretchy fabric.  The brown kit is more like mud brown...oh well. I also bought a huge variety of wires, most of which weren't the right size.  I think two sets are pretty decent and another one or two are maybe ok.  I tried to compare by measuring current bras but that didn't produce great results.  I will wear the two good ones around and see if they are good enough to buy more of.

Tuesday, 9 June 2015

Drape Drape #5, V-neck dress

I had a huge pile of black jersey in my stash.  It was originally for a friend who ended up not wanting anything.  Since my stash is one single bag, I get annoyed when everything doesn't fit into it and I start coming up with projects to use up these big pieces of orphan fabric.  I was attempting to make it into the Goddess dress in the Drape Drape book, but I couldn't even succeed in tracing that pattern.  While perusing the book I started to get a deep yearning for the V-neck dress!  I remember it from Kim's version because I was just learning about Drape Drape when she made it and I was so impressed...it's unusual for the drape projects because it actually has a lot of structure in the top half, which is a nice contrast to the drapey bottom.

A trawl through the webs provided enough successful outcomes that I thought I'd do it.  I cut a size small.  Everyone has noted that it runs huge - particularly odd for Japanese patterns. My jersey is a cotton blend with spandex and is quite heavy. I found the pattern a relief to cut out, it was quite easy to identify the pieces and trace them (unlike that Goddess dress, although I like it I think I will never try to trace it again.)

I put in some effort to overlap the fronts quite a bit so I would have good coverage.  The instructions were adequate for the pattern and for the most part I was not confused.  The skirt though, the drapes...I did them a bit hesitantly and a bit delicately, and I think I could have draped more vigorously!  I didn't get confused but I took my time and found it pretty straightforward.  I also realised that you can't go wrong with draping because as long as both sides are the same it looks quite good : )

I did have to apply a zip.  The waist band is kind of empire waist, and is nice for shaping but is very tight- size small I think is about 32".  It fits exactly around my rib cage.  I interfaced it with some jersey-interfacing which is a bit stretchy but gives the jersey quite a bit more shape.


The dress is very comfy! I feel like the side drapes should be pockets!!  I keep looking down at them when I am walking wondering where my pocket is.  The dress moves nicely and feels good so it seems like a win of a project, and although the back coverage isn't perfect I think it's good enough for a summer dress.  I didn't try it but probably it has enough support that I don't need a bra.

Monday, 1 June 2015

Schnittchen Coco jacket

I have been on a fruitless hunt for a blazer pattern.  I guess I mean, a blazer pattern that fits without me making changes that I don't know how to make.  I know this is wishful thinking.  I made up the free Marfy blazer as a muslin.  Then I did all sorts of weird things to the armscye.  None of it was anywhere near improvement. 

I have been reading Fit for Real People.  Everyone loves this book.  I find the graphics and layout really difficult to make sense of. Also, I just don't know what changes I need to make, so it doesn't feel helpful to know HOW to make the changes.  One thing is says is that you should begin fitting at the shoulders, ie cut the size that fits your high bust and then adjust from there.  I am beginning to think this is worth a try.  Unlike all normal ladies (apparently) my bust is 35 and my high bust is something like 38.  More of that extra width is probably in my back. 

Anyway that was a lot of introduction for the Coco Blazer, which doesn't fit me at all but is luckily for my friend R!  Everyone talks about how great the arms fit.  What that translates into is skinny little arms not made for massive biceps.  I have no shoulder movement, no arm movement, and I can barely get the arms on.  The size is 38, which I would have also made for me.  I tapered to 36 because R isn't very hippy.  She is pretty narrow on top so I expect this will suit her just fine. 

Sorry my head got cut off, new ironing board/camera platform and I don't have the angle quite right...


The Coco blazer is easy to make, which is why I didn't even panic when I started cutting out this evil Marc Jacobs boucle from Mood Fabrics and it immediately started falling apart at every cut edge.  I was very hesitant with the iron, because the fabric is a bunch of different fibers including poly and melty metals.  I think that shows.  But not too badly...I sewed the outside of the blazer together in one quick go with few pins, since they became buried in the fabric and impossible to excavate. I sewed the lining and the rest of the blazer together the following day.  I had to look up how to attach the cuffs in a bagged lining.  (Grainline tutorial.) Otherwise I found the instructions brief but ok. 

Overall I still like the idea of the Coco blazer.  (More than Marfy even though I think with patience it would turn out amazing. Maybe when I find a sewing-fairy Godmother to help?) I have fabrics allll ready for a blazer!  Should I try cutting out a 42 in the shoulders/sleeves and taper to a 38 at the bust?  Does anyone else have fit advice for super wide shoulders and popeye biceps?

Friday, 29 May 2015

Maria Denmark Kirsten top turned into a Renfrew

This is a free top from Maria Denmark when you sign up for the newsletter. The lack of seam allowances actually kept me from making it for so long!  It's a two piece tshirt, and then you just pick how to finish the neck and seams.

I made a size M from this amazing Art Gallery knit.  I love this fabric and got it as a scrap from an etsy seller.  It costs 35 franks per meter here, just to give you an idea.  I LOVE this fabric.  I totally thought it would be a simple and great top.  I put it together and I hated it.  It was loose over the bust and tight over the belly, kind of the opposite of what I generally aim for in tshirts.  
The evidence: I promise it looked much worse than it seems.


I backtracked.

I checked the scraps.

And I turned it into a Renfrew.  My classic, like this: size 4, 1'' waist shortening - it's longer than most of my other ones which I shortened 2", and no change in the shoulders.  I managed to squeeze all the pieces onto my scraps although the waist piece had an extra seam.


The way Renfrew nips in at the bust and out at the hips suits me way more and now I am happy.  Although I would have preferred it shorter.  I have retraced my Renfrew pieces as they were disintegrating, and somehow the lengths don't all match so I accidentally ended up with the longer one. 

As for Kirsten - bigger size?  Drapier fabric?  Maybe, but I think I prefer more fitted tshirts and now I don't have a lot of interest in exploring this further.