Thursday, 8 September 2022

Papercut Patterns Celestia dress review

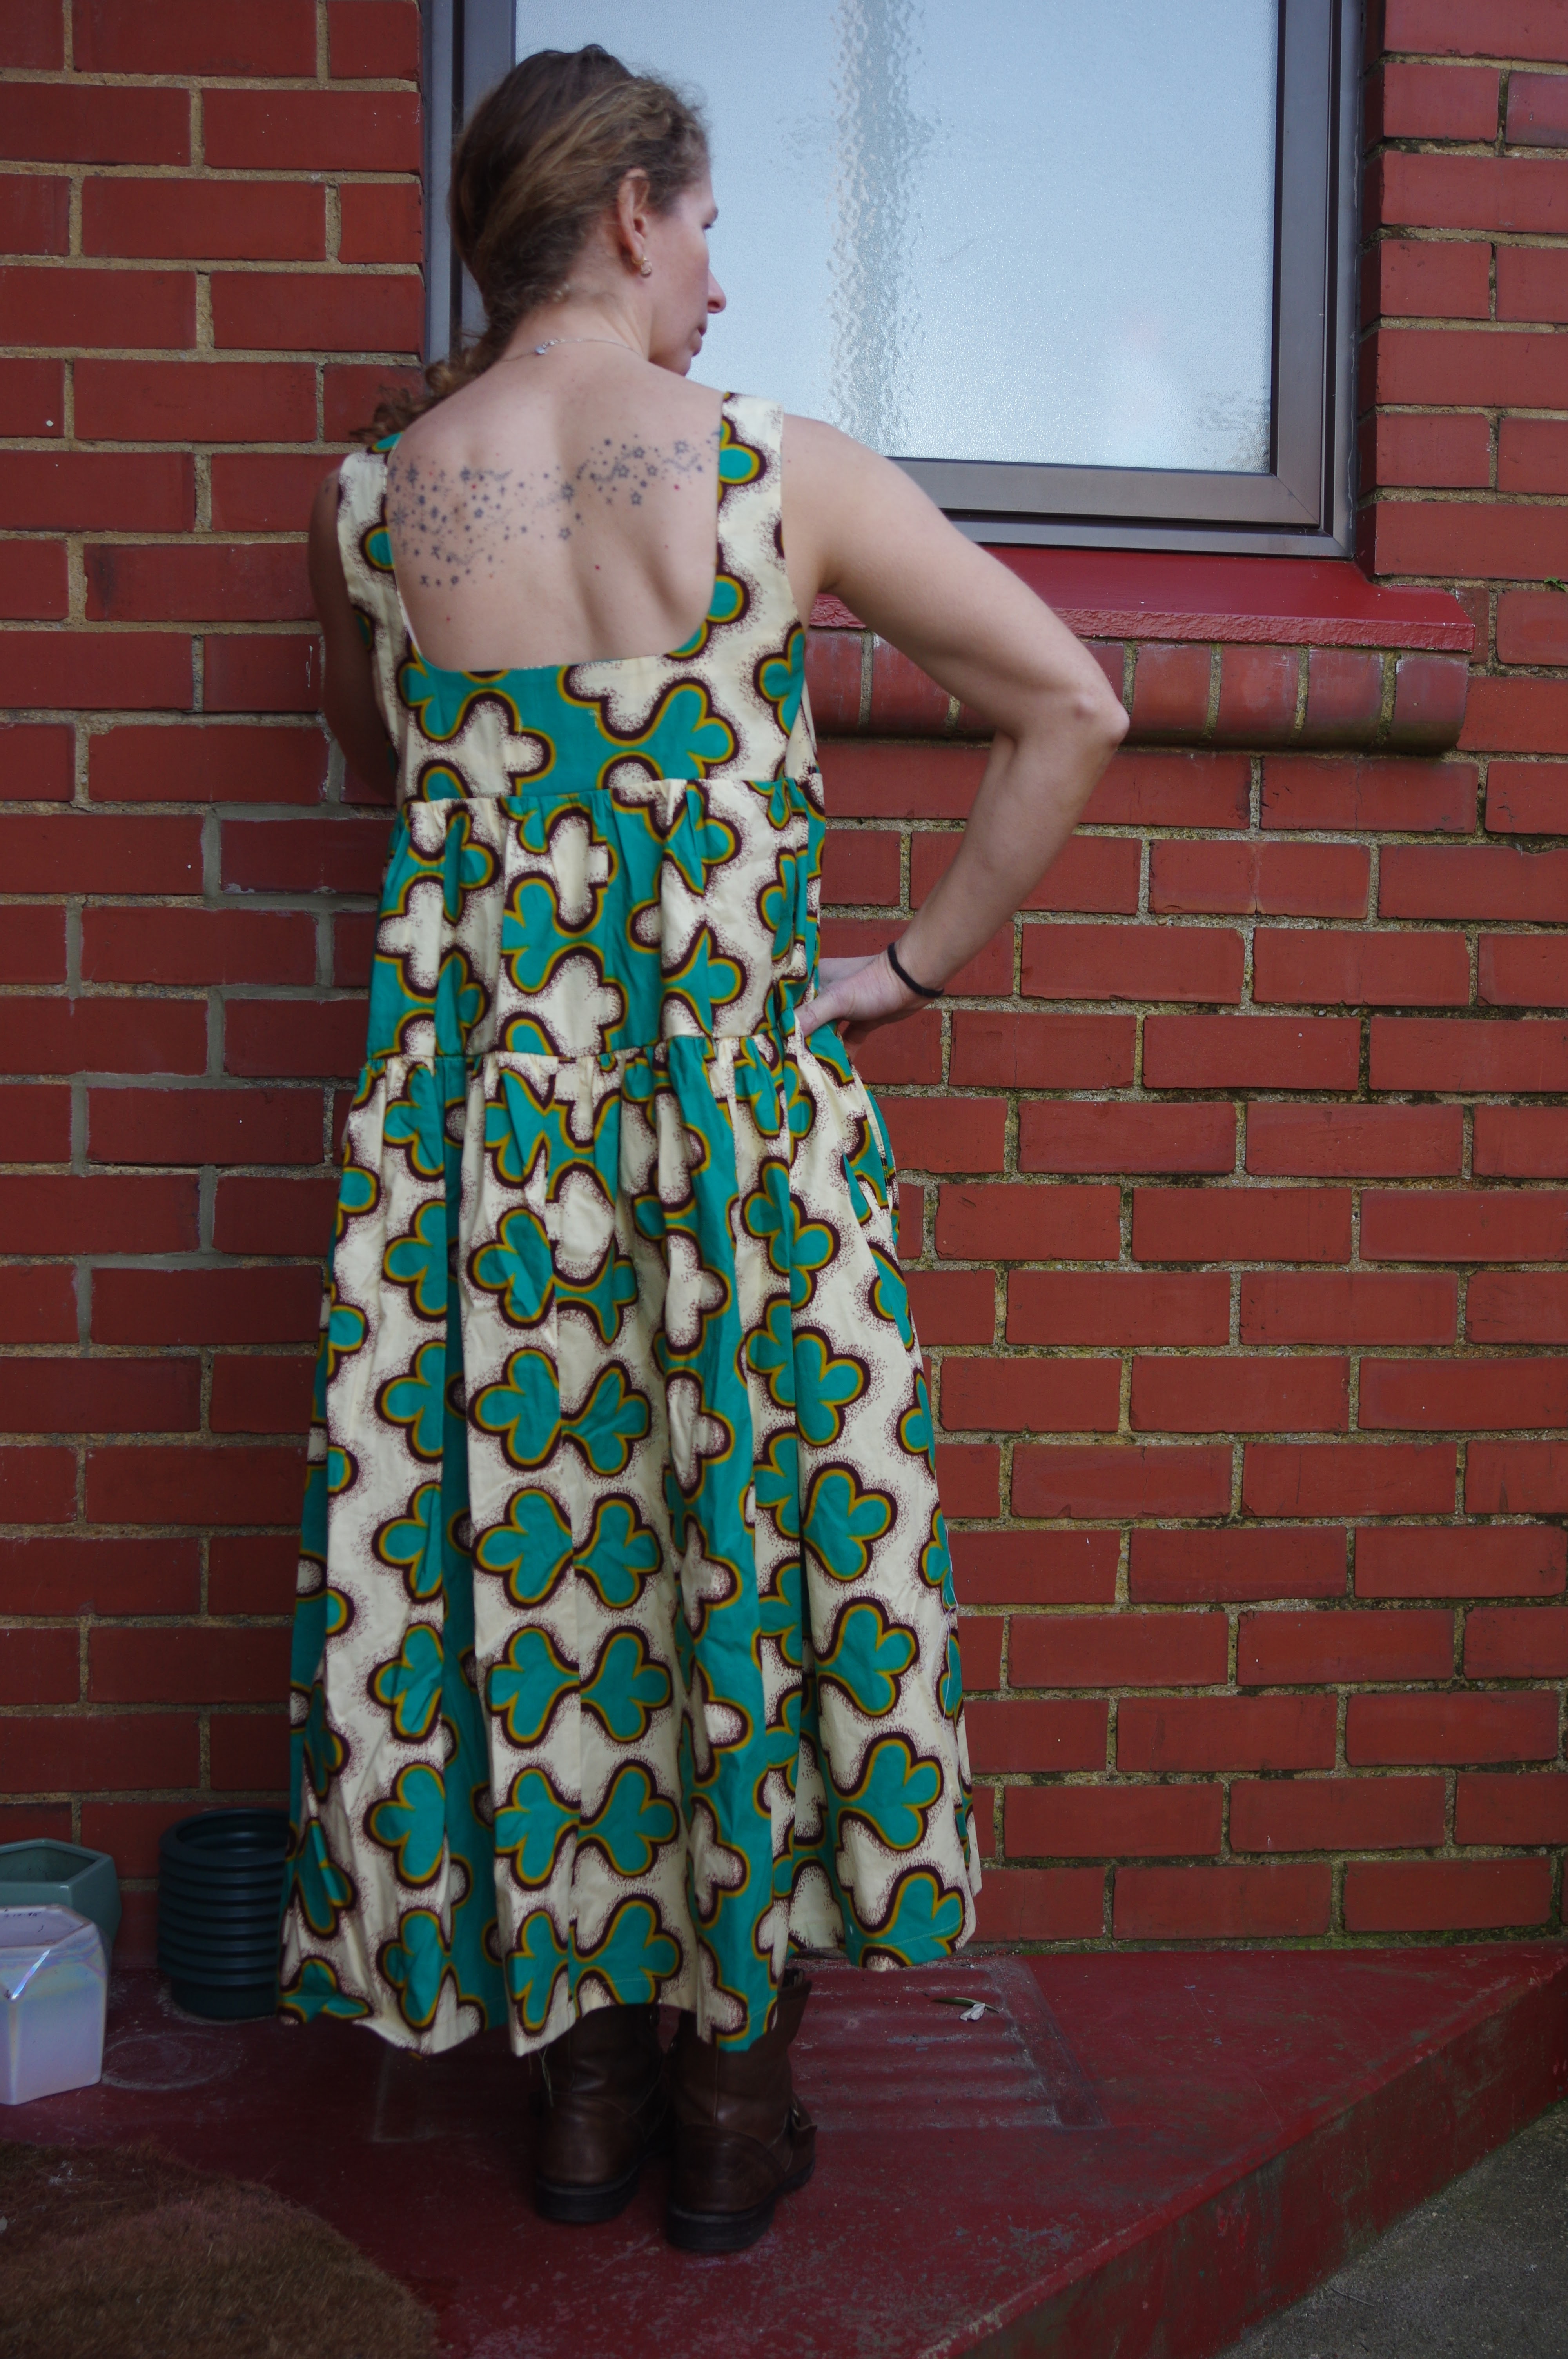
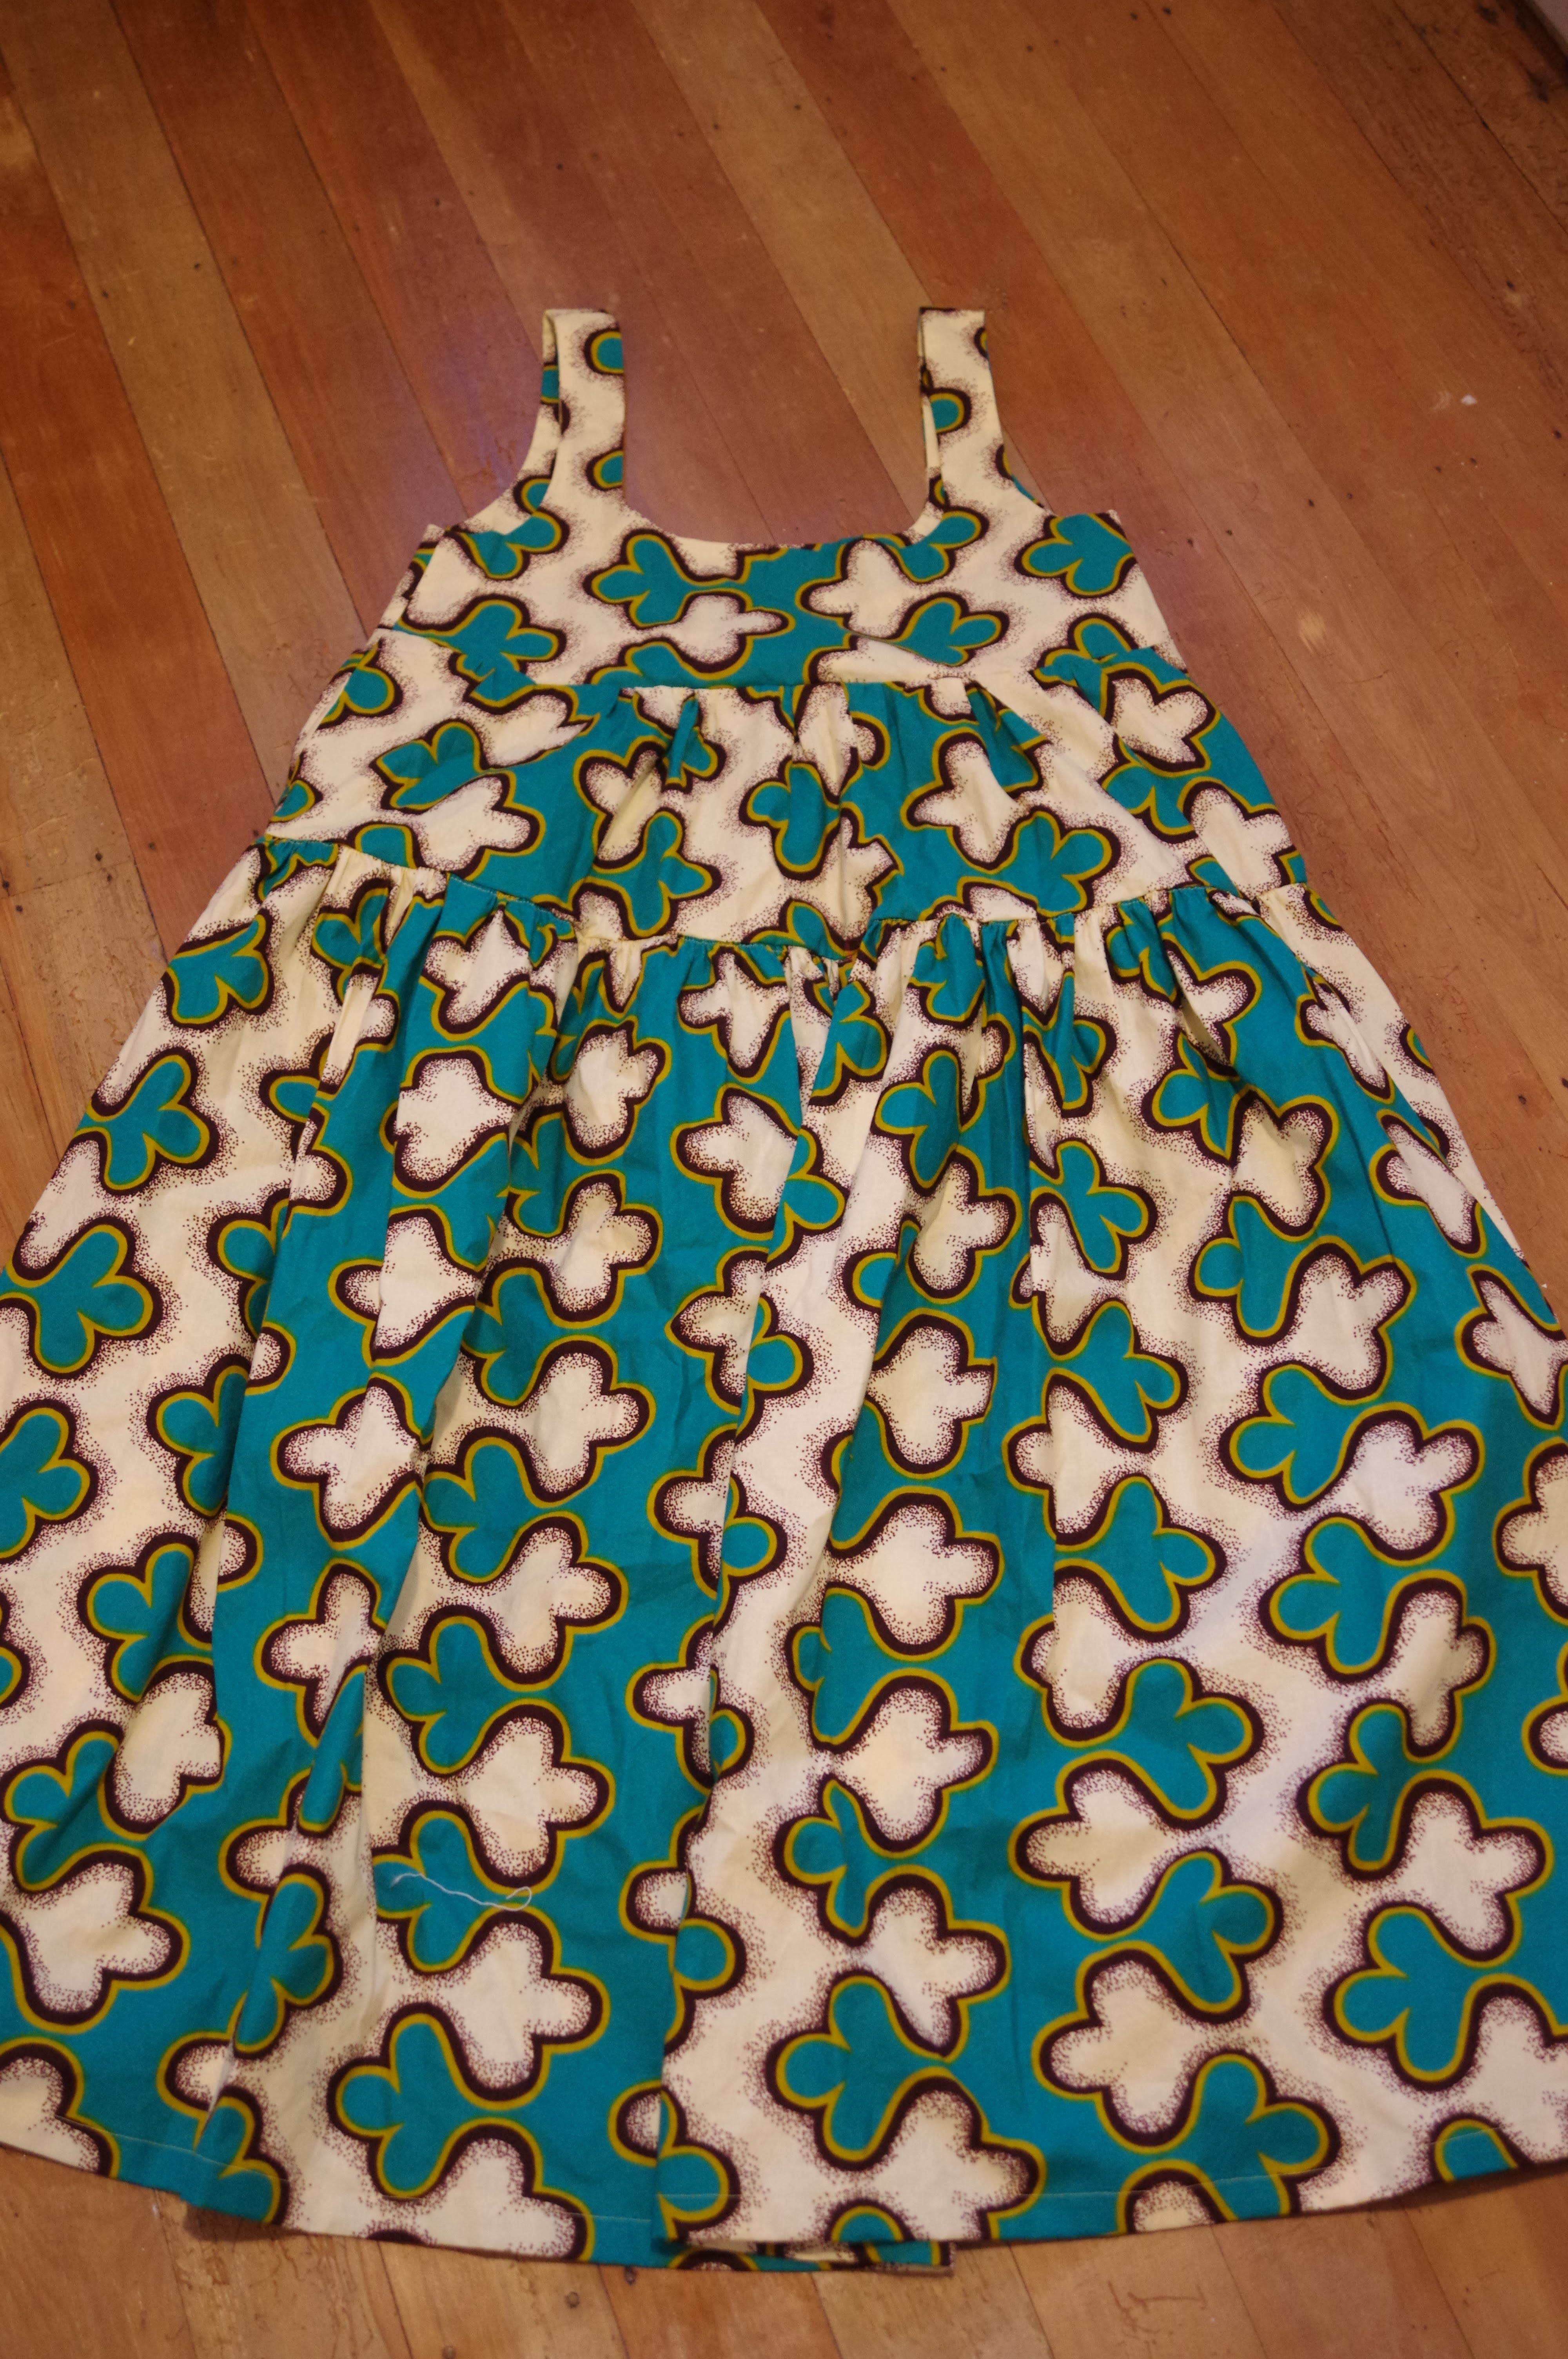
 I read a few reviews of this dress and was therefore prepared to muslin the bodice to make sure it didn't gape too much in front.  I made the bodice in S, which matched my measurements, and then in XS, which is a bit small.  I expected it to be challenging to fit as I have sloping shoulders.  I thought the S wasn't too bad and I wondered how the weight of the dress would change it, so I carried on to make a full dress toile which I knew I would give to a friend with darker coloring.  It's straightforward.  The pockets are in a weird position because the tiers are in weird positions, but the high hem of the middle tier means it really balloons out at the bottom in a comfortably tent like way.  Overall it felt like too much fabric to me, but this is Ankara fabric which is very solid.  


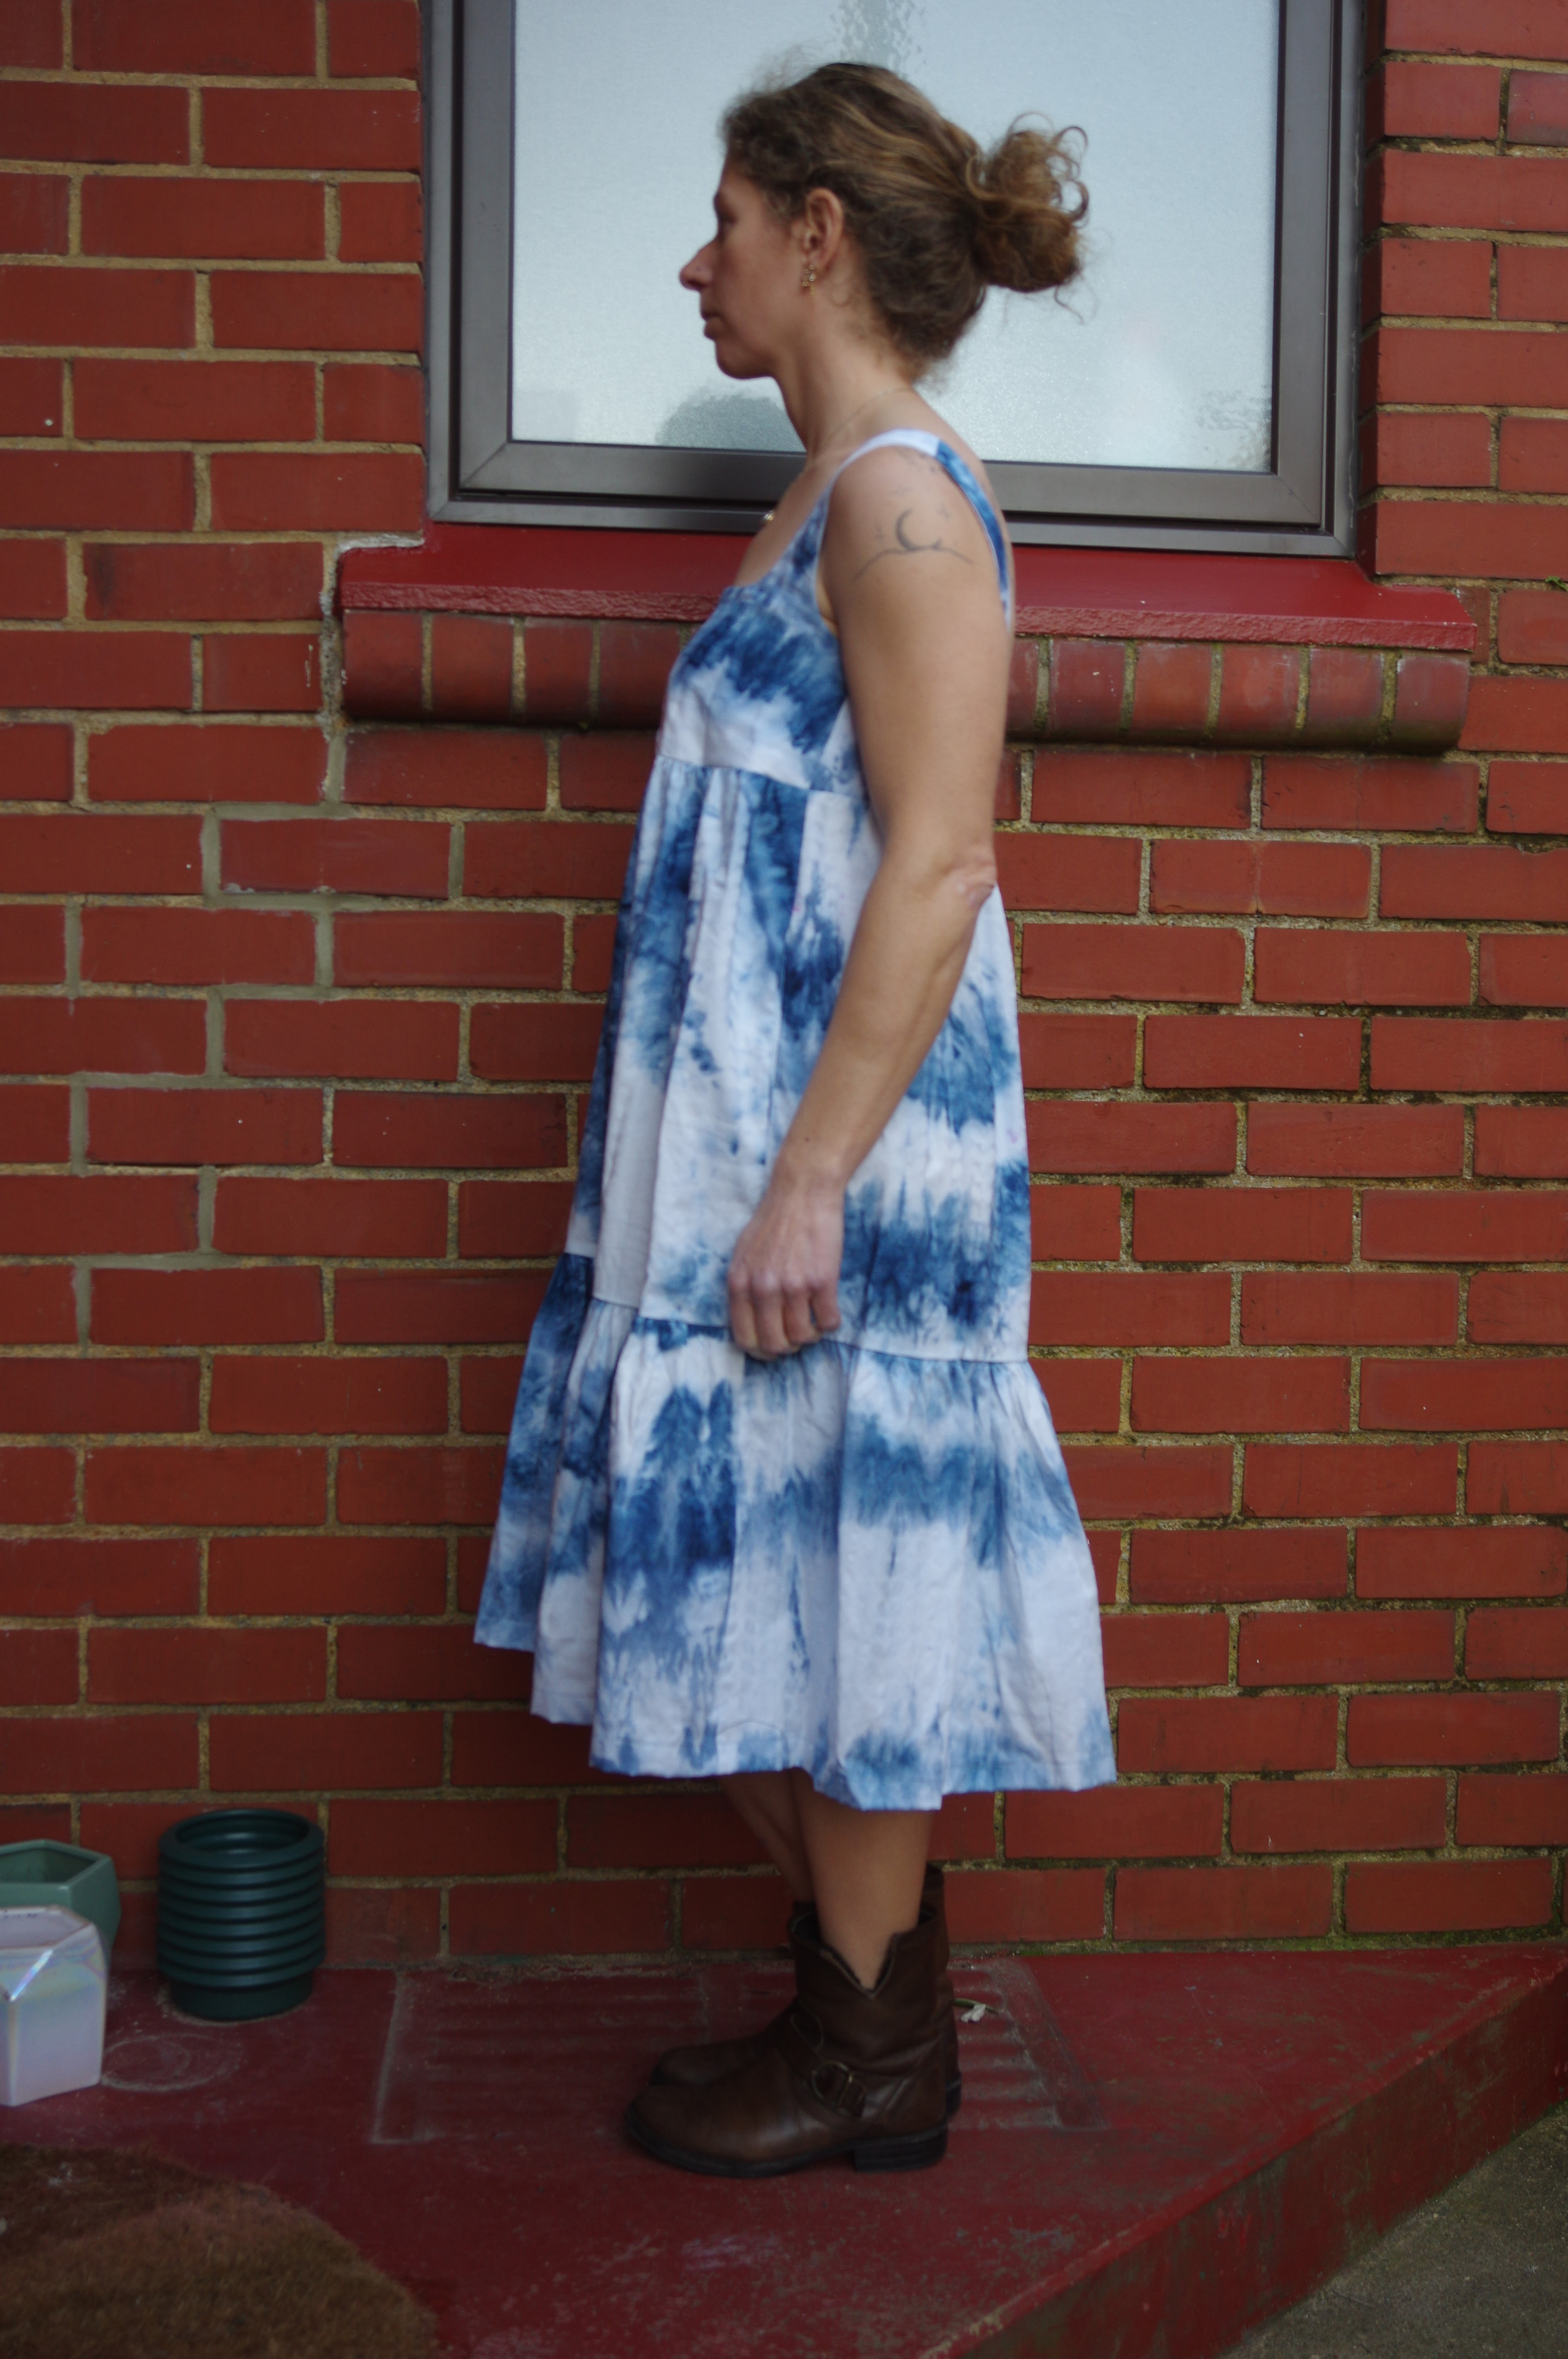
For version 2 I used a nice bedsheet I had ice dyed and the size XS pattern.  I shaved a tiny edge off the straps to adjust for my sloping shoulders. Doubled the second tier and halved the third tier, and put the pockets higher in a more serviceable location.  Despite all of this, the bodice still feels like it will fall off me outwards.  I think I would need to adjust the curve of the front bodice inward a bit to gain more security, though I like the look of the back.  


I can see that people are more taken with the other view of this dress but I wasn't keen on the straps.  The adjustable straps do fix the problem of adjusting the bodice for a snug fit because you can pull the back in between them.  Eventually I might go there using some very lightweight fabric. I'm not sure what I think of the change I made to the skirt tiers.  It feels more normal when wearing the dress, but I think the original tier height is more flattering (though difficult for pockets.) 


Overall this was mainly an experiment conducted to calm my curiosity.  The friends receiving the dresses are happy so it's no loss to me but I'm not really interested in using my fancy Liberty fabric to make another one (which is always a thought in my mind as that Liberty slumbers sadly in the stash, waiting for some unicorn - the perfect dress pattern...)  I feel like there are too many small things that bothered me with the fit of this pattern and I don't have enough interest to keep working on it at the moment.

Wednesday, 7 September 2022

Criswood Parasol dress, again.

 Made two of these last year.  Reckoned the long one was a bit too long but then after I sent it to my friend I looked harder at the pictures and thought it actually had felt pretty lovely on.  Yes, oversized, but in a subtle way, as long as the fabric choice is very drapey and light. So out of the blue I decided I wanted another one and I wanted it in this fabric I had earmarked for something else.  I wanted a kind of grown up (not pink, not highly patterned...) dress.

I think the fabric is from The Fabric Box.  It is a crepey textured rayon.  It's heavier than the bird print rayon of my first version and that led to some pocket dramas.  Up to the pockets things were going ok. My sewing machine was serviced last year and the results of that service...are that I wouldn't recommend those guys to anyone.  It doesn't seem to be any different than before the service (still barfing furballs, still hesitating and mis-stitching all the time like it got lost along the way, arg!)  I noticed that led to some missed stitches and very obvious stitching, but I don't really mind the look, it creates a kind of obvious facing look at the bodice which is ok.  Possibly my thread wasn't a perfect match but I did use a new needle.  


I put the pockets on and they sagged down to the bottom of the universe.  I went ahead and made the whole dress, even let it sit while I debated whether to cut the hem straight.  Decided not to.  I think the hem having a high-low look adds to the dress.  The huge pockets cutting up the flow of the dress, not so much.  With a sad sigh I went forth to remove them and retrofit in side seam pockets.  It's painful mainly because you can't get the insides as pretty, but perfectly serviceable anyway.  Wore dress the next day.  Happy with it!  It is heavier than the pink one was which should have been foreseeable, but that doesn't pull the front or the back down in a bad way, the back tie keeps the dress from falling forward to show too much (nonexistent) cleavage.  I really like the feel of this dress. 

Sunday, 7 August 2022

Lysimaque nenuphar jacket review: a patchwork piece of art


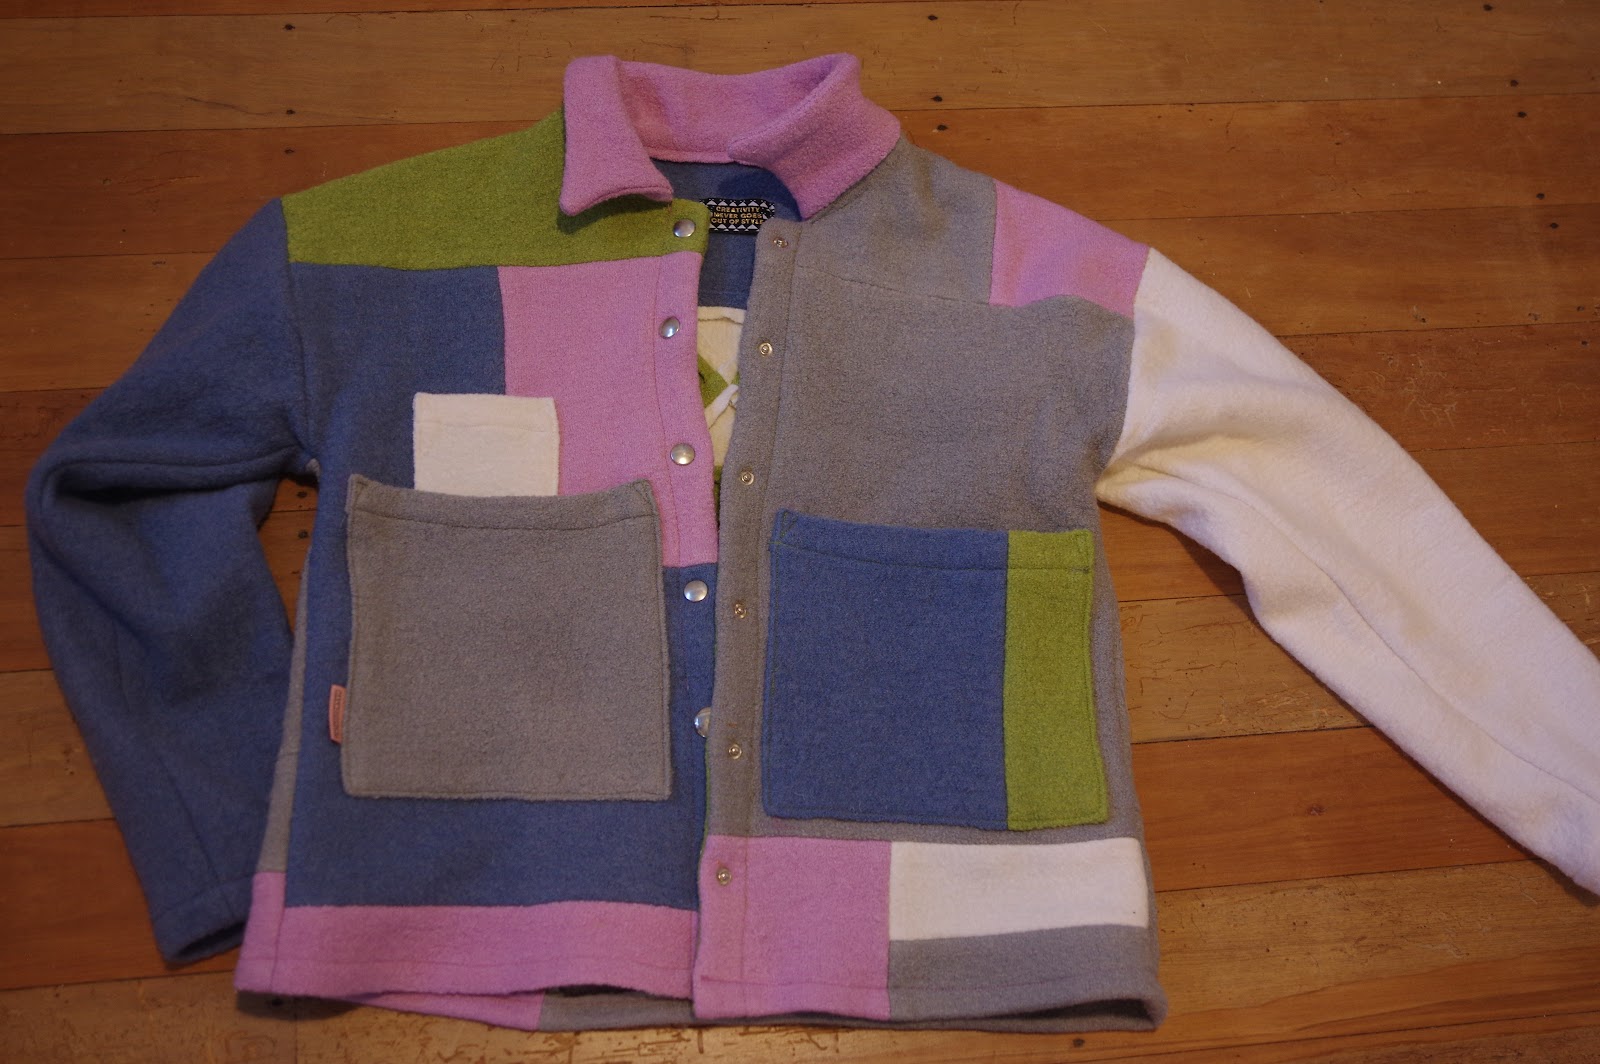
 I saw this pattern and I was so completely in love with the back.  I had an irritating meter of boiled wool and so immediately I thought it would be amazing to use a bunch of colours of boiled wool for this jacket.  I went on a hunt for all the colors.  It took awhile to accumulate, because all the nice ones were in Germany and wouldn't ship to New Zealand.  I finally had them all, and I had the pattern pieces ready to go, and then realised I needed *one more color*.  Ugh.  I ended up moving, with this in a kind of mess as one of those projects I really wanted to do before I moved, but just didn't manage.  

Blue boiled wool was from Miss Maude

White boiled wool was from The Fabric Box 

The other 3 colours were from Mood Fabrics, an order that I justified specifically because of this project.   

I made size 36 for a 84 cm chest, as my chest measurement is about 83 cm but I am happy to overestimate a touch due to my wide back, rather than sizing down, especially for a jacket.

So, other people have mentioned there are two options for the button placket.  Maybe the original, non-pieced pattern has two button placket options.  But the pieced pattern only has one - you have to sew on a separate button facing on both fronts, so you end up with double thickness and seams everywhere.  I would have liked the other option to decrease bulk.  I tried to use a different fabric but it was a catastrophe so I went back to double thickness boiled wool, which at least does respond to a hot damp iron.

I knew going into this that the instructions would be sparse, and they were. They don't provide you much help if you are a beginning sewist and need some hand holding.  I took it slowly and thought hard about management of the insides, since all the seams were visible.  I found that the instructions mirror imaged reality, ie when it said right front, it's actually the side on my left when I'm wearing it.  But they were consistent so it didn't matter.  All the pieces lined up and the order of attaching them made sense.  The pockets are just low enough that I can snake my hands into them.  I did not even consider folding in a seam allowance on the inner collar, since the wool won't ever fray, I just sewed it down as is.  I then added some extra stitching to keep the collar hem from rolling out.  This worked ok, I think I would wear it with the collar kind of up, but it will go down too. 


I got to the end, not sure if I was making something just so cool, or a clown jacket.  And I made the fatal error.  Those two layers of boiled wool would NEVER receive buttonholes from my sewing machine, and while I do have a backup workhorse Bernina, I instead committed to snaps.  I think I'm gonna retire my Prym snap set now.  While the snaps do sometimes work, on any complex fabric they are almost worse than buttons.  I needed to hand sew snaps on.  Hand sewn snaps are GREAT.  I realised my error after I made lots of snap holes and was committed to snaps and then snaps started falling out.  I went down a wormhole of snap repair etc which involved glue and one fake snap where things just got too terrible.  At the end of this, while pleased with the back of the jacket, I don't really want to own it.  A friend has raised her hand for it and I'm kind of relieved to pass it on.  I do like it, but I kind of FEEL like a clown in it, and the snaps have been the nail in that coffin. 


But I still really LOVE the back.  I might come back around to this idea someday, just using the patchwork star or something.

Waffle Patterns Pinda pants in stretch corduroy

 Finally picking up my sewing pace a bit!  I have been really keen to make these pants because it's winter and I want long pants that cover my legs all the way.  The flappy elastic-waist ankle length items of summer just are not doing it.  I also love Waffle Patterns and after making the Azuki work pants I realised I had missed just how cool the Pinda might be.  

So, fabric is stretch corduroy from Nick's Fabric in Auckland again shaming me as I bought it for these pants a year ago.  

Size 38 since that seems to be the wisest fit.  Alas, I didn't necessarily think about how stretchy my fabric was and that 38 is kind of loose on me.  I should have sized down for these.  If you make them do take the stretch into account - 38 would have actually been a great fit in ZERO stretch, but you need the pants to have some negative ease when they are so stretchy and that's not happening here. 

The sewing took a few days but not as long as things were going a few months ago.  Hopefully I'm gearing back into sewing mode.  I made the cute double pleat back pockets...um, beware as they will kind of pleat open and make your bum look big.  I find the pocket placement to be too low as well.  

I did the patch front pockets. The instructions don't have you create a separate pocket if you use the zip so what I did was: add a little pocket facing to the zip area, like making a welt so it would be neat and reinforced.  Once my zip was installed to that, I created a back layer to the zipper pocket from some quilting cotton (see bats!)  I then treated the two units as one and finished the main pocket that way.  Thus the zip pocket is in front of the real pocket where you put your hand.  I'm definitely going to do this again.  I love these patch pockets more than I think I love jeans pockets, because they actually have room to fit stuff whereas jeans pockets are full of my hipbones. 

Anyway the waistband was fine, everything else was fine. The fly installation I do not love.  It looks totally fine and was ok while doing it though you are using a folded seam allowance as your guide instead of basting the fly shut to start, but my zip is actually angled a bit sideways at the top as though somewhere the zipper tape wasn't completely sewn down flat well enough.  I think I actually prefer the method where you baste the fly shut, even though I have said in the past I hate that method.  Changed my mind! 


 By the way, no, we are not going to talk about nap direction.  I am really amazed by how many times *in a row* I can forget something so basic...  please, don't be like me.  Corduroy is directional.  Thanks.

Alas upon trying these on they are very large and are now seeking new owners.  Very large like a solid 4" so no, I'm not going to try taking that out.  I'm also not happy with how much excess fabric there is everywhere.  I could probably have sized all the way down to 34 in this stretchy fabric.  I'm happy with my experiment though and luckily I have lots of pants so even if these ones didn't work out for me, I'm still clothed.  I might think harder about places I can put these nice patch pockets.  Even my little pocket zip was very exciting and I want to do it somewhere else.  


Tuesday, 2 August 2022

Twig and Tale Rainhaven pants in (very orange) Gore-tex

 I planned to make some new rain pants sometime last year.  In a fit of preparation I bought some outdoor fabrics from Ripstop by the Roll.  Sadly my colour scheme was bright green and bright orange.  Luckily the future ski bibs are dark sedate olive green.  Whew.  

This project was on the back burner because I needed it.  Yes, indeed, the minute I actually need to sew something I'm running away screaming, in this case with damp socks and a wet butt because my two pairs of gore-tex rain pants are so leaky.

 But OH past Sonia, why orange?

So I had just made a pair of pants, it had taken me days, it had been fun, but they were too big.  I had a few hours before bedtime.  I was *finally* back in the sewing Zone.  And so I thought nothing to lose, I'll just quickly whip up these gore-tex pants!  (I had the pattern as at some inspired point I had a few patterns printed.  Months ago.)  I needed something that would feel like a Success and of course, cross something off the list.  Cue the threatening music right here. 

I made size 38, no mods, I didn't use any pockets.  I used a teflon sewing foot and after a few attempts, I ended up using a jeans needle because nothing else would penetrate the fabric.  Sewing Gore-tex is one of those tragic life events that you try to block out with a strong alcoholic fog immediately afterwards.  I seam sealed every single seam with tape, also from Ripstop by the Roll, which was the very definition of overkill - dyneema seam tape.  Dyneema, for those who aren't rock climbers etc, has the tensile strength of steel.  The tape was a bit wide so some of my seams did get little wrinkles in them, hopefully not in a way that will let water in.  I then underlined the pants with that horrible green lining fabric.  This was kind of a bad idea - it's really soft and kind of sticky, so while it's comfortable, it's hard to get the pants on and off because they don't slide.  The exterior (orange, so very orange) is a super lightweight gore-tex type membrane.  I suspect it's not official gore-tex because of the rules in how things are named.  Once I had the two layers together they were easier to work with, so the waistband was kind of ok (the elastic got stuck in the layers but eventually pulled through).  For the hems, I made little velcro bands that I can shut the hem with, so the water will drip off my shoes and nothing will get caught on my bike.  


I had envisioned every step of this project long ago, so in a way, it was autopilot.  I knew what I wanted to do.  It did, however, take about 6 hours and I did the entire thing in one go without stopping.  I knew the minute I stepped away from this mess, I would hesitate to get back into it.  


I'm glad it's done!!  I have new, non-leaky rain pants!  And no one is going to run me over!