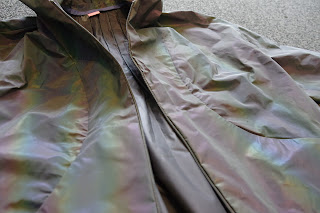
It is a real pleasure that I've made time to get into the sewing room in the past month. I am bombing through projects I've wanted to sew for over a year. Including the endless queue of jackets! Hove has been top of the list, and this fabric from Mood has been earmarked for it. Because the inside is white, I bought black jacket nylon to line the body with. I assumed one of my zipper collection would fit, which was not entirely accurate. The zip I chose was too long (pity I shortened the jacket...) and so I decided cleverly to just let it go further up the front of the hood than it's supposed to. This worked out fine but when wearing the jacket it's really hard to zip up those extra 3 cm. I obviously just don't. If you had a too-short zip it would be better, because you can just start it higher up the hem, but I don't really recommend letting the zip go higher than it's meant to on the front.
At some point in the planning stages, I got serious and bought bias tape and matching thread specifically to use for this pattern - a rare event which pretty much catapulted this to the top of the list.
I have not used a pattern by In the Folds before, except for the free ones by Peppermint Magazine. I made size C going by the size chart, that matches my measurements pretty well and this fabric is quite heavy so I thought it is good for it to stand away from my body a bit (could have chosen B). I did pay attention to the comments in the pattern about drape and I do think you should go with a fabric that will drape better than mine does unless you also want a bell over your bottom (but I'm resigned to this situation.)
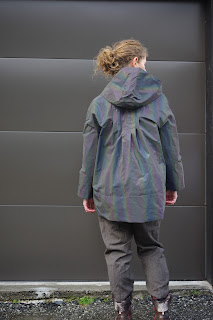
I also took note of the height this pattern is drafted for: 5'7" and I read through all the blogs and noticed the jacket looks fine on tall people and very disproportionate on short people. It really needs to maintain its proportion to be cute. So I accepted the challenge to crop it 3" at the shorten lines since I am 5'4" and short waisted. The actual shortening was fine, there is a line. However, that line is along the front curve and changes the front curve dramatically - there is a huge misalignment to reset. If you don't plan ahead and reset that curve then the pockets won't fit. In fact, I have some advice here. Do shorten the jacket. Do use a French Curve to fix the curve, and then sew the lining to the lining pockets *BEFORE* doing the outside, because if those don't line up you will know in time to fix the problem. It's a lot easier to cut four more pockets than to cut 4 big monster S curve shapes that take a metre of fabric each.
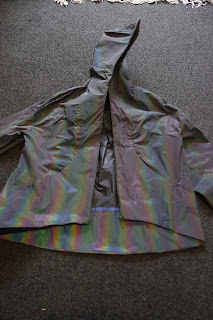
I didn't do that, I just eased it all together and then did some hidden sewing inside the pockets to fix weird gaps that formed. You can see whiskers along the front of the jacket where it attaches to the facing and that is all from me easing the front together like a boss to make it work despite a very dubious cutting of my new shortened curved front. That was when things started to get dramatic. Prior to that I did the back pleats which were a pleasure, because this holographic fabric actually presses very well and I was able to chalk all the pleats and iron them to position them. Of course, the fabric does not take pins, so I was holding everything together with clips and some double sided tape. I underlined the back of the jacket before I pleated, and then I lined the sleeves instead of underlining, so the sleeve seam is hidden.
The pattern instructions are very nice. They are well drawn, clear, and not excessive. I generally followed them exactly.
My dramas were not regarding the pattern, for once. My fabric was fine when I was sewing a single piece. Once I had a larger item in front of me, it was heavier and burlier than my sewing machine, and so I got in big fights with the feed dogs that basically were not moving fabric along at all. I went through many needles, which is fine, because they were all pretty old needles. I got in fights with every single other thing on my sewing table because this jacket basically required a free space of 1m around the sewing machine in every direction. Sewing the sleeves on was the final move and that's good because it was almost my final move. I definitely did not bias bind that seam (but I ran out of bias tape before then. Buy extra, I had 5m and didn't use it on the sleeves.)
The jacket is very trippy. It is stiff and I can wear any number of layers under it. The pockets are roomy and satisfying. Others have commented the sleeves are short - this is true - I like the length for this type of rain jacket because I think if they were longer the shape would be compromised, and water will run off them out of the way. I will most likely wear this walking around and biking because it's too much like trying to maneuver a tent to get into the car wearing it, it's very firm. But perfect for biking, and isn't that when you want to be extra reflective?
 |
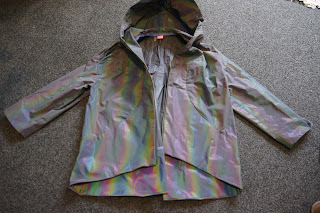
| With the camera flash! Apparently more extreme than when light shines on it irl |
I wore this around Auckland and got heaps of compliments from people who sew. People who don't sew were possibly just too bedazzled to comment. In the photos the colour looks quite drab but apparently with movement it randomly catches the light here and there and is pretty exciting to look at. I had been on the fence about this jacket prior to the Auckland trip, likely due to the suffering of making it, but now I quite like it. I would even sew this pattern again in a very different fabric if I for some reason didn't want to make the other 12 jackets in my queue first.


No comments:
Post a Comment