Showing posts with label Nick's Fabrics. Show all posts

Friday, 16 December 2022

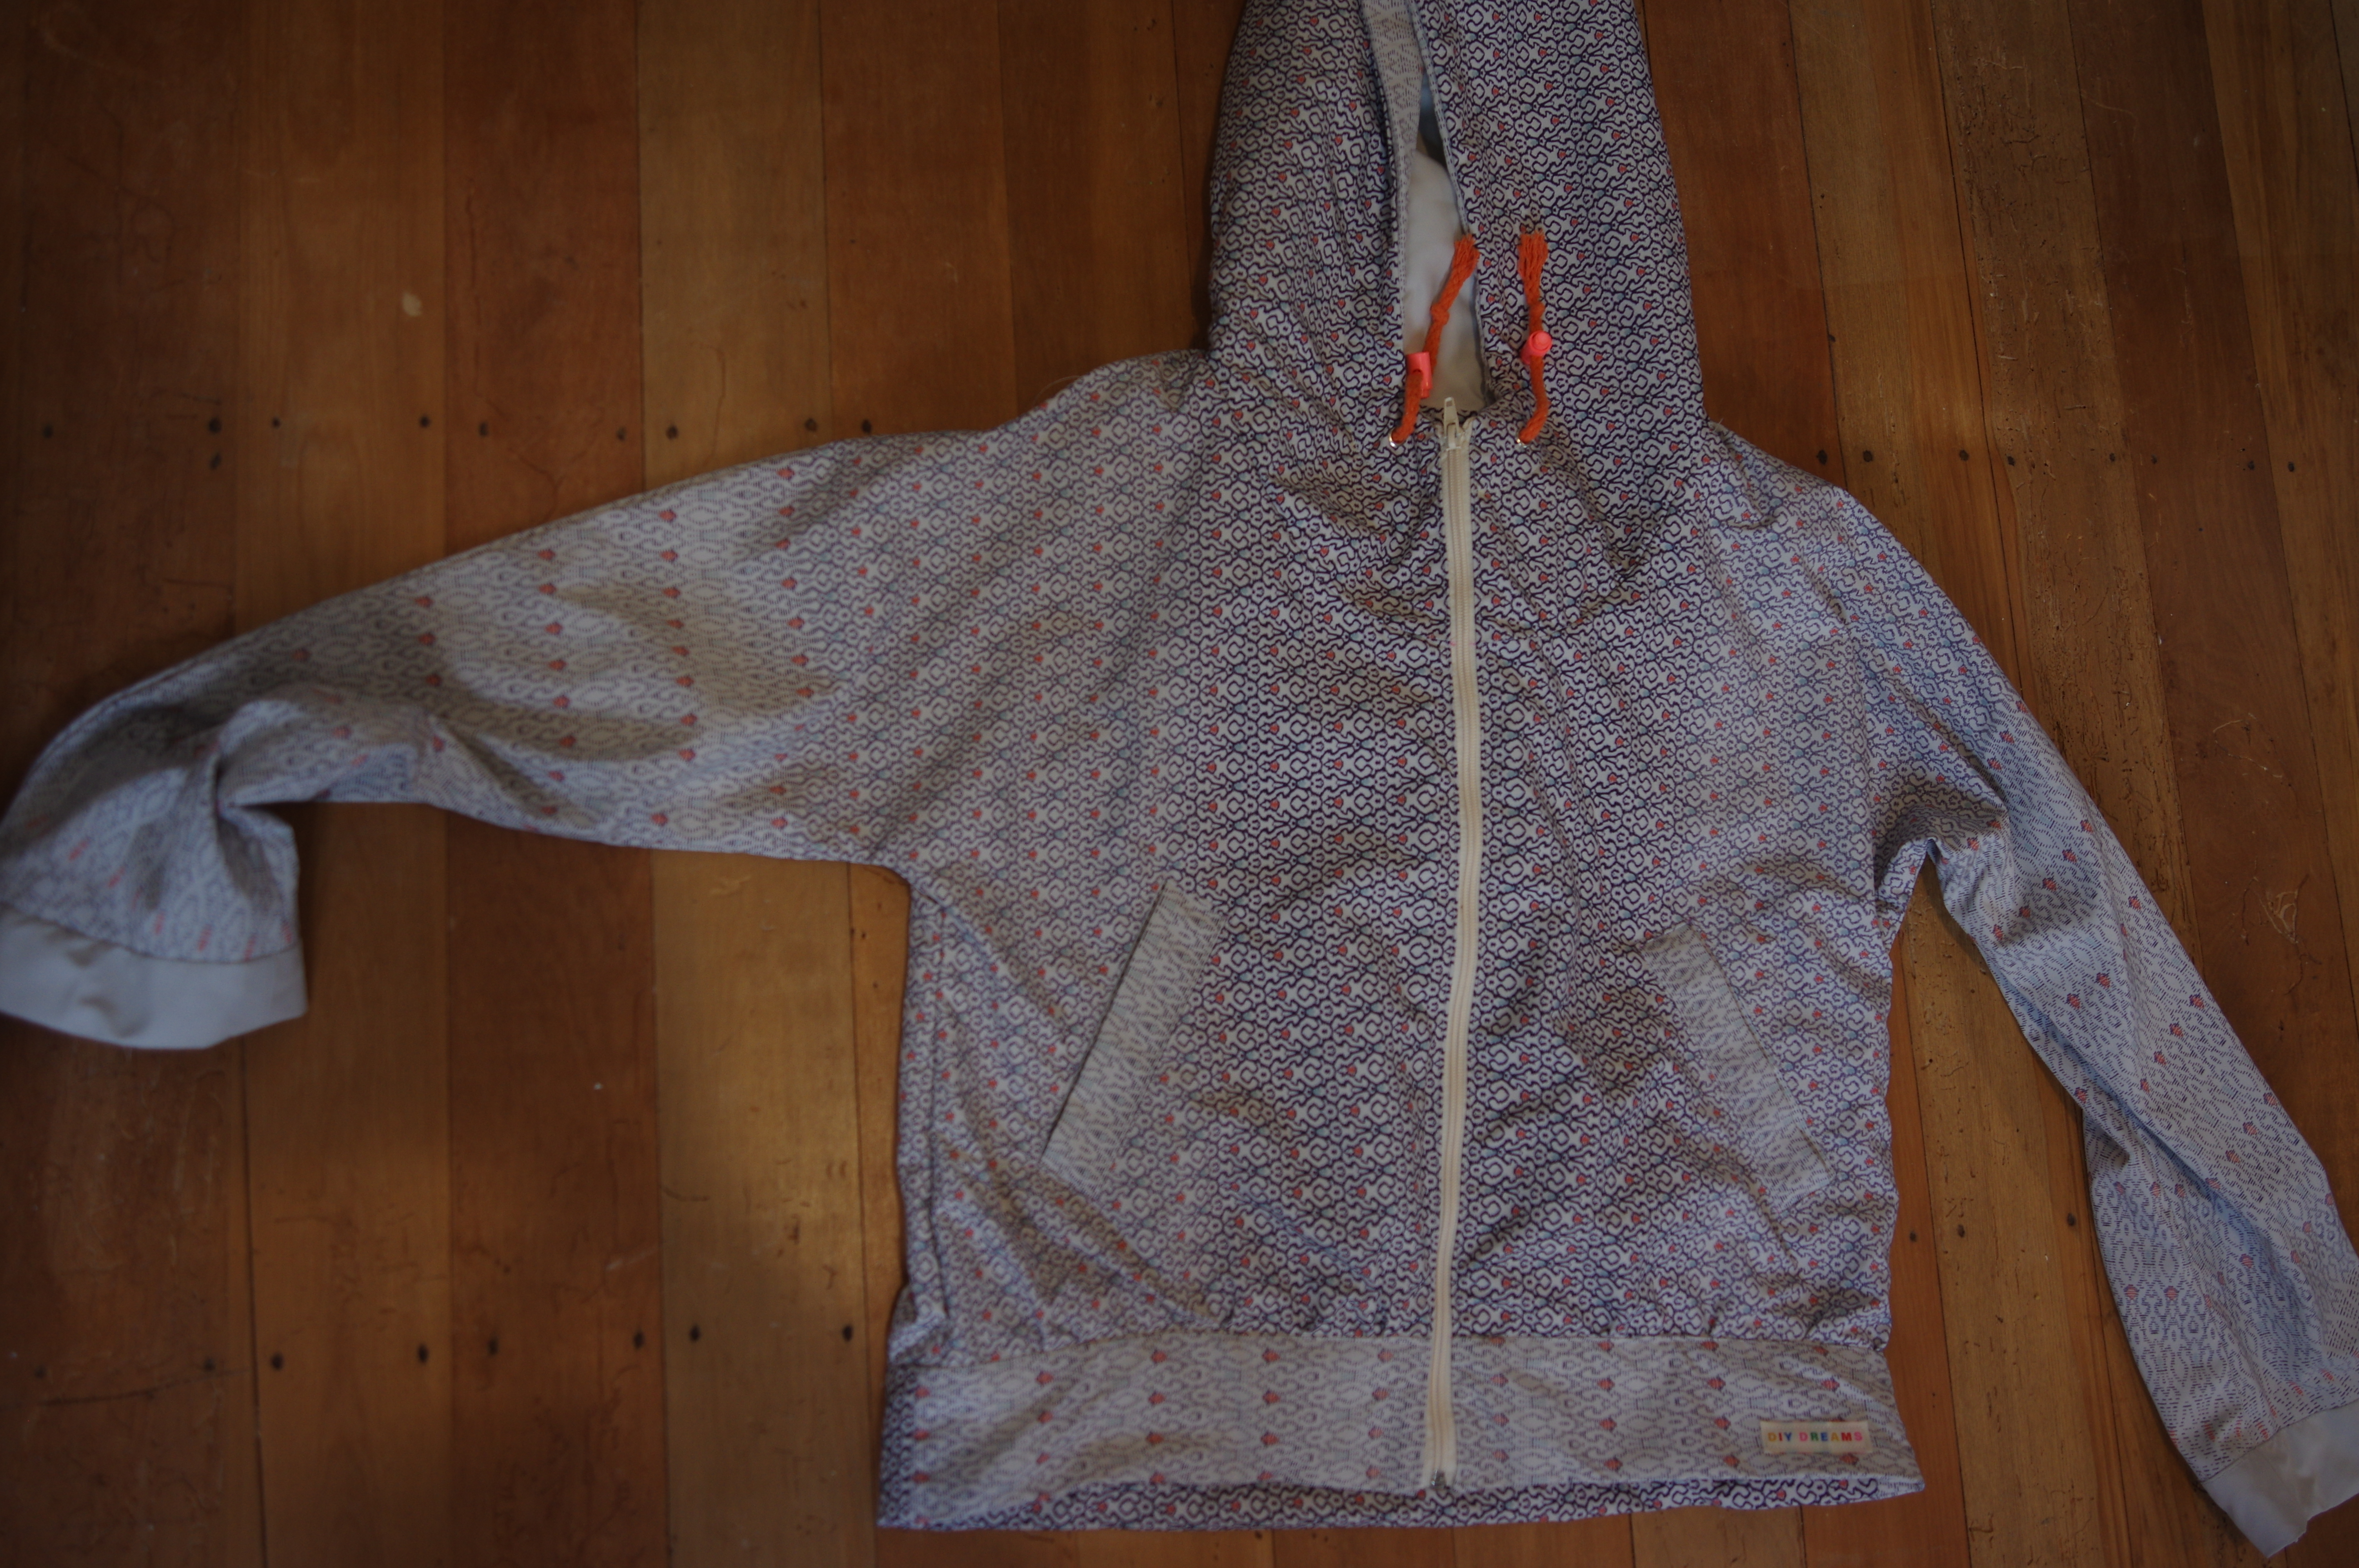
The Wheaton Windbreaker: worth the effort?

I've been planning to make this ever since it came out.  I have a large queue of jackets, you see, and each time I make one I need to recover afterwards.  A nice jacket has a lot of small details, and all that sums up into a Big Project.  For some reason it also seems like it's really hard to produce a jacket pattern that is both a good jacket, and that has good, genuinely helpful instructions.  Thus, the queue just stays the same length no matter what I do!

There was the Glide jacket, by Made it Patterns.  No comment. (I think I have said enough.)

And there was the Arare jacket: beautiful, success, really a bit too small considering my claustrophobia putting things over my head, but definitely a keeper.  Pocket instructions a bit bad for Waffle patterns, but everything else was great.  

I tried Very Hard to make the Wheaton pattern fit on a piece of waxed cotton at some point last year.  A meter piece.  It didn't fit, but left me the legacy of my pieces cut out in a size 0 when I'm a 4 on the size chart.  Right. So then Tessa and I went to buy fabric in Auckland and got matching nylon to make matching Wheaton windbreakers.  We got 3m each.  And even better - when I had a reason to come up to Hamilton for sewing day, we decided to make them together.  

Tessa made size 12, as she was between 10 and 12 on the chart. She reported a size 10 would have been fine. If you are following the size chart, the ease is generous.  The size 0 fits me though I would have liked it a bit bigger, the size 4 would have indeed been optimal.

I prepped ahead of time because I couldn't bring scissors etc with me on the airplane. I cut out my size 0 pattern (sigh) and though I had wanted to use the gradient of the fabric on the cross grain I couldn't make it fit so I had to use it with the gradient going across.  I had enough fabric to be a tiny bit picky, but barely.  I interfaced everything per the instructions.  Tessa really struggled with 3m of fabric but just barely got the entire thing cut out except the pockets.  

Tessa started her jacket the morning of sewing day. She only interfaced as she went along and was less finicky with details.  She quickly passed me and had finished the jacket by the end of the day, while I still had the cuffs to put on, the hem to sew, and the facings to tack down.  This is the summary of the day: the more you follow these instructions, the worse things will go for you.  We agreed that this was the worst sewing day we had ever had together because we were collectively miserable at every single step of the process. (Usually we are at least sewing different things and can cheerlead each other on.)

First: welts.  As every pattern designer seems to think they have to reinvent the welt-wheel, these welt marks are very confusing. They are inside out arrows, instead of a box.  Save yourself, and draw the box around the arrowhead ends.  Then you line up the welts with the sides of your box, per usual.  Also, don't fold the welt lip ahead of time, because then you're constrained to use it without adjusting it to cover the space. Wait til later when you can adjust it to fit - a better pocket results. 

Next issue: interfacing.  Don't interface *anything* that has go to around a curve.  This pattern is drafted so tightly that it just won't go.  Don't interface the hem, don't interface the neck part of the facing. If you have fabric that requires interfacing, it's worth cutting the interfacing down so it is not on the seam allowance.  Tessa beat me here by only interfacing as she went along, and didn't interface things that didn't need it.  She was able to ease in her hood and the hem without catastrophic amounts of seam ripping, whereas I lost a few hours undoing and getting frustrated.  

Tessa:


(In these photos I still hadn't done the facings although the exterior was put together.)


Subsequent drama: the cuffs.  WTF?  You cut out 4 little pieces but as best we could understand, you need 8, 4 for each side.  A LONG TIME after finishing the jacket I suddenly wondered if you are supposed to actually do the cuffs as a facing inside the sleeve, but that doesn't make sense because the sleeves are already super short.  So, if you are doing normal cuffs you need 8 of those little pieces.  Also I forget now what the instructions said but best to ignore them and do normal cuffs - attach to jacket and thread the elastic through the casing.  It will save you some stress.  Consider measuring the length of sleeves and lengthening if not happy - they are pretty short.

Finally if you actually sew the facing and hem facing down to hold the pocket in, you lose half the pocket.  If you want full sized pockets, they have to be outside all those facings and flappy around.  A peeve I have.  


In summary, we both finished our jackets, although I took another month to recover from the very memory and finish mine. After taking these photos I did add elastic into the cuffs. Tessa says that she has been wearing her jacket to work every day and gets so many compliments on it, which gives her the opportunity to tell everyone how awful it was to make.  I don't know if I can get over the experience and I will probably give mine to my cousin, who has asked for it.  (I did, and she loves it.)

If you love the shape of the Wheaton this is the advice I can offer: 

It creates a very high quality jacket though with some flappy but nice and deep pockets.  

It might not be fun along the way.  Do a practice welt pocket, interface only as you go and as really needed, and lengthen the sleeves ahead of time if you arms are anything longer than average or if you want to try a sleeve facing instead of a cuff.  Don't plan to do it in a day or your creative vocabulary will come out!  Plan bribes to get yourself through it. 

Sunday, 7 August 2022

Waffle Patterns Pinda pants in stretch corduroy

 Finally picking up my sewing pace a bit!  I have been really keen to make these pants because it's winter and I want long pants that cover my legs all the way.  The flappy elastic-waist ankle length items of summer just are not doing it.  I also love Waffle Patterns and after making the Azuki work pants I realised I had missed just how cool the Pinda might be.  

So, fabric is stretch corduroy from Nick's Fabric in Auckland again shaming me as I bought it for these pants a year ago.  

Size 38 since that seems to be the wisest fit.  Alas, I didn't necessarily think about how stretchy my fabric was and that 38 is kind of loose on me.  I should have sized down for these.  If you make them do take the stretch into account - 38 would have actually been a great fit in ZERO stretch, but you need the pants to have some negative ease when they are so stretchy and that's not happening here. 

The sewing took a few days but not as long as things were going a few months ago.  Hopefully I'm gearing back into sewing mode.  I made the cute double pleat back pockets...um, beware as they will kind of pleat open and make your bum look big.  I find the pocket placement to be too low as well.  

I did the patch front pockets. The instructions don't have you create a separate pocket if you use the zip so what I did was: add a little pocket facing to the zip area, like making a welt so it would be neat and reinforced.  Once my zip was installed to that, I created a back layer to the zipper pocket from some quilting cotton (see bats!)  I then treated the two units as one and finished the main pocket that way.  Thus the zip pocket is in front of the real pocket where you put your hand.  I'm definitely going to do this again.  I love these patch pockets more than I think I love jeans pockets, because they actually have room to fit stuff whereas jeans pockets are full of my hipbones. 

Anyway the waistband was fine, everything else was fine. The fly installation I do not love.  It looks totally fine and was ok while doing it though you are using a folded seam allowance as your guide instead of basting the fly shut to start, but my zip is actually angled a bit sideways at the top as though somewhere the zipper tape wasn't completely sewn down flat well enough.  I think I actually prefer the method where you baste the fly shut, even though I have said in the past I hate that method.  Changed my mind! 


 By the way, no, we are not going to talk about nap direction.  I am really amazed by how many times *in a row* I can forget something so basic...  please, don't be like me.  Corduroy is directional.  Thanks.

Alas upon trying these on they are very large and are now seeking new owners.  Very large like a solid 4" so no, I'm not going to try taking that out.  I'm also not happy with how much excess fabric there is everywhere.  I could probably have sized all the way down to 34 in this stretchy fabric.  I'm happy with my experiment though and luckily I have lots of pants so even if these ones didn't work out for me, I'm still clothed.  I might think harder about places I can put these nice patch pockets.  Even my little pocket zip was very exciting and I want to do it somewhere else.  


Friday, 15 October 2021

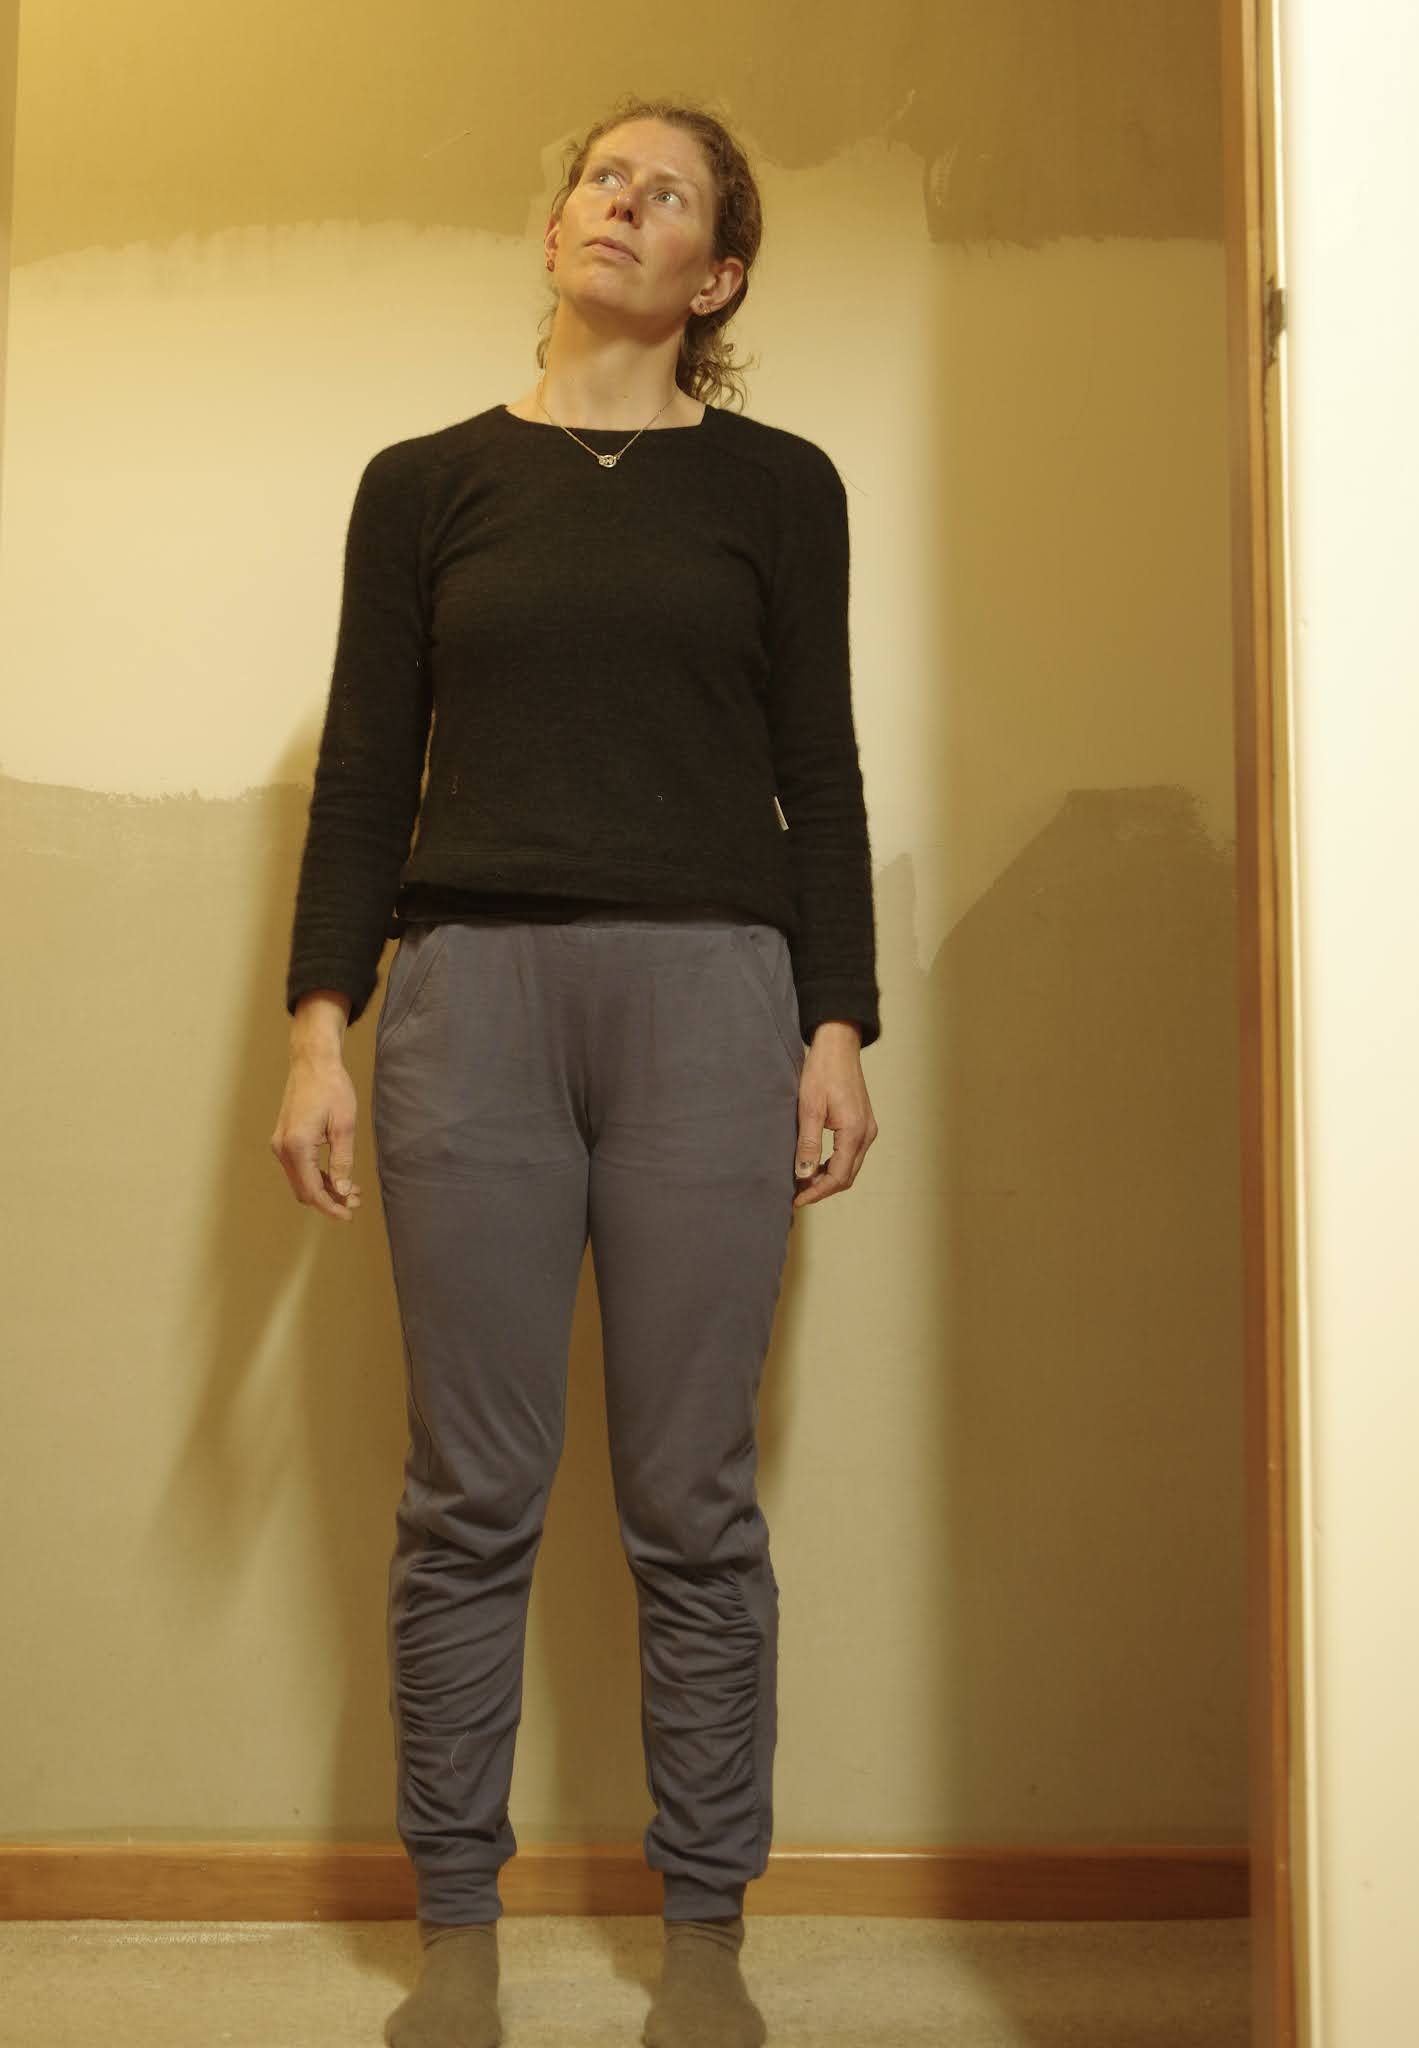
Petite Stitchery Adult Drew joggers review

I really didn't need more lounge pants, but I was so taken in by the slender fit of these and the cool lower leg gathers that I bought the pattern without much debate.  

I went with size small. 

The debate came about when it was time to choose fabric. How heavy? The instructions don't really give you much help.  I perused the tester photos for help.  I suspected in a sweatshirt fabric the gathers might be too thick, but I didn't really want my pants to be tshirt weight.  I had a perfect drapey midweight cupro knit, but for some reason it felt too special to use on this, since I don't know much about this pattern company.  Also, the gathered legs take a lot of fabric!  This is not your 1-meter loungewear special.  I finally compromised on a midweight jersey without much stretch - it was a remnant at Nick's Fabrics in Auckland and was 1.6m.

The instructions are a bit sparse and can be confusing as the different views are intermixed - but really you don't need too many instructions for these pants.  The pattern pieces come together fine.  I found it irritating that there's no top ribbing pocket piece - you have to make it yourself.  This is the kind of small thing that bothers me.  I noticed that it was hard to tell where to stop gathering on the lower leg.  I lined up my pieces and marked the spot, and I've adjusted my pattern pieces now so that I make a notch at that spot.  It would speed up the process a lot to do that in the beginning.  

In the end I like the pants.  I made my waistband too tight.  The cuffs are a bit tight.  This is due to my fabric not really stretching enough.  The fit was great but loungewear is not really very flattering so here are my scruffy hallway-loitering photographs:


The feature of the gathered lower legs does mean the grain goes a bit strange, but really I noticed that when pulling these on, and never again.  I think in stretchy fabric you can size down for a more legging-like look and that weird pull would be even less of an issue.

I think these pants deserve a second go in something cuddly and very stretchy.  I have lightweight sweatshirting with a bit of cashmere in it so I'm debating using that.  I'm happy with the size chart, and pretty happy with this pattern.  It has a lot of options - include a version sans gathers, and a version that rips all the way up the side like those Adidas trackies from the 90s.  (I wanted those so bad. In the 90s.)  However the set up reminds me of Patterns for Pirates and the cousin company Made for Mermaids - in that I would be hesitant to make anything complicated from them.  Simple things like this, fine, because you can really do anything with knits.  However now I'm contradicting myself because I'm in love with the Elliot romper pattern, so watch this space...