Showing posts with label Dropje. Show all posts

Friday, 7 July 2023

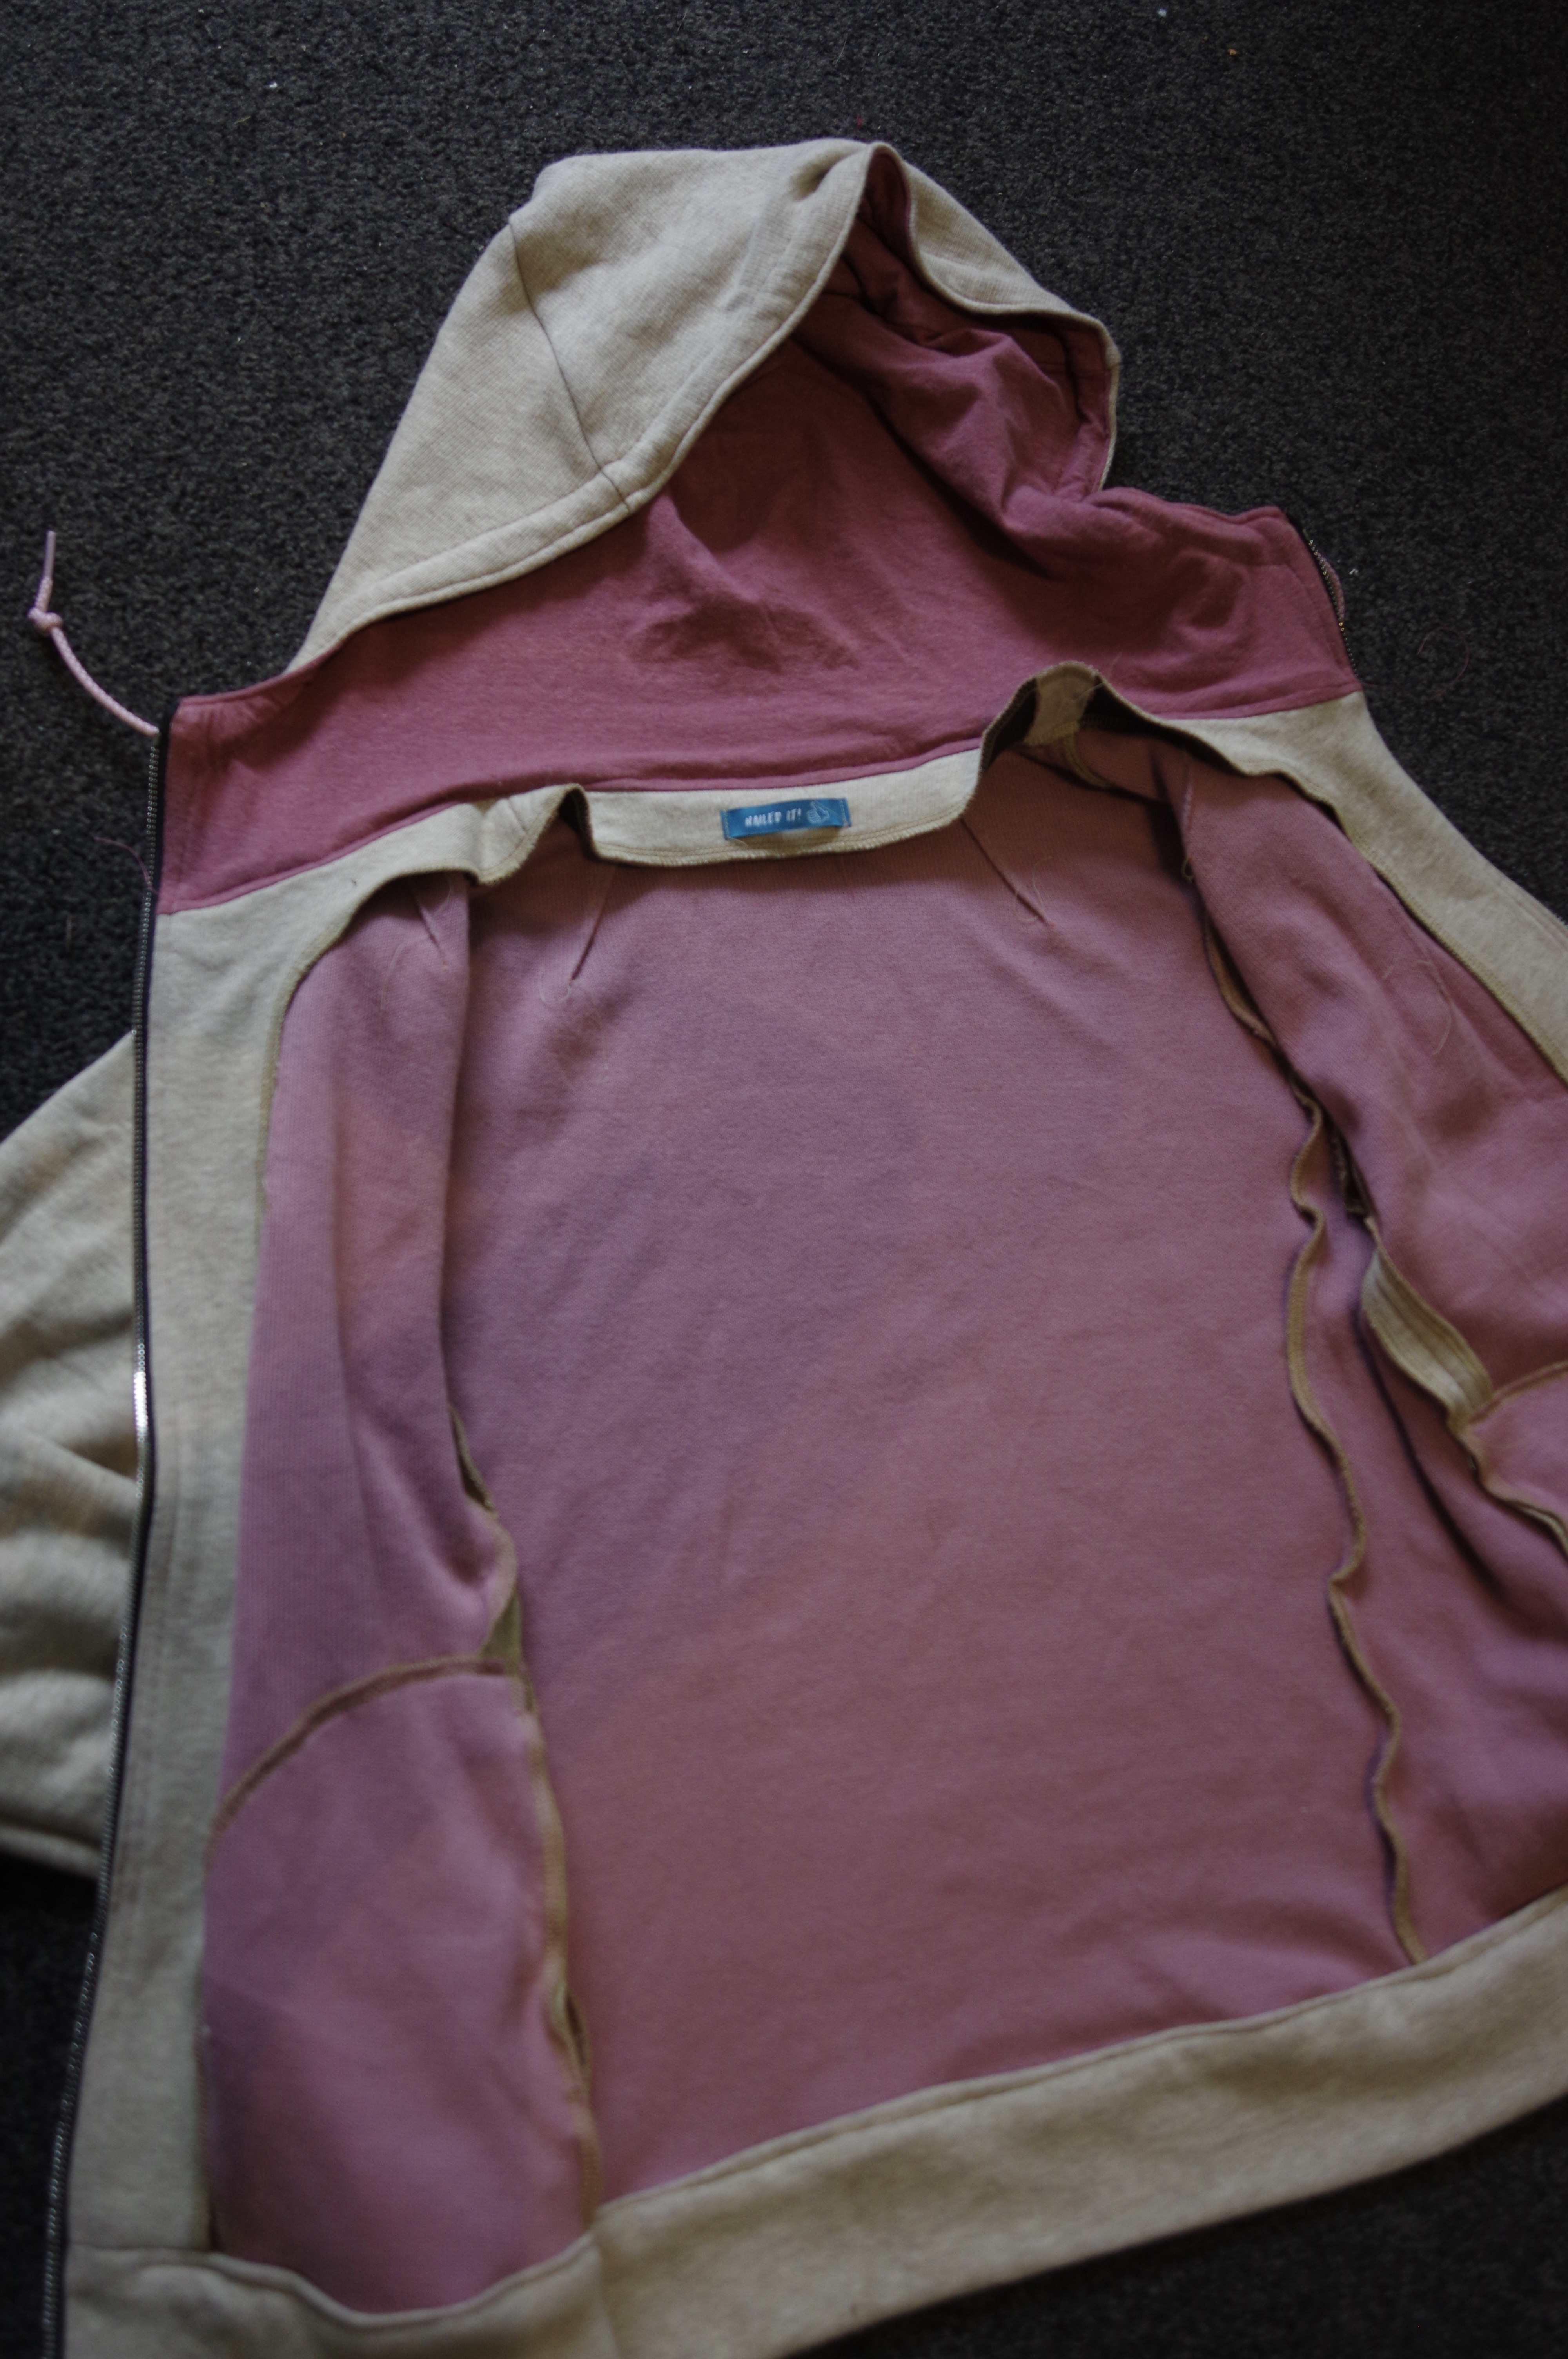
Waffle Dropje long sleeve (knit) hoodie

The Waffle Dropje and I have a history.  I was really obsessed with this vest pattern (see for instance here and here and here.)  When a sleeve addition came out I was very pleased.  In my LONG sewing list, and based on all my experiments leaning towards stretch wovens, I matched this pattern with a scuba fabric in my stash.  And when it came time to finally make it, of course I realised that one metre wasn't enough for a full hoodie, and I kind of forgot that this is a woven pattern, not a knit hoodie, and I pulled out this really stretchy double faced knit fabric.  It's from a destash by Lizzy in Port Macquarie.  I had it pink side out and kind of didn't like it, but as I was sewing I realised how much I loved the oatmeal face.  


It was, however, also very early in the sewing process that I realised this was massive on me. I had made the size 36, as in my many previous forays, 34 was too small (but in a woven!!) ... MASSIVE. I still went through with it.  I used a Riri zip.  I lined all my vests, so I had never followed the instructions before and done the facing.  I don't like it, and in a woven item I think it's better to just line it, but the instructions were clear enough (I like Waffle's instructions.) 


I have a new housemate and she's into slouchy, oversized things.  She has claimed this right away.  The fact that it was going to easily find a new home did get me through the more onerous finishing bits of the hoodie; it's not that fun to finish a project when you realise it is kind of a loss.  And interestingly enough I feel kind of done with this pattern now, like I've plumbed it's depths and gone as far as I want to go.  

I can't really speak to how well the arm fit is with the new sleeve addition since my knit was super roomy. 

Wednesday, 15 April 2020

Waffle Dropje shearling vest

I know, all I do is complain about what's wrong with patterns and then I go and make four of them. (here, here and here.)
Wellll you'd think by now I would have perfected this one.

This concept came to me fully polished while I strolled through Upper Mustang in Nepal.  Yep, it was hot and I was sweaty and hiking up hills of dirt, and I was thinking about making a vest out of animal skins.  I never said I was logical.  I did however drive straight to The Fabric Store from the airport to pick out my skins, and the vest was put together the following day.  However they were one skin short so I had to hold my impatience together while waiting to put on the hood.

I had some trouble figuring out the size.  My last post was oddly vague and all my pieces appeared to be size 36.  I thought I had sized down.  I decided that on a shearling vest, oversized was totally ok.  I went with about 1 inch longer than the pattern piece length, but no waist binding.

For the stretchy side panels I used two layers of merino which I sewed together along the top and bottom to enclose them.  Then I just sewed them to the front and back as normal since those seams won't unravel. (Note: I topstitched them down *to the merino side* not to the shearling side, a fact I just recently thought may have caused later problems...)

I then relocated to Greymouth but luckily my new office manager had a sewing machine so there was no problem! I managed to just barely tease the hood pieces out of that finicky little Singer.

I didn't have leather needles, and my usual sharp needles were not very good - I did most of this using the needles that come with sewing machines that are always in the little hidden storage area.  It was heavier duty and generally didn't skip stitches.  The borrowed Singer was not as good as my Pfaff, and I was really nervous about putting on the pockets.  They aren't perfect, but they are definitely fine and are so so cozy!  I just used a piece of paper to measure about how I wanted them, and then traced two.

This project stalled after that because I was moving and didn't manage to keep all my little bits in one place, but also because I noticed something right away - little rips occurring forwards and back of the merino stretch panels.  I could see that is a spot which has increased wear from pulling it on and off, and the leather can't give the same way the merino can.  I had no idea what to do to fix this.  I thought anything I put on it to bind it will be hard to get on and might make things worse.  I don't have access to an industrial sewing machine that might be able to manage lots of layers.  I asked a lot of friends, and my mother, and didn't get any useful ideas.

Luckily despite my impasse, I planned the rest of the steps for this vest!  I bought the bone buttons in Kathmandu specifically for this project, and then got thick waxed leather thread to apply them.

I planned to use strips of the original shearling for the button holders, and I saved the edges of the skins where there was no furry back.  I strengthened them by stitching down the middle of each piece. All the bits were together, waiting for success.  I even realised I could use grommets in the front for the buttons to strengthen them.

Friends told me that if I used grommets around the armhole it would redistribute stress.  I was finally reunited with this project, all those bits, and my grommet kit, however when I was making shoes recently the grommets were a huge catastrophe and all came out bent, so I worried I wasn't on the road to grommety success.

Fast forward to Isolation 2020!  Haha in between binging on whatever project enters my head in a wheeling free for all of sewing, I decided it was my duty to do my old, scary UFOs.  (Also two bras sitting on my desk collecting dust ughhhhh).  I got out the grommet kit and -ahem- read the instructions.  And realised I was using the wrong bits to put grommets in.

I tried to sort through these pictures but I couldn't choose which strange expressions were less strange than the rest so I kept them all.  Go figure I decided I needed an exotic photo shoot right when gale force winds started blowing!


So that's it, in one morning I: installed grommets all over the place.
Put in the buttons.
Sewed down my button holders, just as I had imagined MANY TIMES in the past two years, thank god I'd already marked placement and everything!
I glued the little rips with shoe glue
And for extra support I did a few sets of stitching down the seamlines of each of those suspicious seams.  I'm hoping between the grommets, the glue, and the stitching I will have redistributed stress enough that it won't rip any more, but I'm also more prepared to glue the entire armholes, or even add little strips of leather for support if I have to.
And then I was so excited I went and took those pictures.


This project really stretched my sense of what I could do.  I started out with inspiration and my inspiration was totally, perfectly fulfilled.  Did I mention that I even reshaped the front of the hood to cup my head without a hood drawstring?  So many perfect plans went into this, but it actually took me all of those two years to get the skills, equipment (shoe glue, miracle worker!!) and sheer determination to deal with the unexpected issues that cropped up.  Sometimes things do need to sit in time out for awhile.

Saturday, 26 November 2016

Waffle Dropje vest in star canvas

This project was imagined behind my eyeballs for months.  I thought of all the positives of the Dropjes that I did last year and all the reasons they DID NOT work.

It went like this:
The size 34 for my friend (see here) was a stretchy cotton with stretchy lining.  It was so amazing and cozy.  I really need that stretch!  I was just figuring out how to bag the lining though so I added some unnecessary facings. 

The size 36 for me (see here) was so fluffy, but it was too square.  It was too solid.  It was unflattering.  I did use the size 34 length and that was just barely the right length.

So I thought: I need to have some stretchiness but it needs to be small.  Plus I have this stunningly fabulous star print canvas from Miss Matabi's etsy store and I want to do something amazing with it.  And THEN I realized that this annoying fragment of stretch silk was a perfect contrasting shade of yellow.  And I got thinking: if I made the hem and the side panels from a stretchy knit, and used the stretch silk lining, I would get the stretch that I wanted while being able to use my little piece of star fabric.  Also by having a stretchy bottom it might be more fitted.  That was my plan. 


Yes, the lining sticks out just a tiny, I think I didn't snip enough around the bottom of the armhole.  But it's just a tiny bit, I both understitched and topstitched


I had to jigsaw the pattern pieces and cut painstakingly and the hood ended up being in two pieces and on the crossgrain. 
I also for the first time EVER actually used topstitching thread.  Whoa, it's really thick!  And scary!  No hiding mistakes here - I think a lighter colour would have been a bit better, or purple, but there wasn't a lot of selection. 

I put together the exterior while waiting for my dad to send me the lining, which I stupidly didn't bring with me when I moved.  I wanted to get the two parts together before going to Europe so I could make sure to get a good riri zip in Munich.  There is a nice shop which will shorten zips and it has a great selection.  I also thought just maybe something from my stash would work - the rest of my stash was also still living in Munich.  So it didn't quite get done, in terms of the lining being ready, but I did get a few zip options in Munich so I could choose the best one.

Then I got nervous I might mess it up so I dithered by making a bunch of things I didn't care about.  It sounds like all I do is sew lately but I promise I do other things too.  Luckily after making the Halifax Hoody x2 I was really on top of sewing buttonholes for hood strings and putting in separating zips...

I sewed the hood together before the armholes.  Don't do that!  I guess the burrito method for the armholes would have been much easier but I did manage and then understitched and topstitched (invisibly.)  I ended up going with a lighter weight zip so that it would not get in the way of the beautiful star pattern.

Nothing else shocking on construction.  I put some lightweight, slightly stretchy interfacing on the edge of the hood and along the zipper of the silk lining, so that it would be a little stronger where the zipper and the hood string go.  I used fusible web when it got to folding the hem and stitching it in the ditch, plus I used way more pins and attention than I think I ever have before.  It was necessary because the rib binding is way more stretchy than the body of the vest, and in fact there was a 2cm spot near one side where I didn't catch the hem binding properly and I think I went back over it six times with increasingly bad results, because it kept pleating instead of sewing straight.  I needed the support from sewing the entire bottom together otherwise I might have even considered hand stitching that hem up. 

I'm really happy with my vest.  It's exactly as I pictured and while it's not quite weather-appropriate I've been finding ways to make it work anyway. 

Thanks for Meredith at No Basis in Reality for yet another photo shoot!