Showing posts with label Blended thread. Show all posts

Monday, 3 August 2026

Kila love

You guys I'm just kind of drowning in amazing clothes lately.  I don't know if I hit my groove, if I usually make things for other people, or what.  Or maybe it's simple: the KILA TOP happened.  

First version is in heavy rib knit.  The kind of knit I struggle to use for anything.  The original sweatshirting is long gone, it's too heavy to really make anything with, but I have a lot.  So I made a tester version of this top.  Size 4, no changes to the pattern.  

The finish for the bindings is similar to the Mission Maxi top, I quite like this way of doing things.  The big difference is that now I'm trying to coverstitch to finish the bindings and I don't quite know where to put the coverstitch seams.  I have so many options - I can do 3 or 2 stitch, I can centre it on the rib, over the ditch, or below the rib.  What is the right way to do things?  

On v 1, I did two rows of stitching next to each other on the body.  It's not visible on the rib, and sort of seems like it should be on the rib rather than the body.  Also, this does not actually keep things straight, the fabric is not quite so friendly and so you can see all the places where it slipped around.  As expected, there is a bit too much length in the straps, but the armscye is good and the length isn't too long.  This is going off to a friend of course. 


Moved on to v2.  I removed about 1 cm from the front straps on the pattern pieces, which is a usual fix for me.  I didn't adjust the pattern in any other ways.  

This is a very stretchy pink knit with some flecks of brown in it.  I don't recall what blend it is, but probably viscose or rayon.  It is transparent.  I wanted to use it for knit Arthur pants, but I didn't have enough.  So I made this top two layers, and just treated them as 1 throughout.  This time for the bindings I switched to centring 3 lines of stitching with the middle line in the ditch to keep things straight.  This does not actually keep things straight, the fabric is not quite so friendly and so you can see all the places where it slipped around.  It looks a bit messy, also because the top stitching is brown and it is visible.  This shirt is very snug, the fabric obviously has less give being two layers and not ribbed, but none of that is bad.  I don't know if I'll end up giving it away but I am happy with it.  


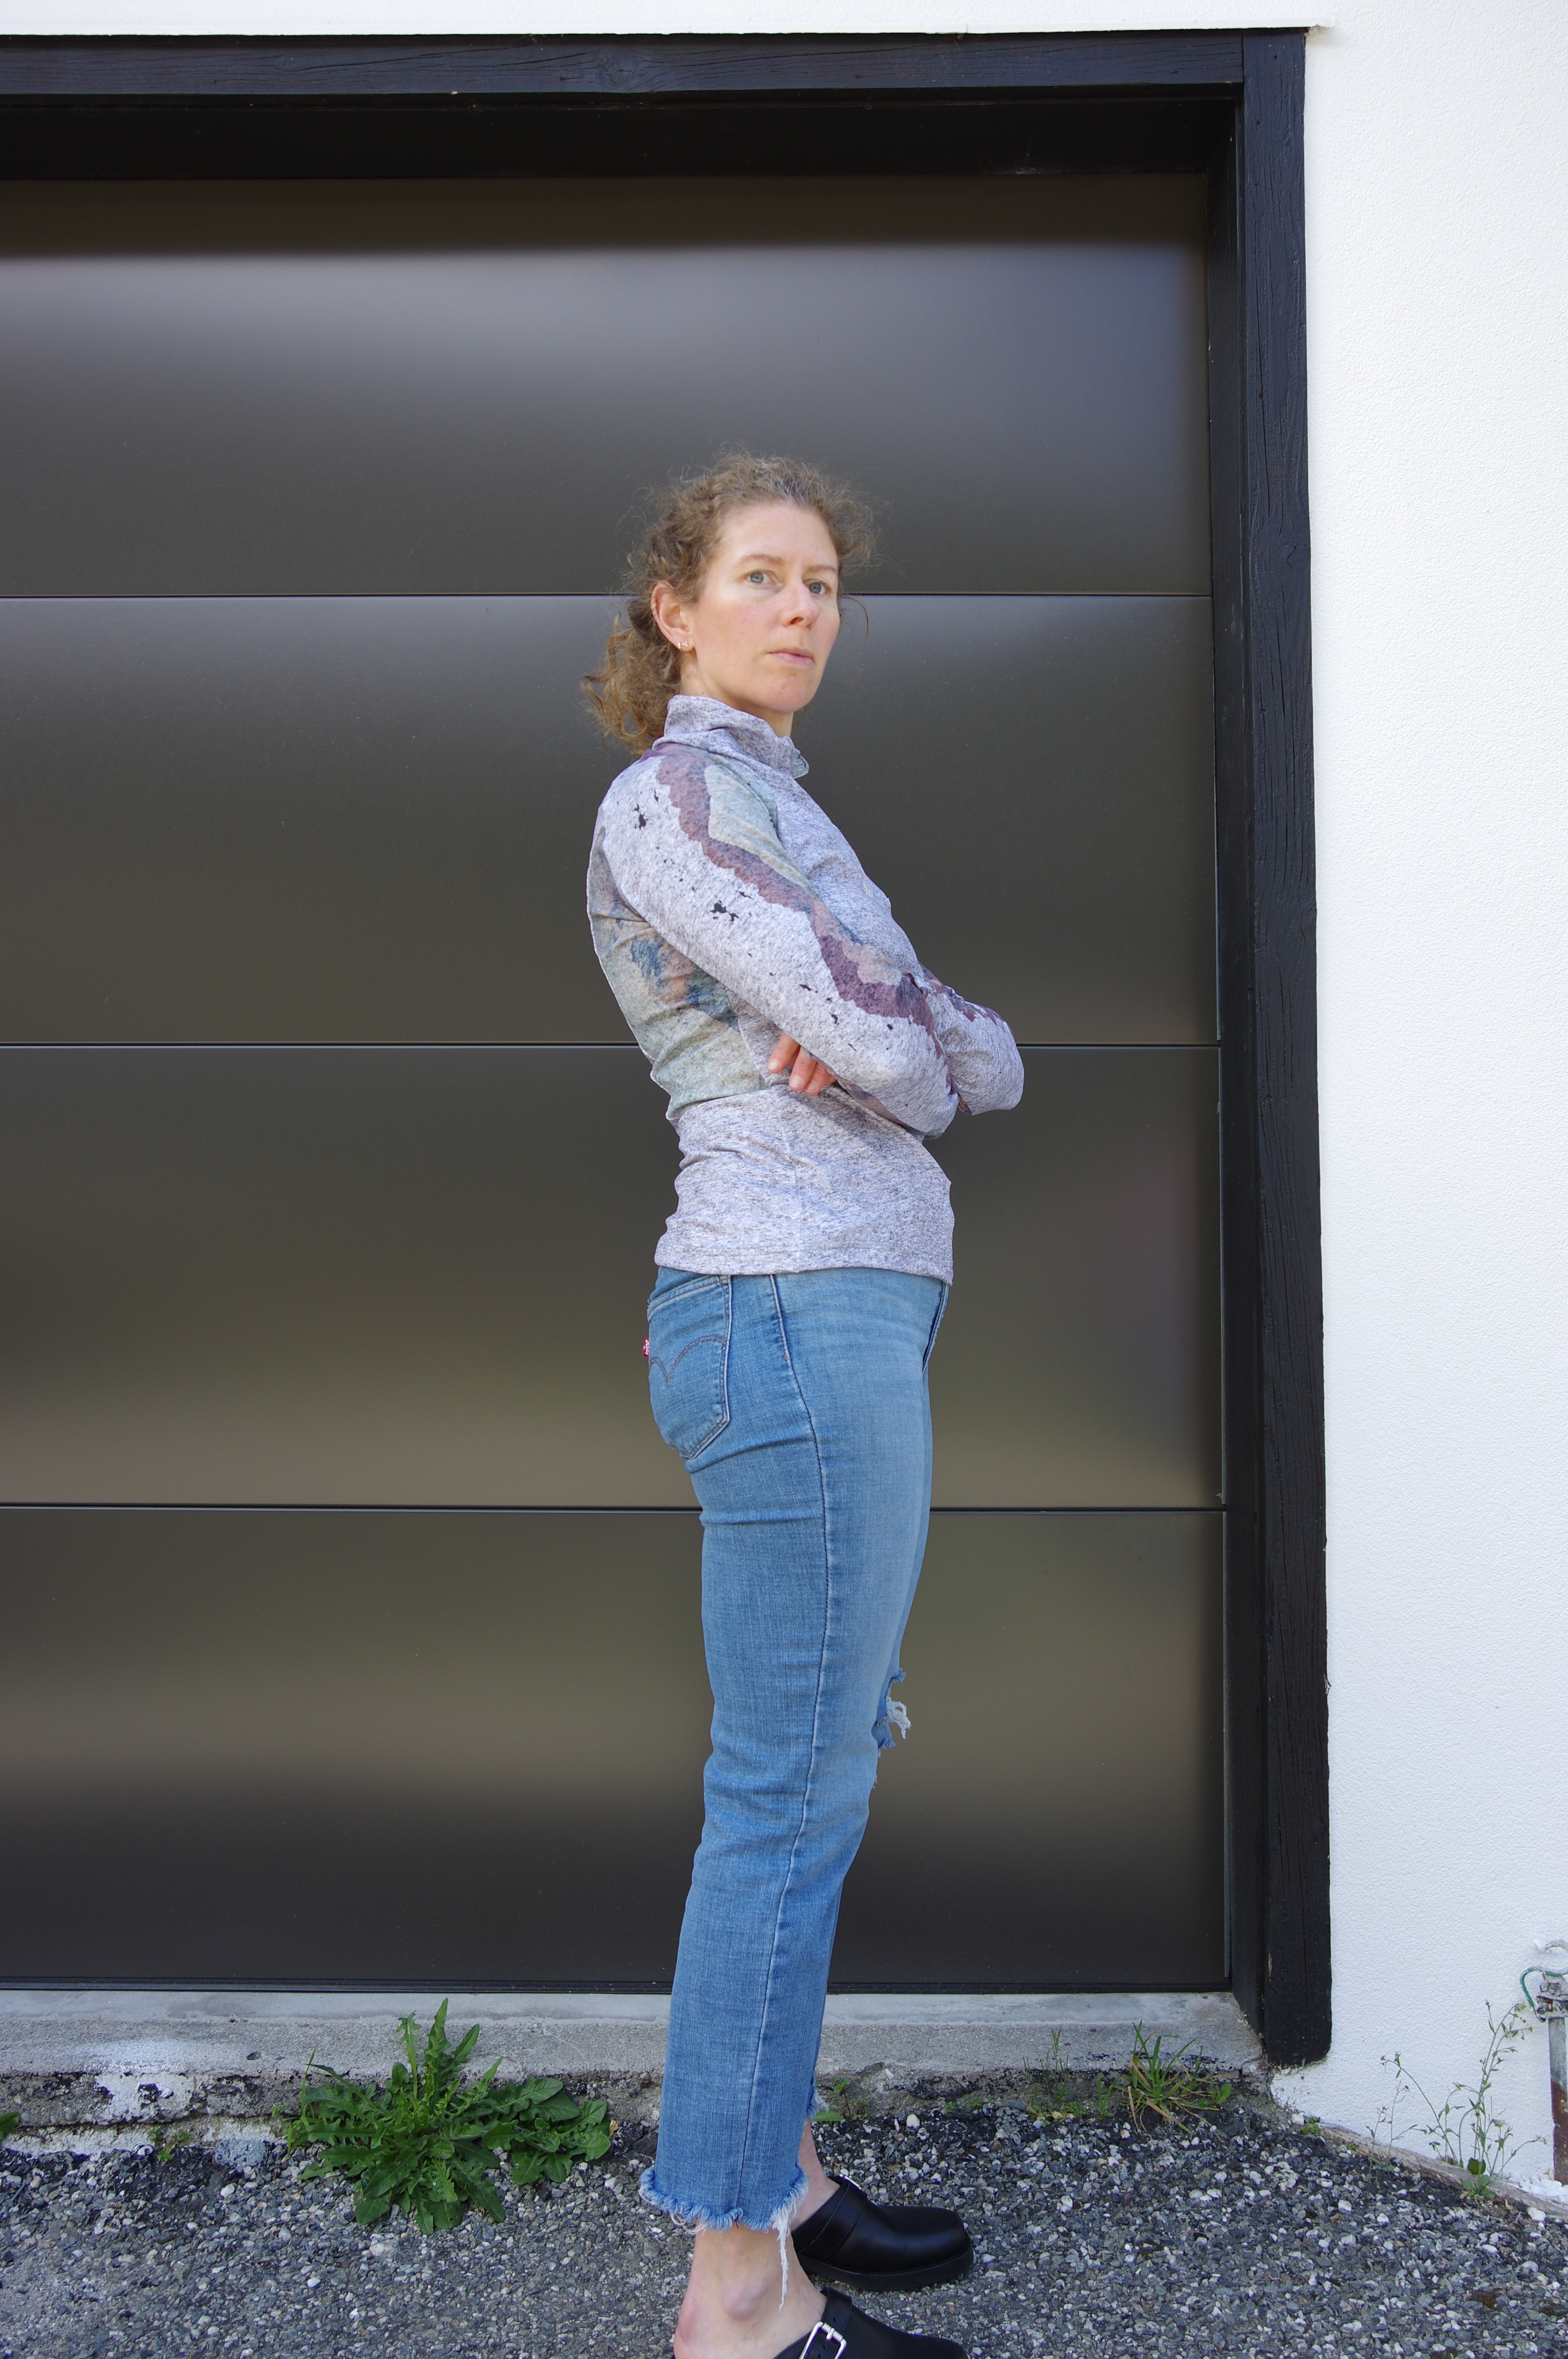
Finally I was inspired to make v3.  This fabric is a beautiful light rib, with irregular ribbing, and of course the pattern is spectacular.  It's very stretchy but retains it's shape nicely.  This time around I did the two outer coverstitch rows but not the middle one (this is my preferred coverstitch), and did 1 on the rib band, and 1 over the edge on the body to catch the underside of the binding.  It looks terrible.  As before no matter how much control you think you have, when the coverstitch machine sandwiches things together it pulls them to one side so a straight line is not always easy to achieve.  Despite this I put this shirt on immediately and haven't taken it off since, so it took awhile to actually get photos because I was busy having fun in my amazing top. 


No I'm lying, I eventually took it off to wash, but I basically sewed 6 items prior to my Europe trip and wore them all the time on the trip, they were so fantastic.  I'm just feeling overwhelmed by having so many cool new options!  

Thursday, 11 June 2026

Made a pair of Lift leggings...and then another one.

 This is the second time I've made these, the first one got onto Insta but only as a flat lay for Reasons. I made it from swim fabric. 

I sized down to a D the first time (I think) and they were too xrated for photos.  It ends up...the gusset matters.  Tiny but mighty.  But also they were really snug overall, though I liked the rise.  Maybe because Swim Fabric is really different to stretchy normal fabrics, I guess.  This time I did size E.  

Easy to make.  The V where it all comes together is just barely off from perfect, oh well.  The rise is VERY high, these go way above my belly button.  Fine, I can actually wear some cropped top things for hot pilates for once.  But I will shorten them next time.   

They were successful in hot pilates. A win! The ruching still disappears when I wear them.  My bum must just be mighty I guess.  


So then I had some leftovers from my beautiful ribbed tree Kila top and thought I might just barely eke these out.  The first pair had done well in hot pilates class, though it's a bit lumpy at that V seam when I'm lying flat.  I can overlook this, but I might eventually just make some super plain leggings too.  Eventually.  I shortened the waist 1" by just cutting off the top.  


Anyway I managed but the trees are upside down on one leg, which I rather like, it adds something to the psychedelic look.  I'm so pleased!  And then I compared these pattern pieces to my first attempt at these shorts and the difference is like 2" so I must have really done something wrong when I printed that out, it seems like more than a single size difference.  

This second pair is much stretchier, because it's a rib fabric.  I have to say that Blended Threads seem to be improving their fabrics and their print jobs, because there's less show through and this rib as well as the bamboo options are so great.  I'm actually waiting for Tessa to tell me it's time to make another order!  My partner wants some underwear in this fabric!  And I am so happy with my new options for hot pilates, as a good environmentalist I've been wearing the same pair of cotton op shop leggings (they were $1!!) for the past 3 years...it's honestly just nice to see some different colours in the mirror.  

Tuesday, 11 November 2025

Elbe Textiles Weiland tank in rainbows

 I saw this tank top on enough people to know that I wanted to make it.  The graceful low back, the V.  It's a beautiful design.  Despite that I really didn't want the process of making it.  No idea why, but this was not a project I reached for with excitement, more like dread.  I tried to spice it up by allocating a beautiful scrap of rainbow fabric, but I still didn't love the process.  I made size B - as always high bust is a useless measure for me, but my bust at 33 is accurate.  I didn't make any modifications. It's quick and easy and the gentle V neck is really lovely looking.  I didn't pay a lot of attention to the pattern instructions for finishing the sleeve holes as I am quite confident with burrito methods.  I didn't have any issues except that I put the shelf bra elastic on backwards so it shows the ugly side towards my skin.  (I am always puzzled which way is the correct way.  It does look good like this.  Maybe it's correct.)


The fit is fine, but rather snug.  I tried it on with a bra and it looks too tight.  Without a bra it is much better, and I think that's kind of the expected fit.  Nonetheless I think I need to make this from a rib fabric (or size up.)  I have lots of rib fabrics that need to get used so yet again, that should be a win, but I will have to overcome the inertia of not really being in love with the process.  This particular top is going to someone just a bit smaller than I am.  I also struggle with crop tops because I have no torso length, so they can kind of overcompress my chest and then balloon out below. 

Thus, I don't entirely know what I think of the length, but in summer some tops with this crop length are great to wear with linen pants, so it should go well enough with a number of things in my wardrobe as long as I choose the right colours and a more forgiving rib.  I'm thinking a bit more lately about sewing specifically to fit gaps in my wardrobe, and I do think a few more attempts at this would be worthwhile. 


Friday, 20 October 2023

Greenstyle Veltori top review

When I saw the Greenstyle Veltori top I was actually, finally, sparked to start making my own activewear.  I'm not sure why this did it.  Maybe because it's a style of top I specifically buy thinking I can't recreate it.  I don't have heaps of them or anything, but it definitely is something I see in my RTW activewear pile.  I've faced the fact that I need to make activewear since it's what I wear the most, instead of telling myself I have enough secondhand Lulu to last my entire life and don't need to make more.  (It is always a lie anyway, the secondhand Lulu keeps coming...)

I also had this fabric languishing in my stash from our Blended Threads order. It's the activewear fabric. I already had made some pants from it, and I find it to be too polyestery and sticky for my liking.  I was thinking of making pants with it but was happy to change tack.  It's a single metre of fabric and I did get to do a bit of pattern positioning, but not perfect. 

So, the pattern.  Greenstyle have NOT done well on their A0.  There's nearly an entire empty wasted page with a sleeve on it.  

The size chart doesn't match me very well.  On the last pattern, the Lumia, I had reviews to follow but there are no reviews of this with any actual information in them.  C bust, D waist, E hips?  Hm, what to do?  And what to do with the high bust info?  I did pay attention to the high bust, thinking it's so tiny of a number (should know better! Ignore!!) and so I went for a size D going out to E at the hips.  

Next, there is a side piece.  There are 2 cut lines on the front and back pieces.  There is NO instruction anywhere clarifying that if you use the larger cut lines, you don't need the size piece. I had extrapolated this while cutting, because I really had no extra fabric.  When I got down to the sewing room and looked at the instructions, I believed with panic that I still needed to cut a side torso piece.  In fact, the instructions also ignore that they have made two possible cuts and don't provide any comment. 

I went into this grumpy because of that side piece drama.  I had to force myself into the sewing room, and so I started this project kind of presuming I wouldn't like it anymore.  Because of that I didn't interface the sides of the zip.  Please, interface the sides of the zip!! It isn't in the instructions (they say to use double sided sticky tape for the zip) but really you just need interfacing.  I would interface both sides. My inner side stretched a lot which was irritating, but actually had little to do with the final result. The way this comes together is a cute tetris and once I got over my irritation and realised I *did not need* that side piece I enjoyed it.  It's a fast project.  

Another comment: use a zip of the correct length. Otherwise, you have to sew over the zip when you attach the front to the upper front, and it's hard to do neatly especially if you are overlocking.  My zip was long and I did gingerly overlock through the teeth. I think it gives things a slightly more bubbly finish in that spot.  I also think that the zip garage is unnecessary here.  I thought it would make it more high-end but really, you don't need it. 

Mostly everything is overlocked, there's a bit of the side front that isn't and it's best to overlock those edges before you attach the next piece or they remain unfinished forever. 


 I have given up ever looking very well groomed in my photos, as you can tell, but I also left my dignity behind in the hopes you would be able to see the front features better. 

It is too big.  I think the fit in the chest needs to be snug and so a size C would have been better, depending on fabric I might have even done ok with a size B but I don't have an instinctual feel for this company yet so I'm not sure.  I shortened it 1" at the hem and I could shorten more, I didn't feel like messing around with all the pieces to figure out where to shorten it otherwise.  The overall feel of the D is too big, like the way the chest sits isn't right.  

In the end I enjoyed the process. It's not a perfect pattern but once I feel like printing out the a4s and putting together another size I will pretty happily make myself this in some coral merino I have sitting around.  I might even make a size B and see what happens since merino has quite a lot of give.  This one is, as always, going to a friend.