Showing posts with label Renfrew. Show all posts

Friday, 11 May 2018

Me Made May 2018 - week 1

I decided sort of lackadaisically to participate in Me Made May.  I'm working nights, living in limbo and it means I commit to anything these days rather hesitantly.  Even wearing things I make.  Which I do anyway.

Because I don't change clothes on a normal schedule (nights! and surfing!) I'm not bothering to take photos of me in the clothes.  I have put in a modicum of effort to make sure I'm wearing something me made almost all the time, though - I think I didn't sleep in me-mades this week but sure, I can fix that for the next few weeks.  Conveniently enough I'm about to make even more loungepants!

This also forced me to finally learn how to make photo collages.  I'm so behind on the concept that there is an app for everything.

Week one included the following items:

Many tshirts: Briar and 2 Renfrews - the red one is upcycled
Mission maxi upcycled tank.
Mystery swimsuit, pattern tester.
Hampshire pants
Calyer pants.
New Jalie cardigan, soon-to-be blogged

I'm perfectly aware that my wardrobe in New Zealand ends up always falling back on comfortable, easy wearing but not necessarily flattering basics.  I am repeatedly surprised how much wear these Hampshire pants have gotten but they are the perfect post-surf pants for fall and winter, which means I wear them regularly once the weather is too cold for capri length pants.  

Sunday, 24 September 2017

Musings on pattern placement

This post has less to do with the patterns that I used (which are the Patterns for Pirates coccoon cardigan and the Sewaholic Renfrew) and more to do with planning, reflection and instinct in sewing.

I am reminded of something that Sophie first put on her instagram. (here) She didn't blog about it.  I'm not sure that link will work for everyone but the gist of it is: she bought fabric from the Fabric Store because a piece of fabric said Take me home and make this dress!  And the vision was absolutely electric - the dress is crazy but it works and she looks amazing in it.

When I do that - when I know exactly the fabric, when I have enough background about the pattern, and I have the skills, ie I'm not pushing my level too much and can therefore push the pattern to be its very best - when I demand that the result be not just wearable but amazing - it is.

And I don't bother to do that very often.
I think that instinct is the hallmark of the sewists that we follow, although taking good photographs probably helps.  They have, by luck or by hard work or by talent or by experience, figured out their own style and they are willing to put in the work here and now in this project to make it as close to perfect as possible.  And the results look amazing, they are worth the effort. They are that magical thing we all want to achieve: better than RTW.

I bought a huge amount of mountain print merino in Auckland at the Designer Textiles warehouse.  It had paint splotches on it and a few holes here and there so they gave it to me for 5 dollars per meter.  Of printed merino.  I took lots.  And my first goal was to make a top with a mountain on it, similar to a certain one that I coveted by icebreaker.

I had some plain cream fabric to use as the accents, but despite my instinct, I went with mountains for the sleeves.  This project quickly fell out of my favor.  The mountains on the chest are somehow in...the wrong place.  The mountains on the sleeves are...annoying the hell out of me.  The whole business doesn't work. 


I took this and toned it down.  I listened much harder to my inner voice and popped out this little Patterns for Pirates cocoon cardigan.  I was careful to make the upper sleeves only pieces of blue sky, and the cuffs and the hem band are cream merino, not the patterned stuff.


This one works a lot better.  In fact, this was a chance to test out this pattern and I went crazy shortly afterwards and made lots more cocoon cardis!  Patterns for Pirates has my attention!

I was very reflective after this experience.  Making one project badly definitely led to thinking harder about making the second project right.  But what kind of commitment do you have to make to each sewing project to make every single one count?

(PS I still had friends who liked the Renfrew so off it went to a new, happy home.)

Tuesday, 23 May 2017

Sewaholic Renfrew x2 (and one is upcycled)

I got annoyed pretty quickly with how I somehow left all my me-made basics behind with this move.  I wear a uniform at work and sportswear most of the time when I'm not at work and there's no way I could have attempted me-made-may under these conditions!  The result is that I basically listed up a capsule wardrobe of basics to sew, just so I can make sure I'm always wearing something I've made myself.  Tshirts were the first on the list because I hadn't brought enough with me.

I got settled into my new place and turned my room into a sweatshop producing tshirts like never before...I've decided to categorise my blog posts by pattern and I'm actually pretty curious which of my tshirts will stand the test of time and become my favourites.

First the boring, tried, tested Renfrew.  Size 4, modification: 2" waist shortening.  I am 33-27-37 and very short waisted, 5'4".

The periwinkle fabric is a merino blend with some poly in it, and has a very small terrycloth knit inside, which does give it a bit of a variegated look, although it's not actually striped.  It's moderately warm and I snagged it at The Fabric Store to make some new Anima sleep pants.  (More on those later.)


I think the wrinkles above the bust are just because I didn't pull it down because I never notice them when I wear it!

The red top is upcycled from an XL shapeless top by one of New Zealand's real sweatshop chains, Glassons.  It was about $4 in an op-shop.  As you can see it had some gathers in the middle.  What you can't see is the ridiculous elastic neckband.  Sorry as always I forgot to take before photographs.


I have nothing to say about construction except that as always, with upcycling you have to let go just a little and it makes things more exciting.  The jersey was tissue thin and my room was cold so it got fiddly.  I used the original arm bands, just cutting them shorter to match the pattern.  The neck band is my own, and the gathered bottom is the original.  It was mostly luck that made it match up lengthwise on the front and the back, although I did try, I thought the front would be shorter.


I love both of these, as the Renfrew really is my favourite pattern ever, and these both went into immediate rotation.  Although my upcycled top might be made of older fabric that will fall apart, I was particularly in love with how it turned out.  The waist feature makes it that something different and the ancient fabric means it already feels soft and worn-in.

Saturday, 11 February 2017

Deer and Doe Safran pants

I was really excited about these pants.
I got stretchy fabric from emmaonesock, which was nice because I knew the % stretch was the right amount.
I read a lot of reviews, including how to make various adjustments.  The pattern itself comes with suggestions for adjustments to make.
I made an (unnecessary) adjustment (I seem to do this a lot to pants patterns...).

I made a size 38 going by the measurements chart.  It's possible, with such stretchy fabric, that I should have gone down a size.  Waist 27, hips 37.

I cut the pants out and then a lot of life got in the way and although I'd been so excited to make them and WEAR THEM right now now, it didn't happen and I had to kind of regain my enthusiasm.  Which was hard.

I love Deer & Doe and I think slowly I'm making nearly every pattern they have put out.  But this one, as far as I'm concerned, is a loser, and I don't recommend it.

Everyone complained about the kind of reverse-mitre of the pockets.  The instructions aren't clear on how many layers to sew, and I think even when you sew the layers correctly, it is very difficult to get a clean corner on the pocket.  It's not worth the pain.  I do like this pocket shape in theory but I think the only way to salvage the pattern is to not use them, unless you are willing to muslin just the pockets until you get a technique that works reliably.

Next, the fly instructions and the fly pieces for the front zip confused me.  I never got this straight.  My zip is really visible, because I have no idea how to do it otherwise.  I reviewed the fly instructions from Lauren's Thurlow sewalong, which has saved me many a time, and while it did help to straighten out which pieces belong to what, a (theoretically) invisible front zip without the fronts overlapping seems impossible. And that seemed like what the pattern wanted me to do.

Plus the butt increase that I added was totally unnecessary.  I don't like the shape of the butt, it's way too flat and baggy, and I don't think my small (a few mm) increase is entirely at fault.  The waist is also really truly a high waist, and it's a bit exaggerated for me.  I like a high waist, but I'm not sure I like it this high, or that I like having such a long front zip.

I was so annoyed so I put in a snap rather than a button cause it was easier.  And actually I really like the snap!

Overall, this pattern could likely be salvaged by skipping the pockets and by totally ignoring the fly instructions and doing a fly per any other pattern, like the Thurlows or the Grainline Maritime shorts. (although you might need to cut slightly different pieces...).  The only reason to do this is if the fit of the legs is utterly bomber.

And yes, after these sat for awhile and I forgot the sewing trauma, I noted that although they aren't really that flattering, and my front zip is ridiculous, they are comfortable and the pockets are stretchy and useful.  The pants are so stretchy that I think they will stretch a lot and feel too big! 


looks better blurry...


And yes, that's a bonus Renfrew.  I thought I made it 2" shorter than the pattern but I think I might have mislabeled my pattern piece, and only shortened it one inch.  I'm going to make sure to shorten it another inch next time. 

Tuesday, 7 February 2017

Closet Case Patterns Sallie top & 2-layer Renfrew

This Sallie top is totally cobbled together out of scraps.  I adore this rayon and wish forever that I'd bought 12 meters instead of just 2.  I was struggling to find a pattern that I could use for it.  Trying to mix and match a bunch of different weights of jersey turns out looking very homemade, so I wanted to avoid that.  And luck had it - I couldn't make a Renfrew out of it because I would have had to use different sleeves and bindings.  But I could fit the two pieces of a Sallie out of it - and I had been musing on making a Sallie top.

I was going to upcycle a merino wool skirt for the lining but the skirt looked like loads of fabric...until I got cutting.  No matter how I turned things, I could only get one piece out of it, and was left with the conundrum - what could I put together with that?  I ended up using some black stretch silk left over from another project.  I knew it would be tighter and so I used that as the front.  It's also rather short but you can't tell.


I made the top as normal.  As you can see I didn't do anything so boring as cut the bottoms even, I just left them as the bottom of the fabric.  It's important when making this as a top to still sew that line of stitching along the bottom in order to hold the layers together - that is what keeps the neckline from rotating out.  My common denominator was the bottom of the silk, so I sewed at that level all the way around - but it wasn't done yet when I made these photos so that's why the lining peeks out a bit.

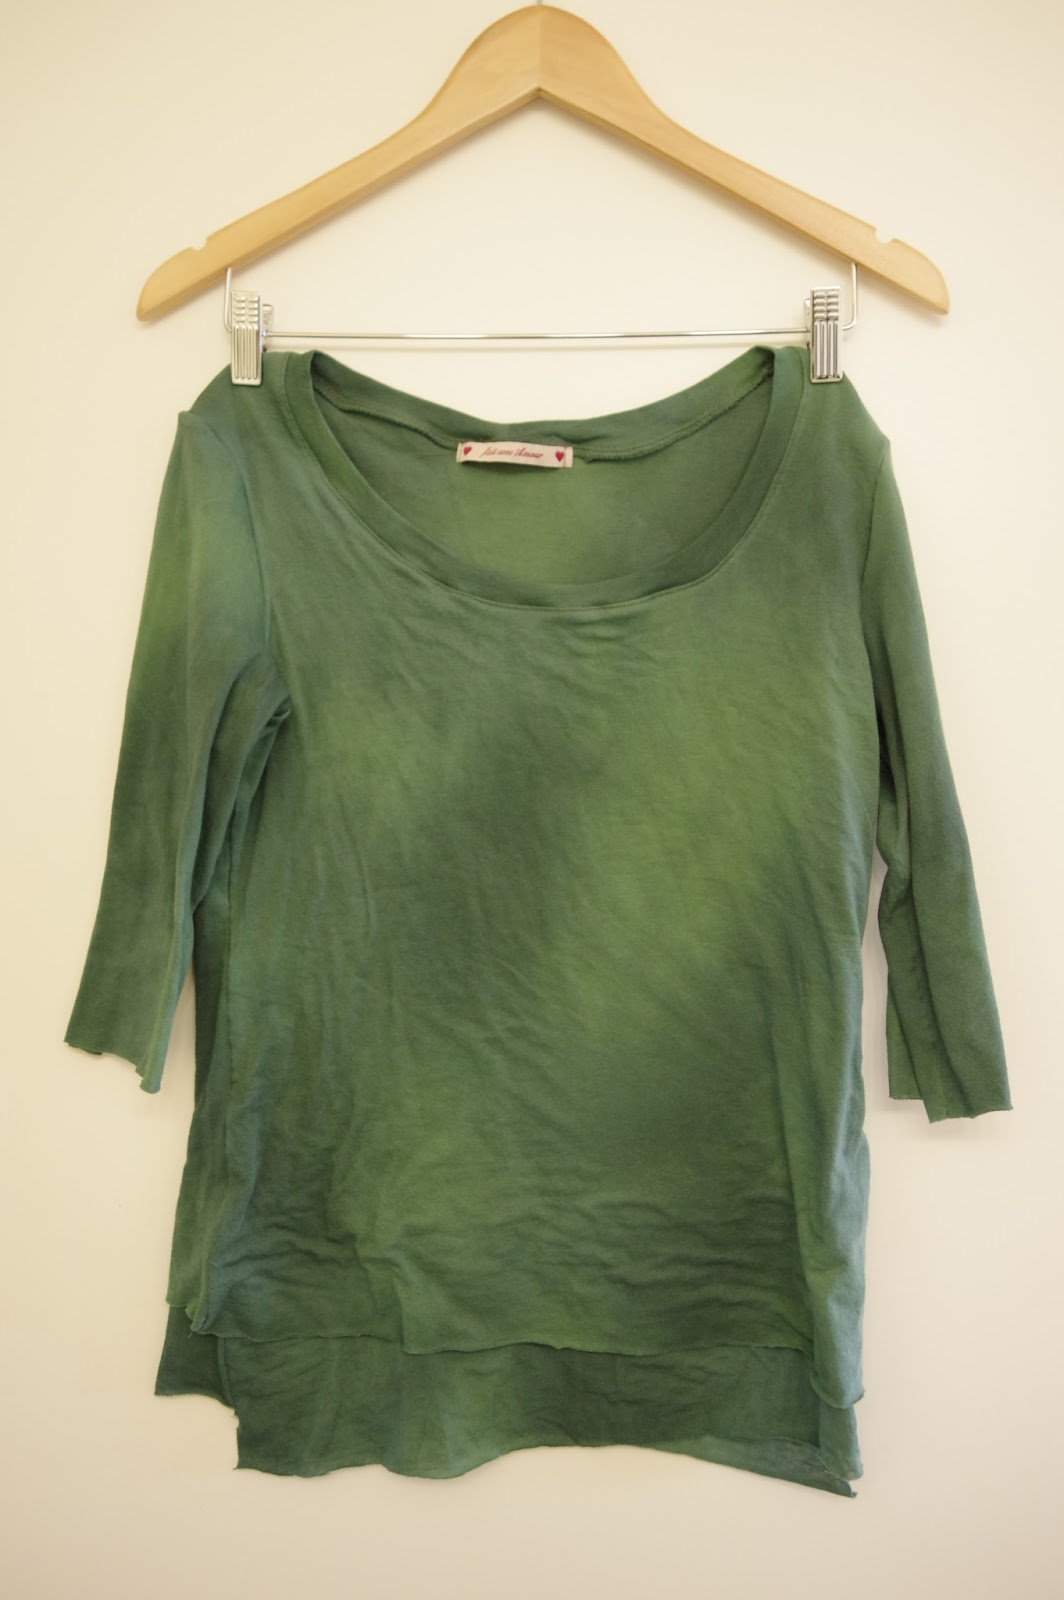
This was really an epic save.  I got a second top out of the best fabric ever and it's got a cozy silk and wool lining and I love the ragged bottom.  As you can see, since I carried that ragged theme over and made a two-layer Renfrew out of tissue weight jersey from Anna ka Bazaar:


 This fabric was meant to be a Sallie back when I bought it, but it was much more transparent than I expected so I set it aside.  Then I was going to make a Style Arc Kylie, but after looking at the pattern pieces I realized there was no way I had enough fabric.  (Reality doesn't seem to come into play when I buy patterns - I always assume I can somehow jigsaw all the pieces into any size fabric...)

The rule of tissue jersey is to touch it as little as possible.  It's nice not to do much finishing but the fabric is still a finicky pain to work with.

I used the standard size 4 Renfrew with a 2 inch shortening at the waist but the length is the length of my pattern pieces.  As you can see I didn't cut these even either.  I just put the shorter layer over the longer layer.  I sewed the shoulders together and the side seams separately.  The sleeves are elbow-length and are unfinished at the ends.  For this one I sewed the sleeve continuously with the underlayer and then sewed the overlayer separately.  I have varied which side I sew the sleeve with and I don't think it matters much.

I thought eventually I might cut the overlayer into something specific but for now I'm leaving it as is.