Showing posts with label Grainline Patterns. Show all posts

Monday, 27 December 2021

A multitude of tops: LB top, Hemlock, Glacial

This was prompted by a need to make a top for a friend, first of all.  But also, I had had a Vision, as you do and needed to follow it through. 

First off: the LB top by Paper Theory. As I have done before, this is without the funnel neck and without sleeves and without any other modifications. It creates a simple little shift top.  In this lovely flannel like fabric from Lamazi fabrics it's so cozy and drapey - I bought the wrong colour (it's hideous!  Haha the combination of dark green and gold really isn't my thing) and will suit my olive skinned friend Regina to perfection.  I use a small piece of bias binding for the neck, just folded over the sleeves on a double fold, and same to hem the bottom.  


Grainline Hemlock with minor modification of the sleeve 

This is a one-size pattern. 

This was my vision.  I have worked this pattern to death and my pattern pieces are a mess because of that, many pieces of badly labelled and taped together tracing paper.  Am I the only one who only accepts wrapping of my shopping if it will be wrapped in white tracing paper that I can reuse for sewing?

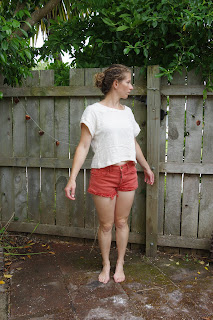
This version has just a bit of the sleeve added onto the shoulder compared to the original (which is a FREE PATTERN) - really just enough to create a seam allowance.  I have long since cropped it from the original which is a long shapeless top.  I then did a cuff of the same size as that sleeve bit - think maybe I should have tapered it a little. The cuff is folded double.  This fabric is by Mind the Maker.  It is their oeko-tex 100% cotton "organic slub jacquard".  It is quite heavy, almost sweaterlike, with only mechanical stretch and texture woven in.  Therefore a bit tricky as you need to think carefully what pattern it will suit.

 When I made this top I was really disgruntled the entire time because it looked so big and so...meh.  But the pictures show me that despite various neck band issues (I think I was planning to do it as a facing style band but that stretched out like crazy so then I did a tshirt type band instead), it matches my vision exactly.  I wanted a cropped but oversized pale top to wear all summer.  I need to get on with that next step - "wear all summer" cause the hot days are here. 


Pattern Fantastique Glacial skivvy, S 

This is the third of the tshirt bundle from Pattern Fantastique.  The price for the bundle was good.  I suddenly wanted a nice baselayer top (which I won't wear for months, honestly) and I thought this would be a great choice.  I didn't size down as the fabric I am using is a medium weight and not super stretchy, and the pattern is specifically drafted for merino blends.  This is another one of the Oeko-tex fabrics I got from my european shopping binge, this particular one from Ansje Handmade.  It is Mind the Maker organic woolen ottoman, 85% cotton, 15% wool.  It has a kind of horizontal rib look on one side and a smooth other side, and has a bit of a sticky feel ie none of the drapey dampness of rayon or viscose.  I went with the short waist length and to my surprise for a baselayer I could even have gone longer.  The long sleeves are just as the pattern says they will be - they go perfectly to my knuckles.  Near the end of winter and in early spring I was wishing for a top like this so I assume once the weather cools again I will wear it a lot.   


These patterns don't have any instructions, which is why they are cheap for the 3 patterns - but there are some instructions online if you need them (I think the Aeolian has more detailed instructions somewhere online too.)  I'm really enjoying this tee bundle!  The Equinox was lovely, though now that I've worn mine I will stick with the smaller size I made - and I'm sure once I get the itch to make the Aeolian I'll go crazy and make 3.


Wednesday, 10 November 2021

My extra long Grainline Tamarack

I have made two previous attempts at the Tamarack jacket.  Maybe I should have just followed through on my first one so many years ago, which I wasn't going to quilt, but anyway, I really wanted to do it properly and after my second one, which was of prequilted fabric and with patch pockets, I wanted the experience of doing it all.  Having made a quilt took the fear out of a lot of things, and quilting is one of them.  

I will say: making a quilt was horrible but it has paid such dividends in new skill learning!  So worth it!  

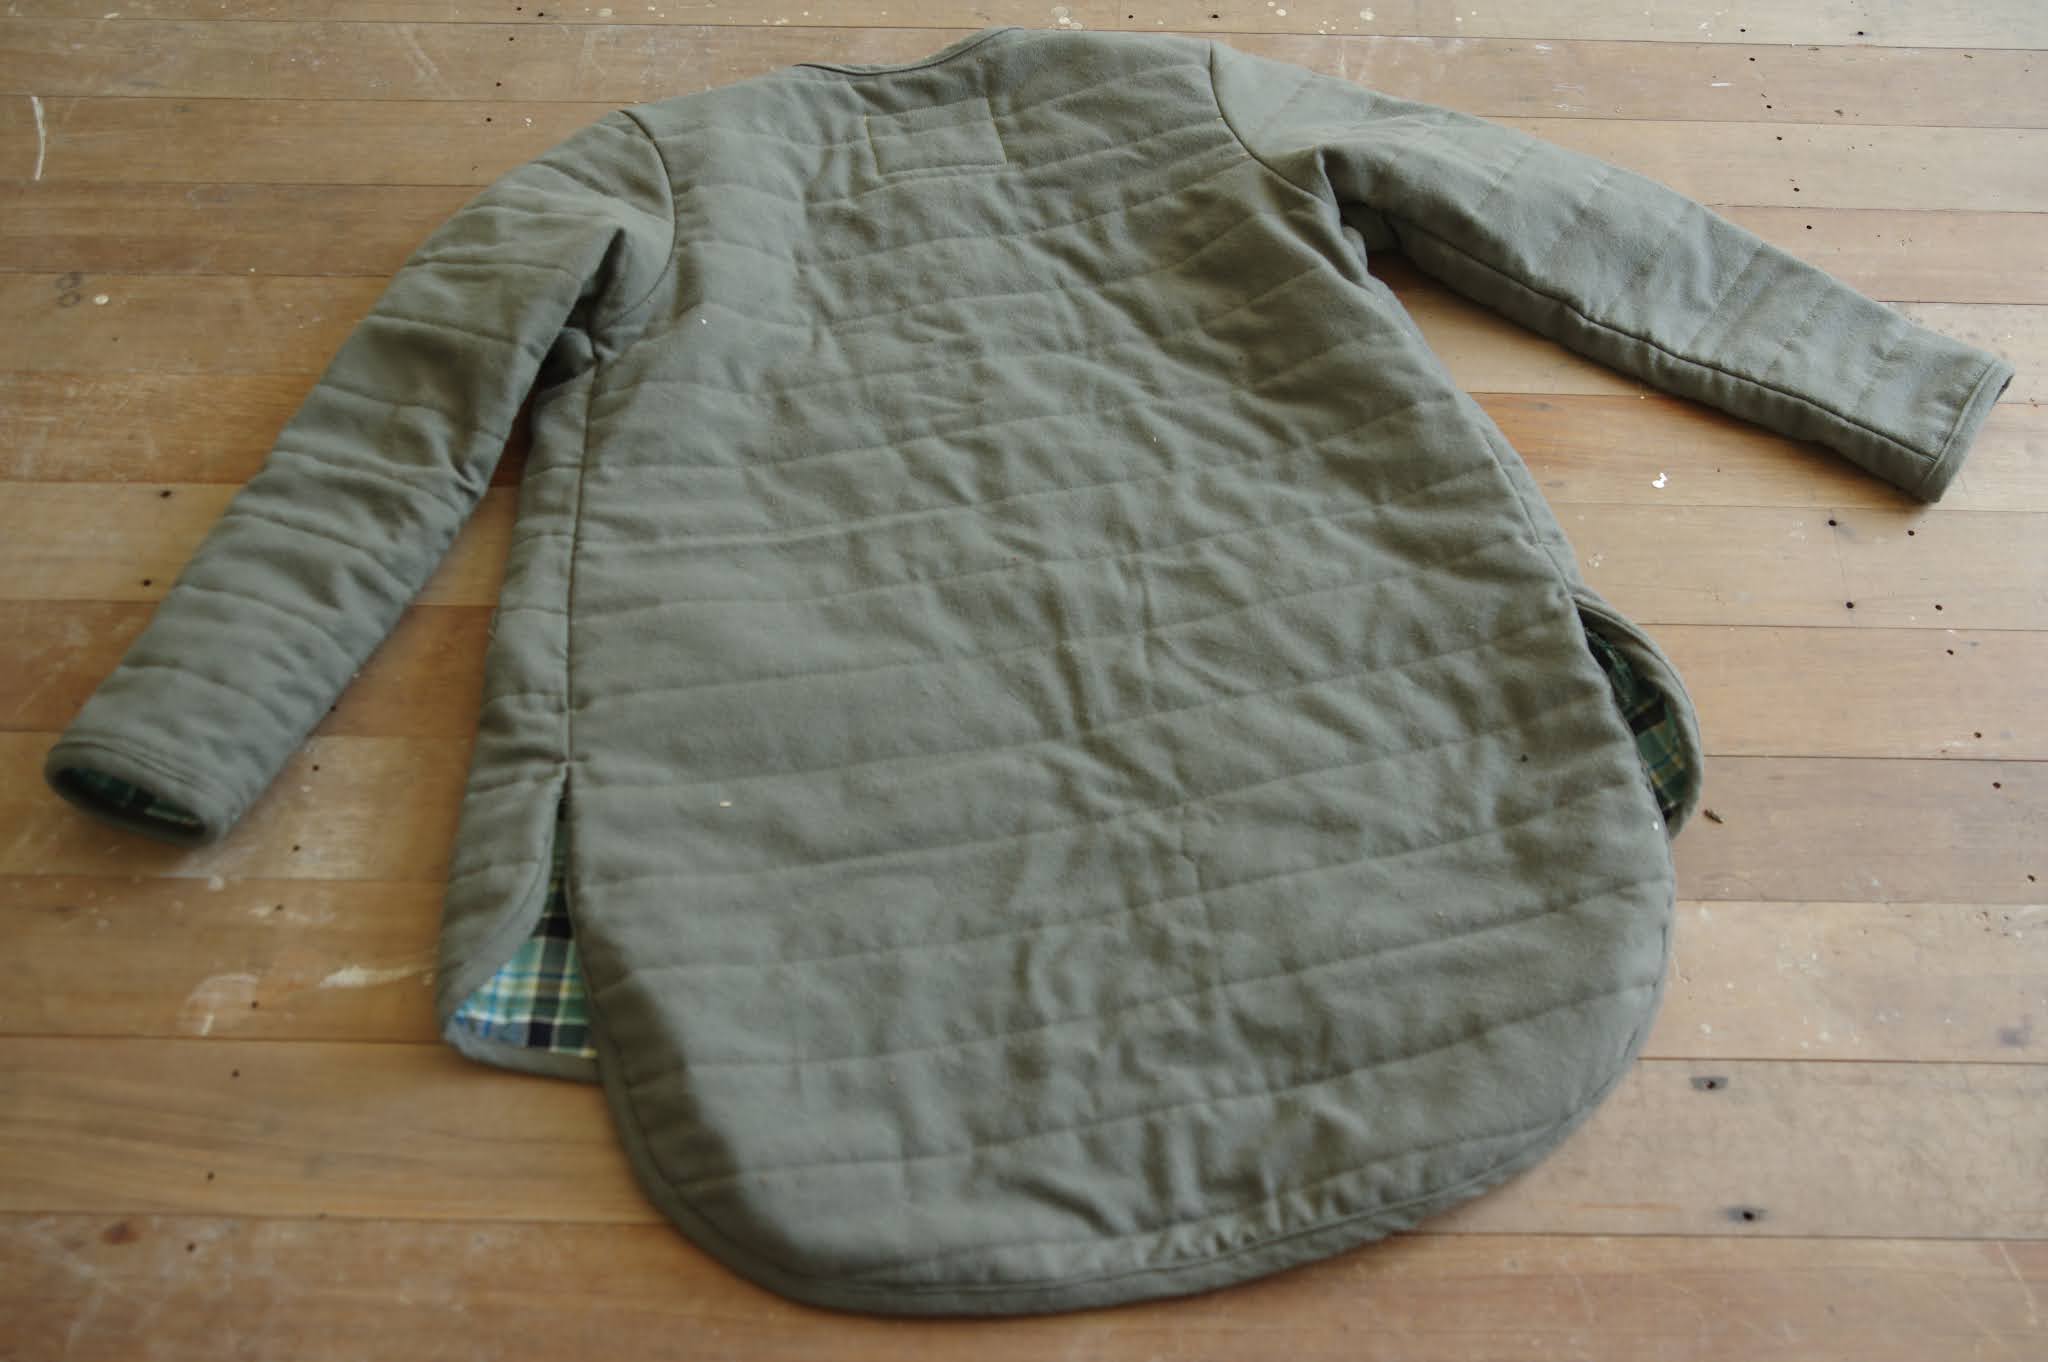
When I finally got on the road to making this particular Tamarack, it was due to inspiration from a RTW jacket with plaid lining, maybe a year ago.  I made the black quilted Tamarack which seemed to fit ok, (I made size 4) and which I gave to a friend, and then had the confidence to trust I should quilt one for myself.  I had this fuzzy wool blend from Mood from a few years ago, and after investigating plaid linings I got this wool woven from Emma One sock last year, but then I had to wait - because I was going to use the same batting from my quilt, so I had to make it first. Hah.  (The batting wasn't enough and I still had to buy more...)

My big vision was that I needed to shorten the front and back separately so they would still meet quite high up.  I lengthened the front 2" and the back 6".  Once I had done that it was straightforward to cut everything out and quilt it and then trim everything down to shape - but it did take time!  That upleveled the feel of the jacket because quite a bit of effort goes into it.  I used a bias binding on the side seam edges and the shoulders.  It doesn't look particularly good, I'm not sure how other people kept it from being lumpy.  I overlocked most of the other seams because I didn't have enough pretty matching bias tape and it seemed kind of like a wasted effort anyway.  

My major drama was with the welt pockets.  After quilting, you've already done a lot of work and you want it to go well.  I found the instructions bad, of the vague variety, and they didn't lead to very successful welts because I didn't cut the sides down properly.  For this reason I recommend with these instructions to do a practice welt on scrap fabric so you can understand what they are saying.  It's hard to know what edges to finish, and in the end I had to hand tack the top of the pocket in place - both the top of the pocket inside the jacket, and the sides of the welt outside the pocket, where there were sad huge gaps.  The insides look ok because they hide the messier bits, but it's not a satisfying aesthetic for me.  I've now done a bunch of welt pockets this year and I think I'm starting to itch to FIGURE OUT the welt pocket so I can just do them my way and know they will satisfy me. 


Also, the fit of the body is comfortable, but the sleeves of this jacket are slim cut.  On me, it suits as a spring jacket with a tee underneath.  I would not be able to wear any more layers. The prequilted version felt very very light, and was much looser, so this is an effect of quilting.  Of course I knew that quilting would make it smaller...but it's different to actually experience that fact.  Quilting also makes it feel heavier and more substantial especially with this heavier outer fabric.

For the snaps, I considered using my prym snap kit but I'm very suspicious of the quality.  Maybe unnecessarily - I recently used it on my Landgate and the snaps were perfectly fine.  Anyway in this case I hand sewed snaps in place, and I'm really pleased with the secure feel of them.  


I'm really glad I made this.  Too bad I took so many attempts to get there!  It's not a pattern I found particularly fun, and the fit of it is only ok.  Now, in the meantime quilted jackets have gotten popular and I think there are other patterns that suit me more.  I will most likely try the Hovea pattern next year. 

Tuesday, 17 March 2020

Various bags, some of which are free

Ugh, why is everyone, me included, so desperate to get our hands on fancy bags to store our knitting?  I've become really disillusioned with this; I'm happy that independent human beings who are making things are able to drum up so much business that we are lemmings for the literal second that the items are posted online...but I hate being the lemming that didn't get the bag, month after month.

I tried to make my own.
(In truth my Ida bag, here, is going strong! I really should just make more big Ida bags.)  

Bag one is a wee drawstring number.


The drawstring isn't done properly because I only had one strand, and you are supposed to use two strands, one exiting on each side.  As long as I remember that and only pull the one side I can shut it just fine.  This project really mattered to me because it's made from scraps leftover after I made my first, failed metamorphic dress. I really love this fabric so I was happy to make the bag and at least get a little bit of the fabric in use.  Now, two years after the fact, I've finally harvested that fabric into a Sorbetto top so all is good in the end!

Here is bag 2, the Summer Madras Tote.  Here is the link.


This took forever to make because I am allergic to cutting out big squares.  It got trapped in moving mess. I had to buy extra solid interfacing for it...I pulled it out and then the idea of making my own bias binding stopped me.  Finally I got annoyed at having it sitting around.  This one is more of a grocery type bag.  All of that interfacing was Really thick!  I didn't have a problem sewing it, but it is a stiff bag, at least now before it gets broken in.

And then there is, of course, the Stowe bag.  I had the pattern away in my luggage in Australia but I couldn't wait *2 MORE MONTHS* and so I bought the pdf as well.  Sigh.  I experimented with some Stowe bags, made a bunch, got kind of irritated with them, and on my final version, bagging the lining so that it would be cleanly finished on the inside.  I store my knitting in it.  Haven't made the large size yet.  It seems bizarrely huge! 


This white one is the first one that I made, following the pattern, no lining, and I got a kit from A Verb for Keeping Warm (here are the kits, which are sold out) and did the sashiko stitching (my first!)  This kit consists of fabrics grown and woven in California.  The blue and striped one is the only other one I kept after I dispensed them among friends - it is two layers with no pockets.

Monday, 10 February 2020

Tamarack Time at last!

I've been about to make a Tamarack Jacket for about 4 years!  Seriously!  I bought the pattern as soon as a snap front option was available.  I cut it out once.  And then I just didn't believe it would fit.  I couldn't find good binding.  I left it behind and never came back to it.  Then I cut it out again another time.  I decided that fabric was a terrible idea and I ditched the plan. (true, it was neoprene, it would have been horrible.)

I think it is actually too bad I didn't make this back the first time I was prepping it, because I struggled for ages with jackets due to trouble fitting my shoulders. The drop shoulder in this pattern is a lot more forgiving than other patterns coming out a few years ago, and it might have inspired me in different ways at the time.  Anyway now we have so many drop shoulder options, it's no longer an issue!

Third time was the charm.
Fabric is pre-quilted Nani Iro from Miss Matabi.
Size 4.
Binding is linen from The Fabric Store.
I added patch pockets because I still did not TRUST this pattern to fit me, for some reason. I wasn't willing to commit to welts.


To my surprise it was so easy to make.  I sewed the bias tape to the inside first and then to the outside, because I have zero faith in doing it the other way.  I was annoyed by the instructions, hoping there was going to be some really cool method for mitring the bias tape, but in fact the way it has you sew the bias down is pretty cool and definitely effective.


I have a wild idea for a dramatic modification and I've been thinking about it and collecting the bits for months, so there's an underlying plan going on here.  I'm already thinking of another (third) Tamarack, with the welts, maybe even in quilted silk (I have some really precious bits of silk around and it's annoying that I haven't found a use for them yet.)  But my Prym snap kit is not up for the task so then I start thinking about how I need a proper snap setter.  Hm...

Anyway, I'm really happy I finally did it and made a Tamarack! 

Wednesday, 11 September 2019

Grainline Hemlock binge

Welcome to the Grainline Hemlock!  I didn't like this pattern at all when I first made it.  Since then styles have changed, as they do, and I don't know what sounds better than a drop sleeved oversized curved hem top.  This pattern is free and it's one size fits all.  It is better suited to lightweight, drapey fabrics.  Don't be like me and make it out of a stiff sweatshirting weight jersey (here.)

It took a few modifications to perfectly achieve my vision.

Version 1 is shortened 4 inches - this is the original pattern I used a few years ago.  In a drapey silk viscose knit it's fantastic.  I used about 2 inches of the sleeve.  I love this shirt and I think I was insane not to love it before.  If I keep rediscovering my own patterns, I'll never need to buy more!


(Yes those are my new Papercut Palisade pants.  I recycled pictures!)

Version 2 used the short version as the side seam length, and then lengthened (the back) and shortened (the front) using the curve from the Megan Nielsen Briar tee.  I also inspected the sleeve and changed the curve of the body, slightly like the Strata top body-sleeve area, so that it would not bunch up in my armpit as much.  (Interestingly this is the same design feature that I complained about on my first Strata top.  I reserve the right to contradict myself freely.)


Version 3 is the version of my dreams.  I lowered the front curve a bit, and also extended the shoulder seam down one inch.

This is merino blend from Otara in Auckland, land of cheap fabrics.  There may be a lot of blend in there because it's quite lightweight and doesn't feel like merino. 


And then on version 4 so I wouldn't have too many TOTALLY IDENTICAL items in my wardrobe, I added cuffs, but the shoulder seam is back in the previous location, same as the grey one.  This merino is from The Fabric Store, and it feels quite a bit denser than the stuff from Otara.  The challenge is on: is $40 merino better than $10 dollar merino?


I'm done with this now!