Showing posts with label bad fit. Show all posts

Saturday, 15 February 2014

Deja vu: Grainline Scout, now in silk velvet

I couldn't part with my silk-velvet scraps when I left New Zealand so I quickly did the wide shoulder adjustment I'd been putting off and cut the project out.  It was my first thing to set up when I arrived at my parents and surveyed the Necchi.

Welllll, how did that go?
It ends up that velvet is made up of all these hair-like fibers that stick up.  Remembering to iron it with two layers of velvet stuck together - that was pretty easy.  But getting things to line up for sewing was tricky.  It ends up being nefariously shifty, not like silk, but like suddenly shifting a 1/4" as the fibers all simultaneously bend.

Put this together with some bias tape and I was screaming bloody murder and blaming it on the machine.  The poor plodding thing wasn't really at fault though...so I'm really glad I did a velvet practice project.

Moral of the story: don't sew with velvet.  Hah!


Luckily the Scout is easy and until I got to the bias binding I didn't have real trouble.  A walking foot would have been nice but the tin full of feet is full of weird feet (except for a rolled hem foot, I recognised that one, yippee!) and none looked like a seamonster-walking foot.  I zig-zagged my edges and then for the hem and sleeves I just folded that over and sewed it down.

In the end even the neck isn't too terrible, because once the bias tape was attached all the mess disappeared inside the shirt.  However I am really dissatisfied with the final fit.  My best friend, Dana, taking the pictures insists that it looks great but the sleeves seem to downright droop off my shoulders (was 1" too much?) and the usual shapeless Scout looks particularly shapeless in velvet.  Or is it just me?  This is the same size 2 that I have made for all the other versions, except that I idiosyncratically lengthened the hem, more in back than front for a bit of asymmetry. 

Not sure about this one yet, but it was a good practice project.  And I'm done with Scout tees for awhile!


Pattern: Grainline scout, size 2, slightly lengthened, 1" shoulder widening.
Fabric: silk velvet with a touch of nylon, from Global Fabrics in Wellington
 

Thursday, 19 December 2013

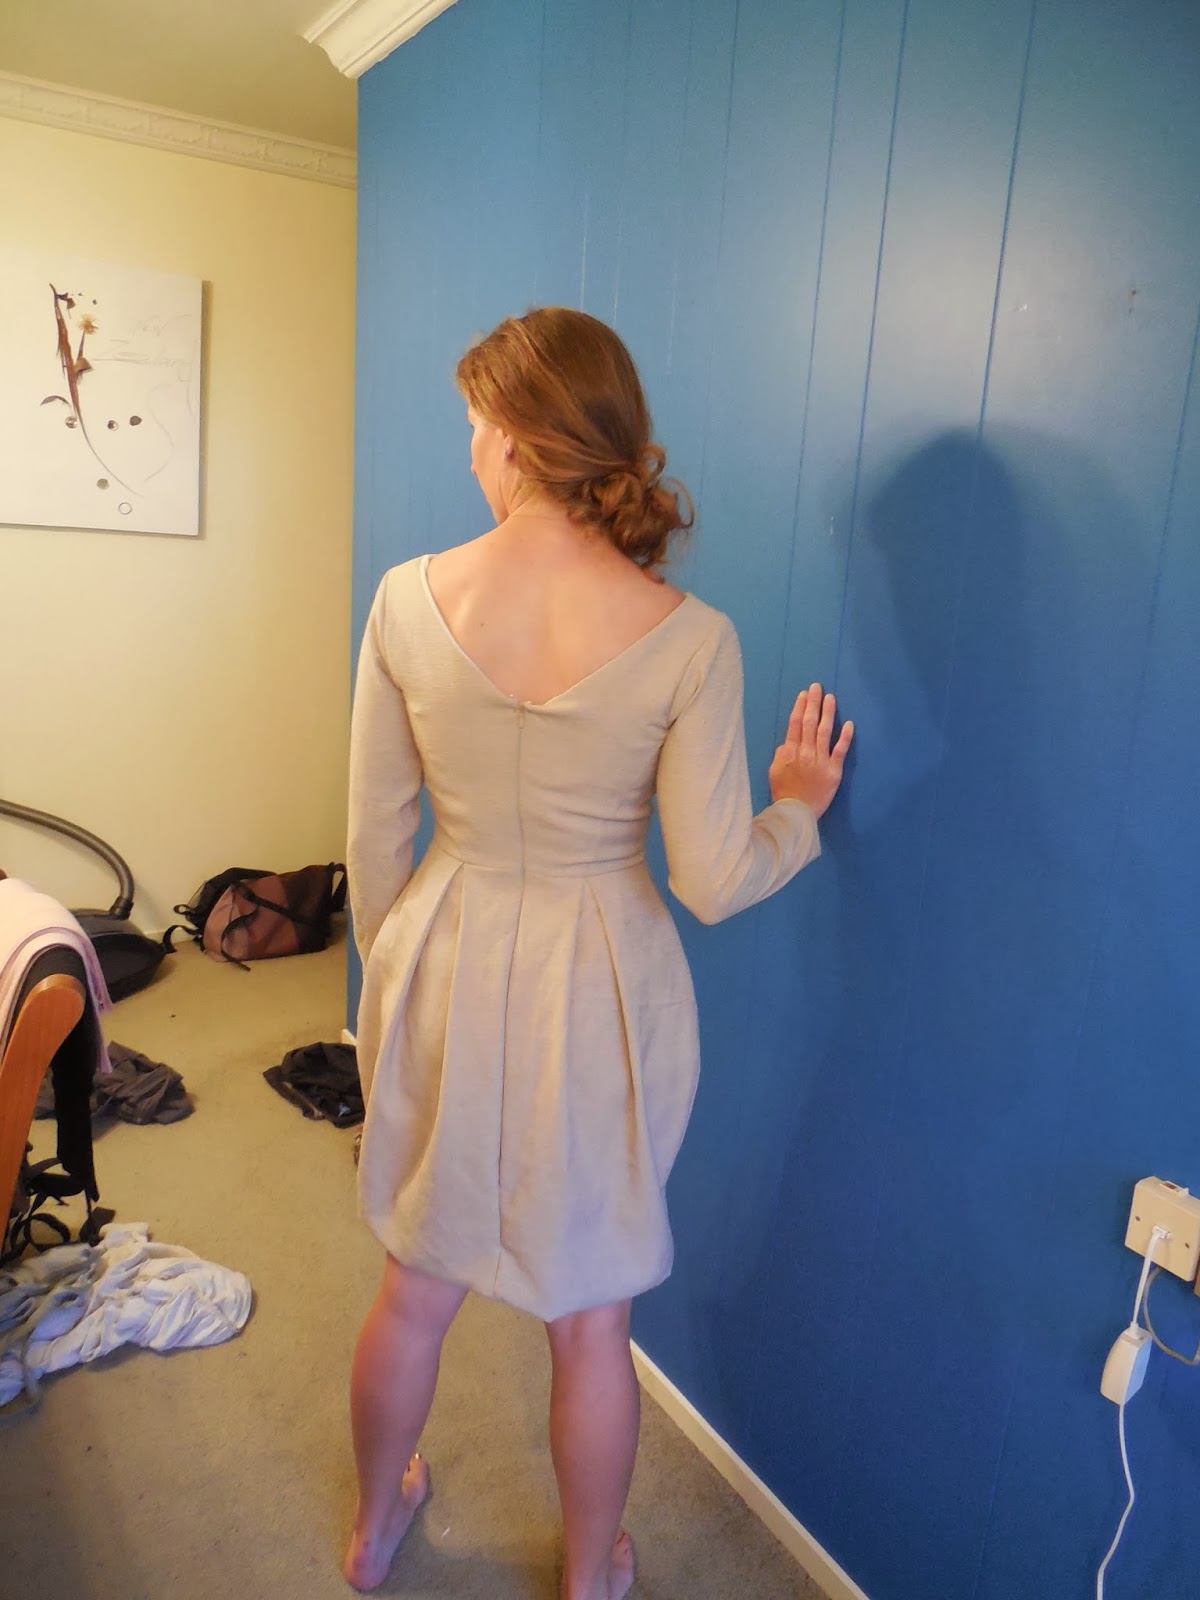
My tragic Elisalex is a work in progress

By Hand London and I have some size issues.
My two Anna dresses sadly didn't fit very well - my first size 6 was too small, and the 8 was way too big (but fits my friend Ellie perfectly!  It was fated!)  My third Anna, which I did after the Elisalex, was a size 6 and was also slightly too big.
My Polly top was a size 6 with an inch shaved off the shoulder height.  And it's rather baggy but in an ok way.
When I looked at the final measurements chart for the Elisalex, the 8 seemed pretty reasonable if I accounted for BHL not leaving any ease.

Oops.  Such a wrong call.


Back to the beginning - my fabric is a linen-silk with lurex threads.  It doesn't have that much body, and in fact wasn't my original choice for this dress.  But I love this fabric and I love the idea of a cream coloured shiny Elisalex, I thought I would prefer the tulip skirt with less out-ness, so I went with it even though it's definitely not long sleeve weather. 

I cut off 10 inches from the bottom to start with and sewed it up without other pattern changes.  Once it was together I had two issues - major hugeness, and not being sure whether I needed to give myself more booby room.  I just can't tell if the princess seams are too tight!  I cut one inch out of each side of the centre back.  That fixed the overall too-bigness (and was possibly too much).  Then I started to shave off the princess seams and now I think they are better but they are lumpy.  At this point I still have no clue what to do with them.  The chest needs work. 

I have pinned the hem up about 6 inches.  (On top of the 10 inches I cut off initially!!  Do not forget to measure the length of your Elisalex!)

I would consider this a work in progress - I'm tempted to take off just a bit of the side skirts so it's not so tulipy.  I need help understanding how to make the princess seams fit my chest.  Probably I should have done an FBA.  I am doing what we do when things go wrong...taking it home for my mother to look at...since I'm moving I am in a crazy busy state of trying to get all my remaining projects at least cut out so I don't have to travel with extra fabric!  23 kg luggage limits are the bane of my existence!

On the bright side, my zipper looks awesome.  It's the first invisible zip I've done that looks invisible!  Hurrah!

Friday, 27 September 2013

Papercut Patterns undercover hood

I was demoralised after the Anna.  I still had a whole weekend before leaving on my holiday.  So naturally I decided to throw in a last quick project.  This took a mere few hours out of Sunday and although (eck, as always?) it doesn't fit, the changes are minimal and I think I will make it again, 2 inches shorter in the body and sleeves.


Maybe more than two inches?  Excuse the photos, they are my first attempt at using the self timer.  I am going to hunt for nice outdoor locations in future but I was too rushed before the holiday.  I cut out the XS.  The pattern does not provide a lot of hand-holding for beginners - for instance, it just says "neaten seams" leaving you to decide how to do that.  I was really glad for the Jalie long underwear experience, as that pattern suggested sewing the seam allowance and then zig zagging the edge, and that technique worked really well here.  In fact, it made me pretty cheery to work with this knit - a green merino wool with loads of stretch that I got at the end of winter sale at Global Fabrics, in Wellington.  Nothing like a pattern - and result- that is 100% New Zealand!!  Everything fit together without a hitch.  I did use the ball point needle which I've just made habit for all knits, although I have no clue how much it matters. 

Just that it's so long it could be a dress...
Luckily I have a taller friend who might be a happy new owner of this hoody. 
I could have cut out the XXS and I think the fit would also have been fine, it has quite a bit of ease.
Also it could be super cute with the hood lining and the pocket in a different fabric...

Wednesday, 4 September 2013

Grainline Scout in silk - take 2

I thought I would give the Scout one more try.  I had a remnant of heavyweight black silk and this seemed like a great use for it.  I don't know what kind of silk it is, but ironing it turns it shiny (oops) and I can actually hear my needle snicking in and out of it.  Pins, needless to say, were a torment to put into it and so one goal of this easy construction was to use no pins.  Luckily the silk is very well behaved so that wasn't too crazy of an idea...

I unfortunately didn't notice that my roll end had a little chunk cut out of the bottom when it was folded.  As it was I had to cut two pieces to get my back length and the little triangular hole was a source of some creative reflection.  Also no way was I going to cut bias tape for this.  The only silk bias tape I had was white so I went with that. 

I cut a size 0.  For a perfect fit I would have found the size 0 with size 2 armholes to be better. I pleated the sleeves as I sewed since I didn't want to bother with gathers, and it miraculously almost matches on both sides!


I still don't love the Scout and I doubt I'll make it again because even the size 0 is shapeless.  There's nothing about it that makes me want to try out my barely-there drafting skills...

Sunday, 21 July 2013

Lisette 2059 -Continental blouse.

My second sewing attempt was in the wake of my excitement about project #1s success.  I was really thrilled with this blue spotted fabric from Global Fabrics in Wellington.  On this one I cut a size 12, assuming that I wanted more ease compared to the Lisette dress I had done, and also going by my measurements on the envelope.  This was a mistake!  The first shirt was big and even when I pulled in the side seams it was still floating all over me.  So I gave it to a friend and made a second one.  (I didn't take pictures of the first one before giving it away, but the spots were big at the bottom and graduated to small at the top.)

This seems to be possible because I hadn't learned about fabric width - most often in New Zealand it seems to be 150 cm. So I had huge amounts of leftover fabric for my two projects.  Enough, in fact, to squeeze two shirts out of the spots.  I had to move the spots around of course.

I cut a size 8 this time, as I had with the Passport dress.  It became increasingly evident that I may not ever need to make a bust adjustment but the Lisette patterns are not cut to accommodate my wide shoulders.  In the final version of the shirt I feel it pulling across my upper chest and if it had less overall ease it would be uncomfortable to pull my arms up.


In the end the shirt came out looking ok, but I don't think I would try to improve on this pattern in the future.  Trying it on again for our impromptu indoor photo session actually made me more fond of it!  Maybe I'll like it more in the summer since it's a very lightweight cotton fabric.