Showing posts with label bras!. Show all posts

Sunday, 16 July 2017

Noelle bralette by Madalynne

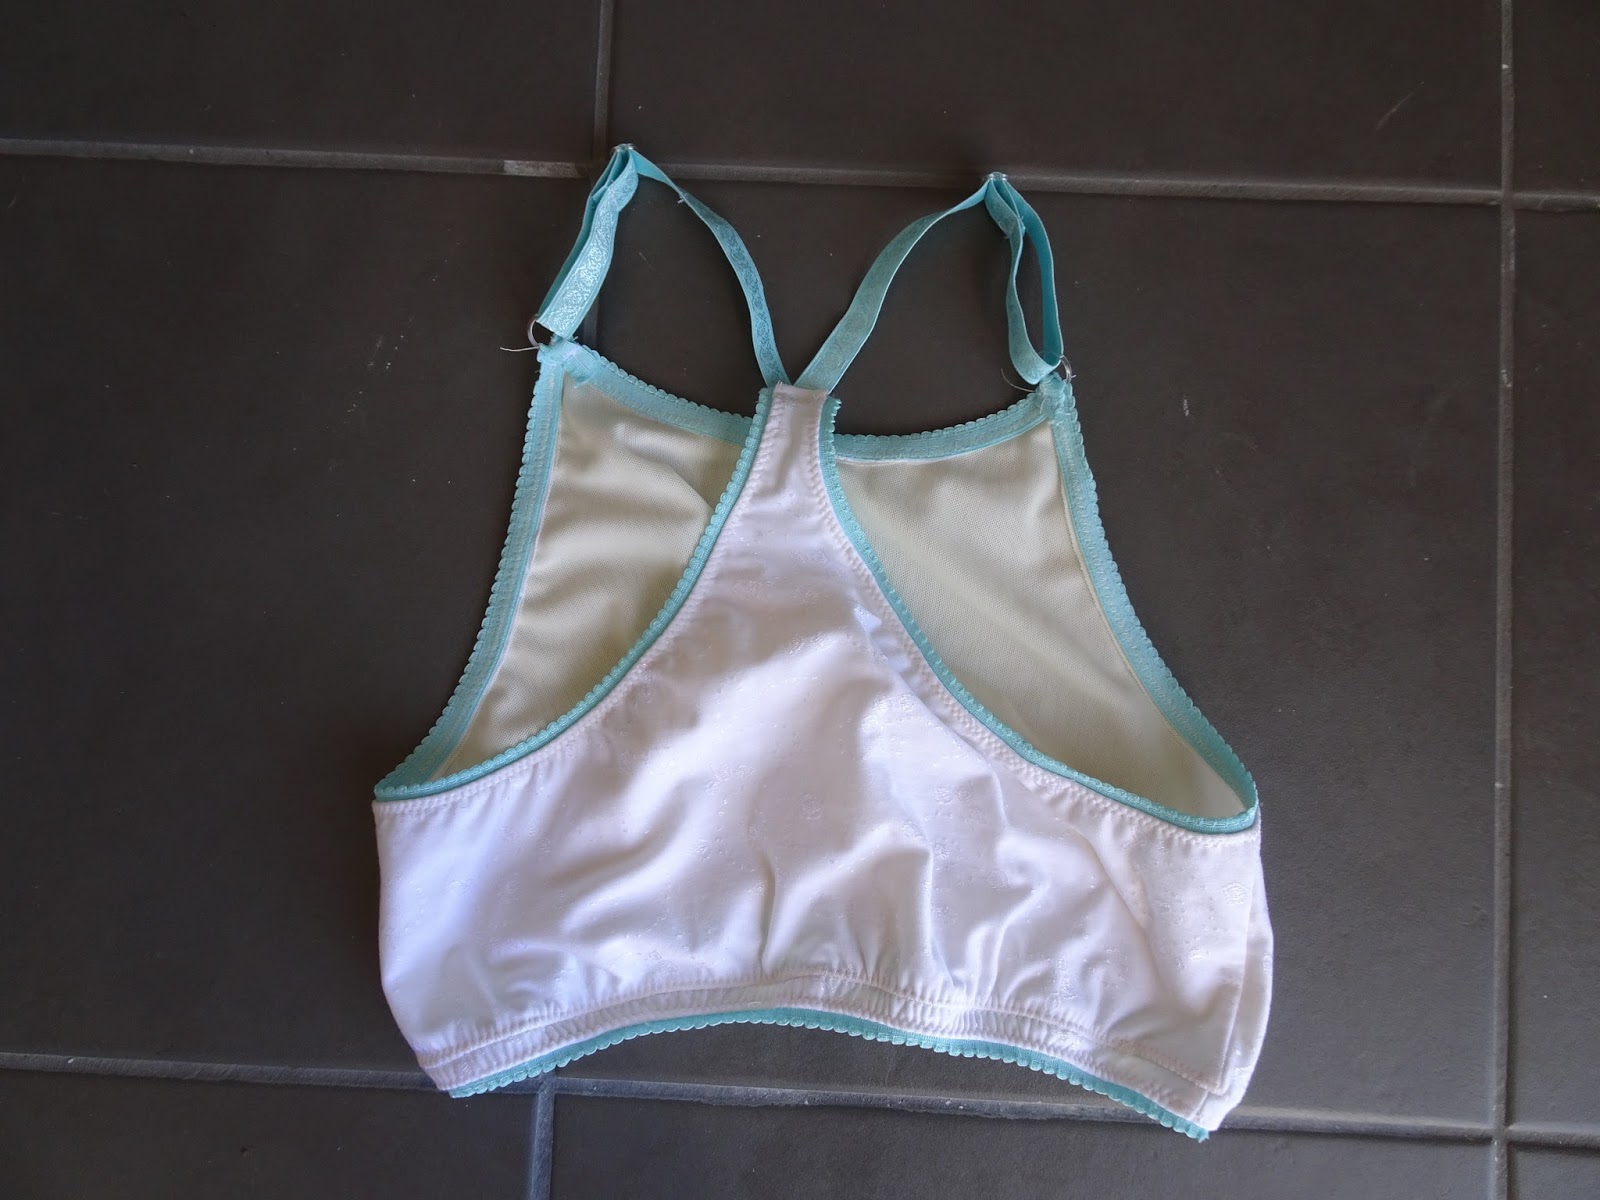
Madalynne has made it impossible, via Instagram, to avoid the Noelle bralette.  I had not realised that it was also a free pattern, and when I realised this, I had to make it immediately.  (I also discovered that I liked the Mallori Lane and so that followed, also immediately.)

I used size S.
The fabric is a leftover from a german bra kit, I think it's from www.sewy.de The trickiest bit is sourcing a single round thing for the back.  I didn't have one so I just tried to make my straps arrive at the right angle.

Once I got it all together (very easy) I determined that the long-line part of the bra was totally ridiculous on me.  I am short waisted.  It means I have like no rib length and no space between the end of my ribs and my waist, so this thing came down to my waist.  I took off the entire bottom panel except a bit to attach the elastic to. 


After that it's totally wearable.  I think there is still somehow too much fabric in the back so I am thinking about how to change that, and I also don't like that the strap adjusters hit right on my collarbones.  I am probably going to try again and make some changes, including just skipping the long line and using some heavy elastic below the bustline, and then maybe cutting out some of the back. 

Friday, 17 March 2017

Not so boring grey Watson bra

This grey stuff is from a Merckwaerdigh kit, which I bought on Etsy.  It came with lace which I used on the Madalynne bralette.  I thought I should give the Watson another try since my first try was pretty good (see here) but I didn't like the long line bra at all.

This time I learnt from my recent Marlborough experience and cut out the B cup instead of C.  Still with a 32 band.

I double layered everything, therefore avoiding any elastic on the center of the cups, but I used powermesh on the band, and so I didn't figure out how to get a clean finish when attaching the cups to the band.


It was pretty easy and I didn't do anything else surprising.  It fits pretty well although the band looks like it's wrinkled, it seems to sit just fine. However, the support that the center elastic usually gives would be nice to have.  Next time I will probably go ahead and use elastic there but make sure it's a very low profile elastic - I hated all the frilly bits sticking out on my first Watson attempt.  Of course it's not the kind of bra that lifts and centers, but it's good for very low impact sports.  The band is actually a bit loose and I'll eventually get around to fixing that.

Friday, 10 February 2017

Orange Lingerie Marlborough bra in brown


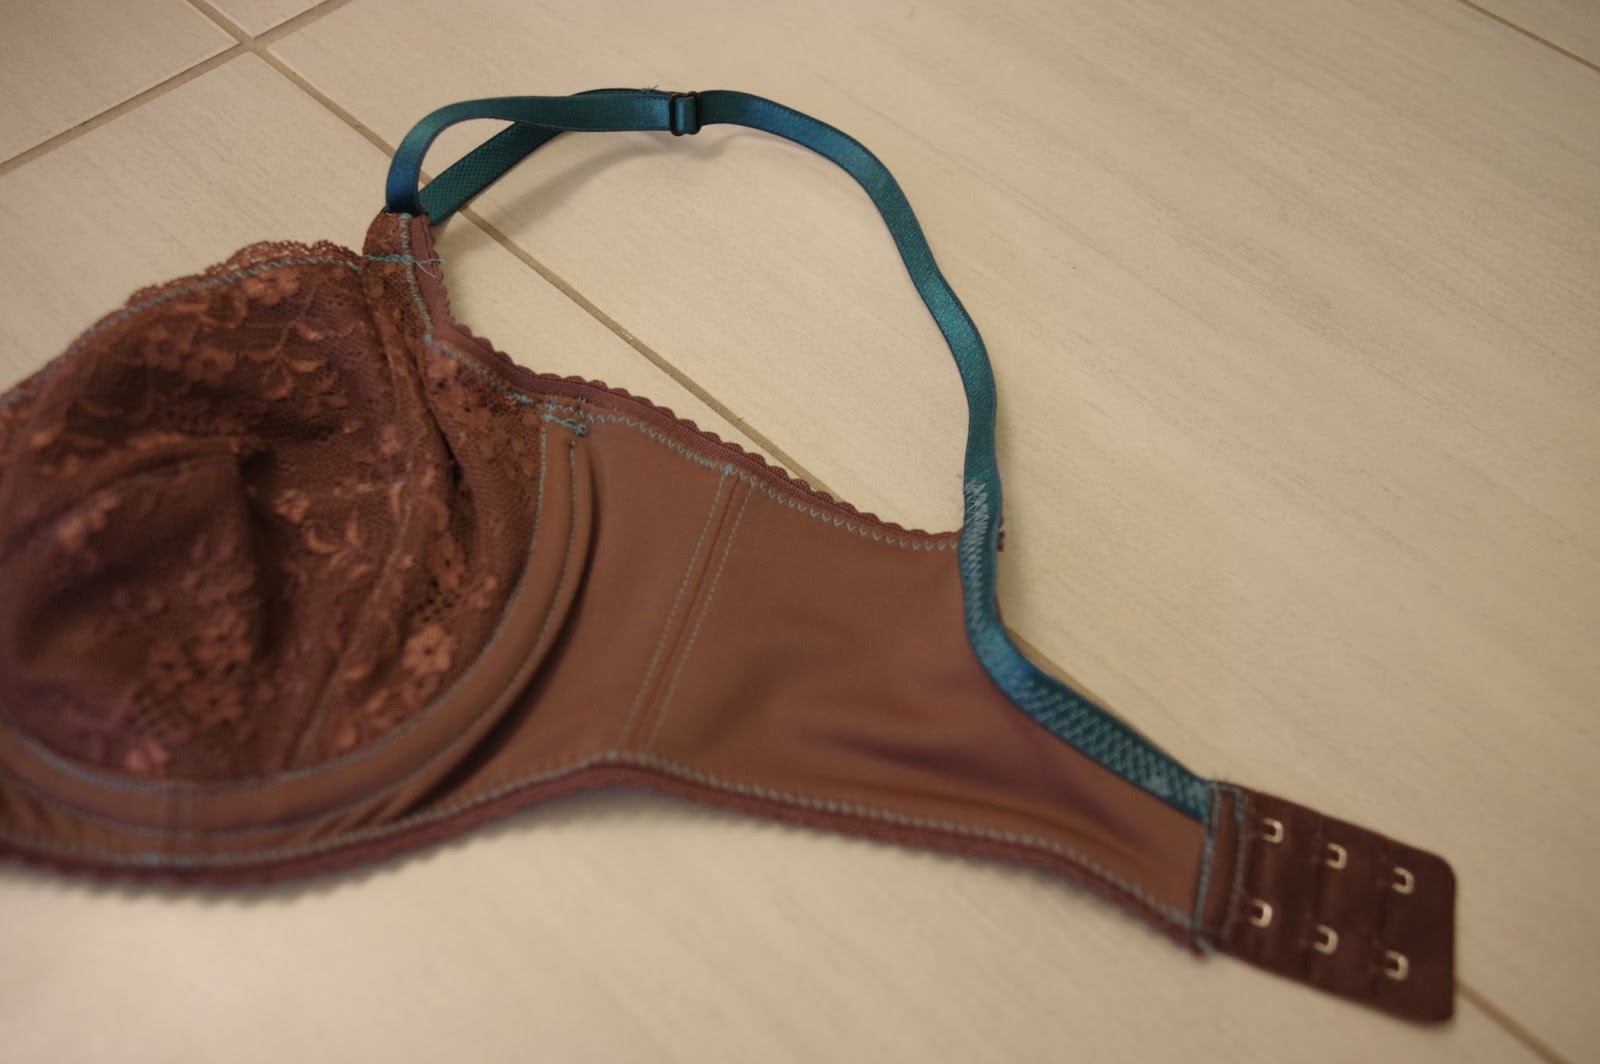
Once upon a time, I proclaimed that I had no UFOs.  Well, this is like, the ultimate in UFO-action: I cut it out in Switzerland and then carried it around for 1.5 years and now here we are.  So, I'm guessing by this bra that I made a 32C, and I hope that I made these changes which I have documented as necessary:

-tighten underarm elastic (I remembered, and did this)
-lower height of center bridge (it looks a tiny bit lower, maybe)
-sew the bottom elastic on a bit higher (done)

I thought I had wanted to remove a bit of fabric off the outer side of the powerbar, to make it not come up so high in the front of the armpit, but I guess I left that, in the hopes that tighter elastic would fit better.

However in all the excitement I lost my brown bra strapping, so in order to make it less muddy I went ahead and ordered teal- all my recent bra supplies have been from tailormadeshop, who I am in love with for their cute supplies and quick shipping.  I used teal thread too, which I knew was risky because when you can see everything, you can see the messes...

The bra came together pretty fast, and unlike in my first bra experience here, I underlined the lace cups with powernet.  This makes it feel like a real bra, it's substantial!  I didn't have any issues putting it together.


However, I made my own bridge (as previously) following the book Demystifying Bra Making, by Norma Loehr.  My bridge is narrow compared to average, and so I discovered that the wires overlapped.  I'm debating whether I could shorten the height of the bridge to use shorter wires, or whether I need that medial support.  I don't have much tissue on the top half of my breasts, so mainly I need the lateral support, and some of my RTW bras don't have high cups in the middle - something to consider for next time.
There is a lot of wrinkling in the upper cup - I could pinch out a centimeter of fabric - best seen in this view.


The sad end of this story is that a bra prepared two years ago doesn't fit today... It's comfortable but the cups are a little bit too big and I think the lace is scratchy.  I've probably lost just a bit of weight since then and of course my boobs are the first thing to shrink. I'm not totally sad, I know I'll fluctuate and fit this bra again, but I'll measure myself again before making my next attempt. 

Thursday, 12 January 2017

Upcycled Papercut Anima pants and Simplicity 8228 Madalynne bra

In order to not stand around in just a bra, I figured I'd show these two makes together.

I spend too much time trying to think up things to do with tshirts.  You know the ones I mean - those heavyweight, oversized, shapeless, screen-printed tshirts that we all get too many of for free.  A few of them work to sleep in but they last a long time!  So this pair of Papercut Anima pants was brought about as a trial run to use up some shirts.  Since the pants are sleepwear they are totally allowed to look silly plus I get to wear a bunch of tshirts which I do actually like - I spent six months working with MSF last year - and I've done a bunch of trips with the American Alpine Institute, so both of these shirts have some emotional value to me and I'm happy to make them continuously useful.

The anima pants pattern is my standard one, size XS - I didn't shorten the legs this time, but I have lowered the front waistband by removing a wedge that I tapered out to nothing at the side seam, plus obviously I got rid of the fly and pockets.

In order to use four tshirts for this pattern, I cut each tshirt apart at the sides and across the top, and then I sewed the bottoms together, like this:


Even with this magenta tee, which was a size S ladies cut, I had enough to make an entire pant leg with some room remaining.


I went kind of crazy with the waistband and it was bad, so I had to totally remove something like 5 rows of stitching (I measured my elastic wrong and it was about 5 inches too long...) and then I went for the minimalist waistband with no stitching in it.  The elastic stays in place so I'm content for now.  This version of the anima pants, seeing as it has no pockets, no fly and no string in the waistband - is a pretty minimal version and is easy to make.  It took a few hours including tshirt prep. 


So the bra top!  I bought this as soon as it came out.  After all, lacy bra thingies are so in right now!  I wanted one!  The lace is from merckwaerdigh's etsy store, the cream coloured powermesh is from tailormadeshop.  I used really bad fabric glue to stick the layers together and then the idea of making this bra top faltered.  It was a few months before I came back to it.  There was only one review which mentioned sizing, and the reviewer used her normal bra size rather than following the size chart, so I did that too and cut a 32C.  I marked each pattern piece with the side that should be along the scallops and I found cutting out easy.  Sewing was easy and quick too - just a couple of hours.  I found the instructions to be adequate and not confusing at any point.  However because of my crappy glue, I had to then zigzag all free edges (luckily this is invisible in the lace) because the mesh was flopping around otherwise.

The band is tight enough to be supportive, which itself, in non-stretch lace, is a problem because although I can get this top on, it's nearly impossible to get off.  The back is much lower than the front.  I was debating just removing 2 cm off the spot where the back narrows to see if that helps, although I suppose it's not too important.  Also,  the cups fit mostly ok, but I think I'll take a wedge off the center front piece for my next try.  The lace is also really itchy.

I have a nice kit from tailormadeshop to make another one of these, which I'll do with those two small changes, but I recommend using stretch lace, and not using powermesh on the band, especially if you have wide shoulders or a muscular back like I do. 

Thursday, 27 August 2015

Watson bra by Cloth Habit

I made the Watson panty a whole bunch of times but the bra pattern sat for awhile before I felt ready for it.  Finally I was convinced when I had enough silk scraps left over -- this is stretch silk which I dyed last summer using the Shibori technique.  I made a Renfrew from a friend out of it, hence the scraps.  In order to stabilise the fabric, I cut two layers of everything.  I cut a 32C.  My spray glue came in handy!  I glued the fabric in half and then cut double thickness of each piece, except for the front part, where I had to cut it on the fold anyway and just cut two.

According to the size chart I should be a 34D.  I didn't believe the size chart.  I cut a 32C.  My silk is pretty stretchy and my boobs are pretty small.  I think that I will never have believable bust measures since my high bust is bigger than my normal bust size due, most likely, to my back muscles. 

I basted the front together, which is recommended by the instructions, then sewed all the double pieces as one unit.  Had some trouble figuring out what I should use to finish the front cup, but I went with lingerie elastic as that is all I had.  I don't know if I had high expectations due to other people's pictures, or if I thought making two Marlboroughs turned me into a bra genius, but I had no fun making this bra and I don't like it.  AND I know there isn't a good reason for the latter.  My Pfaff makes bra making catastrophic.  A short zig-zag stitch doesn't get caught by the IDT foot and the fabric sits still and makes lumps of thread.  Anything horizontally uneven gets pushed to the side and so, for instance, sewing on the clasp at the back was terribly frustrating.


For a next version I would try the shorter one so that it feels like a normal bra.  I would use much finer elastic on the front and top.  I really don't like the look of this wider elastic (and something can also be said for pretty findings - I'd match the elastic colour instead of mixing black and white).  I would round the cups at the bust point and take a tiny bit of fabric out of the right one.  I might also take a tiny wedge out of the lateral side of the outer cup.  I always have gaping there and I don't know if pulling the elastic tighter would be enough, or if I would be better off with slightly less fabric in that spot. The 32C was the right size though, so I wouldn't change that.  I usually wear a 32C or 32D bra so this is consistent with RTW for me.

In terms of bramaking in general, I think that this is almost comparable to the Marlborough for a first bra pattern.  I think the Marlborough has more hand holding details and it is possible to get a better result.  Here I found the intersection of the cups and also the top of the cup where it goes through the strap to be spots where the results could vary a lot.  But overall I don't think there is a huge difference. And I think some of my lack of excitement is that I am not sure what I would do with a bra like this.  I am pretty partial to underwires in my daily life. Maybe the shorter Watson would convince me more.

Wednesday, 1 July 2015

Marlborough Bra for real!

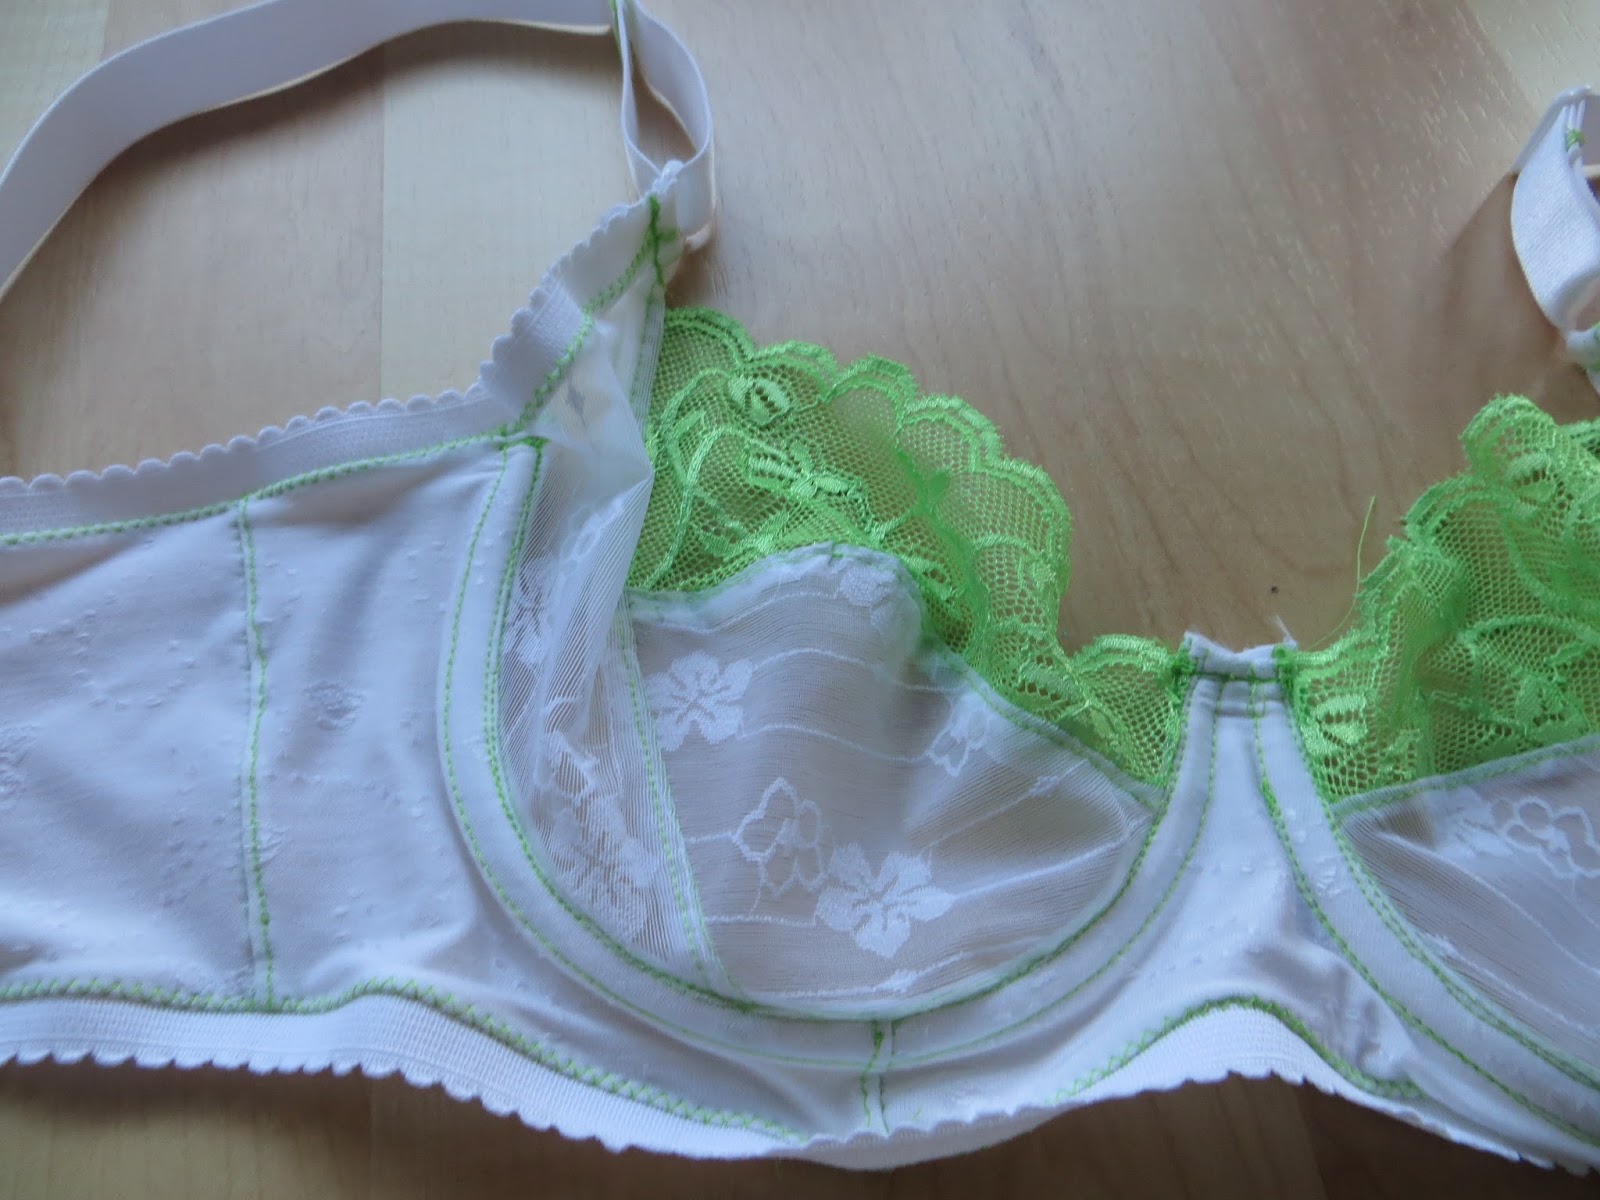
I made a prototype in January when I got on the bra bandwagon.  Things were going great, and then I got started sewing the Real Bra...I didn't know that lace requires some special sewing techniques, and I was still very nervous with the new sewing machine.  I sewed the first cup together, and then on the second one the feed dogs ate the lace and then got indigestion.  I had to take apart the innards of the machine and call the shop panicking...of course it was all fine after a rethreading!  But that really threw this bra into the corner for awhile.


It was with some surprise that I pulled the bra pieces out of their bag and saw that, despite my whining, I had actually finished sewing all the lace bits!  It still took me awhile to get up the nerve to finish it.  Despite bra making being easy in some ways, it's fiddly and I have to refer to the directions at every step.  Once I finally went for it, I finished this in a single sewing stint.  I have been following Anne and paid a lot of attention to her fit issues with this bra because I thought I had a similar shape to her, so I was pretty curious how a non-foam version would fit (and I reckoned I would try some of her recommended bra patterns if the Marlborough wasn't a go for me.)

Regarding the pattern, I read Demystifying Bra Making, by Norma Loehr, prior to making my foam tester bra, and that gave me what felt like a solid foundation.  The book has you make your own center bridge, and I have done that. Coming back to the theme after six months, a few of the terms were hazy but overall not difficult to understand.  I continue to find that my Pfaff with its IDT is terrible to make bras.  It doesn't go well over small, fiddly bits and my stitching is pretty horrendous.  It didn't eat anything else, at least.  And, shock of shocks, the bra fits! I did not use elastic over the green lace top, because on store-bought bras I find that anything tight on that edge creates double boob.  I don't know if it will end up becoming too loose too quickly without that support, but for now it fits very well.  I also didn't pull on the underarm elastic and it gapes a lot.  My kit came with wide shoulder straps and plastic bits, which I don't like so much. 


The changes I will make are to tighten the underarm elastic, to remove some of the height of the center bridge, and to sew on the bottom elastic with a bit more fabric, because it actually wrinkles a lot- I sewed it on with the tiniest of seam allowances but I think I don't need much bottom band more than the elastic itself.  The fit of the bra seems correct.  It doesn't give me a lot of lift or volume, but it is comparable to some of my store bought bras.  I think that when I tighten the arm elastic, it will pull toward the center a bit more which I would prefer.

I also find it strange that the back piece is not the correct height for the hook and eye pieces.  You have to cut it down quite a lot and the instructions don't mention this anywhere.  Even with my hook and eye being big, I still had to snip a new curve to the back.  

My bra kits are from Spitzenparadies.  I got this one and this one.  It took me quite awhile to find everything on the site because of how I still don't have much German sewing vocabulary.  The green kit is quite see through, but has huge amounts of the flowered stretchy fabric.  The brown kit is more like mud brown...oh well. I also bought a huge variety of wires, most of which weren't the right size.  I think two sets are pretty decent and another one or two are maybe ok.  I tried to compare by measuring current bras but that didn't produce great results.  I will wear the two good ones around and see if they are good enough to buy more of.