Showing posts with label wool. Show all posts

Tuesday, 3 August 2021

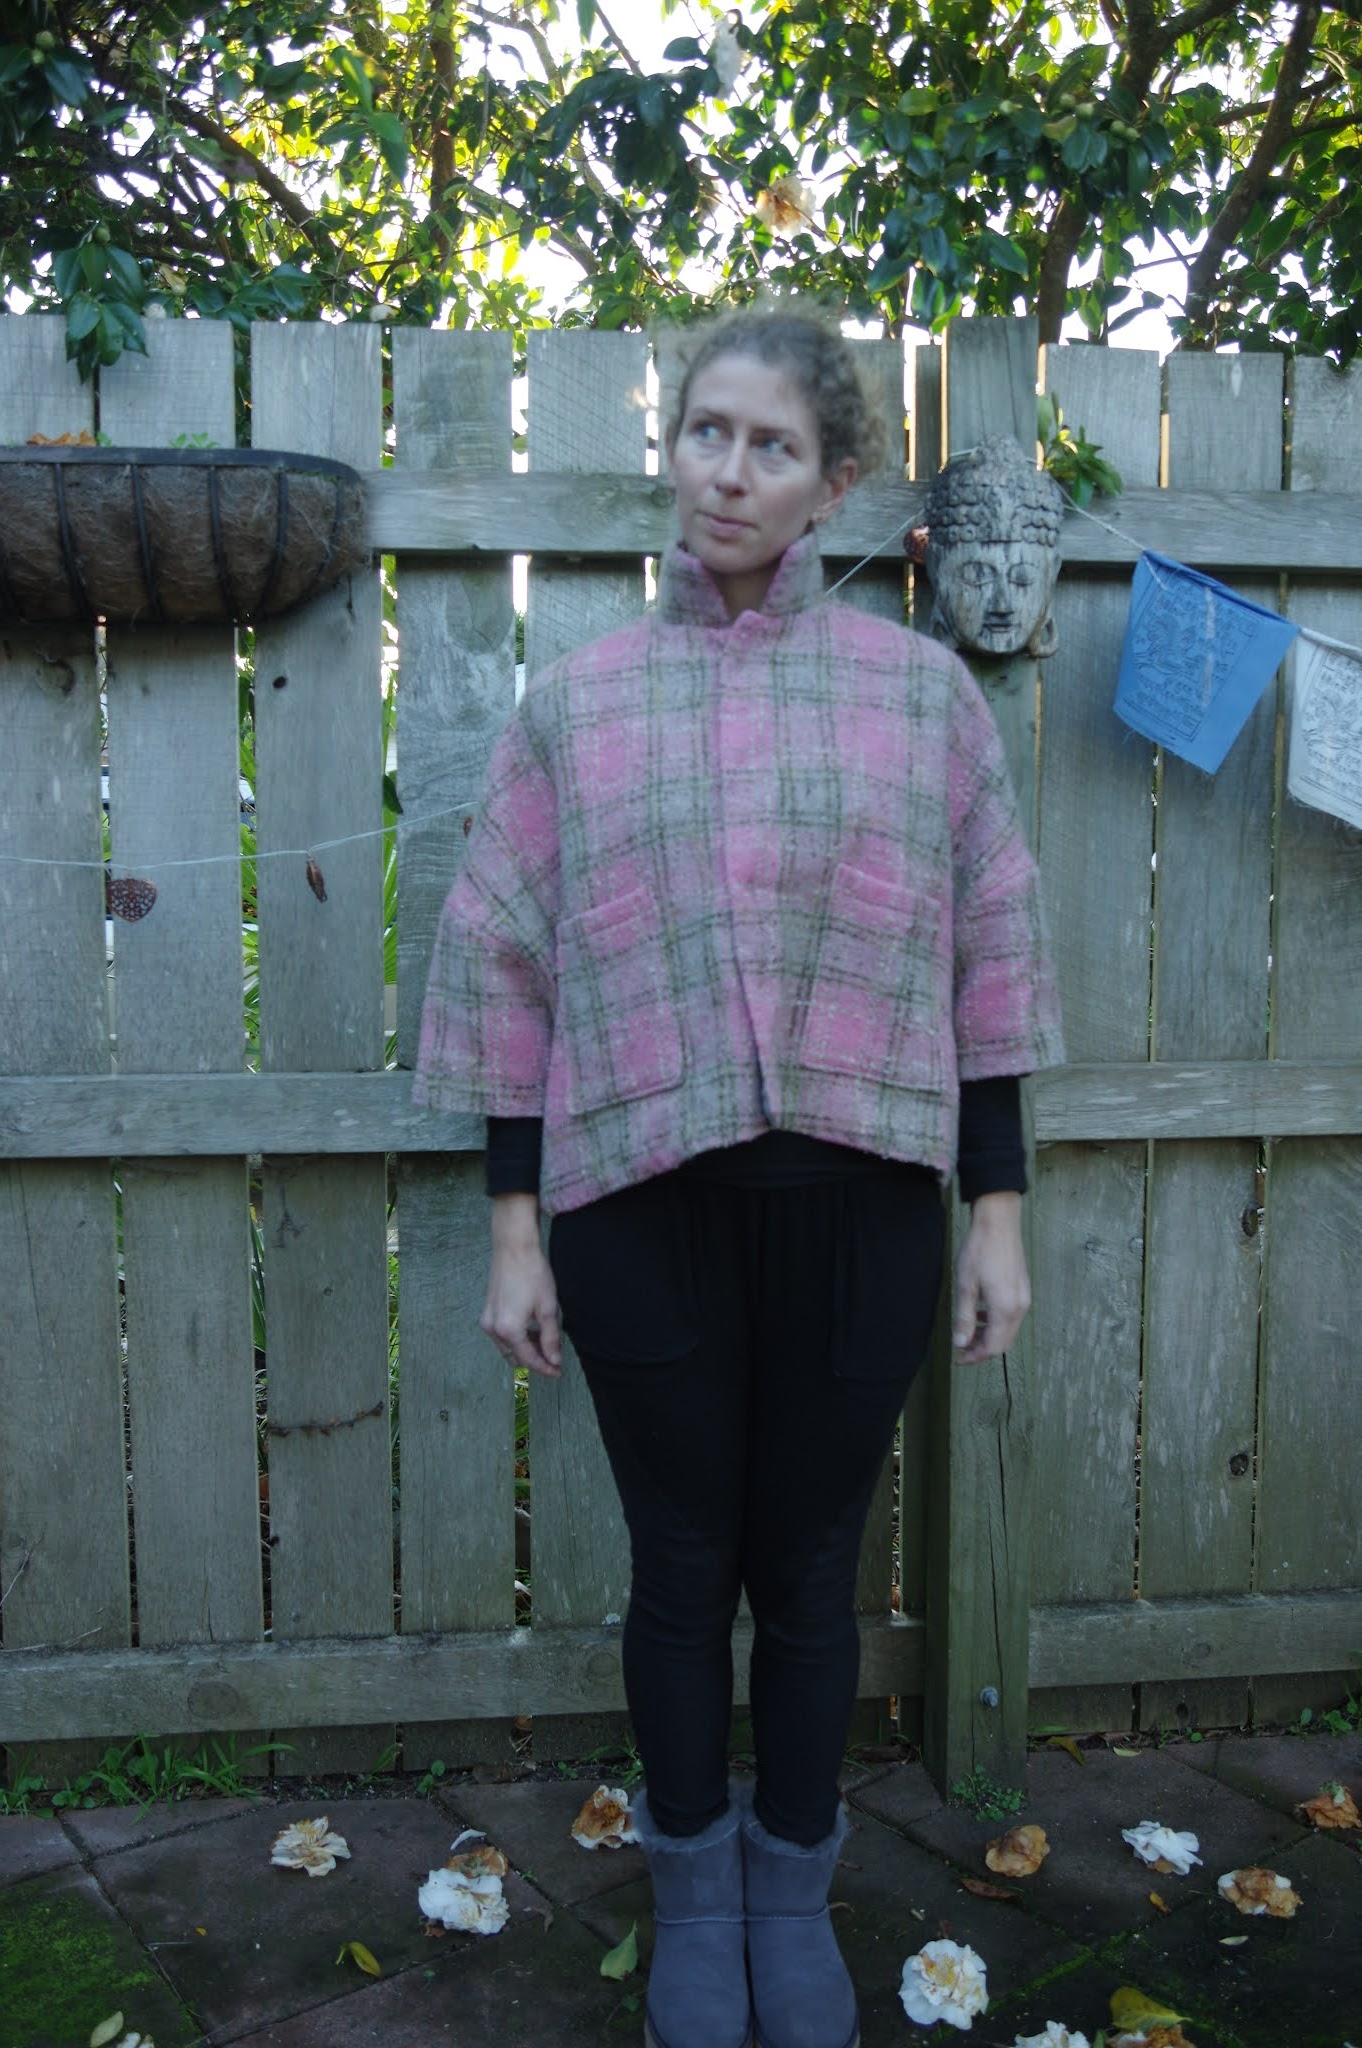
Alabama Chanin car coat, experiments

I bought this pattern during my Alabama Chanin binge last year. I couldn't resist!

I will say - Alabama Chanin are not out to market their patterns. I get the impression that they grudgingly provide the patterns, but they aren't trying to compete on the indie pattern market. What I mean by this is that the layout of the pattern in A4 is quite wasteful. Every single piece, including the pockets, crosses multiple pages. There were at least 5 pages that could have been done away with.  Ok, anyway I survived. I would prefer an A0, which there *is* so that's for next time as obviously I threw away all the rest of the pattern other than the cropped coat and I hate A4 taping.

I've settled on S as my size for Alabama Chanin patterns, though on the size chart I would be M. Also, this coat is meant to be crazy oversized so I wasn't worried about it fitting.

For version 1, I used a poly/merino blend knit that's smooth faced and has nubbly bits on the other side. I think I used the same fabric for my Mabel miniskirt.  It's very stretchy and a bit heavy, and in fact halfway through I got worried that it was a bad choice, since it doesn't have the characteristics of interlock jersey.  1.5 m was totally sufficient for the cropped version with cropped sleeves. I lined with various merino scraps.  Yay, it's great! It's so cuddly, I didn't expect to love it. The lining sticks out all over the place and so I decided to go with my new theme and hand topstitch the whole thing together, which would have been great if I had black thread.  I would have used ANY black thread...but I had to wait a bit to get hold of some.  I waited to put on the pockets until after I'd gotten the lining nicely controlled. By then I lost the fabric so there are no pockets.


The pockets are (like the Papercut Stacker jacket!) oddly tall and not that wide, it does look nice but it's tricky to get hands into them, I noticed this and tried to make them a bit wider than the pattern piece for my pink version.

I immediately moved on to version 2, which is what I was excited about.
This is a single, narrow meter of wool that I bought when I lived in Switzerland. It has a lot of memories associated with it. I was supposed to make a miniskirt, but I didn't and then I convinced myself it shouldn't be a miniskirt after all, but what would possibly fit such a small piece of fabric?  I considered every coat, every top, every skirt...I kept coming out at a loss. (Now I think gosh, I should have just made that damn miniskirt! But anyway.)


It fit on my fabric perfectly and I even had enough left over to pattern match the pockets.  I matched the fronts and backs and then let the sleeves do their thing. The lining is stretch silk, chosen because it'll help give more structure to the loose wool.  I did a lot of hand topstitching here because I could.  I let this project drag out over about 3 days, though it's really about a 3-hour effort.  I totally panicked halfway through worrying that it would have too much body, but in the end I'm happy with it.  I do notice that the hem of both of these pulls up a bit, as it's not my strength to hand sew hems with the lengths matching properly. 

I loved both of these in theory and was happy with how they came out, but I really delayed getting snaps, so they sat around for quite awhile.  I wanted snaps from Alabama Chanin but couldn't handle the shipping cost, and then finally bought some locally and then I moved house and didn't have my stuff in any order for months...and then it was summer.  So only as I have started to clean up my winter plans did I sit down and apply the snaps and think about whether these will get worn...and well, a friend likes the pink one but I think the black one is off to go out of my sight.  I was at one of the local secondhand shops and the racks were nearly bare (seriously, only in Gizzy) so I pretty much feel like it's my duty to share the things I make and don't need!
 
I, nontheless, really want to do a long sleeved long version of this coat in 2 layers of interlock knit, in true Alabama Chanin style.  I think the short sleeves feel useless to me, the body of the pink version is too much, etc. Long and funereal, that's where it's at: it fulfills some dream of being a grunge princess that I didn't know I had.  This aesthetic of mine has been evolving in the past few months and it seems the rest of the world is with me, have docs come back into fashion? 
 

Monday, 19 January 2015

Papercut Saiph, take 2

When this pattern came out I snapped it up.  It was right when I was getting confident with modifying patterns and identifying my own taste.  I made it in silk charmeuse with the fluttery skirt, using an XXS based on other reviewers size assessment.  I skipped all the facings, and learnt that it's not wise to try just folding silk armholes to finish them.  That was one of my first truly successful patterns - I wore it a lot for the last two summers.

So, back to this pattern.  I felt like it deserved a try as written.  However, let's review why I had made all those changes above...
-I hate facings.
-The waist seam is exactly on the widest part of my hips, aka very unflattering
-I own NO woven dresses with long sleeves, because they don't fit my shoulders or upper arms at all.


I'm staring here at the problem I always have with woven sleeves- this tightness right at the front bottom of the armhole.  It pulls a lot.


What could one expect, then?  No surprises here, this dress is a fail.  My camera decided to wash out my pictures and make me gain some long legs, but that's only because the skirt is about 4 inches long.  It doesn't look good in reality.  And I think I was supposed to move those darts somewhere. Also, I found the instructions for the pockets to be confusing.  You sew the pockets on to the skirt front, then fold them but how much are you supposed to fold up?  Are you supposed to sew the pocket top into the seam allowance? Something was off, and the result is that they gape open and have messy corners.

Friday, 28 November 2014

Vogue 1051 trousers

I haven't seen many of these in the blogs, and a short inspection reveals that the pattern is already out of print.  I bought it when I started sewing about 16 months ago, and it's been sitting on my pile ever since.  It was with me when I came to Switzerland, and therefore at the top of my list this month.  I found this amazing green wool in Frankfurt while I was slumming and waiting for my visa.

However it had passed me by that I usually wear a size 12 in Vogue, at least according to the pattern envelope...and the sizes of this pattern were 4-6-8-10.  So I cut the 10, not completely sure it would fit.  I tried to do a full frontal thighs adjustment.  It seemed to me like it might be doing absolutely nothing.  This is it:

It really only struck me now looking at this photo that I should have opened one side like a wedge...


As seems to always be the case, I thought the welt pockets wouldn't be too bad.  I mean, I suffered through them with the Rigel Bomber, I should be ready by now right?  No such luck.  And of course with finicky pants like this, you have to do four entire welt pockets, plus the zip, before you get to find out if the pants fit.  The result is that I didn't finish all my seams as I went - I zig zagged them later.  The welt pockets had me fussing and whining, and for the back welts, I put the welt piece upside down because I couldn't figure out what the pattern was doing.  I have sewn those shut to hide my shedding welt bottoms.  Anyway, I would never use butt pockets on these pants, and in fact I will not make the back pockets again.  My final lesson is that when you are doing welt pockets, you need mathematically precision, drawing out every step in chalk on the fabric before you move.  Because I still have no decent sewing supplies, I winged it, and got crap results.  


Bulgy waistband!


Is there any way to decrease the everpresent underbutt wrinkles??

some whiskering there.  And I know I don't have enough hooks on the waistband.


I will make the pants again though!  They fit just like on the model!  (er, except for the 6 inches of the hem that I hacked off - beware, these are really long.)  And I have the same little front whiskering like the model, too.  I guess the crotch curve could use a minor adjustment, if I ever figure out how.  In a loose trouser like these I think it's not a major concern, unlike in tight or stretchy trousers where my bar is higher.  I'm overall surprisingly happy with these pants.  They are my second decent pants from Vogue, my first ones are so straightforward that I am planning to buy that pattern again (I left it in New Zealand.)  However, I have the same fit problems with all pants and I am still struggling with how to fix them.

The waistband is high waist, ie they sit just covering my belly button.  On me that is a great, flattering style, but beware if you prefer low waists.  Also, the bell-bottom is pretty pronounced.  Maybe less if you are really tall, but I am 5'4" and removed at least 6" from the bottom of the pants.

Now however, I have made enough pants to notice one more trend - my Thurlows definitely had this issue, as did my Datura blouse when I sewed down the lining. When I sew the waistband to the pants, all is good.  When I fold over the waistband lining and sew it down, suddenly my waistband itself is floppy and ballooning all over the place.  Why?  What should I do to fix this? Why do I have a terrible fear that it is because I don't iron anything enough? 

Thursday, 6 November 2014

Papercut Rigel Bomber

This is the project that seemed doomed.  I had all these jacket plans for the summer, hatched on that bed in the hotel room in Arizona in May.  It looked, from that vantage point, like I'd have so much summer time to sew jackets!  You may note this is only the second jacket.  There is a third one still out there waiting to happen.

Fabric: Marc Jacobs grey wool tweed, from Mood.
Lining: silk from ramieandlinen on Etsy.
Bands: Pacific Fabrics in Seattle.
Zip: my new local shop 'Nählädeli', after the worst, longest hunt ever.  Who would ever believe that a shop open for about 12 hours a week in a village of 1000 people would be the one place I would find this zip?

Size: XS or XXS?
I sized down (XXS) after reading all the blogs.  I figured I wanted this jacket to fit pretty closely and I didn't want the bagginess issue many have had.  Also I thought wool would be relatively loose.  The blogs were very helpful regarding lining, but because I read so many I ended up confused.  Overall I followed Anna's lining recommendations, but I think I was confused by Kim, who drafted her own lining.  I assumed I had to do that, which made this project slow to begin as I was nervous about drafting anything. Not to mention it was unnecessary, and ended up complicating things later on.

I assumed that I would have no problem at alllll with the welt pockets, since no one else did.  I didn't do a lot of prior research.  Um, oops.  I had everything ready, including a US-purchased 35cm zip that has since vanished during the move.  I attacked my jacket front with scissors and installed my first ever welt pocket to discover...a huge honking hole, because you are not supposed to cut your hole longer than the welt covering bit.  Which the instructions, I must say, did not explicitly comment on!  (Don't tell me it's obvious...)

After that I took a break, read up on welt pockets, found out nothing useful, and anyway managed to do most of the second one successfully while trying to figure out what I was going to do to salvage my hopefully amazing jacket.  When I start a project I am always full of this zeal that it's going to be the best thing I've ever made, and whenever I make my inevitable first mistake, comes the sad downfall that it might not, after all.  That made me hesitate for a long time, because my expectations were so high and my huge mistake was so early.

Contrary to all other bloggers, I found ZERO useful resources on welt pockets.  Who knows - maybe I need scientific diagrams and words instead of pictures, but I did not return to my jacket edified.  So it sat.

And then I finally was ready to try again and...my sewing machine (the Necchi that I stole borrowed from my mother - divine retribution?) broke.

So I packed this baby up in plastic bags, assumed it was hopeless forever, and shipped it to myself, where in a new, leisurely mood and fully freed from any expectations, I faced down the big massive hole in the front of my jacket, and realised there was no way I was going to undo everything and make a new front.  The hole had to be hidden, and it was doable thanks to the loose weave of the tweed and well matching thread.  There's a bit of a fold where I had to pull the fabric around the hole, but I was saved by how the tweed eats the thread so it's invisible.  I sewed a zig zag over the remaining hole and then sewed the last bit by hand.  Salvaged!  And I still really have no clue how welt pockets work : /

The rest of this jacket went along in the same leisurely fashion.  Because of my self-drafted front lining, but normal back lining, I didn't know exactly where to attach the facing to the lining, since they didn't share a seam.  The bottom front where the binding, lining, facing, and front come together was also a puzzle that got pinned and repinned many times.  I sewed it only just before putting in the zip.


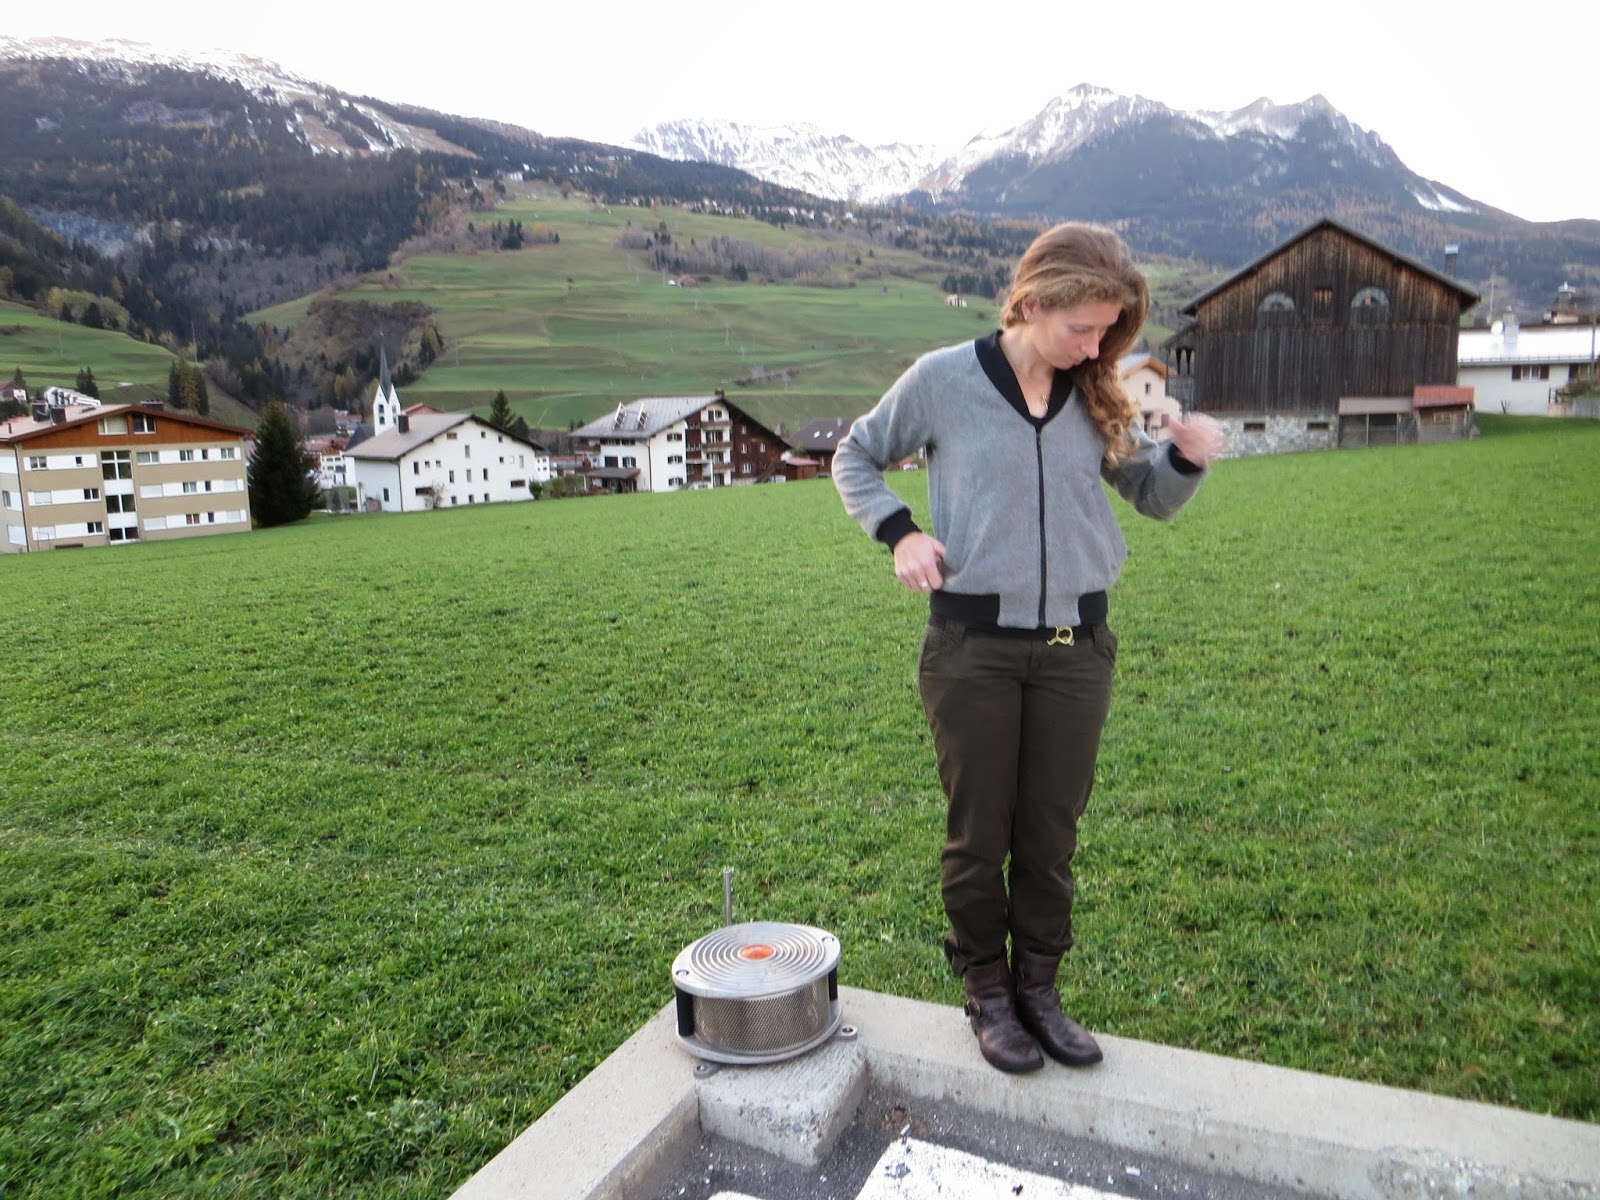
It is not as baggy as it looks in these pictures!


Thanks to my coworker Isabelle for the photos!  Many of them are taken at the side of the hospital heli-pad, which at least has a nice view.

I sewed it mostly like Anna, as I said above - normal jacket together, lining together, attached them by sandwiching the hem band in all layers.  After that I diverged slightly.  I sewed the facing and the lining together by pinning everything into place and approximating where they should overlap.  Next I sewed the sleeves in using the Sewaholic method from the Minoru, so my sleevebands were also fully enclosed.  I sewed in the zip and finally sewed the facing to the zip and all the way around the neck.  My technique maximised what I could do without a zip, since I didn't have it until the very end.  Also, my final seam ended up being along the zip and then the neckline, and therefore basically invisible, while sealing everything in.  The most finicky spot was the bottom of the facing/front beside the zip, which just had to be very well tucked together and ironed before I could sew it shut.  This worked nicely in my wool, but if you were planning less visible topstitching on finer fabric, it might not look as well.

What I would do better:
-the thin silk pockets, I would interface the silk.  They are important in a jacket like this and I feel like they are going to fall apart, especially since my welt pocket skills are still just about zero and I'm not totally sure how I attached the pockets to the jacket.

-On size and fit: If you are not short waisted, and if you don't have proportionally short arms, then make the arms longer.  I changed nothing, and this baby hits just above my hips, and the sleeves hit exactly at my wrists.  If I wanted it cozy, baggy, or to go over sweaters, I would need to size up.  To go over a tshirt, it's perfect.  The binding does make a blousy effect at the bottom, no matter what fabric you use.  If you don't want this, then make the binding longer than the instructions ask for.

Ok but, shockingly enough and despite everything, my jacket is totally amazing.  Of course, it snowed yesterday...