Showing posts with label Scout. Show all posts

Thursday, 1 February 2018

Fun with knickers + UFO completion potpourri

I started my sweatshop in Seattle with some knickers that I had cut out in Arizona erm just about 10 months ago.  4 pairs - Watsons and the free pattern from So Zo.  I did different bindings on them as I am still seeking the perfect binding.  So far all the picot elastic I've gotten on etsy has shredded in the wash.  And the Watson gives me terrible panty lines which I know and have accepted.

So far: the blue ones with folded tape actually are great, and the red ones with the thin FOE that I couldn't fold over are tighter than the others, and already falling apart, as this FOE from Etsy was only about 1/2" wide and so I have only zigzagged it onto the outside of the knicker - and the stitches are already coming loose due to how much my Mum's Necchi hates knits and skips stitches.  The other two, with picot elastic, are fine. I suspect the grey and the blue are the So Zo pants, and that the green and red are the Watsons, but I'm not entirely sure.

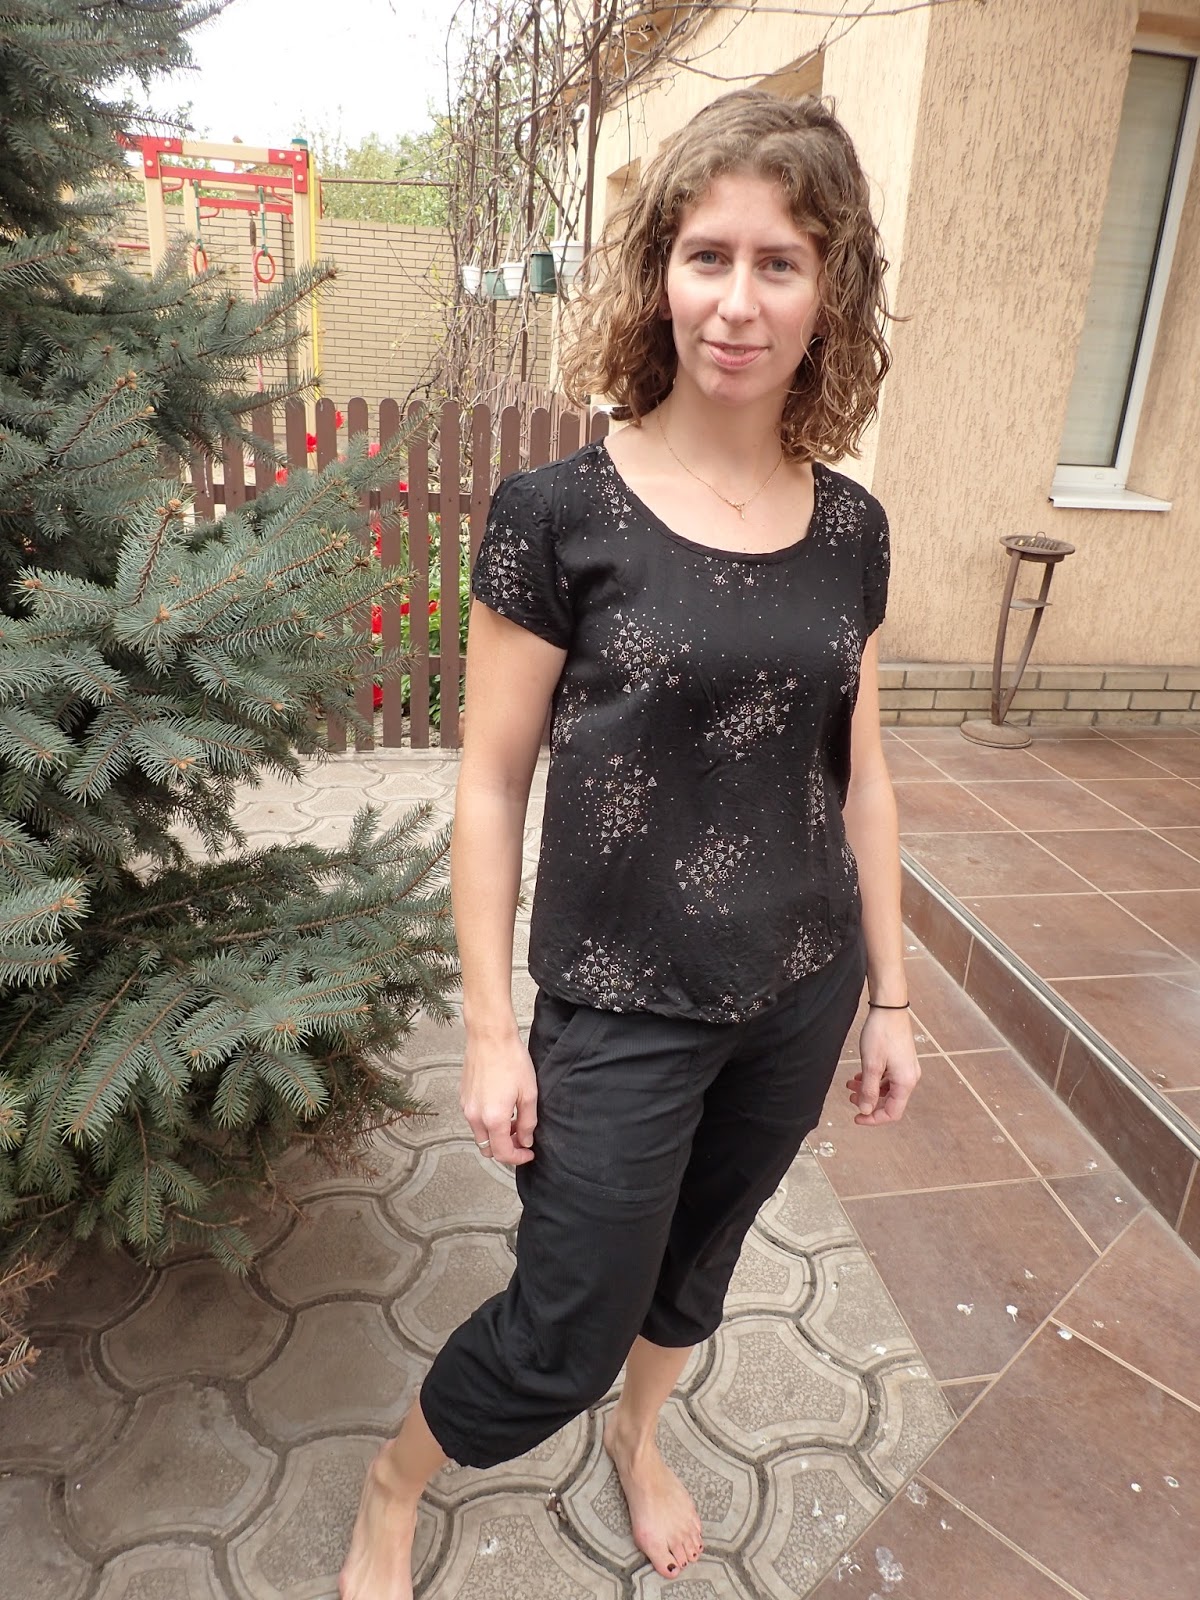
I finished a Grainline Scout which is upcycled from an old dress:


My final thought on Scouts is that the only one I have ever really liked is the double-gauze.  So I think I'm going to stick with that from now on.  The fit of a size  4--2 seems to be good with no other changes. 

I decided once and for all that this Ondee does need to be an Ondee and not an Ondee-skater.


And then I moved on to some new knicker patterns: the Acacia - 2 sizes from one tshirt! (XS and S - I was between sizes, and I think the S fits better.) Yesss upcycling!  I like the butt coverage of this pattern, and I liked the option to use 3/8" elastic.  However I also think that using picot bra elastic gives the nicest finish when you don't have a serger.  And the samples made by Megan are way cuter than using old tshirts and inspires me to actually buy fabric specifically to make knickers with - one day. 


And the Kitschy Coo Barrie bottoms, size 2, which pattern I had high hopes for as it uses normal bindings that might hold up better in the wash.  First one is the lower waisted cut from an upcycled navy rayon tshirt - very soft but a pain to sew.  This has worn well and is actually my favourite of the batch.  Second one is my mum's old blue tshirt circa 1980 and the higher waist - doesn't have much stretch, in fact, those ended up too small to even pull on.  I do like the rayon, the fit is good, they sit totally below the butt so while there are panty lines they are at least not so obvious, and the soft waistband is great.  Must make these in more nice soft stretchy fabric.

I was also very pleased by how many knickers I could get from one tshirt!  This is an upcycling win!  Although I think my Anima lounge pants are totally the winner on best upcycled use of tshirts - enough that I might do them again but focus on colourblocking them so they actually look good too. 


Saturday, 19 November 2016

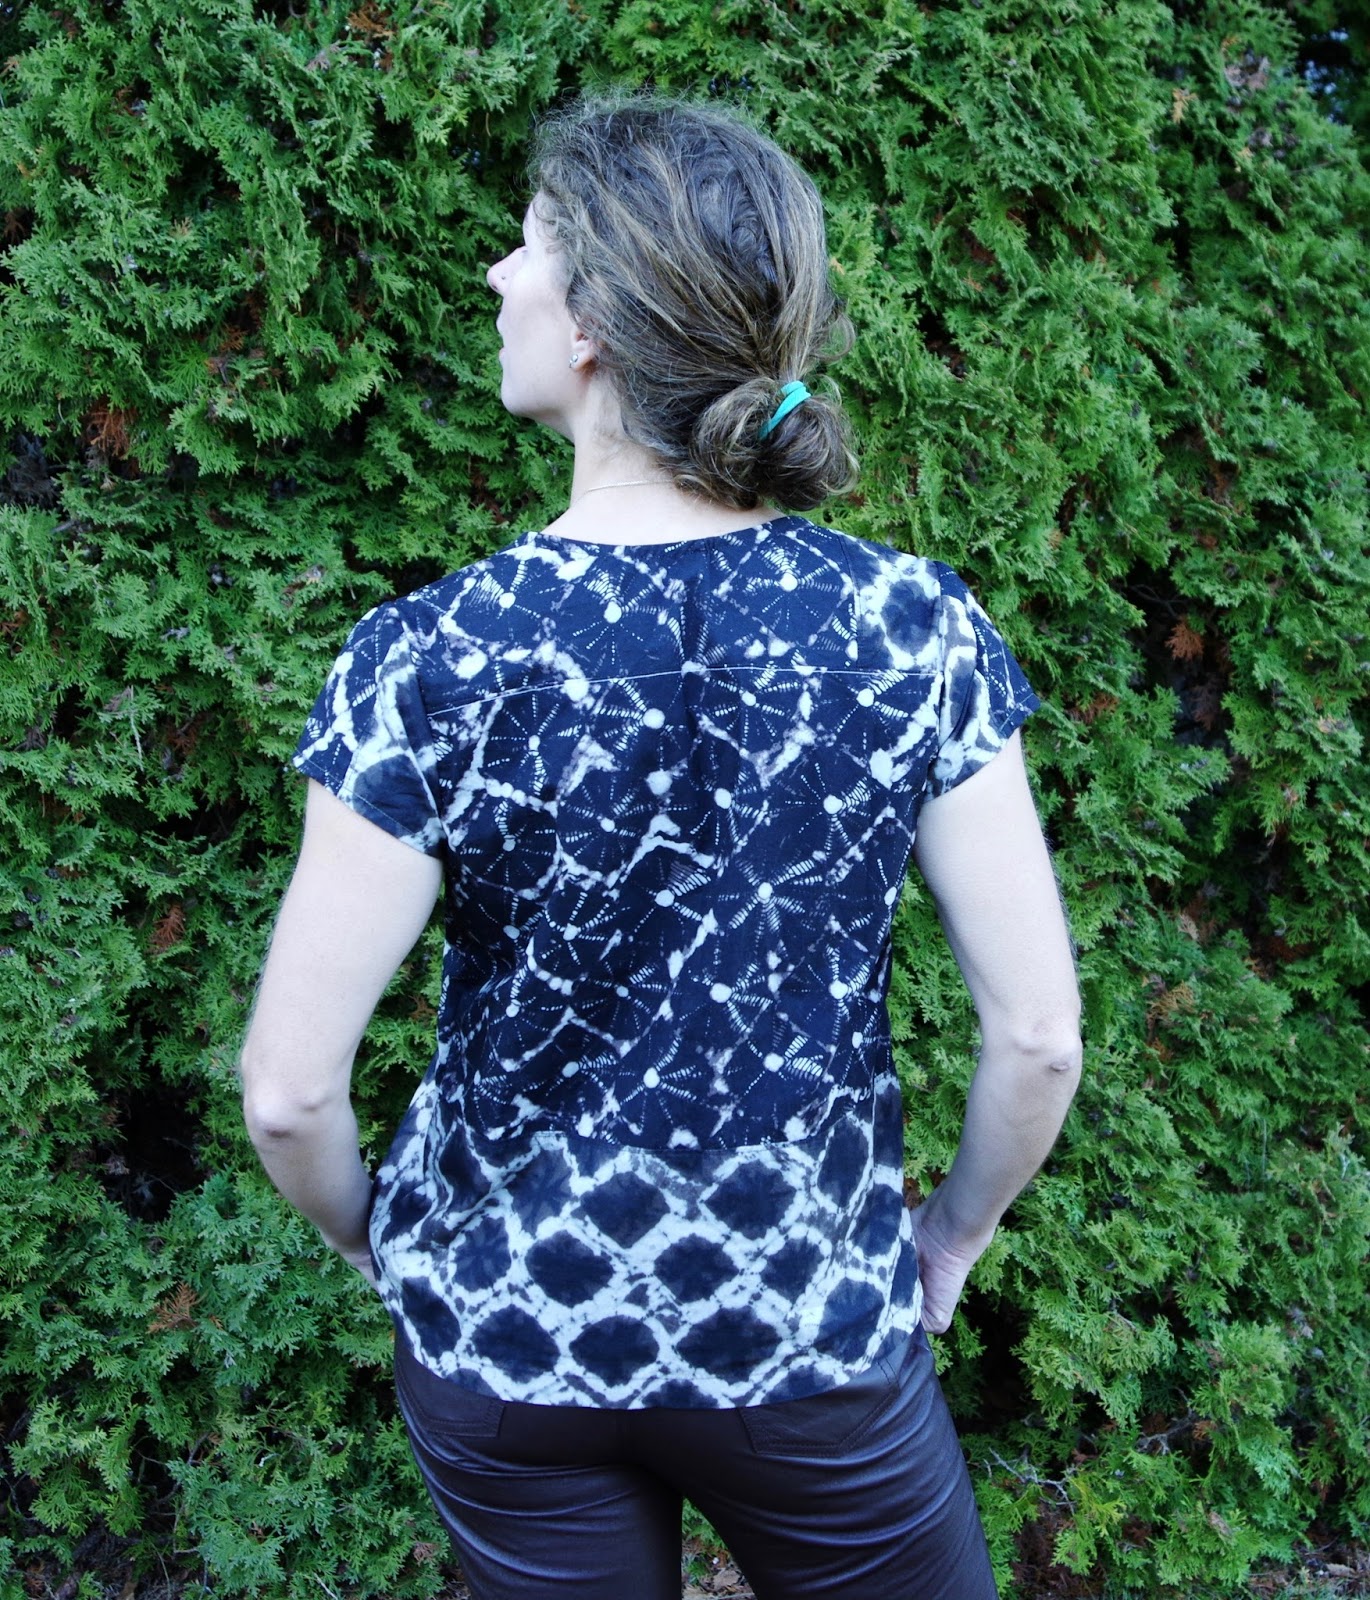
Grainline shibori Scout & Hemlock tee

In my endless, slow progress toward a well-fitting Scout, this version is for my cousin who is basically the same size as me. (Previous Scouts here, here, here, here)  It's a size 4 at the top, going to a size 2 below the armscye.  No other changes.  It's interesting to see all my trial Scouts in different fabrics, but the main lesson (other than ugh, silk-velvet) was that a shoulder widening didn't improve the fit across my back.  This version is much better.  I will add in a sloping shoulder adjustment to my next Scout...but I'm hopeful that I'm finally nearly arrived at my goal!  

Making a Scout is pretty easy.  I french seamed the shoulders and sides, and therefore forgot what the seam allowance was to set in the sleeves, which I refuse to french seam, but it didn't influence the fit (I sort of went from 5/8 to 4/8 on one sleeve.)  The fabric is a very densely knit cotton that I dyed about 2 summers ago, using shibori techniques. 


And I've been looking for some kind of ideal, exciting knit top.  So finally I got on the Grainline Hemlock bandwagon.  Because it's free, and the dropped shoulder started to appeal to me.  But I think this top needs a fabric with less body.  My version is just...ok.  I did what I could to make it wearable, aka I added cuffs to the sleeves and shortened the body by 2 inches.  I might make another one in a lighter weight jersey and take 2" out of the center front and center back to narrow it a bit.  Not sure yet. 


The fabric for this, as boring as it may appear, is actually interlock weight organic cotton from siebenblau in Berlin.  I love their website but they don't ship abroad, so during a recent trip I allowed myself to buy a few pieces of fabric there.  It was overwhelming!  There's still so much I wish I could have from their website!! 

Tuesday, 26 April 2016

Grainline Scout: the Goldilocks problem

I've had enough time to review my past Scout mistakes and improve, so I totally thought this was going to be nirvana.  I also had weeks to prepare for my sewing vacation so it's an embarrassing oversight that I didn't review my old posts and the size of Scout I've used in the past! I cut a size 6 sleeve and a 6 top, tapering to a size 4 below the armscye.  If I had paid attention I would have known to taper from a size 4-->2, as I have made both a size 2 and a 4 in the past and wasn't really satisfied with either of them.

I increased the width of the bias piece, which has never been enough for me.
I changed the bottom using the Polly Top bottom, which adds shaping but also adds width towards the bottom.

The fabric is a drapey rayon that I got from Anna ka Bazaar.  I have seen people rave about Anna ka Bazaar, and the shop is cute and the girls in it were nice to me when I was in Paris, but I find the fabric quality, when you buy online, can really vary.  This fabric is a lovely, not-quite transparent rayon, and I've seen other people using it as well - Republique du Chiffon used it for their Madeleine dress (which yes, I would totally make if I had more time.)

Small rant: I know everyone loves Grainline.  I don't love Grainline. I'm always lukewarm about the patterns and then eventually because everyone loves them, I try them, and then I keep trying and keep trying them, but I never seem to arrive.  I'm additionally grumpy because I had to re-download all my pdf patterns, and I had some expired links (it's been many travels and many computers since I started sewing!).  Every company that I wrote to sent me a new link for one more download.  Except Grainline.  They ignored my email entirely and I had to buy the Scout pattern again.  This doesn't make me change my mind about kind of not loving Grainline.  Rant over.


And, in fact making this Scout made me grumpy.  Black is hard to see and the rayon is just slippery enough to make you pay close attention. The results are still not totally satisfying me. In this size the back looks ok but there's extra fabric in the front - I could easily take out 2inches from the entire front.  Also, the extra width from the Polly bottom makes this feel like a capacious, shapeless top.  The drapiness and beauty of the rayon balance it out ok but in the end it's still not perfection!  Arg!!

So for next time - read my notes!!  Cut a size 4, tapering to 2 below the sleeves!  Don't change the hem! Also I really loved the feel of double gauze (I used a Nani Iro gauze for my first Scout and I only recently gave it away because my muscles finally were too much for the size 2 sleeves...)  Nirvana is almost in my grasp...or do we feel that with each sewing project? 


Friday, 21 August 2015

Silk Emmeline & Silk Scout

Oh my gawwwd I am such an addict.  I am in my usual pre-departure phase which means I suddenly and unhelpfully want to buy clothing as a psychological support for my upcoming months of homelessness.

And that extends to fabric, ah, sillllkkksssss!  In Italy!!  We went to Como one day because it was a Swiss national holiday and thus, what could be more thrilling than the not-closed Italian grocery store full of wine, cheese, pasta, fresh tomatoes, etc? Um, and the not closed shops in the center of Como full of nice cheap clothing?  Or the FABRIC STORE in Como full of not cheap, Italian silks? Especially as I was just recently reminded I wanted to do Emmeline in silk...And the shop was full of silks!  I couldn't possibly resist an artistic Italian panel, or some wild paisleys...so now my pile of projects for the next month has stopped shrinking!  Help!!

To gird myself for this and also for an upcoming evil chiffon project, I got out the tools. On the Scout I tried out the spray glue. So, spray glue.  Really.  Doesn't help a whole lot.  Instead of just lying your pattern piece on the fabric you have to apply it really carefully and I think this took up enough time to make it a waste of time. Your fabric and pattern piece are nicely attached to cut out, but then you have to rip the pattern piece off the fabric (would NEVER work on anything fragile) and then you have sticky pattern pieces. Which gum up your iron.  haha!

Sorry head, we don't need you after all...


More on the Scout: I cut a size 2 with a 1" wide shoulder adjustment and a bit of shaping at the bottom, otherwise no changes.  I continue to be incapable of doing whatever I am supposed to on the Scout with bias taping, so I went for another, um, creative couture finish. (This is very narrow bias tape! I can't fold it over into 1/4s!) This is a good fitting Scout and I am so happy with it. It still pulls a bit across the back but overall the fit is much better.  After the glue experiment, I gelatined the rest of the fabric before cutting out the sleeve.  Gelatin here is a bit tricky as it comes in sheets.  I ignored the instructions and plopped it in warm water, which made a gooey mess, and then I just popped the fabric in that...it got some bits of gelatin on the edges but was delightfully firm to cut and sew.  I love gelatin.  One is supposed to dissolve it in cold water and then add it to a warm water bath.  That way you avoid the gummy gelatin ball.


Annoying unfinishable triangle at the armpit.


As a reminder of how great gelatin is, I cut out the blue Emmeline without anything.  It sucked.  I also didn't pay attention on the front which is why it has a design feature of being half matte and half shiny.  I am great at adding design features ; )  I lengthened the Emmeline using the bottom of the By Hand London Polly top pattern. I french seamed, and had the same problem as before that there is no real seam allowance difference at the sleeve, and so it creates a triangle-fabric-mess.  I can't think of a way to avoid that. I then used my micro rolly hem foot on everything.  This was totally experimental but it came out amazing, even though the shirt is actually quite, ermmm, not symmetrical...it looks great on!  Way better than expected! and NO BIAS TAPE!!  My life has been so improved by learning the use of this hem foot. 


Monday, 5 January 2015

Simplicity 7715 Rainjacket (and a bonus Grainline Scout!)


This is one of those creative projects that was so wrong in loads of educational ways...I had the idea of a little hooded rainjacket.  I found this pattern based on my idea (there is this one review of it.)  I knew I would shorten the hem and raise the pockets, but I planned to basically follow the pattern other than that.  However because it's quite loose, I figured I should muslin it, and I did, using a bedsheet.  That wasn't helpful at all.  The real question was whether to line it, and how it would look in coated fabric, and a bedsheet couldn't approximate that. 

I got the idea to make it for a friend as a muslin.  She's smaller than me by about one size, and said she could find a use for a baggy rainjacket.  I got pink Gore-tex-like fabric and wasn't sure what to use as the lining (it ended up being part of another bedsheet.)  When I was browsing blogs ages ago, I came across a post discussing the different types of Gore-tex-like fabric.  I can't find the original post, but the gist was that there is 2-layer and 3-layer.  Two-layer is a layer of nylon on the outside, and a Teflon inner side, which is white and gummy.  Three layer does not have that gummy feel, because the inside has also been treated (or there is a membrane sandwiched between two layers of nylon.)  The 2-layeris what I had, and was reported as being notoriously difficult to work with, because the Teflon sticks to everything and since it is rubber, it also stretches and will lose its shape.  Therefore I can admit I was warned.  


The things that were bad:

1. 70% fail: the fabric.  Sewing coated nylon when it was the pink side (not the Teflon side) up, and when it was against the lining, was not terrible.  Sewing two layers of coated nylon together was terrible.  I made no attempt to avoid all that shirring, because I didn't have the equipment for it, I had no teflon or walking foot.  I found that masking tape didn't help. I occasionally put pins in the seam allowance, which is also a pain because the fabric is rubbery and doesn't accept pins very willingly.

2. 30% fail: the pattern.  It's not a bad pattern, but it's a very oversized, kind of shapeless hooded jacket.  I probably needed to actually shrink the pattern about 6 sizes before it would have matched my hopes.  The finishing touches, which are always the most difficult for me, were done freehand and are particularly bad -- how do you attach the bottom of a separating zip, when the little lower panel of the zip is hard plastic?  My sewing machine needle won't go through it.

The only reason I continued:
I thought despite everything, my friend might still find it hilarious enough to wear.  For a little while, anyway.  The finishing is not very good, especially along the zipper bottom, and so I'm not sure whether the zip will pull loose.  

I lined the body but not the sleeves of the jacket, and folded elastic into the cuffs and hem - I just folded it over and sewed it down.  It's not a very neat job.  The pockets are lined with geometric rayon geometric scraps, which made them easier to sew down to the front of the jacket.  I was considering putting a string into the hood, but I left it out because the hood doesn't seem that deep (I am not sure it's very functional) and my string was too short...

Here, also for my friend, is a bonus Scout.  It's such a relief to make a really simple, easy project!  This is a size 0, and I used store-bought bias binding and french seams.  The only seam I left open is the sleeve attachment, although there is a Grainline tutorial that says you can french seam the armhole the same as the body.  The quilting cotton was easy to work with so I practiced my iron skills by actually using the steam - generally it scares me and I avoid it. 

Saturday, 15 February 2014

Deja vu: Grainline Scout, now in silk velvet

I couldn't part with my silk-velvet scraps when I left New Zealand so I quickly did the wide shoulder adjustment I'd been putting off and cut the project out.  It was my first thing to set up when I arrived at my parents and surveyed the Necchi.

Welllll, how did that go?
It ends up that velvet is made up of all these hair-like fibers that stick up.  Remembering to iron it with two layers of velvet stuck together - that was pretty easy.  But getting things to line up for sewing was tricky.  It ends up being nefariously shifty, not like silk, but like suddenly shifting a 1/4" as the fibers all simultaneously bend.

Put this together with some bias tape and I was screaming bloody murder and blaming it on the machine.  The poor plodding thing wasn't really at fault though...so I'm really glad I did a velvet practice project.

Moral of the story: don't sew with velvet.  Hah!


Luckily the Scout is easy and until I got to the bias binding I didn't have real trouble.  A walking foot would have been nice but the tin full of feet is full of weird feet (except for a rolled hem foot, I recognised that one, yippee!) and none looked like a seamonster-walking foot.  I zig-zagged my edges and then for the hem and sleeves I just folded that over and sewed it down.

In the end even the neck isn't too terrible, because once the bias tape was attached all the mess disappeared inside the shirt.  However I am really dissatisfied with the final fit.  My best friend, Dana, taking the pictures insists that it looks great but the sleeves seem to downright droop off my shoulders (was 1" too much?) and the usual shapeless Scout looks particularly shapeless in velvet.  Or is it just me?  This is the same size 2 that I have made for all the other versions, except that I idiosyncratically lengthened the hem, more in back than front for a bit of asymmetry. 

Not sure about this one yet, but it was a good practice project.  And I'm done with Scout tees for awhile!


Pattern: Grainline scout, size 2, slightly lengthened, 1" shoulder widening.
Fabric: silk velvet with a touch of nylon, from Global Fabrics in Wellington