Showing posts with label Willow. Show all posts

Saturday, 26 December 2020

Made for Mermaids Willow romper review

 Size "purple"

Fabric: lightweight merino, probably a blend, from Otara, which is the land of cheap fabrics in south Auckland. 

I bought 4 patterns by this new to me company.
I have now made 3 of them: the Avery, Logan, and the Willow. 

As far as I can tell this is either a friend, subsidiary, or someone who stole the concept from Patterns 4 Pirates.  The designer uses a very similar layout in her instructions, though the patterns are slightly different - using colour coding for sizes.  They feel very similar in character as well.

My first large irritation is that I had these printed as A0 patterns and the paper usage was horrible.  Pieces were not placed tightly on the paper, and I think there was an entire huge sheet for a single A4 element that could have been put somewhere else.  I pay for the luxury of A0 and it's $7 a sheet.  When a pattern lazily takes up 3 sheets, that's 21$ I have paid on top of the cost of the pattern!  

I have mentioned elsewhere that I passionately hate instructions done as colour photos.  This is unchanged.  The way I survived these instructions is that basically, I rarely needed them. 
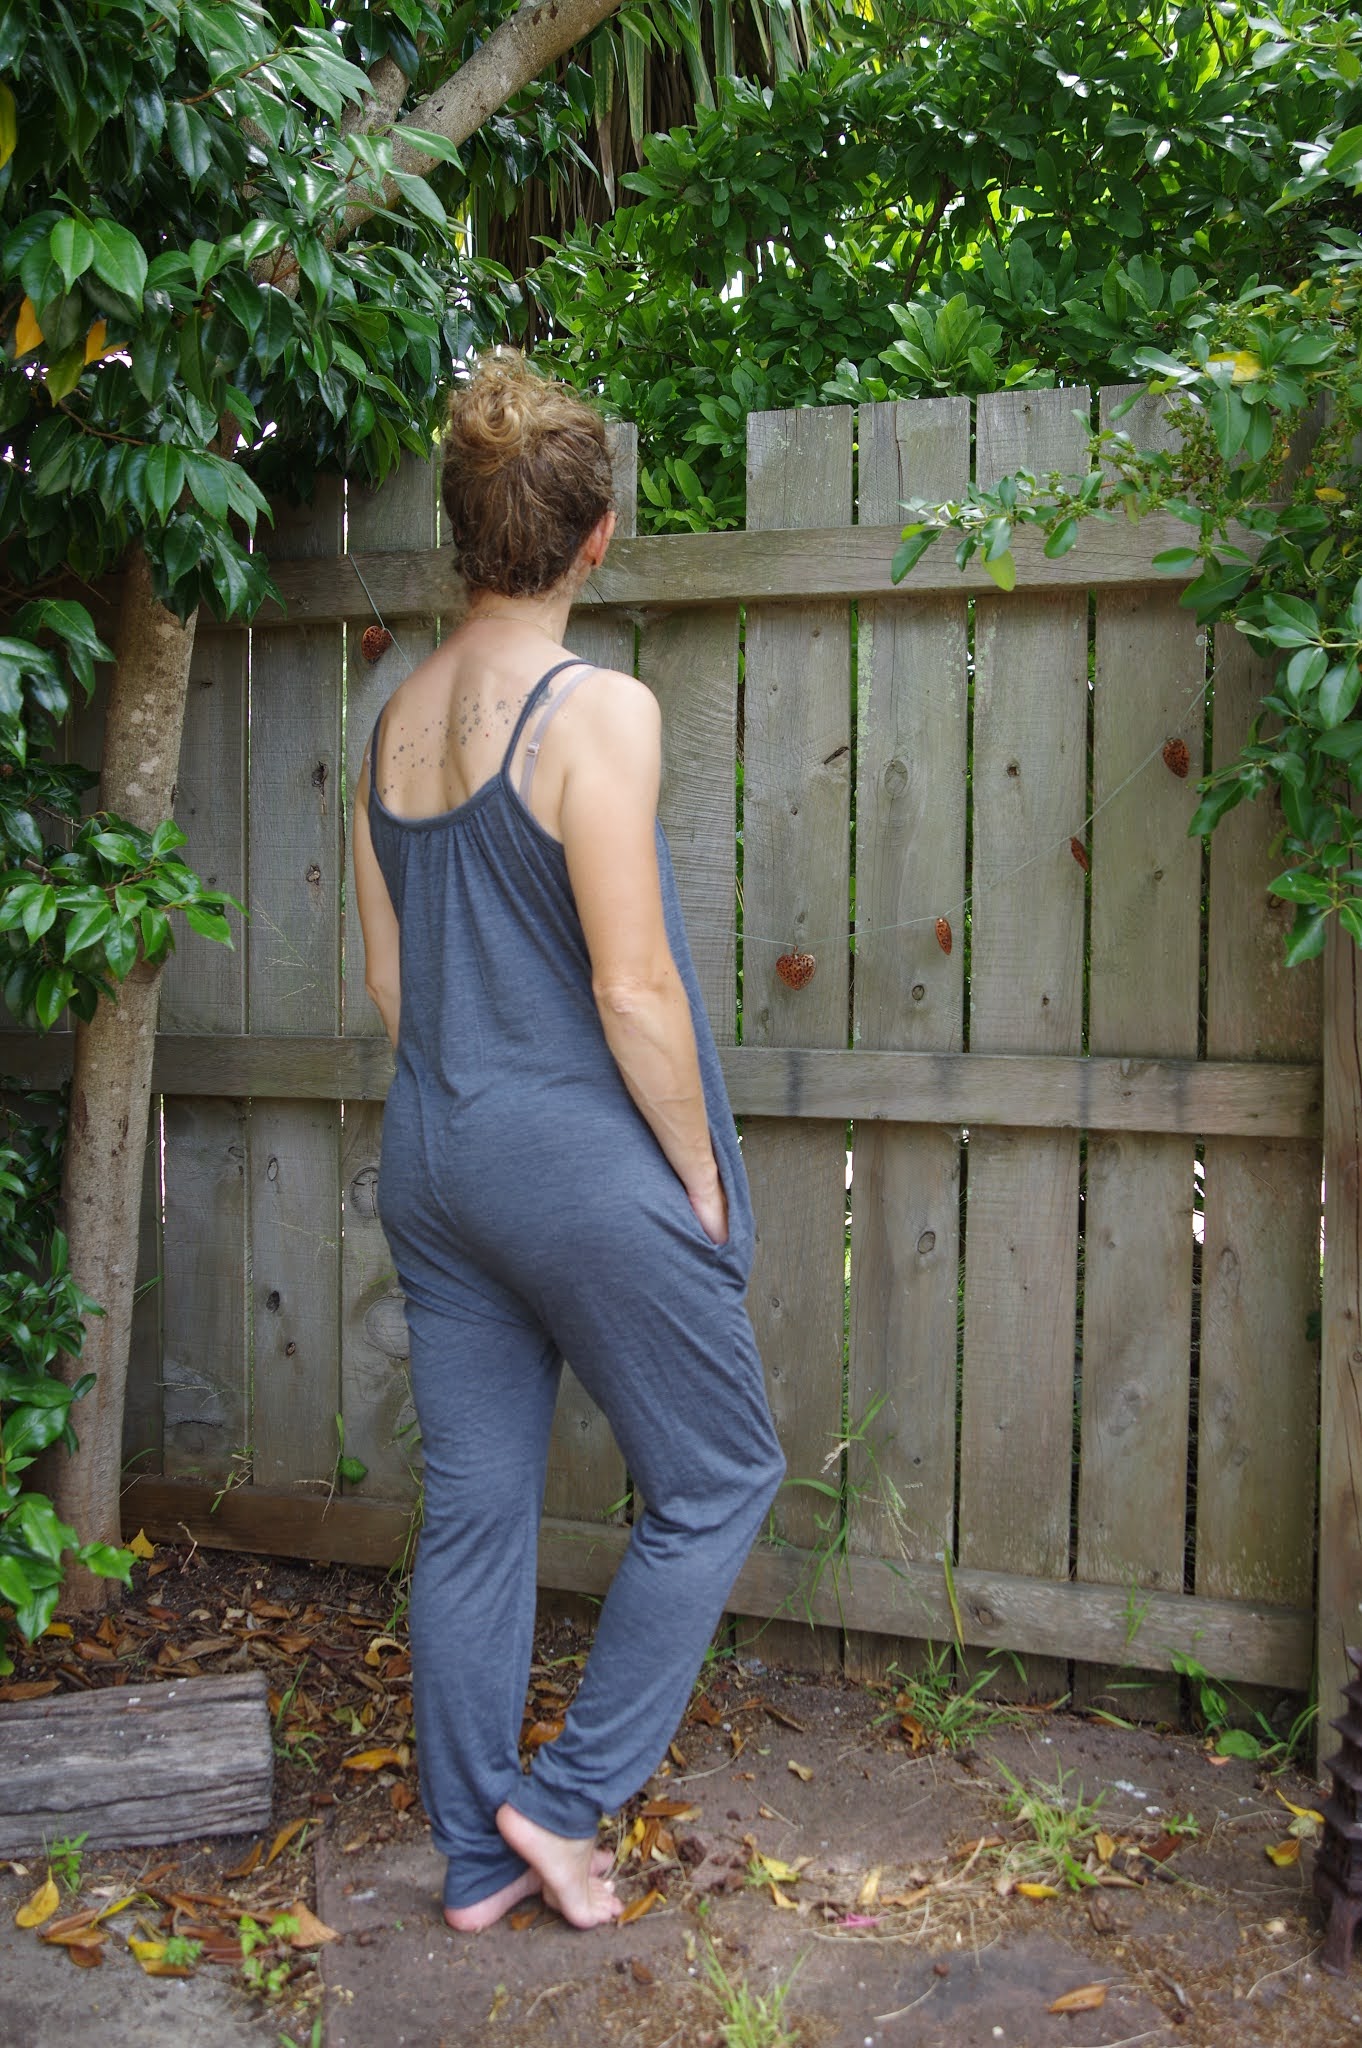


This was a fast pattern, as were the Logan and the Avery. Thus far my feeling is that this company puts out easy to make patterns with very lazy drafting, in knits where it doesn't matter.  I made the higher crotch romper, and I might have shortened it.  The fit is fine, though not at all flattering. The pockets are a bit too low.  I don't really like the strap method.  You precut the straps and sew the ends together then treat it like a bias strip, sewing it it as a binding for the armhole which is just not sewn to anything at the top. There's instruction on how to put clear elastic in the tops - which I recommend, but my straps are gaping all the way around, suggesting that this method overall doesn't create a very good structural finish for a garment.  I do like the bodice fit enough to be semi tempted to make the dress, but not until I have decided how to fix this strap issue. 

Friday, 11 October 2019

Two layer silk Grainline Willow

This was one of the super precious projects that I thought up in my final month or so in Arizona, the first time I was in Arizona, when I was still pretending I'd have time to sew prior to moving.  I cut it out and then have carried it with me and it made the trip mainly by dint of being few pieces and being really small flat pieces.

The outer fabric is silk-cotton from Ramieandlinen on etsy.  I used it here for the lining of a Stylearc jacket, and it was terrible lining fabric because it's basically sheer and far too lightweight for such an application.  So the second layer is plain white silk, which I did gelatin prior to cutting out.  Comparing the two layers, the gelatin seems to have done well as the silk layer isn't too grossly different shaped than the top layer.

I used the same size (4) as on my first successful Willow, with the same extra cm added to the centre back.

The method for attaching was the burrito method -
Sew shoulders
attach the neck seams, understitch and cut
burrito and sew the armholes
pull through shoulders
sew side seams continuously

I then thought I would hand sew the bottom because the key feature I'd thought up for this was to do a shy amount of embroidery over it along the hem lines.  I reckoned this would hide the seams which you can see through the fabric, it would keep the neck and sleeves more stable, and it would make the hem more interesting.  I thought it would wrinkle if I did a machine hem.


Because of all this thinking, of course nothing got done, so here we are two years later.  I gave it all a good iron, picked out some thread and set a long stitch length.  I'll embroider some other project, some other day!


Also you can see how my Dawn Jeans are wearing in - not quite a perfect fit but totally wearable and they definitely impress everyone.  This is a totally me-made outfit!  My sandals are from the Shoe Camaraderie workshop last April. 

Sunday, 2 October 2016

Grainline Willow Tank

I had to wait until I had made more than one of these to give a real review, because my first tank was really short due to lack of fabric and I didn't feel like I could judge the pattern by it. 

This was an unplanned pattern purchase.  I was in Seattle looking at what sort of constitutes a stash (the fabrics left in my mother's old stash in our basement) and a small tank seemed just the way to get rid of so many floaty wovens.  But then I got distracted by this amazing scrap of Nani Iro rayon double gauze, from Miss Matabi on etsy.  In retrospect I should have waited because the fabric was dramatically shorter than the tank - about 4 inches, I think.


I cut a straight size 4.
Too tight across the back and the armholes.
Lots of bias taping.  My bias tape technique needs work, it always stretches out.
For the bottom I made the most minimal hem that I could, considering that double gauze unravels fast so it was still about 1.5 cm total.

It's a very easy pattern.

The second time I used a very drapey, spongey rayon from emmaonesock. The problem with such drapey wovens is cutting them out, ugh, as bad as silk for shifty and slipperyness.  However, this time around I didn't have the pattern instructions so I had to make do without.  I mean, there isn't much to surprise you about this pattern. 


Sorry for the low resolution of my photos.  They were taken by my cousin in Edinburgh centre, using my phone (which is pretty crappy). 

I did wonder if my cutting out was bad and that's why it seems so big compared to the first version. Since it was a paper pattern and I had cut it out, I kept the size 4 rather than trying to cross size lines.  I added 1 inch to the middle back.  I expected to scoop out the armscye too, but after trying it on I was shocked -- A change of fabric makes a huge change in the result!  This top was so drapey and big.

I stay stitched all my curved lines first this time.  I did the first half of the French seams and then assessed and decided it was worth my efforts to raise the darts.  They were drooping something like two inches below my bust.  So I unpicked and resewed them about two inches higher by marking where I wanted them to end.  It wasn't bad, just the dart edge didn't get caught in my new French seam so I had to do some emergency zig zags on the inside.  Also I made them physiologic rather than matched on each side, and I think that makes them look uneven - maybe I should have put them in the same place...

Also as you may or may not notice, my amazing inability to hem a straight line presented itself here.  But my struggles with Grainline's perennially too-narrow bias tape worked out ok, although I thought my neckline was all out of shape, some ironing improved it and it sits fine when worn.  I attached the bias to the outside with about a 1/8 seam allowance, and then folded it twice to the inside as I sewed it down on the second pass.  This actually worked ok.  It felt like using a rolled hem foot. 

The end product is amazing.  I'm really really pleased, both with this fabric, and with the result.  If I made the dress I would probably put in the effort to make an upper back-widening instead of widening the entire back body.  It would be nice to have the instructions prior to making the dress but I think they might be lost in the void.  Who knew pdf patterns had so many pluses??  Is there anything in the instructions that's not obvious? 

Overall: I recommend a fabric with some drape to take advantage of the shape of the top.  I like it!  I will make it again and might try the dress, although how do you attach the bottom part to the top?