Showing posts with label sewing clothes. Show all posts

Thursday, 5 September 2024

Vikisews Leora dress - my first vikisews encounter

I have actually moved on to making things that are more winter-appropriate.  But I bought two vikisews patterns and I wanted to at least sew one of them this year.  The Oona was planned, but I didn't have enough fabric.  So I moved on to sew the Leora.  

I would never have looked twice at this from the model photos.  It was an instagram picture from @maisewdelic that got me - cropping the dress, the sleeves, and putting the tie only through the channels rather than up and around your neck.  NOW I was sold.  

I dove into the weird world of Vikisews fit.  I got the size 36, height 162-165 cm. Because of that I made no additional pattern modifications, assuming that the petite fit would be allocated just as I need (hmmmm).  Cropped the sleeves randomly halfway down.  Removed 45 cm of the skirt. And cut the tie half as long as required.  

The instructions were really cool once I got over the question of what knit bias tape is.  I used strips of an old tshirt because it seemed more stable than the rayon of my main fabric and I had it handy.  I love the finish that provides, actually.  Creating the channel was very cool.  Overall this was a super fun one day project.  

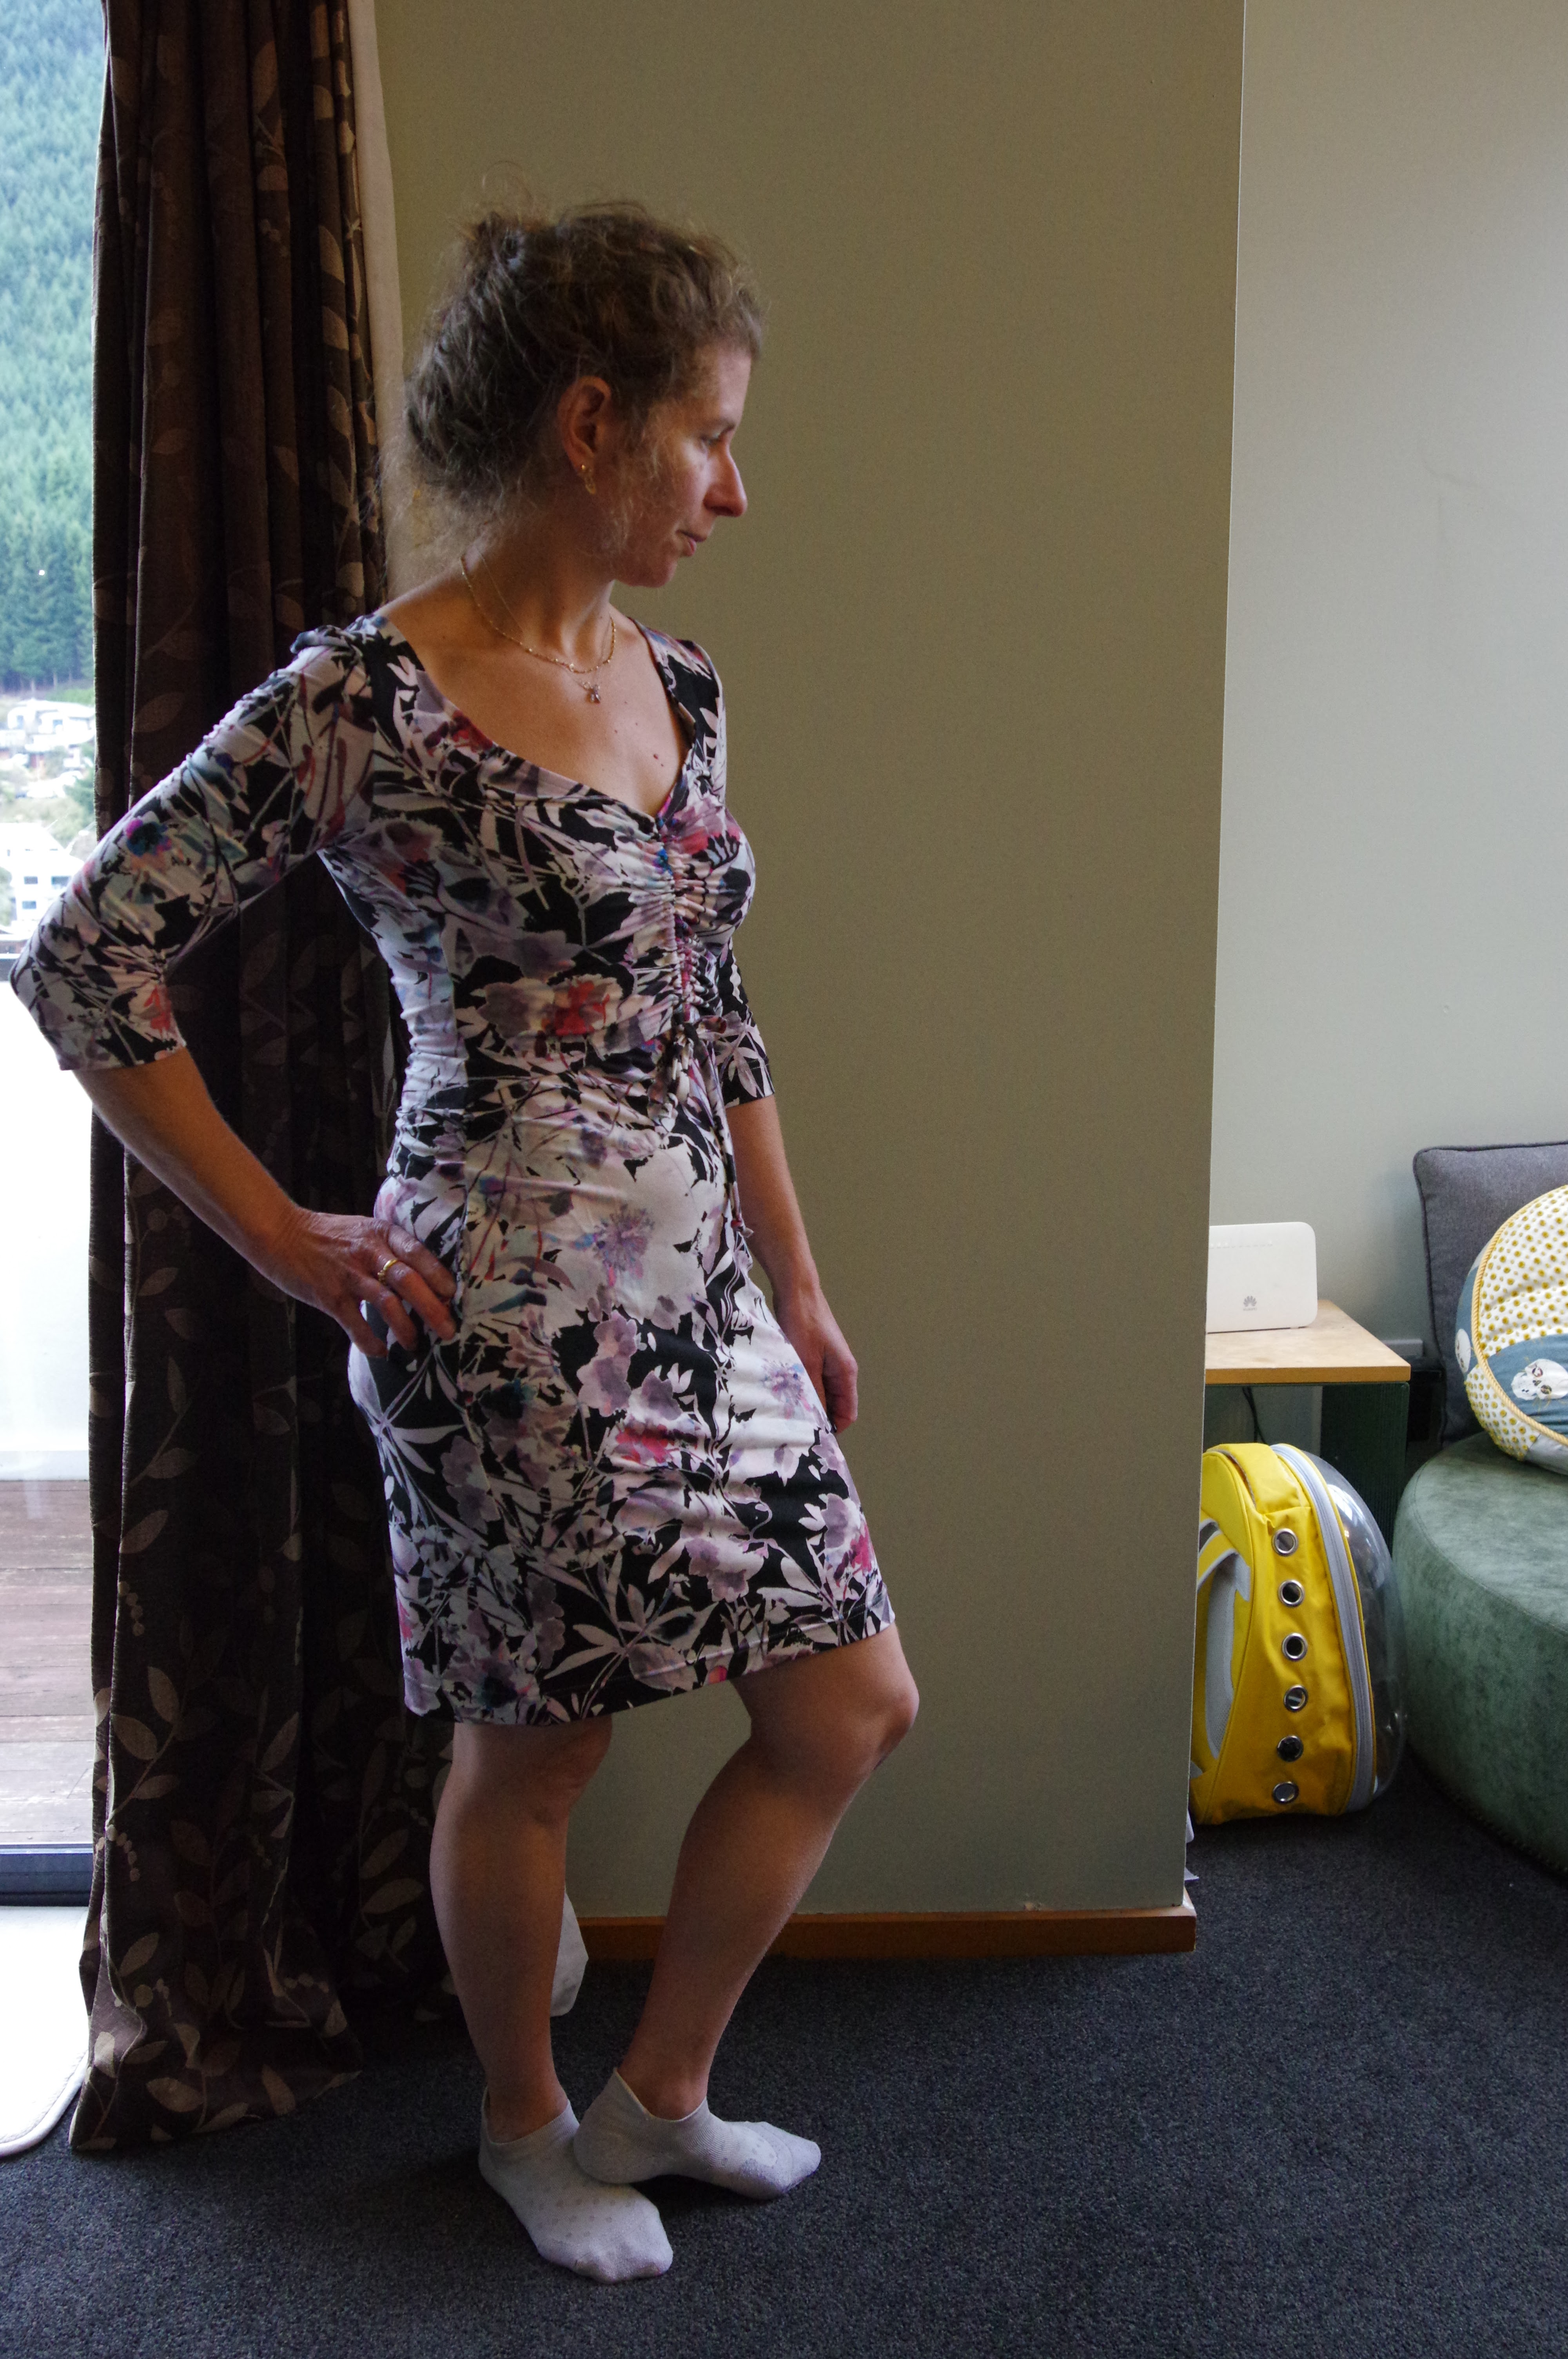
Finally get to try it on. Hm, interesting. 

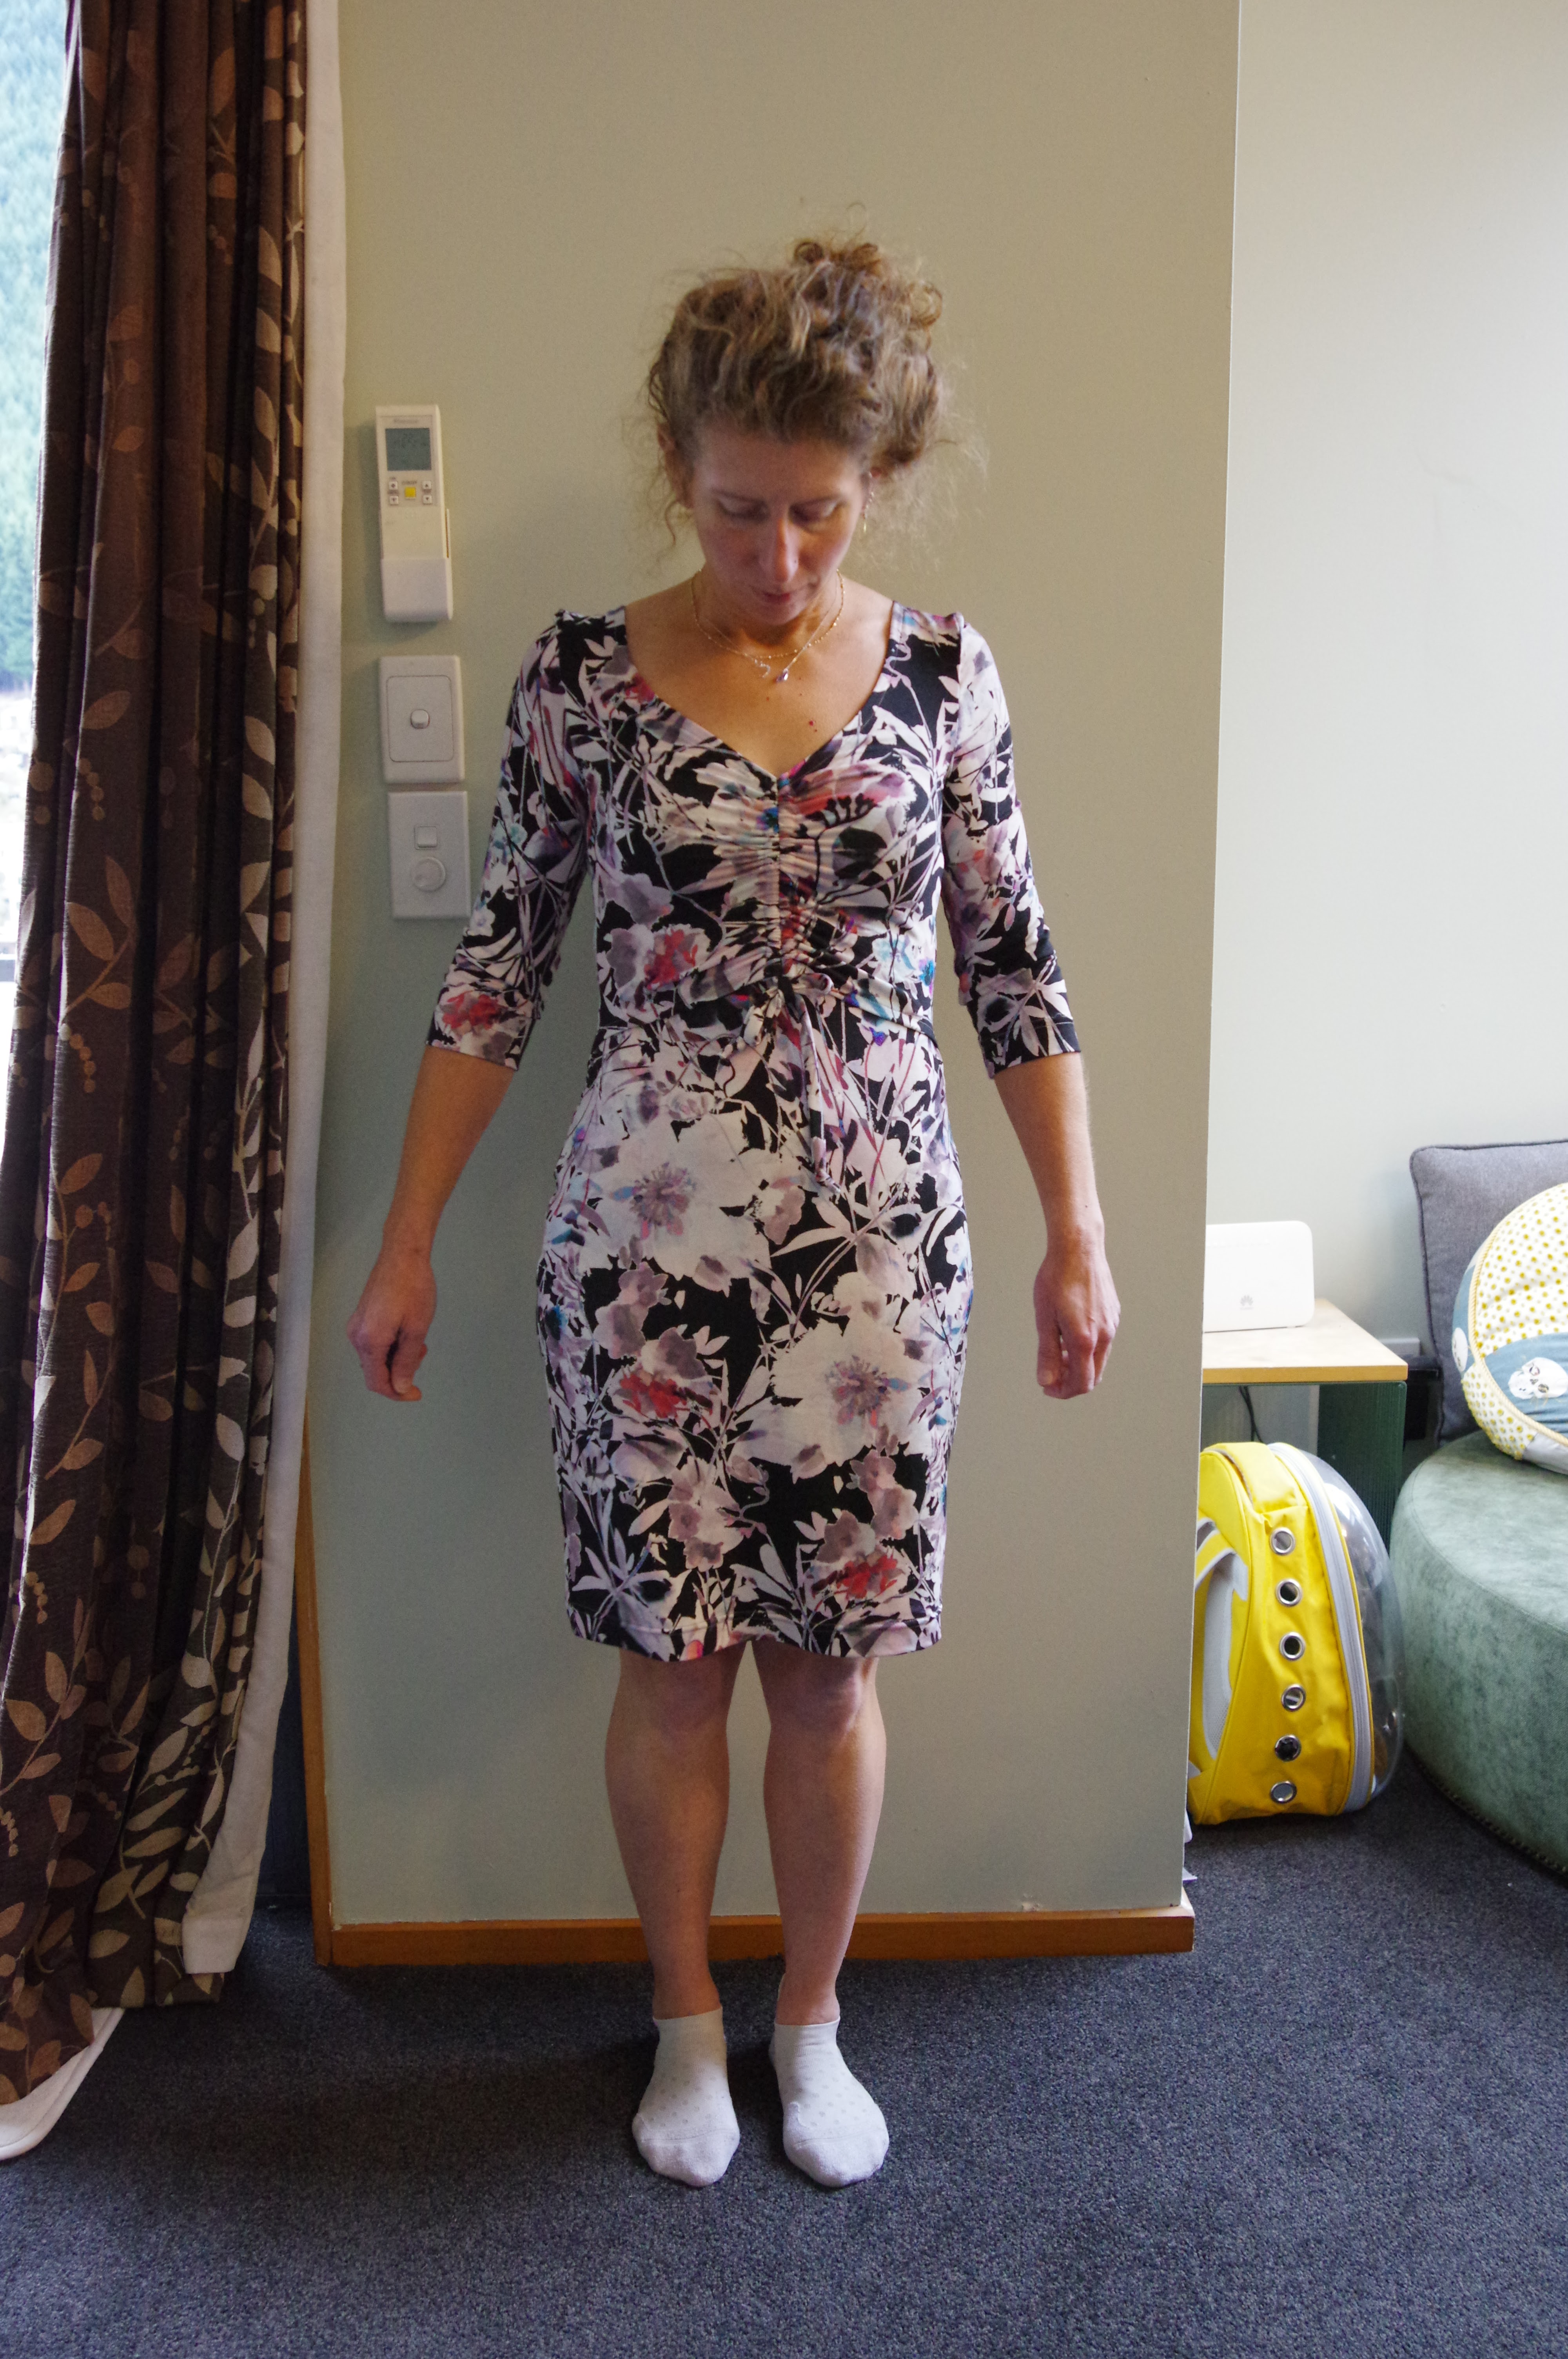
Now, this fabric is from Tessuti, it's another stash special fabric, and yet again there's me splashing out on an untried pattern.  The fit of this is good (does anyone like looking down at your own belly?  But I think it's not really something another person can see) except oddly the right shoulder. The left is a little bit better for some reason.  The right seems like the sleeve was put in wrong, though it wasn't.  I need to try to just overlock off the top curve of the shoulder - actually this is where a sloping shoulder adjustment would have saved me, enough that I might consider just doing it on everything in future. There's a huge amount, maybe 1" of dead space at the top of that shoulder, and this is quite a wide chested cut, so that's important to keep the top from falling off. I would have done it right away but I changed my overlocker thread and my overlocker is broken so changing thread is currently a bit dramatic.  Alternately, that fit is due to me also being short across the upper chest.  I've never shortened a pattern at that level, but the straps on tank tops are often too long, and I've often noticed taking a wedge out from the front horizontally above the bust would have helped things fit better - unfortunately this isn't a fix you can do once you have sewn a garment together, so I rarely consider it. 


Sorry about the particularly bad photos.  My usual outdoor location was blocked by a car and I got really frustrated with my camera's autofocus. 

Aside from the right shoulder, the fit is great.  It looks nothing like on the model.  Because I'm so short waisted (I presume that's why), the skirt comes up past my belly button and the ruching lies over it - no hole!  Very demure. I had the exact same fit on the Papercut Axis dress.  Possibly if I did do the tie over my head I could change where the ruching lay but I will never do that because I think it is hideous.  I'm fascinated by how consistent this is - I have a couple more front-hole dresses to try next year and I wonder if I will continue to find that they sit very differently on me due to my short waistedness (or some other reason?) 

This counts as a win. It's cute and wearable and actually very flattering.  (I got around to fixing that shoulder as planned, and it's better.)  I would love some Fasanella style analysis on why my fit is so different from the expected fit though! 

Tuesday, 14 November 2023

Anna Allen Helene Jeans pattern review

I think I had this pattern from the print shop last August, and the fabric was a splurge from Blackbird Fabrics last year...this is a clear example of the things I wanted to sew Right Now when I fell down the work and travel rabbit hole from October to June!  And oh, they are amazing.  Utterly fantastic.  All the jeans will be Helene jeans from now on.  Except for one more pair of Gingers, because my only pair are starting to fall apart and despite the terrible fit, I have worn them quite a bit with long shirts to hide the waist.

(On which topic, find the high rise Ginger pattern that has gone awol in mine or Tessa's stashes??  Or find a way to add some length to the top of the rise of the midrise pattern?  Also, will I finally suss out how to get rid of the extra fabric in the thighs?  And finally, why do people like those idiot tummy-stay pockets?)

Back on task. 

Made size 4, matches me on the size chart and is what I have usually made with Anna Allen patterns. 

This recycled denim is beautiful to look at but it has an oddly sticky feel at times while sewing.  Not when wearing - it's just fantastic feeling on.

32" inseam, slim straight version - I wanted to do the straight version but for some reason I didn't find the pattern pieces first and had already adjusted this one. 

Shortened rise a mere 1/2" because I compared it to the Persephone pants and the rise is like 2" lower in the front, so I didn't go crazy. 

I did, however, do a different crazy thing when cutting these out.  For some reason I decided I was Done With Leg Twist.  On the Cone Mills website they have a cutting layout to avoid leg twist and I used it.  I don't think that it uses more fabric to do things that way, although it does mean you can't use the selvedge. On which topic - how can you BOTH use the selvedge AND avoid leg twist?? 

(To find this link: Look up Cone Mills prevention of Leg twist and it will download the pdf with a diagram, also via Fashion incubator.)

Topstitching thread is Mara 70.  It's great on many things, but I think I can use heavier topstitching thread when I really want a nice topstitched effect. My Bernina can handle it, and this sort of vanishes into the fabric in places.  Rivets are KATM but I had to order them so they aren't in the pictures. 

The zippers in my stash were Riri "trouser" zips which I do think I bought specifically for this...back in October, in Switzerland, and the zip was a little too short. I made a tactical error of leaving a gap at the top of the zip.  Don't do this!!  The trouser zip is a bit hard to grab and bitey on my fingers, which I will survive, but the 1 cm gap at the top of the pants below the waistband is right where there is a heavy lateral pull anyway, and it worsens drag lines, pocket pulling, and pulls the front belly open.  All bad things. I will have to hand sew a little snap or hook in there.  


 Sorry these photos are rather poor.  I definitely don't think they display that these jeans are amazing.

Putting these together was relatively drama free. The zip fly instructions are not the best.  The Persephone add-on zip fly instructions are much better.  Overall, the Dawn Jeans instructions still win as the best jeans instructions EVER but these are still very good. 

And of course the final exciting shocker: these have the best butt and thigh fit I have ever gotten in any pants.  I read on a review that some people have been sad by how loose their Helenes are compared to the designer's photos.  I did not find this to be true at all.  I know there's all sorts of panty line in my photos, but these are not tight.  The butt and the thighs are supremely comfortable.  I have full range of motion in these, my butt feels lifted and supported, my thighs are cuddled, there's no excess fabric anywhere....it's shocking. 

I still need to do some work on the rise though, I think it's too high and as is always the problem with AA patterns, I can't get my hands into the pockets very easily. I will need to lower, maybe another 1" and then widen the top back up a bit.  It's not as easy as with Philippa pants, where I literally just cut off the top inch of the pattern.

I have dreamy designer fabric and for once I'm enthused to go straight in.  However, I've had thoughts.  I'm doing a different leg version - the straight leg I was more keen on.  And I'll actually size up to 6 but shorten 1.5" from the rise.  Thinking it will be a 30" inseam and I plan to leave the hems raw.  Unfortunately I already cut out all the pattern pieces as a size 4 so I've been a bit slowed by this!


Sunday, 13 March 2022

Closet case Kalle top, a review

I did have a make 12 list in 2021. It wasn't something I needed to make too public, but was rather a way of keeping myself to task on projects that had been queued up for a long time that I was avoiding because they felt hard. And it was the cusp of the new year and I had one remaining thing on the list: Kalle.  For the something like 6th year or whatever since it came out, and despite how I wanted to make it the minute I saw it.  Also despite the fact that I bought fabric for the dress version something like 3 years ago.  I actually bought enough, which means I have an unusual 3m stashed piece of fabric that has not been harnessed for another last minute project (so so rare!)

And so despite the time limitations and the fingers of desperation curling around my psyche because of my upcoming move, I knuckled down to make a practice version using the long popover view...in Nani Iro double gauze.  ("Practice version".  Indeed.)  The double gauze was well behaved but I treated it like gold to make sure it didn't fray.  I worried many times that this was a bad fabric/pattern combo, because double gauze really has no drape and so I thought it might hang up on my backside.  I also really don't like shirts with collars, and so I wasn't sure this style would suit me.  That was kind of why I made it first, I was cutting out the paper pattern pieces and wanted to test the size and fit of the view I liked the least.  I did some regretting that I was going ahead with this piece of beautiful fabric...

I was between a 4 and 6 (or even 8) on the size chart as I'm 33-27-37. I know that I'm either a 4 or a 6 in most Closet Core patterns despite not being a great match on the chart, and I did waffle about what to do here.  I ended up going with a straight size 4.  It meant I was committing to a size 4 on all the versions so I was a bit nervous, but I'm happy with the fit.


The instructions were fine.  I went relatively slowly - took a few days to make this, avoiding the hottest part of the day.  I had never done a front button band before and I didn't understand what I needed to sew down, exactly, but it came together neatly and the bits I didn't sew right away were easy enough to topstitch later.  I skipped the buttons for my first instagram photoshoot while thinking about whether I needed buttons - decided I needed one so I wouldn't flash people a boob.  Then while looking at my button stash a friend grabbed out these green buttons (I was scheming over grey vs pink) and two it was.  That way it looks more purposeful - I'll never shut the top one and I'll never open the bottom one, but I like the balance they provide.  

A few labels made their way onto this top. 

Lo and behold I LOVE it.  Thank god too, wouldn't want to waste this fabric.  I was definitely not sure how to style it at first since in the middle of summer I was too hot to wear much at all, but it ends up I have a reasonable number (= way too many) fitted pants I can wear it with and that seems to be the best thing to balance the extreme length at the back hem. 

I think the back of the armhole bunches up a bit, could be my wide or slopey shoulders causing a bad fit there, but it doesn't bother me and I think it just looks like wearing ease.  Yay for an end of the year win (it did take me into the new year to finish this top but I'm glad I didn't rush!)