Tuesday 23 November 2021

Merchant and Mills field belt in oilskin

 I had been planning this for a year or so.  I had a scrap of suede, which is always annoying, I need to not buy leather without plans...

Anyway so something was blocking it.  And eventually I realised I didn't want it in suede.  I finally had the true vision! Bought grey oilskin from Miss Maude, the oilskin backing, and used a piece of my precious heart fabric that I sadly made into a crappy and thus far not salvaged top!  I had the notions kit and it was so amazingly easy!  Really easy!  I want to make all the bags, and I want to make everything with oilskin now!!


This is basically a rectangle that you fold up and you apply the clasps strategically onto it, bag out a lining and box the corners - that's the hardest bit since they are at the bottom.  I had been thinking about this bag for so long that it came as a shock when the entire process took an hour or two.  The rivets in the kit just hammer together with no tools, and my very old hole maker for leather performed fine at making holes.  The only trick is getting the buckles on upright, the picture is correct but somehow seems wrong, which played with my mind.  I used a teflon foot for the oilskin but I'm not sure I even needed it.  My machine definitely got oiled a bit!

A fun little project. The bag is very small, and the leather belt is very firm, so my only grief is really a fabric belt or something floppy would have been more comfortable, because I'll never get enough weight in the bag to need such a substantial belt portion, since I will wear it loosely belted as a bum bag, or as a crossbody.  Maybe the leather will soften.  Also the leather belt really is sized for a man, I could have done with about 10" less length altogether and I've added more holes but probably still not enough if I want it relatively high at my waist. 

I now want to make a whole wardrobe in oilskin.

Monday 15 November 2021

Linnea sweatshirt review, by Sinclair Patterns

 This pattern was free for a short period and I jumped at the chance.  I haven't made Sinclair patterns before, but they are often represented on the Blended Threads website, and I was very curious to try a pieced and colourblocked sweatshirt.  It didn't seem to matter which one exactly.  

I made a size 4 petite.  It was very nice to have petite options, however, I didn't feel like it was particularly petite so this must be a very long sweatshirt in the normal option.  The instructions were nicely written.  Size 4 was correct for my measurements.


I found that my pocket binding, in rib, led to the pockets not matching up with the side seams at all.  They were canted at an angle.  To determine if it was safe to just cut off those extra triangles, I sewed the sleeves so I could approximate the side seams before I did any basting of the pockets.  (It was safe to cut those bits off.)  I'm not sure if my rib being long made the pocket angle change. 

My huge beef with this pattern was regarding the labelling and expectations of the different coloured pieces.  I mentioned this on instagram because I was so peeved and my resulting sweatshirt angers me and I had to find a way to give it away immediately (a friend took me up on the offer.)  

The front pieces are labeled F1-F2-F3.  The back pieces are labelled B1-B2, then you have the option to piece the back in 2 pieces as well.  However, B2 lines up with F3, so technically it should be B1-B3.  As you can see, the colourblocking effect of my pieces doesn't match up at the underarms.   Second issue, which is obvious and I should have just changed this: the colourblocking in the only photos online is of the children's sweatshirt, where the colour change is about the level of the elbow.  In the adult version it's a tiny strip near the wrist.  I should obviously have ignored that cut line and made it near the elbow for a more balanced result.  

This top was a nice learning event in terms of what works where.  I will try the Itch to Stitch Lamma hoodie next winter, because I have some of the birds and associated terry cloths left (they are, by the way, from Ansje Handmade, I need to stop binging on european fabrics...) but I am not particularly tempted to have another go at this pattern.  However my recommendations are: obviously match B2 to F3.  Top of the sleeves in pattern, not in colourblock, to make it look less busy, and then with the lower half of the sleeves in colourblock.  If I did make this again I would probably shorten it 2".

The pockets are nice!

Sunday 14 November 2021

Closet core patterns Morgan, otherwise known as the Birdie Jeans

I'm been getting better.  The backlog of cut out projects from ages ago is down to 6.  The number of projects that have been sitting on my long-haul to do list is only 2.  And I bought this fabric specifically to make these jeans a mere...3 months ago!!  I really see the correlation between spontaneity and satisfaction in sewing.  Yes, some projects need to be chewed on to develop in the head, but it's best to do that before you buy the fabric.  I haven't quite learnt the lesson yet but I'm getting there. 

So, out of the blue this winter I wanted Morgan jeans.  I had made my Gingers in the nick of time, ie, I no longer want super tight jeans and was kind of over them but forged ahead anyway.  I was actually in The Fabric Box in Auckland (oh, when we could go to Auckland...) and realised I really wanted to make some looser fit selvedge denim jeans. 

I researched around a bit and it seemed best to cut to my measurements.  Size 6.  I made a 4 in the Gingers and even that has extra material in it - I could possibly have fit into a 2.  For the Morgans 6 was a good choice.

I did not really do any research on how to take advantage of selvedge denim.  I don't really see any benefits.  I found that trying to use the selvedge made it harder to cut the jeans and finish them.  Presumably there are tutorials that make this more sensible.  

The only modification I did for that was to kind of flatten out the hip a little bit so I could cut the outseams of both front and back on the selvedge.  I took away a cm on each side at the greatest, tapering down to normal up and down from that - so you could argue these are less than a size 6.  Obviously you can only do that up to a certain size before the curve is more important to fit your hips.

I found the instructions to be ok. Unlike the Gingers I didn't need to review the sewalong to understand them (the Ginger fly written instructions make no sense to me).  I didn't really understand why I was sewing things where I was, but I trusted and the fly came out fine.  As always, this is because I have already made Megan Nielsen Dawn Jeans and I have learnt from those instructions (they are MUCH BETTER.)  One beef is that these instructions don't teach you how to manage topstitching thread.  I actually used real topstitching thread here, which means you can't backstitch the ends, you need to pull them through to the back side and knot them off.


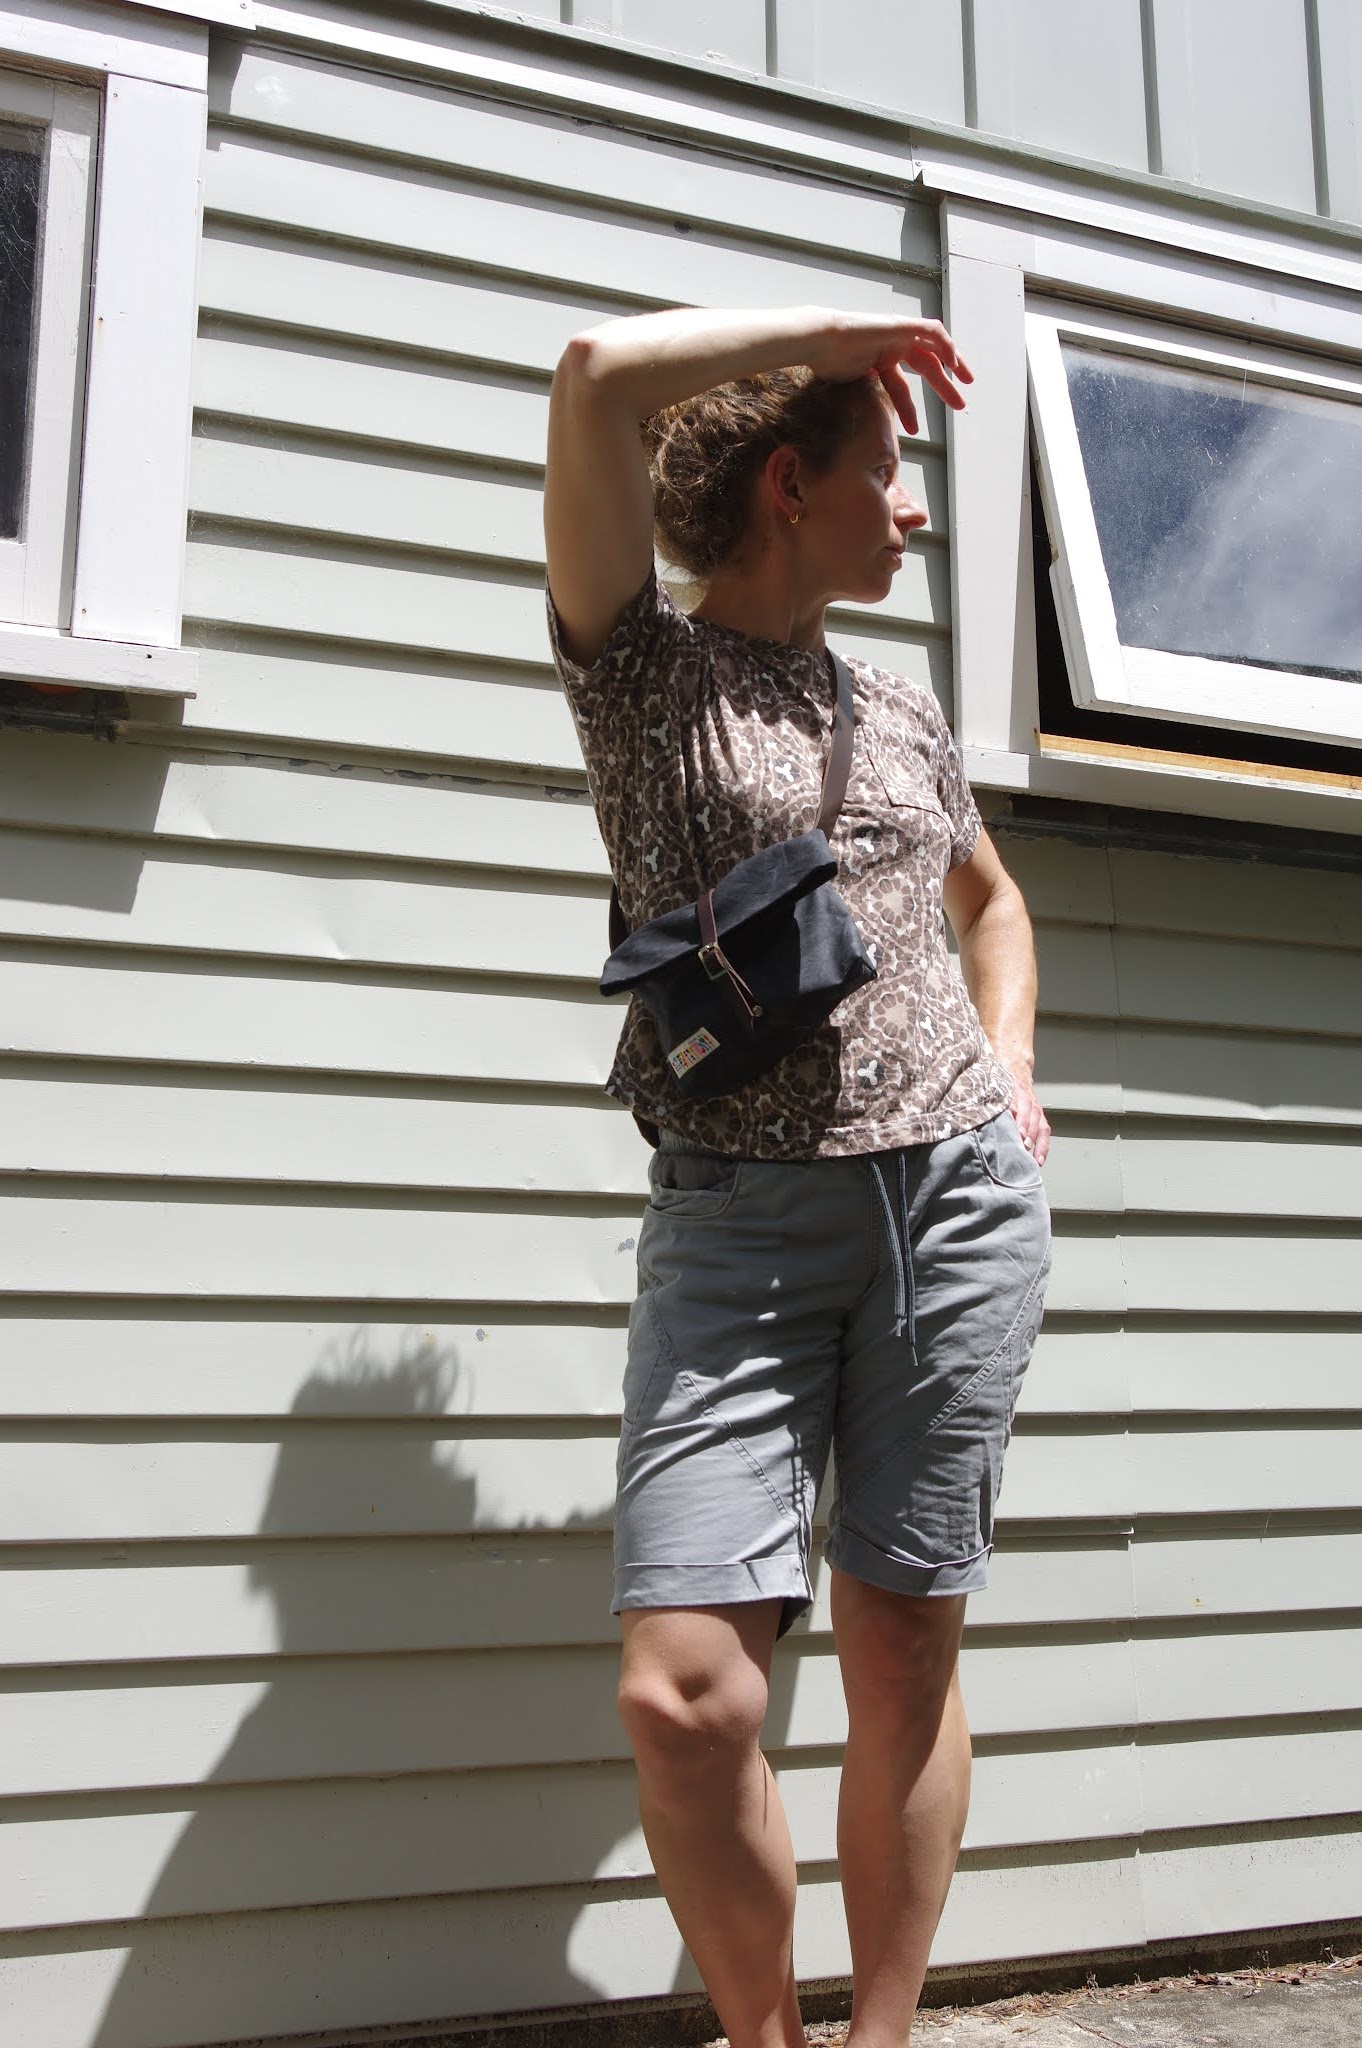
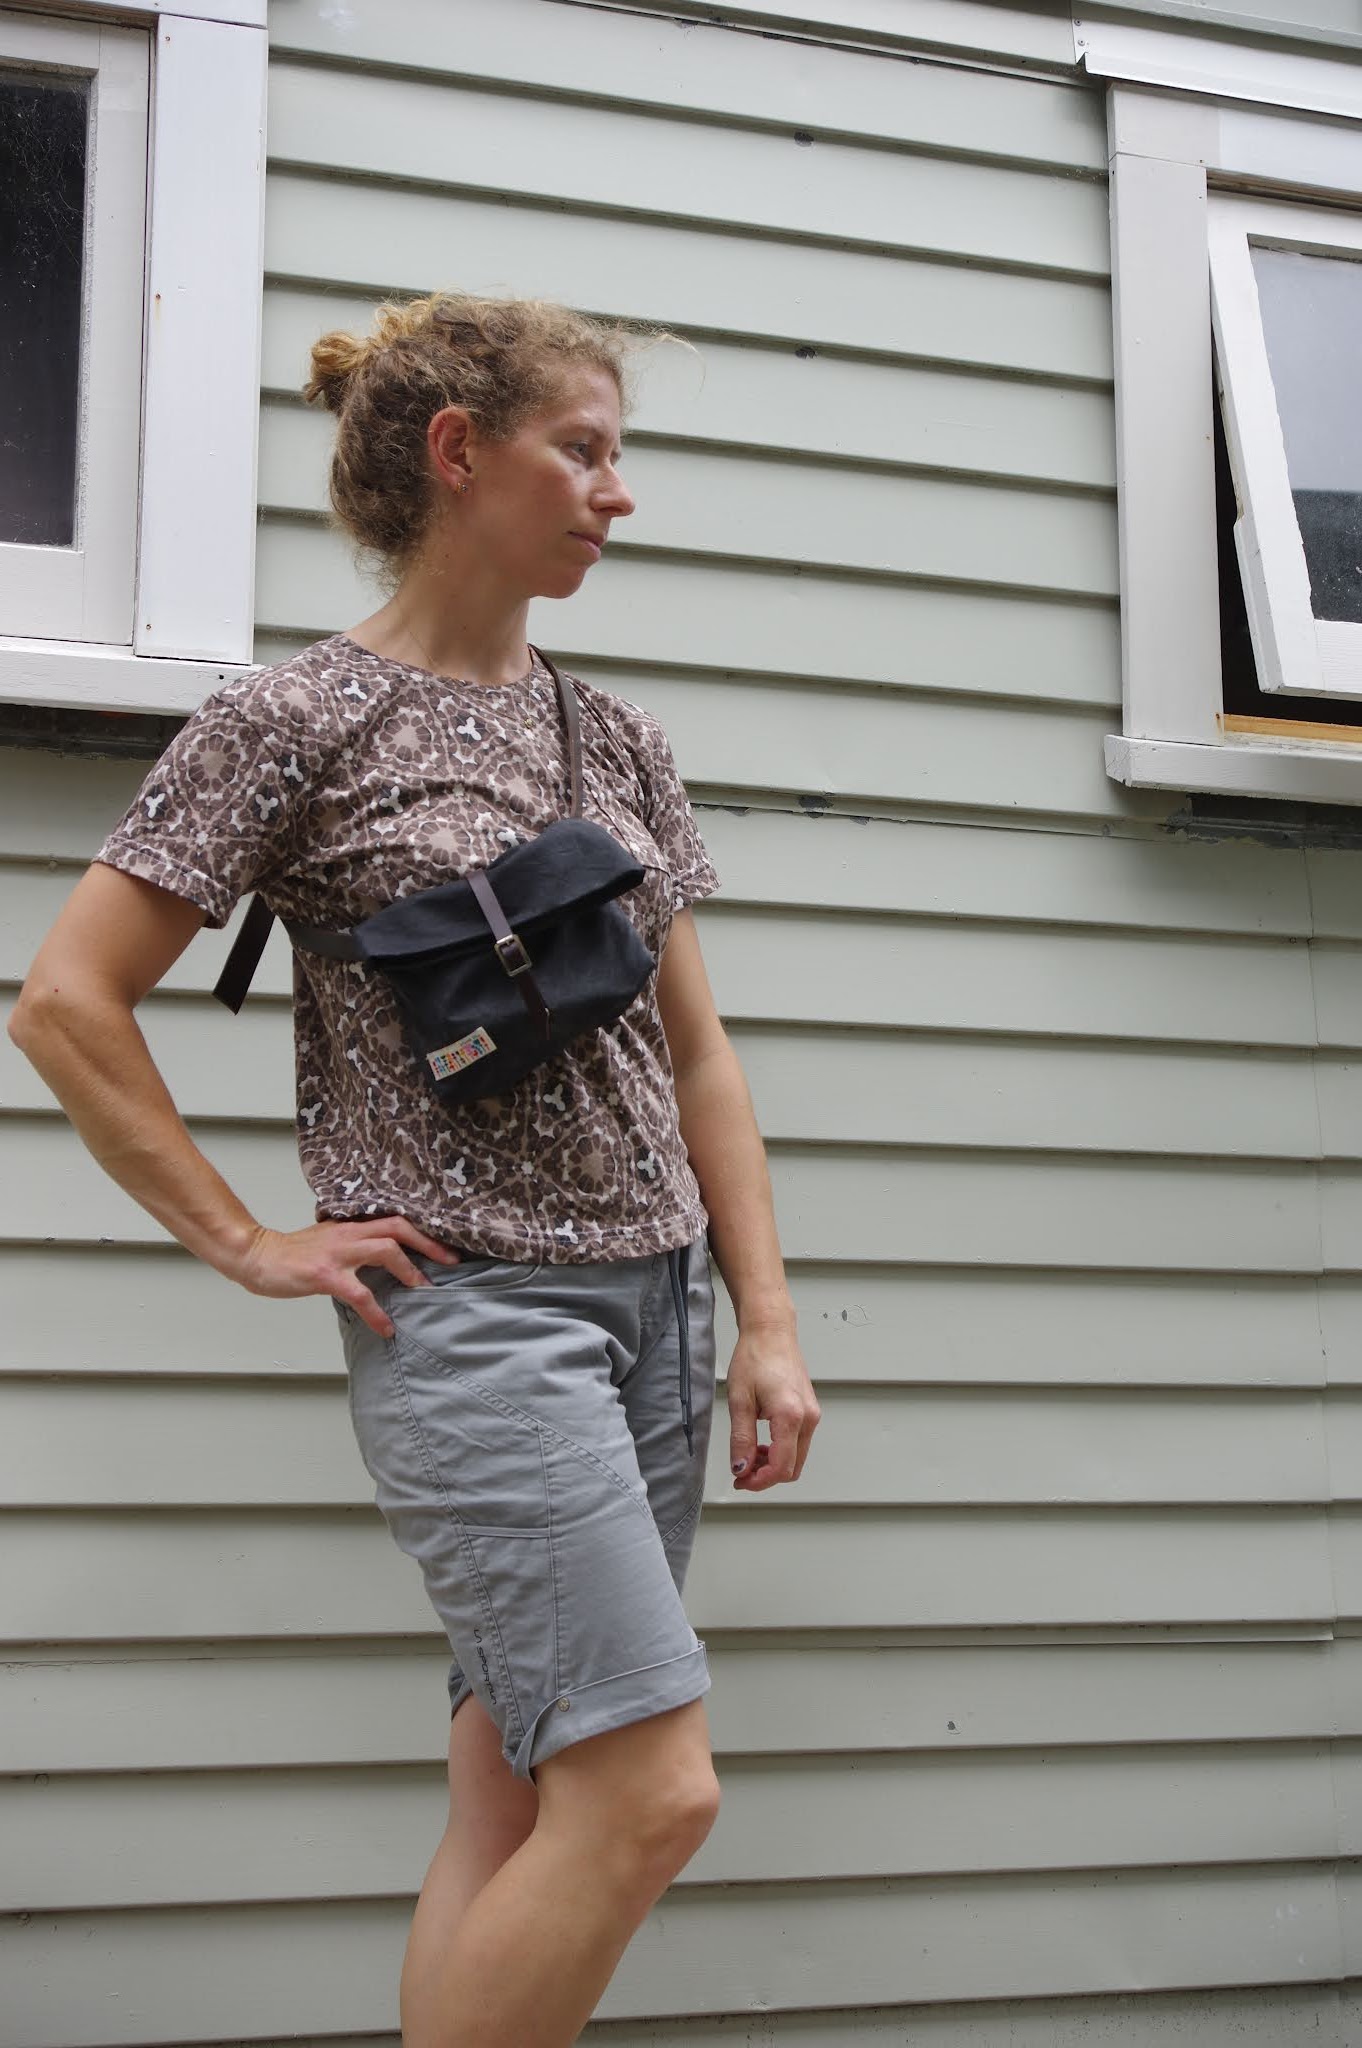
Once I made the jeans, I was sort of surprised by their non-loose, non-boyfriendy fit.  

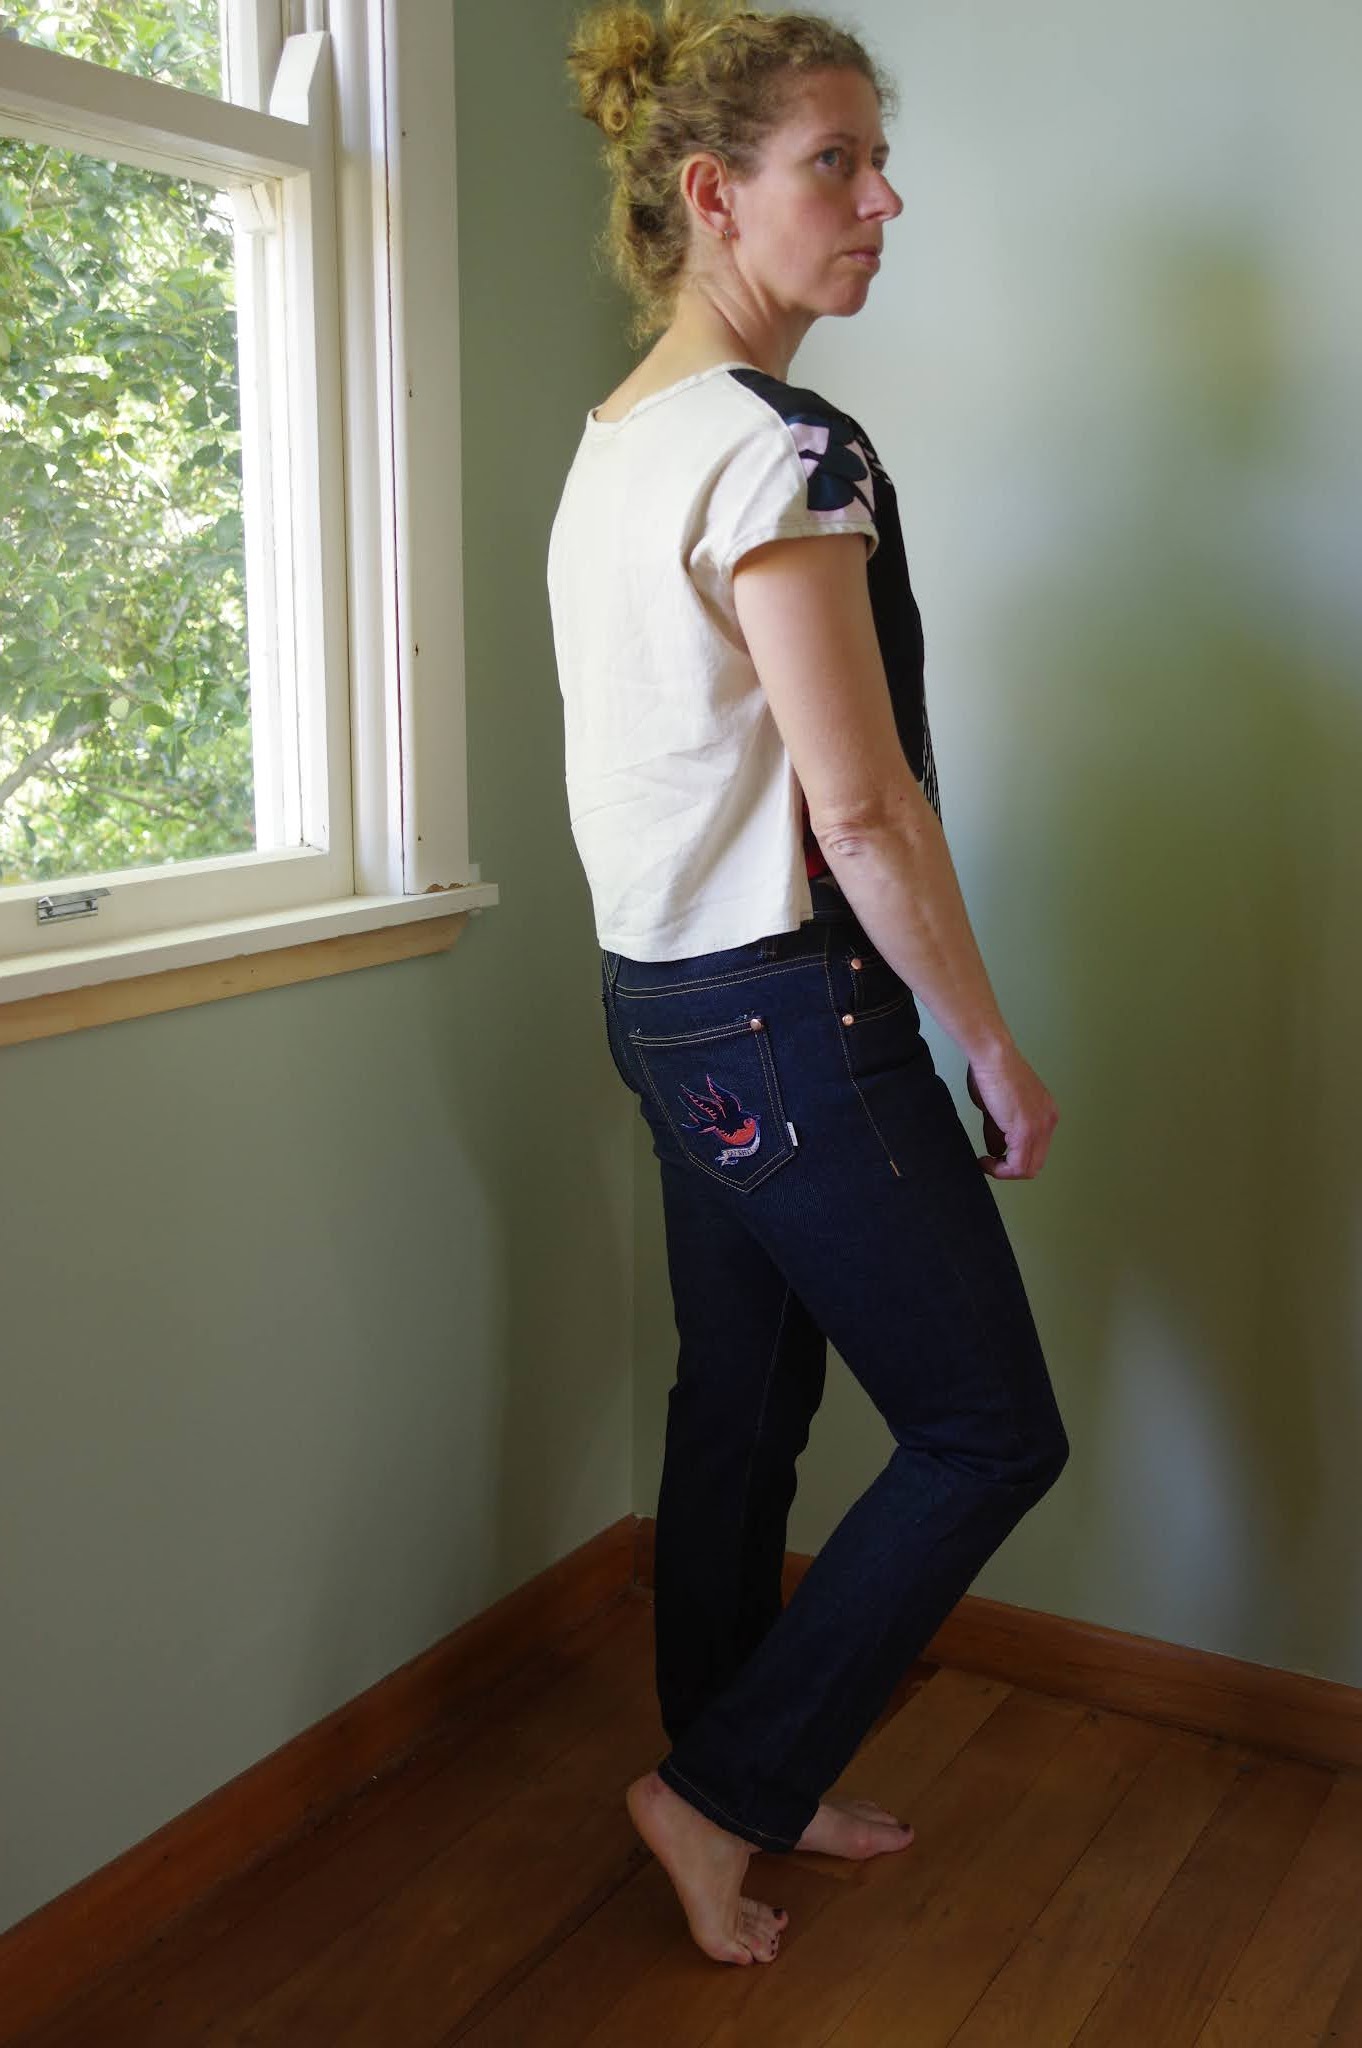
Oh but are we talking about my birds?  I wrote to the source (the Badaboom print shop) and asked if they were iron on, and received a firm yes.  So I ironed them on...and they proceeded to fall off right after I sewed the pockets in place, thus ensuring many hours of torture hand sewing these patches onto pockets that were already on the jeans.  Learn from this mistake! Never trust the iron!  I would probably have had to hand sew them no matter what because of the irregular shape, but with the pockets sewn in place it was hard work. 


 More birds!  Also there was zero hesitation to create a design feature here when my inside waistband failed to cover the entire seam allowance mess...I just stitched everything down as securely as possible and I rather like the triangle on the outside. 

After sewing on the patches I wore these a few days in a row and noticed that the denim settled a lot, and by the end of two days, I would indeed call them boyfriend fit. That's in dramatic comparison to the Dawn jeans. Straight off the sewing machine, the Dawn jeans and Morgans are very similar.  

I found:

-Dawns have a narrower upper thigh and a higher rise, and a really stupid pocket entrance which I never really managed to fix

-The fit of Morgans was better on me 

After wear, the Dawns never settled and are still tight, but the Morgans loosened up a lot.  Presumably that's more to do with the denim.  All of my Dawns are still really tight, but the green ones with the modifications fit me amazingly well.

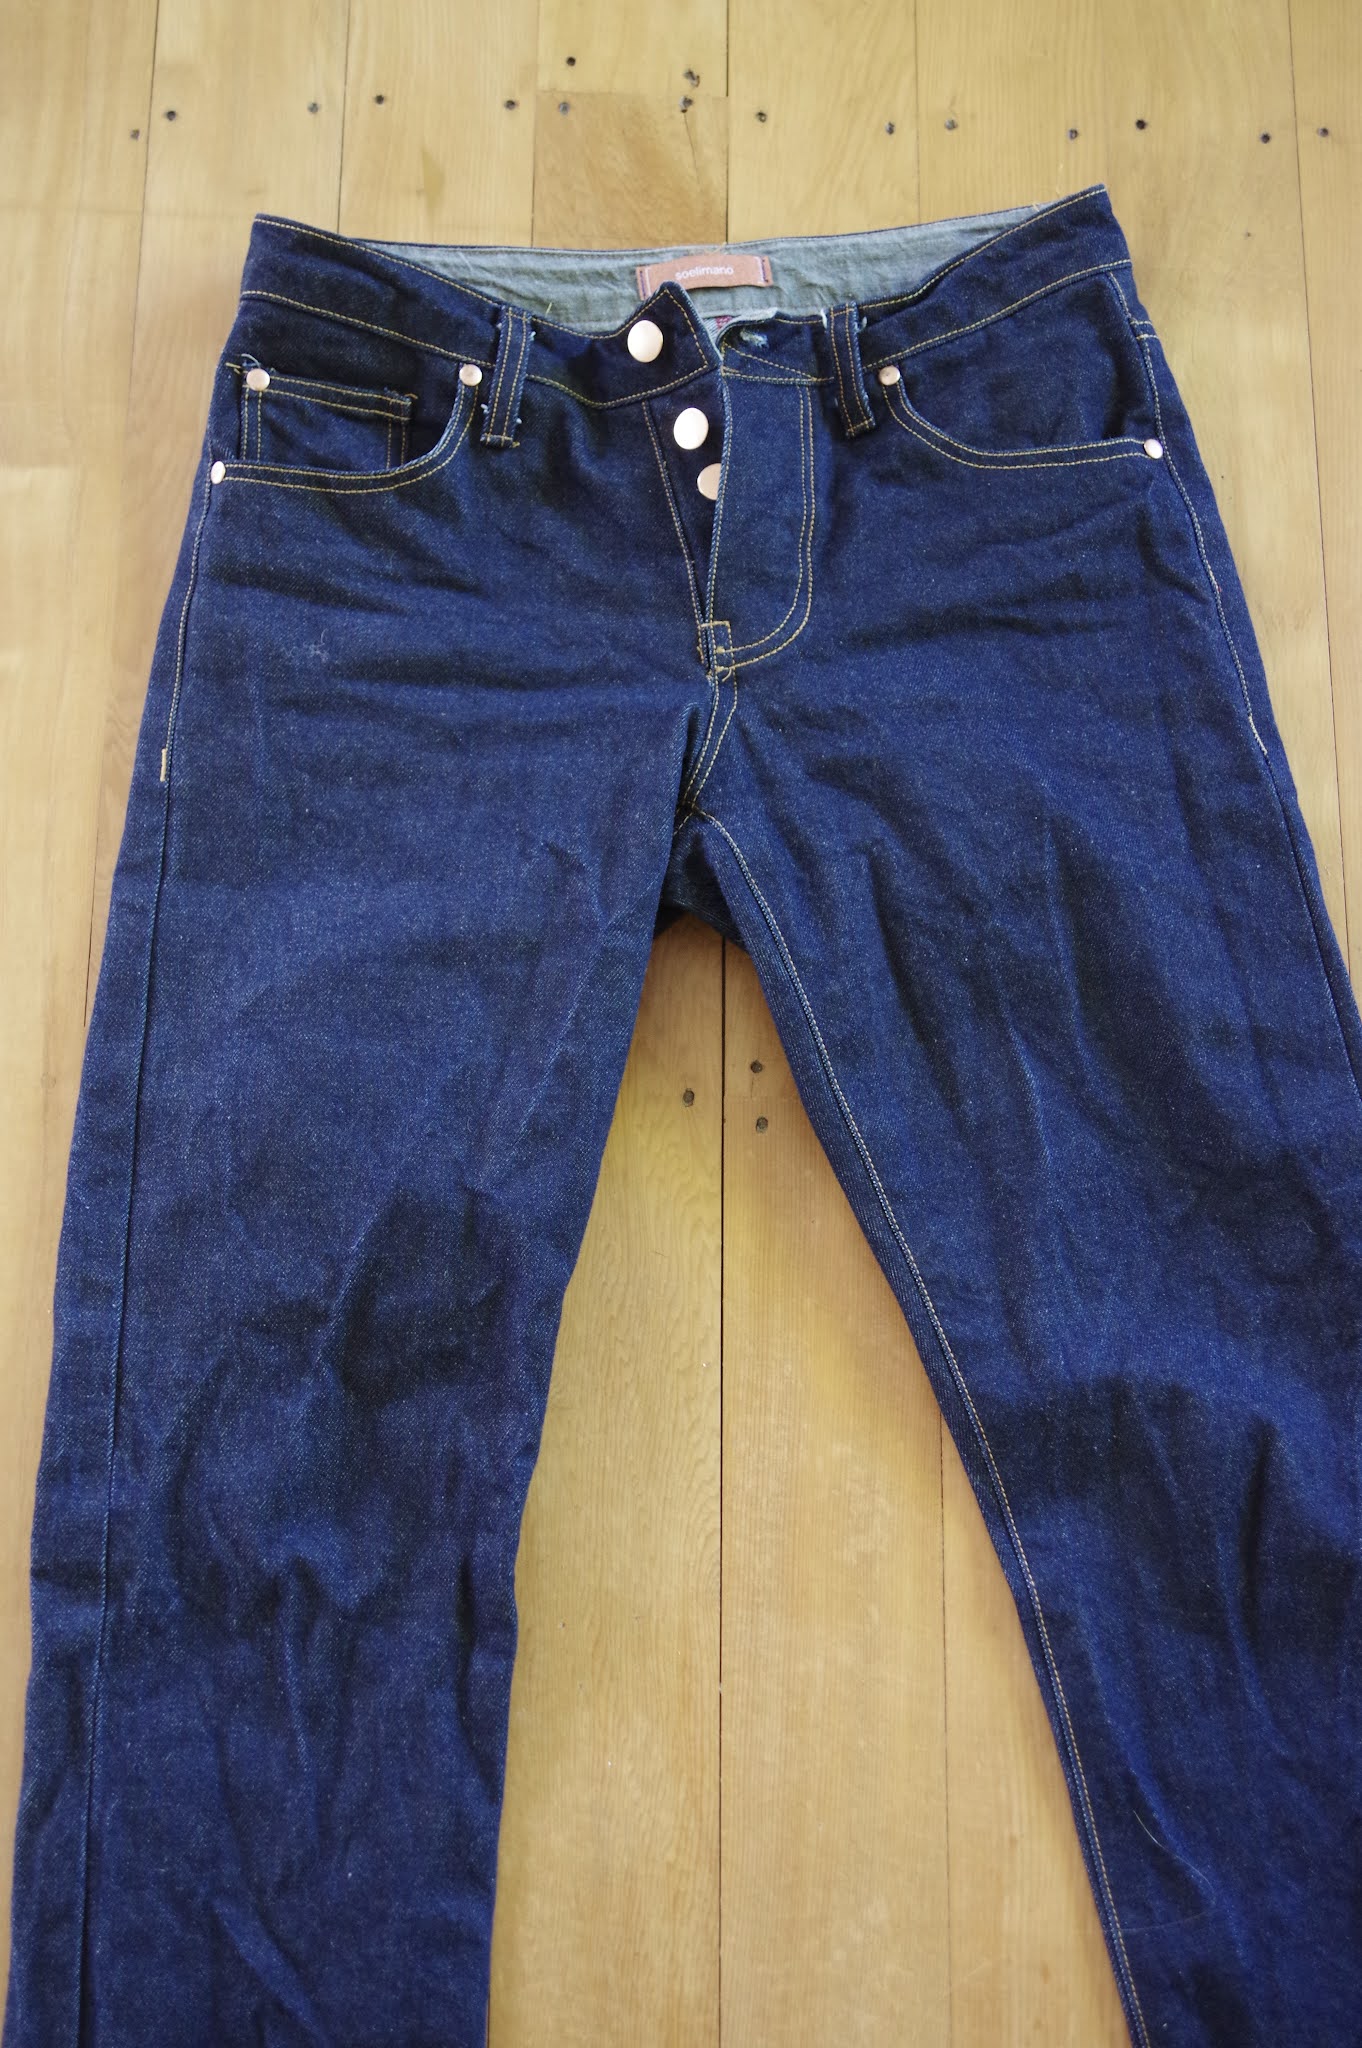
My photos are taken after their first wash - tight again!  I'm happy with the fit of these, but now I think I've gone full circle.  I modified the Dawn jeans with so much attention that when I next make jeans I think I would use stretch denim and my modified Dawn pattern (I have discussed these changes before but basically I used the crotch of the Persephone pants superimposed onto the Dawns, giving me a better butt shape and more space in the upper thighs.)  Also a side note, there are patch pocket pattern pieces available for the Persephones now!  The in seam pockets are pretty cool but it's hard to get anything into them.


Tuesday 9 November 2021

Made for Mermaids Juniper Jumper review

I bought this pattern without planning ahead of time, and sent it to the printers with a bunch of other patterns.  Then equally rushed I cut it out of beautiful scuba fabric from Blackbird Fabrics.  And then it sat on the floor and collected dust because I wasn't sure I cared that much.  I got rather sad to have used this gorgeous fabric on this as other ideas came and went. 

Size: purple.  Matches my waist/hips, and my bust of 33 as the "high bust" seemed fine, the bust measurement was 34-35 and really I would not have wanted this style to be tighter, though I see many of the pattern testers preferred a snug fit.


I used the high front, low back, but as you see, it's not particularly high front or particularly low back though the armholes are quite cut out towards the front.  I expected to need a top under this, and instead it's a dress all on its own! 

I'm not sure there were marks on the skirt for where to put the pockets (could have been me since the pieces sat for a few months.)  I put them 1.5" down. 

I got annoyed by the dust bunnies and summer is basically here and dresses are great, finally inspired me to get on with it.  I actually sewed this entirely on my sewing machine except for the waist seam and the hem seam (to make it prettier.)  I didn't finish any of the other seams because of the scuba fabric.  The top is fully enclosed. I understitched the neckline, but the SA is 1/4" which is too little to snip into and in the scuba even with understitching it rotates outward.  For the first time I get the appeal of the larger SA on this spot.  The SA, other than the neck and armholes, is 1/2" so beware! 

The scuba from Blackbird - bought probably last Feb or so, so I'm not sure what it is.  Maybe bamboo.  It has a standard scuba look on one side, and a paler, matte on the other which is so beautiful.  I used that matte as the exterior.  This scuba has more drape than usual scuba fabric, less body, and is a bit thinner.

1" hem. 

To my surprise I love this little dress.  It's so cute and simple and in a fabric like this that doesn't need finishing, the innards are so very neat.  The pockets are a stupid shape, there's no reason to not make them into Elbe Textiles Bardon pockets (the platonic ideal of pockets) or reshape them deeper, because the skirt billows out enough to hide all.  I knew this and didn't do it.  Live and learn.

My extra long Grainline Tamarack

I have made two previous attempts at the Tamarack jacket.  Maybe I should have just followed through on my first one so many years ago, which I wasn't going to quilt, but anyway, I really wanted to do it properly and after my second one, which was of prequilted fabric and with patch pockets, I wanted the experience of doing it all.  Having made a quilt took the fear out of a lot of things, and quilting is one of them.  

I will say: making a quilt was horrible but it has paid such dividends in new skill learning!  So worth it!  

When I finally got on the road to making this particular Tamarack, it was due to inspiration from a RTW jacket with plaid lining, maybe a year ago.  I made the black quilted Tamarack which seemed to fit ok, (I made size 4) and which I gave to a friend, and then had the confidence to trust I should quilt one for myself.  I had this fuzzy wool blend from Mood from a few years ago, and after investigating plaid linings I got this wool woven from Emma One sock last year, but then I had to wait - because I was going to use the same batting from my quilt, so I had to make it first. Hah.  (The batting wasn't enough and I still had to buy more...)

My big vision was that I needed to shorten the front and back separately so they would still meet quite high up.  I lengthened the front 2" and the back 6".  Once I had done that it was straightforward to cut everything out and quilt it and then trim everything down to shape - but it did take time!  That upleveled the feel of the jacket because quite a bit of effort goes into it.  I used a bias binding on the side seam edges and the shoulders.  It doesn't look particularly good, I'm not sure how other people kept it from being lumpy.  I overlocked most of the other seams because I didn't have enough pretty matching bias tape and it seemed kind of like a wasted effort anyway.  

My major drama was with the welt pockets.  After quilting, you've already done a lot of work and you want it to go well.  I found the instructions bad, of the vague variety, and they didn't lead to very successful welts because I didn't cut the sides down properly.  For this reason I recommend with these instructions to do a practice welt on scrap fabric so you can understand what they are saying.  It's hard to know what edges to finish, and in the end I had to hand tack the top of the pocket in place - both the top of the pocket inside the jacket, and the sides of the welt outside the pocket, where there were sad huge gaps.  The insides look ok because they hide the messier bits, but it's not a satisfying aesthetic for me.  I've now done a bunch of welt pockets this year and I think I'm starting to itch to FIGURE OUT the welt pocket so I can just do them my way and know they will satisfy me. 


Also, the fit of the body is comfortable, but the sleeves of this jacket are slim cut.  On me, it suits as a spring jacket with a tee underneath.  I would not be able to wear any more layers. The prequilted version felt very very light, and was much looser, so this is an effect of quilting.  Of course I knew that quilting would make it smaller...but it's different to actually experience that fact.  Quilting also makes it feel heavier and more substantial especially with this heavier outer fabric.

For the snaps, I considered using my prym snap kit but I'm very suspicious of the quality.  Maybe unnecessarily - I recently used it on my Landgate and the snaps were perfectly fine.  Anyway in this case I hand sewed snaps in place, and I'm really pleased with the secure feel of them.  


I'm really glad I made this.  Too bad I took so many attempts to get there!  It's not a pattern I found particularly fun, and the fit of it is only ok.  Now, in the meantime quilted jackets have gotten popular and I think there are other patterns that suit me more.  I will most likely try the Hovea pattern next year.