Showing posts with label success. Show all posts

Monday, 12 January 2026

Roberts Wood Flower Patchwork dress, a Frocktails adventure

 I have been wildly in love with this pattern since it came out. 

But in love like unrequited love.

There was the first big hump: what fabric could cope with so many unfinished edges?  I spent a year mulling this over.  I reckoned it had to be silk, maybe organza.  Something with body, so the flower petals would stick out.  The pattern consists of 3 separate sets of flowers, so you can use 3 different fabrics and you won't end up with the same fabric next to itself - or of course you can just use one fabric, or two. 

I got too curious and bought the pattern and had to recover from that for another year.  Both the financial hit, and the 5 tightly rolled up A0 pages with nothing on them but...flowers.  Hundreds of flowers.  The size is built into the pattern- and I was confident with the smallest size as it coincides neatly with my measurements.  The dress is a bit oversized, but I wouldn't have wanted it smaller, the neck hole fits just right.  It feels quite substantial around me I think that's because of the three-dimensional-ness of it. 

I bought three colours of silk organza and stuck it at the bottom of my stash.  I moved house a few times (always a good reason to procrastinate.)  I changed jobs and didn't get to sew enough...

And then moved to Auckland, a city with a Frocktails!  I put this dress on my Make 12 list for the year, deadline: Frocktails in early September.  I also reorganised my stash and thought actually the cranberry red dupioni silk, previously purchased for something else, might be a perfect fit for this.  The organza idea just didn't feel right.  Months passed and trips came and went and suddenly I actually only had two weeks until Frocktails.  

I spent two days cutting out paper flowers while my partner watched.  This improved when I realised I had an audiobook to attend to.  I thought I would stick the flowers onto the silk, cut roughly around them and then cut more precisely one by one.  To make this possible I bought the sharpest little embroidery scissors in Spotlight, a new micro-olfa cutter, and a small pink cutting mat, plus three spools of matching thread, and I hijacked the kitchen table.  

This phase took another 2 days.  And catastrophe then struck: a pile of flowers were neglected on the sewing room table...a RANDOM cross section of flowers from the three different colour ways.  And I had run out of fabric.  An emergency trip to The Fabric Store - a very lucky grab at a bolt of red dupioni silk - the last of the dupioni in stock - and an early morning trip to the laundromat later whew, all the flowers are accounted for, and hopefully the different shade of red will add texture.  Four days to go. 

I quickly realised it was better to pin the flowers to the silk for the rough cutting phase.  I just needed to get them into a pile of flowers, it didn't matter if they were a bit askew on their individual fabric pieces.  An unexpected participant joined the fun: Paivi LOVED all the excitement happening in her personal playground and joined the sweatshop with enthusiasm.  She particularly liked all the sharp objects, and unpinned bits of paper...


Cutting the flowers out on my new surgical desk: 2 days. 

I now had 2 days to sew the dress, plus the day of Frocktails which was after night shift so I could do some sewing, but nothing too strenuous.  It ended up being the bindings, done on the day from that original organza.  Organza is a terrible thing to cut and also to sew on the bias and was a horrible choice to use for bindings, so if you look closely, they are a bit messy.  


The insides! There are many micro holes at the corners where my sewing lines weren't perfect, but you can't see any of this in the dress when worn.


I showed up at frocktails slightly glassy eyed post night shift, and with a few faint chalk marks here and there on my dress - but DONE!  and it was a perfect way to celebrate a project that ran my life for about two weeks, while also being a kind of sanity-saver and distraction from some simultaneous health drama.  To give you some scale: I consumed 4 audiobooks during the simple parts of cutting these flowers out. 

And you know, I would do it again.  I would actually use fabric scraps and just not worry about the fraying edges and make a wildly ridiculous patchwork version of this dress.  Also, it has heaps of room and needs pockets.  I was absolutely not going there this time around but I see no reason to skip it on a future attempt.   


Wednesday, 31 May 2023

La Maison Victor Lize tshirt dress (3/2019) in Pucci

Gah!  Where has the time gone?  I have been sewing a tiny bit but somehow not enough to finish a blog post?  For 6 months?  That's never happened before unless I was literally unable to get to a sewing machine. 

Anyway, I borrowed a few different editions of LMV a long time ago and traced a few patterns.  Here is this one.  Unfortunately the only way to access it is by finding a copy of that magazine. I was kind enough to my future self to add the seam allowances too, so basically the traced patterns were ready to go.  I've already made the Charlene sweatshirt which I thought was quite cool, though I sort of hate voluminous sleeves in real life.

This is a long tshirt dress with no remarkable features.  I had traced size 34, which I presume is my size, and I could see by the lines on the pattern pieces that I'd given myself a good 1 cm seam allowance.  I cropped the pattern as long as the length of my blue fabric.

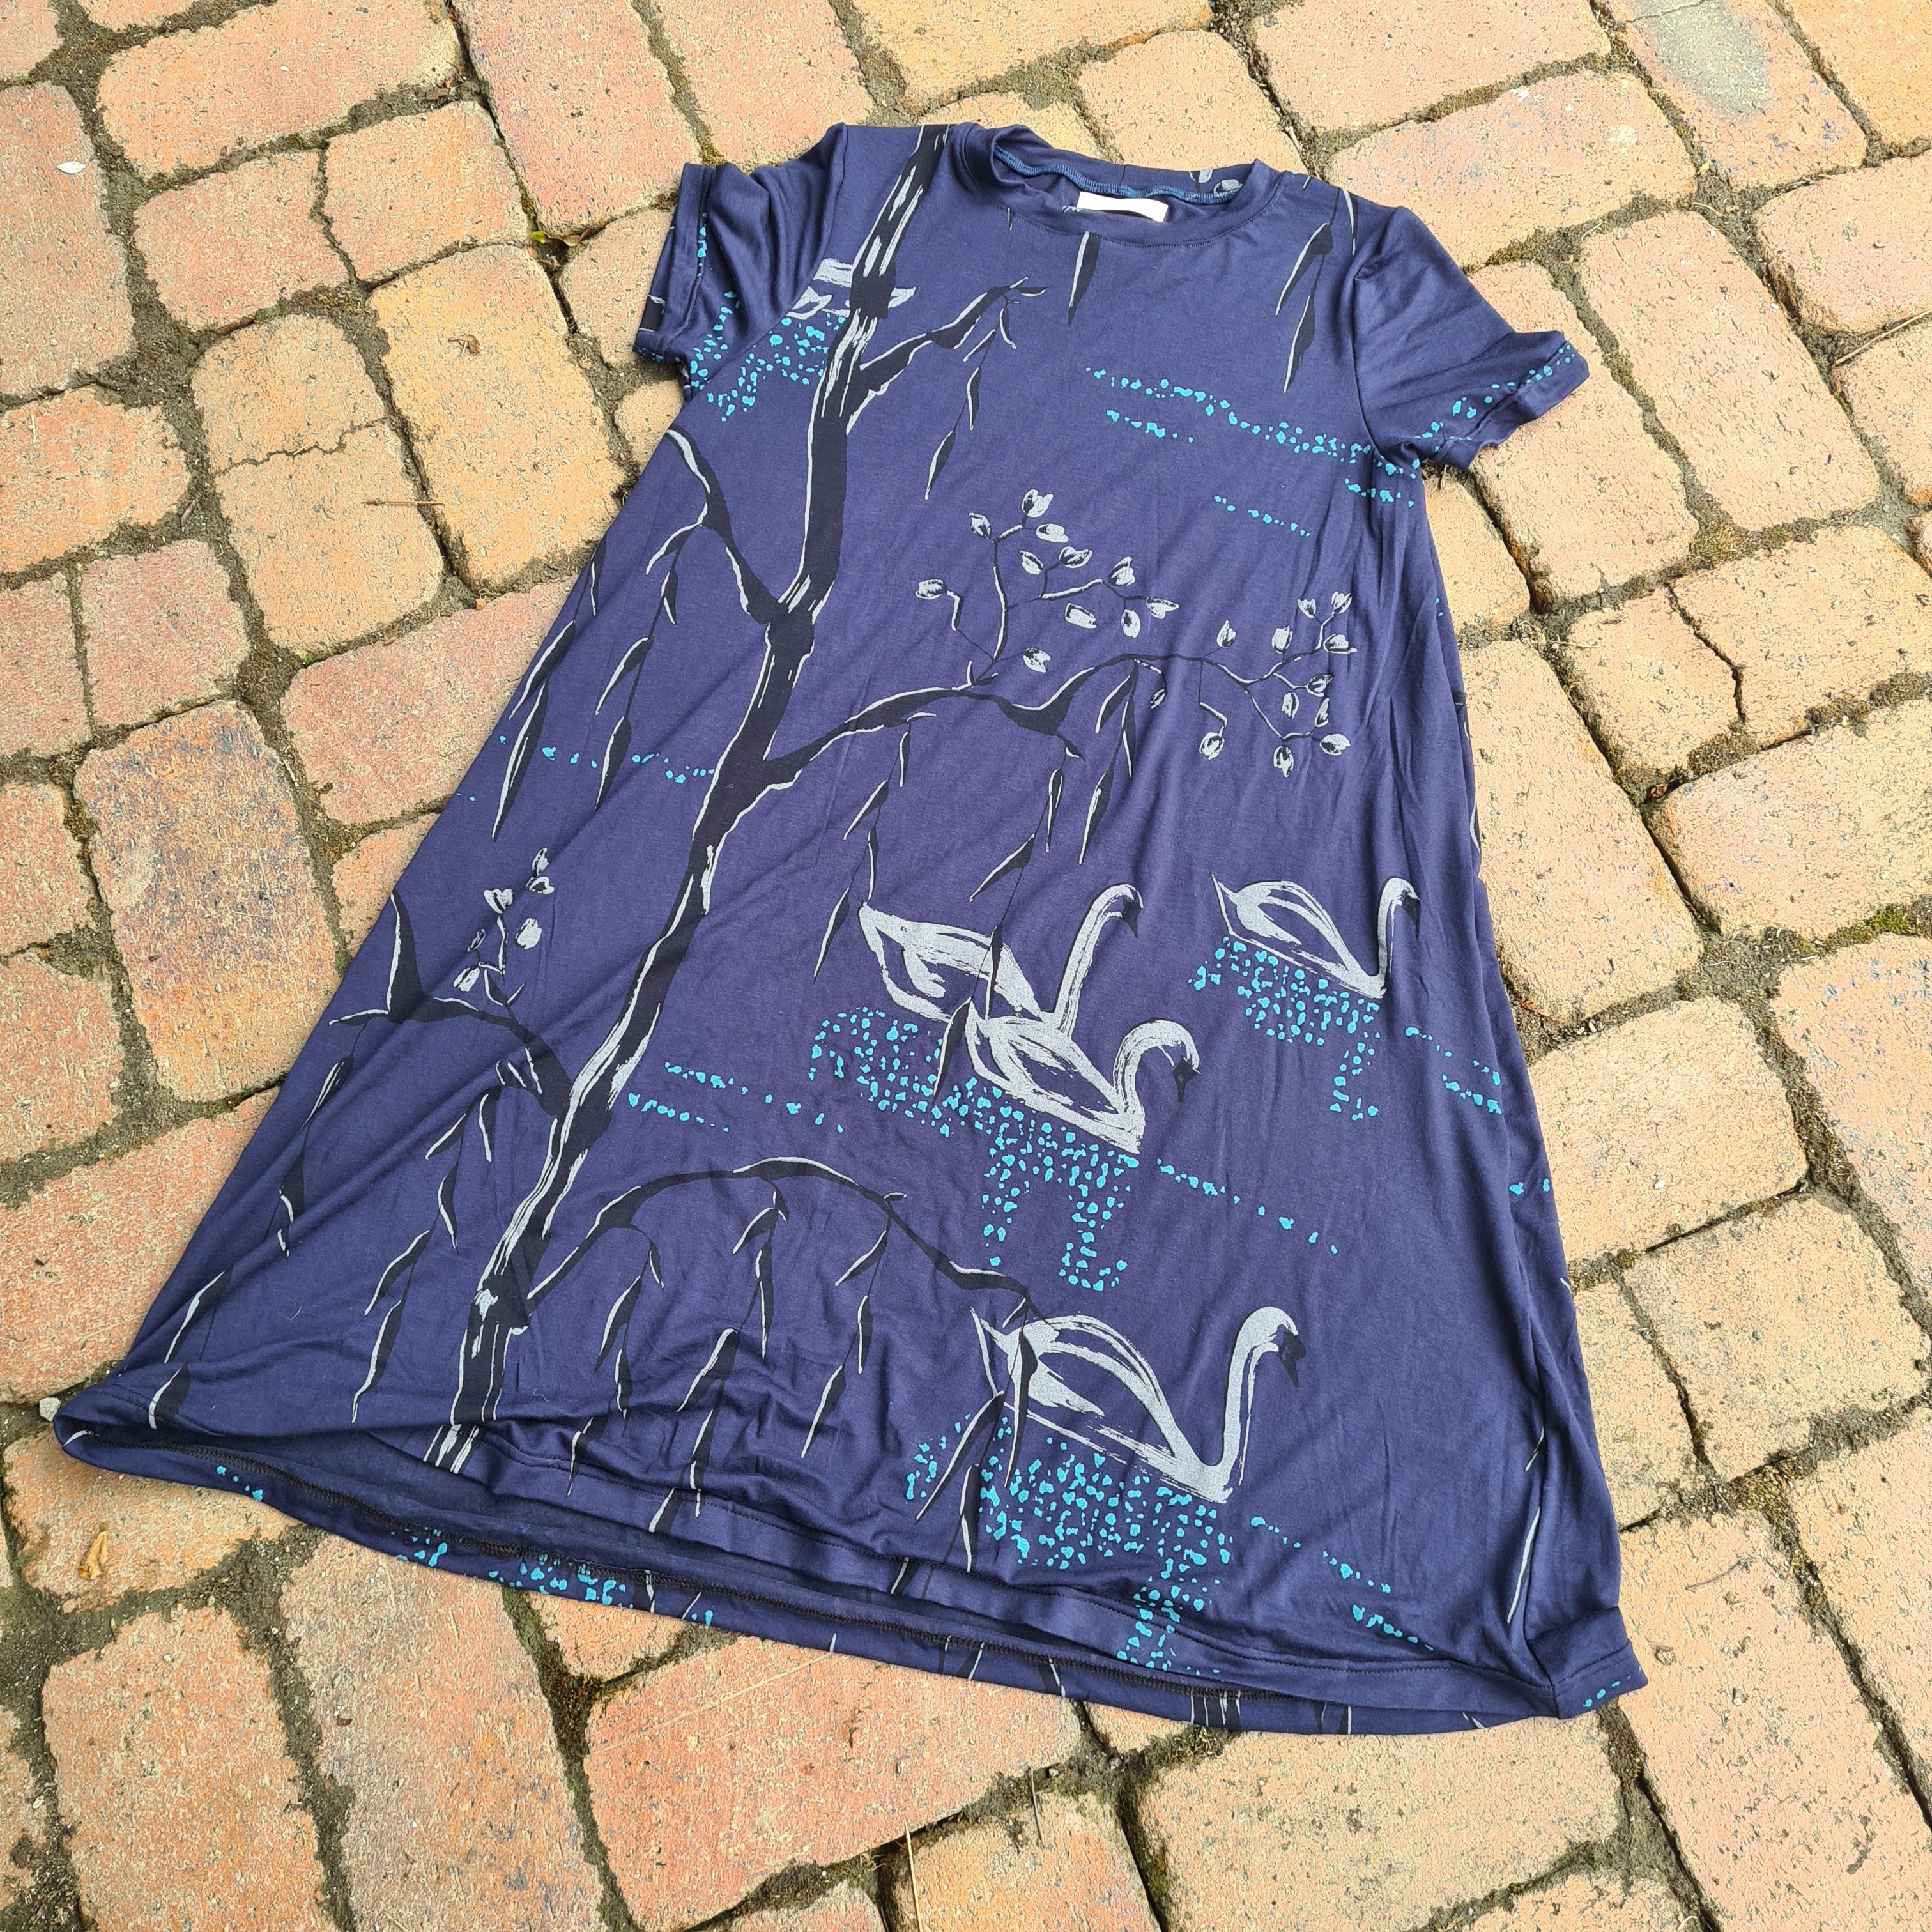
I had schemed to use an amazing little tiny metre of Pucci fabric...so first I followed the pattern and made this nice swan dress for a friend.  I was too lazy to add pockets.  The swan fabric is rayon and it's from one of my European binge shops about 18 months ago, I don't love it, so I was happy to offload it onto someone else.  I liked the fit of the dress, but it's SO A-line.  Too much for a tshirt dress. If you made it full length that would be a lot of fabric.  Maybe nice to swish around, but anyway.  Because of the higher neckline it does not Show All, unlike the Closet Core Ebony dress, but I would say it's only a bit less voluminous.  I didn't choose that pattern because I thought it would be harder to balance the pattern across the raglan shoulders, and because the wide shape is the point of the pattern so removing all that volume seemed like a bad idea. 


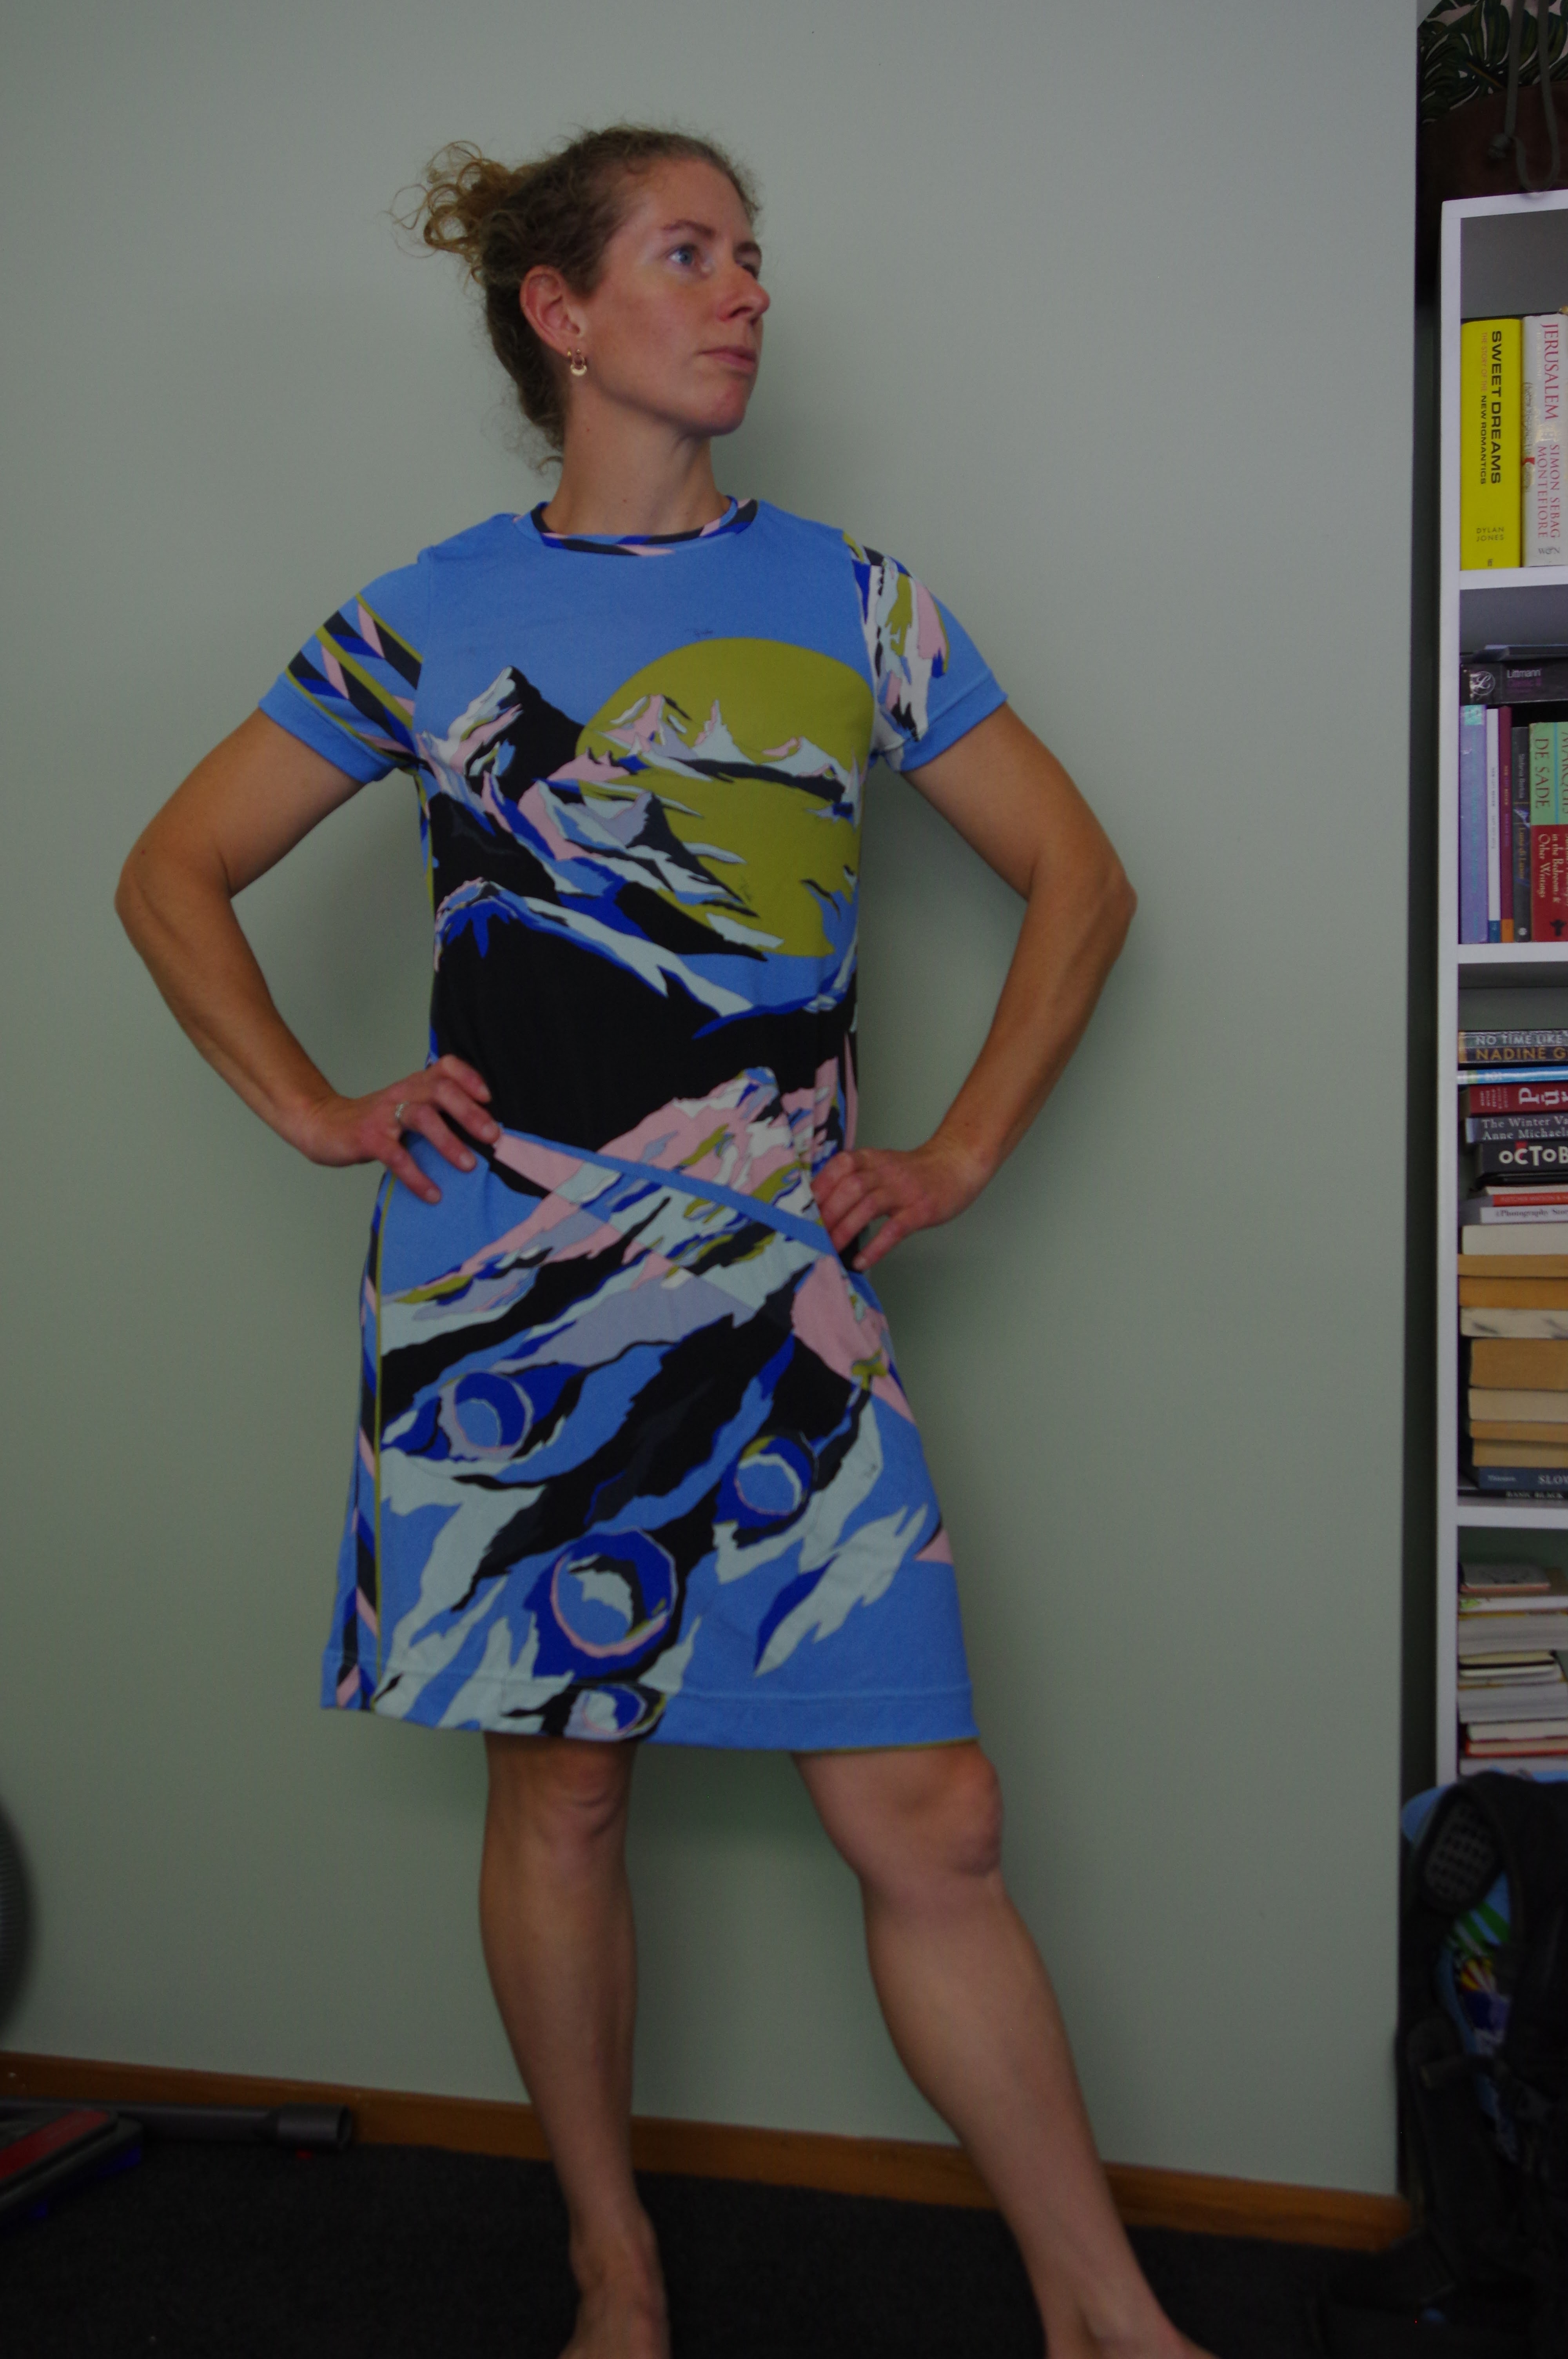
So I retraced the pattern flat instead of on the fold. I laid out my tiny metre of fabric on the floor (my kitchen floor isn't a great cutting space but unfortunately the carpets aren't crappy enough to rip up yet) and laid out my new pattern pieces onto it.  Then I proceeded to basically crop off the A line until it fit the fabric.  I cropped off a lot!  EEEK!  I played around with the fabric layout as much as I could but had to give in and use the geometric border, which I would have liked to avoid. 


I was overjoyed by the results.  I again didn't add pockets, this time because I didn't want to mess up the line of the dress.  I have stashed this insanely cool fabric for about 18 months and it's been on my mind the whole time.  I don't think another garment would have suited the heavy rayon drape and stretch as well as a tshirt dress, and it's obviously the best canvas for a print of this nature.  I also managed to keep things like mountain tips off my nipples, which is a grand success.  The geometric bits are all on the same side, and the other side matches up harmoniously.  Overall, a win for a special stash fabric. 


Wednesday, 25 April 2018

French Navy Calyer pants: tacky lounge pants for the win!

Like most people these days I discover new patterns via Instagram.  I saw a few pictures of Calyer pants sneak up before the pattern was put up for sale and I was already drooling at the lovely front, the spiraled side seams and the clever pockets.  Plus the fact of no closures on pants that look so stylish had me full of fancy aspirations.

I bought the fabric at The Fabric Store in Auckland to make these pants.  The fabric is a marled grey woven in a weird blend of merino, plus linen? silk? rayon?  who knows.  When I washed it the fabric kind of shrunk in on itself, getting a bit denser and rougher feeling.  It doesn't really have stretch, but it has a lot of mechanical give in the horizontal direction.  It has basically no drape.  The fabric is also super narrow.  I think I bought 1.5 or 2 meters, which is of course less than the pattern calls for.  The pattern calls for a lot of fabric because the back piece is very wide.  So, note the width of your fabric if you want to use less!  I could not fit the pieces across the width and had to cut my front legs in two pieces and make a seam just above the knees.  I actually quite like doing that and I think of it as a design feature, but if you aren't keen on such things, then ensure your fabric is wide enough to cut the back pieces on.

My sewing friend Tessa had made Calyer pants a few weeks ago so I saw her learning process as she didn't leave the seam allowance for the pockets and had to backtrack.  She also cut a size smaller than the size chart recommended.  (Size chart for her measurements were L, but the finished measurements suggested she'd be fine in a M, so that's what she cut.)  It was also very good to see her finished version as the pattern does not make clear that the pocket lining will be visible when the pants are worn.  Tessa's fabric was extra wide, so she could fit the pattern pieces on something like 1 meter of fabric!

The directions are so precise they are almost micromanaging.  However, this is an "advanced beginner" by which they mean intermediate pattern.  That is because the shape of the pattern pieces diverges from "standard" pants, and because the order of construction is original.  By precisely following the directions you are basically guaranteed a fantastic result.  Seriously.  These look amazing.  There is basically no spot that doesn't line up, no edge that's crooked.

As for me, I cut a size XS and I am glad of it.  I considered cutting the S.  My waist is 26-27 and hips 37. I am scared, because my Orla dress was fit for (and was given to) an 8-year-old.  So I was tempted to size up.  Truthfully though I think I had a psychosis moment because on the Orla dress size chart I was not an XS or whatever I cut, but something like an M, so that was my own mistake.

I made no changes to the pattern, and I used some faded rose coloured silk for the pockets and for the front waistband facing.  That was good as the nice stable fabric was easy to work with.  I liked the pop of colour which is subtle but blends in with grey.


I did these during my sewing day, so they took about a third of a day.  I had no problems and my only pause was when Tessa went out to buy my waistband elastic.  I also did not shorten the hems, though they are drafted for a person sized 5'6" and I am more like 5'4", the inseam seems fine on me.  If you are tall these will be slightly above ankle length.  I like the length as it is though.

All my photos are taken at the Mount, aka Mt Maunganui.  The pants did well for a movie night, followed by a morning stroll and a climb up to the top of the mount, though I was pretty sweaty by the top.  (Google says it's 231 meters up.)


My final thought was that the pants look so super cool lying on the floor but when I put them on, the gathering from the back elastic makes my bum look terrible.  They are not form fitting, and so they are kind of like a pair of classy lounge pants.  However then I realised that I basically live in things that don't fit very well which are takes on classy lounge pants.  Also, it was my own fault for not using drapey fabric.


I wore these to work and they were comfortable and made me happy (I am working night shifts and thus basically wear takes on "fancy lounge pants" in order to not wear scrubs.)  I don't plan to make more now, but if I made more I might take a tiny wedge out of the front waist just to dip it down in the centre front.  Other than that, and using a drapey fabric, I wouldn't make any changes.  I suppose theoretically I could size down from the S at the hips to XS at the waist, to decrease the amount of fabric entering the waistband gathers.  But I think first trying a lower profile fabric might make a difference.  So pay attention - if your fabric has a lot of body it will not lie flat due to the elastic!  Also make sure to leave precise seam allowances when sewing the pockets.

Overall I am really happy with these and the pattern.  It was sort of a mystifying experience as I went along but it came out great.  I still don't really get whether the weird angle at the hem of the pants mattered, but I guess it's good when life leaves us with a few unsolved mysteries.