Showing posts with label made by Madalynne. Show all posts

Saturday, 16 June 2018

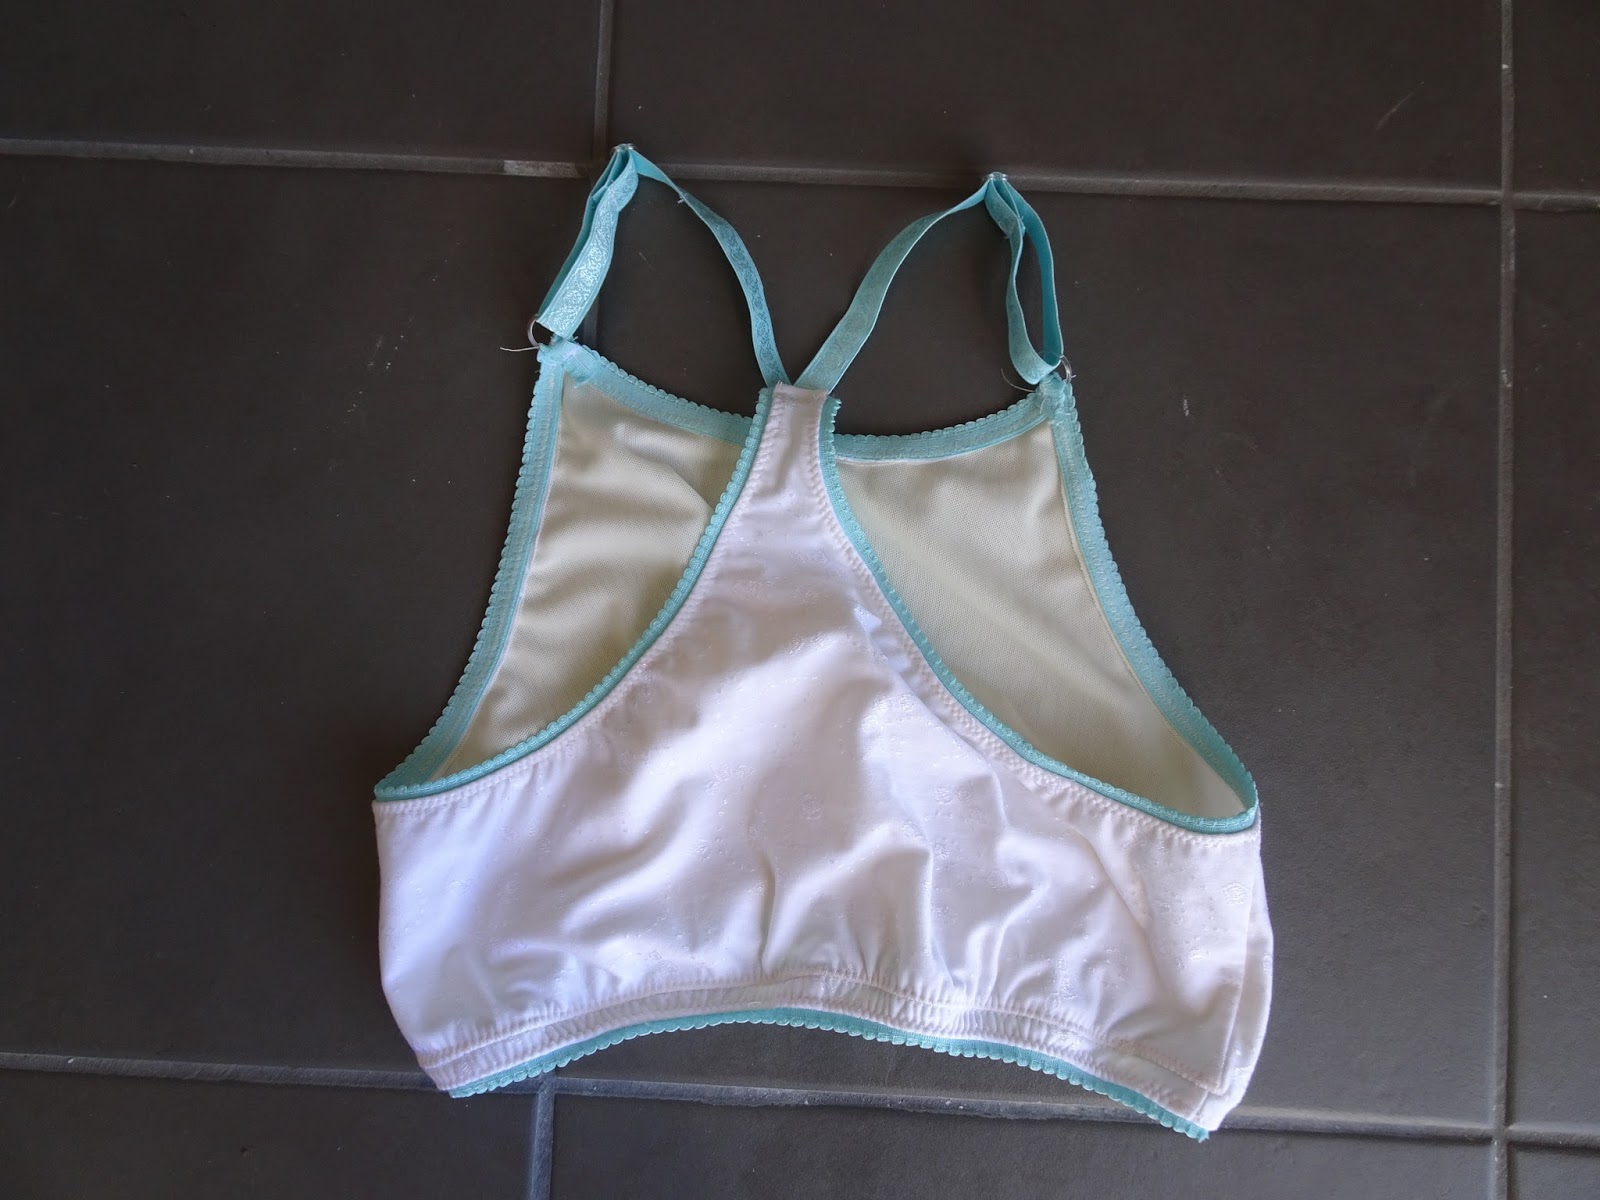
Noelle - Mallori Lane bra top (plus a bonus Watson!)

I have been planning on making this top since I first made Noelle and Mallori Lane bra tops.
My initial problem with Noelle was that (a) I think I was making a size too big, and (b) the back didn't work for me.
My problem with Mallori Lane was that the long line wasn't happening, and without that it was kind of a nothing.  Though I might return to that concept and make some very simple bra tops, it wasn't quite inspiring enough on its own.

I used the back from the Mallori Lane, lower half, and the front from Noelle, size XS, top only, without the long line addition.  I did add a seam allowance which I don't think I needed.  The sides lined up with no adjustment.

This is scuba fabric, also used for this here Watson bra:

The Watson, in a size 32B, fits me correctly around the chest. However unless you have boobs of steel, I think scuba fabric is a bad idea for this type of bra, because it tries to shape the cups too much.  The silk Watson is the one I've made with the best fit, so I think I'll return to that kind of fine, drapey stretch fabrics in the future.  So this bra was a loss because I didn't want weird shaped boobs.

So, back to the main story.  I didn't use any metal loops in the front, and I did a cross back with normal bra strapping and the adjusters in the back.  This was partly to avoid having metal bits on my collarbones, but that was also fixed by being the correct size.  The size small was sitting right on my collarbones.  I pulled slight tension while adding the picot elastic.


And this is perfect!  Exactly what I wanted in a halter-style cross back bra top!  Might not need a whole closet of these, but I'm really satisfied to have finally gotten all the elements to come together nicely.  I would probably add the metal loops in the front next time as it is just nicer looking than trying to sew about 6 layers all together at that spot.

Also, definitely a good option for a swimsuit top.

Tuesday, 17 April 2018

Madalynne's free Barrett Bralette, x 2

When this first cropped up on Madalynne's instagram I was very impatient for the pattern to be made available - which in short order, it was!  I haven't been sewing much, and I've been choosing rather carefully what to sew also because I've been sewing only weekly at my friend Tessa's, but this pattern alone revived my lingerie sewjo which has been lurking at nil due to last year's lace-based catastrophe and an overdose in other bralette patterns.

Size small which fits me correctly. The sizing chart seems accurate.

I went into it a bit pessimistic, because I quite like my findings - all from Elle Joan via etsy - a local NZ seller so very awesome to get fast service and be able to support local.  I reckoned no way could it end up as good as I hoped.  Plus it's not an easy bralette to make.  Despite the popular sewing bloggers all optimistically waxing poetic, this bralette has lots of little tricky bits and the instructions are very wordy - a thicket of words often obfuscating what the actual next step might be.  Going into it I felt a bit nervous due to those instructions but as long as you have made bras and are used to dealing with picot elastic it doesn't hold major surprises.

I did the first cup wrong - sewing the lining and the outer material of the vertical seam separately, but by the second cup I realised what the instructions were trying to say and I sewed all four layers together correctly.  Indeed it creates a much better result as the seams lie flatter, and I can see the difference when wearing the bralette.

I thought the instructions for putting together the straps were bad, and I referred to the Marlborough bra for those, because it's an easy thing to get confused on.  In the end one can always figure it out.  But this is one of those cases - which reminds me of Tilly and the Buttons patterns - where a multitude of pictures and words can cause more confusion rather than clarity.  I also really hate colour pictures and strongly prefer drawn diagrams.  I think that people are polarised on this : )

As I was making the bralette, the open V of the front didn't seem to sit straight.  It is improved once the straps are on and does not influence the fit but I think I could have changed the angle with which I attached them to that bottom elastic.  I realised once I put clothing on that it is very important because it creates a lumpy silhouette if you don't have that v totally flat.


It's the bottom elastic that makes this a particularly not simple sew.  Because you have to overlap and maintain the SA - I think that is an intermediate skill.  Madalynne assumes that you have glued the layers together and that they will act as one.  I didn't use glue so I had more layers to manage and I had to undo and fix some areas where all three layers didn't catch in my stitching.

The stitching is really visible when it's lying flat but not visible when its worn, so it actually miraculously looks quite decent on.


My sewing machine is borrowed and the needle is offset from what looks like centre.  It has a terrible system for adjusting the width of the zig zag.  So I need to pay a lot of attention to choose the right zig zag and to correct for this visual error I kept making which meant I was stitching off the side of where I wanted to be, which added to my grumpiness.

Overall it was still under 3 hours. This is a fantastic pattern and I really love the fit, so for once despite some errors along the way I'm both happy with the result (yes I will wear it) and I am excited to make the next one, and make it better.

And the second one:
I discovered the width adjustment for the zigzag.  Haha, oops.  Things are better now.  I also got in the habit of putting the needle down into the fabric so I'd know where it was starting, which has also helped. 
I didn't stretch the elastic quite enough under the arms.
To improve the underbust elastic problem, I measured 1/4" down from the top of the bust elastic, and drew a horizontal line to pin the fabric to.  I left this alone at the center front, put the bra on, measured where those 2" should be at the V of the front, and then pulled and gathered in order to get the V to lie flat.  Bra 2 is much nicer looking under clothes - it doesn't stick out weirdly.


I think I've had enough of these, though they were fun.  I have been inspired to go back to an old plan of making a Noelle-Mallori Lane mashup...


Monday, 17 July 2017

Mallori Lane by Madalynne

I found this while browsing on Madalynne's website when I realised the Noelle was a free pattern.  I thought this bralette might also suit me so I downloaded it right away and made both bras on the same day.  I cut this in an XS.  I really didn't expect it to work, and I was just going crazy with my leftover lace.  I glued the lace to some power mesh (my glue is terrible but slightly better than nothing.)  Then I tried to catch the loose bits of lace in as I sewed, since on the bust it wasn't quite long enough.


This was a fun make, probably the most fun I've ever had making a bra.  I was also totally blown away when I realised that it fit!  After the Noelle bralette, I expected another long line bra to be equally badly fitting.  It still feels substantial - it covers most of me, really, but it's comfortable and supportive.

This is waist length on me!

This is hard to get on and off.  Also, it's hard to get the straps lined up properly.  I have a muscular back and the straps mean all sorts of fat seems to stick out everywhere.  And it's itchy.

All this said I will definitely experiment with this pattern some more, prioritising softer fabric and maybe playing with the straps.  One way to make things more stable would be to use boning on the sides, which I might try.

Sunday, 16 July 2017

Noelle bralette by Madalynne

Madalynne has made it impossible, via Instagram, to avoid the Noelle bralette.  I had not realised that it was also a free pattern, and when I realised this, I had to make it immediately.  (I also discovered that I liked the Mallori Lane and so that followed, also immediately.)

I used size S.
The fabric is a leftover from a german bra kit, I think it's from www.sewy.de The trickiest bit is sourcing a single round thing for the back.  I didn't have one so I just tried to make my straps arrive at the right angle.

Once I got it all together (very easy) I determined that the long-line part of the bra was totally ridiculous on me.  I am short waisted.  It means I have like no rib length and no space between the end of my ribs and my waist, so this thing came down to my waist.  I took off the entire bottom panel except a bit to attach the elastic to. 


After that it's totally wearable.  I think there is still somehow too much fabric in the back so I am thinking about how to change that, and I also don't like that the strap adjusters hit right on my collarbones.  I am probably going to try again and make some changes, including just skipping the long line and using some heavy elastic below the bustline, and then maybe cutting out some of the back.