Showing posts with label I hate facing!. Show all posts

Friday, 14 February 2014

silk-cotton Papercut Sigma

I spent all winter making summer dresses.  Hm, deja vu?  My excuse is that when I cut this out it was summer!  Stupid northern hemisphere.

This wasn't my first project to jump into this past week.  However, Necchi and velvet didn't get along so I moved onto this.  My mother finally dragged the Singer/not a Singer out of the closet and after some initial noise that sounded like a lawn mower, it is working pretty smoothly.  I don't know whether to blame the Necchi or my materials for my agony over the latest project, but more on that later.


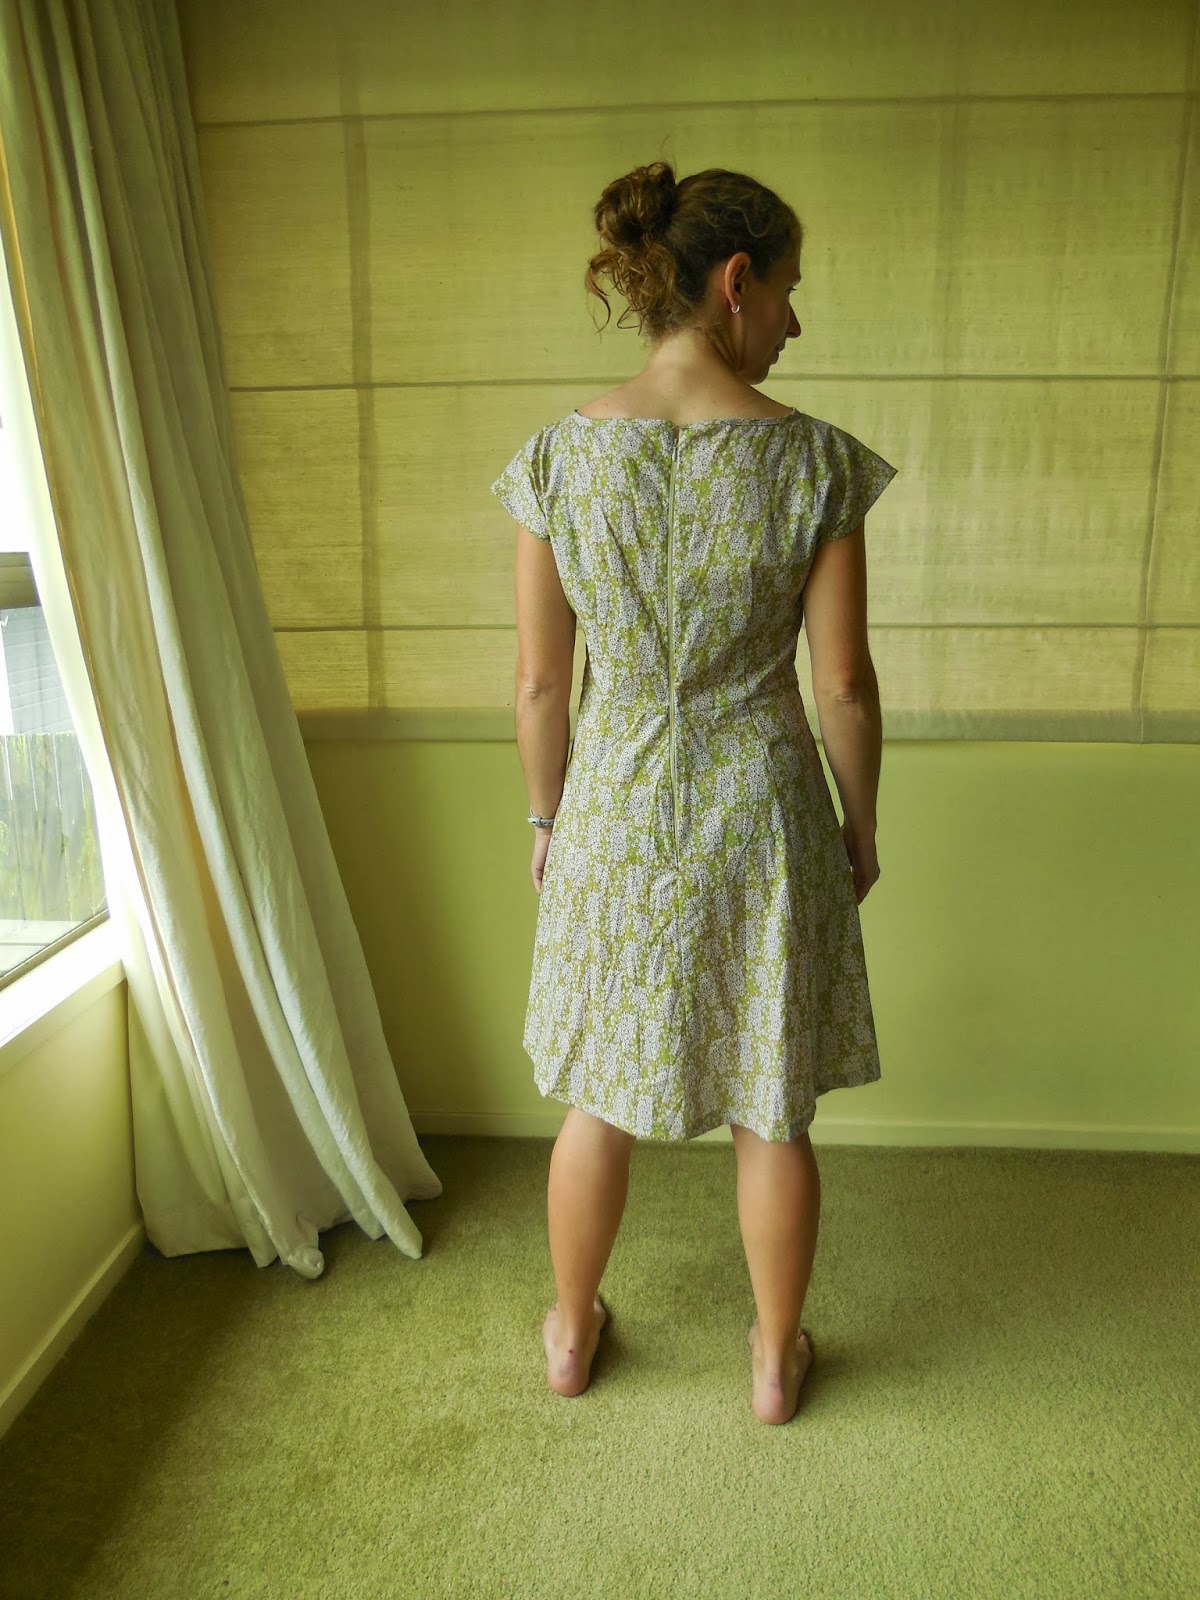
Yeah...those are my awesome backward pockets...

This sewed up really quickly!  I was sooo excited for it and it's cute and of course will make a delightful spring or summer dress (arggg!  I'm NOT happy about winter!  It snowed today!  It never snows in Seattle!)  However I had some issues.  The first was about the pockets.  The instructions have you put some interfacing on the front of the skirt and attach the front pockets.  They then blithely tell you to attach the back of the skirt.  Um...what about the rest of the pockets?  Since this method was new to me and seemed really fiddly and stupid, I did the second pocket in a more intuitive way (I hear Lizzy saying now that intuition always wins over instructions!) which was to apply the front and the back pockets to their respective skirt pieces, and then sew one single seam from the top of the pocket to the bottom of the skirt.  The only thing that I totally missed in my irritation was regarding the floppy pocket tops, which have to be sewn into the waist seam...um, the front part of the waist seam...so yeah, I have two backward facing pockets.  And I'm not moving them!!


I also feel like the skirt poofs out a lot, it ends up reminding me of the Elisalex skirt.  Other people's don't look that way.  I am not sure if the version without gathers is the same, or if I did something to make it particularly puffy.  I only hemmed it about 1/2".  It feels a little silly but everyone else has said it looks good so I'm not sure.  Overall this dress is easy to wear and comfortable but it does seem a bit loose.  Next time I also might shorten the upper bust darts slightly. 

The silk-cotton was a joy to work with.  The sewing machine got quieter as I worked (oiling itself?) and after my struggles on the previous project it was quite a relief to be doing something trouble free.

Details:

Papercut Patterns Sigma from the Constellation collection.
Size XS, no alterations, view 2
Fabric: silk-cotton blend from global fabrics in Wellington.
outcome: I'll do it again, with some changes

Sunday, 22 December 2013

Long Liberty Anna, at long last

I have no idea what my problem has been with fitting Annas.
I cut a size 6, and measured so carefully so that I would make it bigger than my last size 6 Anna.
I did 3/8" side seams with that in mind, even though I was sad to forego the french seams and clean inner finish.


Result?  ARG!!!!  My Anna is still big!  It's not terribly big, mind you - not as bad as my recent flowered Anna.  But it is definitely not very formfitting.  So whyever was my first Anna so much smaller?  I will never know...

This was my first v-neck Anna.  The facings went in ok and I understitched them with a vengeance.  By this time around there were no construction surprises and all of my seams matched up when I attached the bodice.  I cut 8 inches off the hem when cutting out the dress - no sense wasting fabric - and that was spot-on so I could do a normal 1 inch hem.

Since my dress is striped and is dark I didn't see any sense in hand sewing the slit.  I did hand sew the facings down at the zipper and I'm really pleased with the result.

Overall I love my Anna!  Next one will have to be a miniskirt Anna!  Also, I think that silk is a better choice for the long flowy Anna (or rayon) because mine kept catching around my legs since the cotton sticks.  I know that usually I wouldn't wear tights with this but an unexpected cold front came through.  Silk would behave better...

Sunday, 15 December 2013

Rainbow lined Colette Crepe


This sat around for awhile and I read about it online quite a bit before I got annoyed with the pile of fabric and dove in.  I wasn't sure what to expect - both with the vertical striping and with the pattern itself.  I didn't make any effort at stripe-matching.  I also didn't know whether my silk lining would be solid enough to function as facings.  I played with the idea of ironing on the facing pieces to the top and armholes of the dress but then decided that was too much effort. It was my first Colette pattern and I have read a lot about people having fit troubles so I wasn't anticipating a perfect dress on the first go round.  On the other hand, my Vogue wrap dress just feels too big and I do not love having it open all the way up to the waist every time the wind blows.  So I thought the back wrap might be a nice change.

I cut a size 4 which matched my dimensions exactly. I do not like facings so I decided to line this dress with some lime green silk.  Also, I treated the silk with gelatin so it would behave (an example of how to do that is here, and this certainly made it less shifty.  That's currently my favourite method for dealing with lightweight silk.  Less shifty does not = zero shifty, so it was still a bit off, but I just made some little folds along the shoulder and that was taken care of.  The shoulders are funny shaped anyway!


 I followed this tutorial for the order to sew with a full lining.  What it neglects to point out is that the wrap belt also has to be done and attached prior to sewing the lining onto the bodice, but I remembered that from my Vogue wrap so it wasn't a problem.  Sewing a wrap dress is easy and the Vogue dress with lining had super instructions, so this time around felt a little bit like deja vu even though I was adding the lining myself.  I sewed it in by hand at the waist, and I have to say, this dress is gorgeous inside.  I did notice that my needle make little lines in the silk - even when I switched to a microtex needle.  I don't know what that's a sign of. 

As for fit...meh.  I don't actually like the loss of control that I get with the wrap in the back.  And I think wrap dresses just feel like too much fabric or something.  The bust of Colette patterns is bigger than in the big 4, and in this case it's too big for me.  The dress is cute and I really like the one piece sleeves.  It's possible that I would make it again, but I'm not totally sure. 

Thursday, 5 December 2013

By Hand London flowered Anna

Time for another Anna. Size 8/12 this time.  I luckily only had to trace/guess at one piece because I had mostly traced out my size 6/10.  Construction pretty straightforward.  I lowered the front neck slightly, and skipped the facings to try out self-bias tape instead. I waited to put that on until after the zipper, since I was anticipating some gapping at the back.  There wasn't!  I guess that in this rather loose variant of the Anna, when there is no pull inward below the bust, it doesn't pull outward on the back??


My size 8 Anna is pretty loose, and the pleats are the only thing that give it shape.  I'm feeling rather frumpy lately with my loose Belladone, and now my loose Anna.  But I do love breathing...

This was my first attempt with the invisible zipper foot.  Which is apparently not a Janome specific foot, or my needle is not centred in my machine.  I could only use the left side tunnel.  Then I realised I hadn't matched the waist so I had to redo it.  I used the normal zipper foot on the second side.  The invisible zip foot also isn't creating a very invisible zip.  I wonder if I'm doing something wrong...anyway it's still been a much nicer zip installation than usual.  I was very tempted to take out an inch at the centre back but finally restrained myself. 

I actually love this dress!  It may be loose and frumpy but it has no facings, no loose threads, no sticking out funny bits...it's about the best construction ever, and makes me love Anna all the more!  I have one Anna left to do...my long, sleek, v-necked black Liberty Anna. So...is this size too big and frumpy for that??

Friday, 22 November 2013

Sewaholic Alma

This was a pending project for quite awhile.  I finally figured I should stop dithering as it was a very very quick piece to make.  I wasn't interested in any details - just wanted a nice shell top.  It came together in about 2 hours, although that's because I didn't have to put in the zip (more on that in a second.)


My fabric was a cotton with lycra - quite a bit of stretch, that I got as a remainder.
I didn't do any belt or neckline decoration.
In fact, now that I've figured out how to properly understitch, my facings stayed in place pretty well.  However I would totally be keen to do this in a lighter weight fabric with some self bias tape.

I cut a size 4 and didn't taper at the hips.  I thought a bit of flare would be quite nice on this piece.  I shortened it by 1 inch at the waist, and added 1 inch width at the shoulders.  I think I'm getting the hang of the basic changes that suit me.  As a reference, I'm short (5'4") and square, about 34 1/2, 27, 37 and with abnormally wide shoulders.  This top isn't form fitting.  I'd probably use the same size for a material without stretch, but in a stretch fabric I could take out some at the seams (but then I'd need that zip.)

The construction was simple and I just pinked the seams, so it was very quick.  As it got time to put in the zip, I discovered something unexpected - I did a Taracat!!  She is renowned for never needing zips, but because of my wide shoulders and weird in-dress claustrophobia (I have been stuck in things!  Seriously!)  I never expected it to happen to me.  That was extra delightful and probably took an hour off construction.  I am still putting off learning how to use my new invisible zip foot.

The shaped hem is a particularly nice design feature.  I'm extra happy for my Polly top now, because the instructions for the Polly are very detailed regarding these shaped hems.  They have you make a line of stitching (I used 1/4" here) and then trim all the curves after you iron that up at the stitch line.  It's simple then to just fold it over one more time, making a perfect curving hem.  Otherwise I think I would have made a mess of it. 

Monday, 9 September 2013

By Hand London Anna dress

This will be my last post for a few weeks as I am going on a desperately needed holiday.  Well, "holiday" for some high-angle rescue training, but so so much nicer than sitting in an office.  Not to mention I will have a few hours stopover to spend in Los Angeles in the garment district!  And the training is in Utah which means it will be hot summer!  I am soooo excited (as I sit here next to the fire in my merino baselayers) just thinking about wearing shorts. 

I only traced the skirt and the bodice front, since I expected to do the longer version as well as the V-neck.  I had high hopes for this dress!!  Unfortunately I should have traced the whole thing...

I cut this dress opposite the grain because I wanted the pattern to be vertical on my dress.  That was my little bit of creativity here and I am pleased with the result.  I also used french seams for the first time!  How exciting to have such a nice clean finish : )  I'm already imagining that a lined Anna would be awesome since then it wouldn't have any flappy facings...unfortunately I'm still scared of linings, especially linings that I have to figure out myself, so that seems like a distant prospect.

It took about two and a half evenings of sewing to complete this dress once I had cut it out.  Fast!  With the french seams it also means there was not a lot of finishing that needed to be done which is always great.  Since I recently went back and finished the seams on my first few Lisette dresses, I've started to realise how much nicer it is to do all that right away and not when things have started to fray and wrinkle...and since handmade garments so far do seem to be more fragile than their store-bought cousins, it seems smart to do everything I can to make them last.

Like every project there came a total disillusion moment when I was totally sure the bodice wouldn't fit.  The pleats mean that there is a very very generous amount of space for the bust and that initially looked like way too much for me.  Yet again I had a massive discrepancy when it became time to put in the zip!  One side of the skirt was about 2 cm wider than the other...but they do match quite well on the front and sides so I guess my french seams were slightly less than 5/8" overall and led to some extra.  I ended just cutting this off to match the other side of the skirt back.  Less hesitation with it than on the Lonsdale dress (I dithered for days on that one!)  and overall this felt like a super stress free construction.   I only did one french seam backwards...oops.  I usually don't lap the fabric over the zipper, but keep it to the sides so the zipper is visible - my zipper techniques are pretty neanderthal, I think.  I was so high on how well this dress went that I lapped my zipper properly.  The result of that extra half inch?  I think I should have cut a size 8/12.  My boyfriend likes it but I can't take a breath.  Total letdown!  Of course I didn't trace enough of my pattern pieces to still be able to cut out the 8 so I'll reflect while I'm on holiday and see whether I'm ready for another try.  BHL do say their fits don't have much ease, and I would agree with that.


 Just barely warm enough to be barefoot for a photo shoot...but not a minute longer!


This is a super pattern for the wide-shoulder problem because the sleeves fit my shoulders so nicely.  However, like most people I had gapping on the back along the zipper.  I see Ginger has come up with a nice way to fix this, here.

Overall my Anna experience has been mixed.  Maybe I should have sized up, but the flappy facings also really irritate me.  I would want to use a slinkier fabric so the facings would stay in place, or line it, if I made this bodice again.  But I do love the bodice! 

Monday, 26 August 2013

Lisette 2209- Passport jacket

This is the last of my Lisette patterns!  It seemed like the most daunting project and because of that I left it for last of the batch.  Of course in the end it was pretty straightforward and the fabric was incredible to work with.

For this one I used some lovely green silk-linen that I got at the Global Fabrics while passing through Dunedin.  I was planning to line it with pale blue chiffon but it ends up that I hadn't read the pattern very thoroughly and it doesn't require a lining.  Next decision was whether to use same-fabric facings or to use something else.  I didn't have anything optimal in my stash - plain black or white silk seemed a bit silly and I did end up having enough of the fabric itself so I just stuck with that.  After reading through Tasia's sewalong for the Lonsdale (an upcoming project!), I was super keen to go get some seam tape and make my seams beautiful....but the local shop didn't have any : (  Stupid small towns.

I cut a size 10.  I had cut the previous Lisette designs in an 8 and on this I had initially considered doing a wide-shoulder adjustment but I thought 4" of wearing ease might be enough to take care of that.  I know I'm mixing up design ease and wearing ease but the pattern is cut in enough pieces to make me hesitate before changing the wrong ones.  (And the various types of ease are a subtlety I'm only now starting to understand, I'm not sure if they matter in practice.)  I also hesitated because the front is cut in two pieces and I wasn't sure where to add in the shoulder width.

A lot of cute variations online made me consider more than one button and after trying it on before I put the facings in, I saw how totally shapeless the back was and went for three buttons.  The third button down is the key one in holding the jacket together so it's not too boxy (er, and so I can lift my arms...)

The ruffle went on without a hitch.  I ran out of thread near the end and used bright blue on the facings though...not sure if that looks stylish or tacky.  I had to give in and buy more so that I could sew the hem.  Hand sewing practice notwithstanding, I don't have enough faith in my abilities to slip stitch an entire hem.

The final word is that I truly have to work on putting in more effort into fitting my garments.  This is a project I put a lot of time into and it's really cute, but the shoulders are just too narrow.  I have only recently noted that my dresses and tops are all either tank tops, or are stretch knits.  There is a reason for that!  I actually don't fit into standard size shoulder width tops!  This is always obvious for me when I buy things in stores, but when I'm fitting patterns for myself, somehow I imagine I will fit just fine...by the end of the first day I noticed that the back seams were pulling apart just a little bit.


Also, my pictures are very unflattering.  I probably need to figure out the self timer because I'm too self conscious when others are taking pictures of me and I clearly haven't got much sense of what angles I need to actually show off the good work I've done. 

This jacket would definitely be awesome if it did have a lining.  I'm quite sad not to get to use seam bindings - etsy came through so some are on their way but I ended up just using shears on all the seams, and I will eventually seam bind the bottom. I will get some wear out of it, but the shoulder limitation means it's uncomfortable to bicycle in and that's my primary mode of transportation.  Seeing how one day damaged it makes me hesitate to put it through my usual rough wearing.  Also, silk linen is nice and shiny in certain light but it wrinkles a lot!  This would be really cute in corduroy.  And this fabric might make a nice Scout!  Hah!

So, are handmade garments inherently more fragile?
How do you decide what fitting modifications to make?  I know that making a muslin is the obvious answer but it seems like I don't figure out a lot of things until I wear the dress/shirt/jacket and see what happens.

Wednesday, 21 August 2013

Vogue 8755 Pants

My first trouser attempt!  I wasn't initially planning this so soon.  In fact, last week I was lurking Tasia's delightful sewalong for the Lonsdale dress and that was the plan for this week.  The sewalong gave me so many great ideas, things like using seam binding...so I went to the local shop and they didn't have any : (  Not to mention underlining, it was a breakthrough!  I want to do this to everything...I could hand sew all those floppy facings down to something!

I thought about that afterwards and realised I have finally gone up a level.  I noticed it with the Lisette jacket (it's almost done!) - it finally doesn't seem like too much effort to bind my seams and do extra little touches that make the final product genuinely awesome.  I'm even considering hand stitching things -- I have never slip stitched anything in my life; all my hand sewing was made up as I went along and usually to fill in a hole or fix an open seam.  As a result it usually looked pretty bad close up.  It's been illuminating to realise what a big place hand stitching has in sewing. The Colette Sewing Handbook had a great chapter on how to properly hand sew.  (Unfortunately my CSH came without its patterns and I am still pining for them but Amazon wouldn't ship them to New Zealand.)

So I went to Wellington and got this crazy silver spangled wool.  And I thought it would be perfect for the Vogue trouser pattern.  I was so right.  And I have apparently figured out Vogue's sizing (choose one size smaller than you actually are) because I picked a size 10 and they fit perfectly (even maybe a touch loose at the hips).  As always, halfway through the project I thought they were too small.  These were a super easy project to do and overall just took a few hours...until I got to the facings.  It's a bit bewildering to do pants - I am not used to which piece connects to what, whereas with dresses it usually seems instinctive, and the zip was to go in the back and I followed the pattern then realised I do have free will and I would have preferred it on the side.  The lining is black silk that I got as a remnant.  Naturally it's just a facing (oh I sooo hate facings!) but a nice one and it will definitely help the pants hold their shape.

I was so pleased with how the zip went in - the instructions were to baste the back shut, apply the zip, and then open the seam, and I did that.  I shortened it at the bottom and then, feeling oh-so-clever, I shortened it at the top so I could fold my facing over the edge.  Um, oops.  People, there is a reason that zips have a little plastic stopper at the top....yes, I zipped my zipper right off and that was the end of "just a few hours."  And the end of my awesome teal blue zipper.  The other one I had in the right size was sky blue, still a little bit interesting but not exciting.

Three hours more work to get the zipper in, again.  In the thick herringbone wool my stitches nearly vanish, and the trousers have three darts on each side.  (One front and two back.)  So I sewed the facings down by just sewing vertically up every seam (sides and front), and sewing along the darts.  The stitches are invisible, and my evil facing is held down!  Awesome!  I'm actually really excited how these pants turned out, and I definitely put in some extra effort finishing edges and facings.  I did a simple hem and most of the finishing was done with my shears.


Sorry for all the shots of my bum...

Sparkly wool!  Again, sorry for close up butt action but that way you can see the zipper too.  I will be doing side zips from now on.

Wednesday, 24 July 2013

Lisette 2209- Passport dress

During my online shopping spree, one good friend of mine accepted my offer to make her a dress.  She picked the Passport dress out of my Lisette offerings.  So I got fabric to make two of them.  I made them at the same time.

Most of this construction was straightforward.  I cut a size 10 this time going by the finished dress size, and as before I gave myself a little extra room by hemming the side seams together very narrowly.  For my friend Sarah I didn't have to do this as she is slightly smaller than I am.  I used the dress for me as a muslin preparing the skills, and then copied them on her dress.

The pleats at the waist gave me pause because I think I might have done them the wrong way.  Is that possible?  The waist seems to billow out a bit.  Other than that, the dress is cute.  Unfortunately here I think my choice of fabric was terrible...after we had chosen fabric I searched online and found that this dress has more popularity than some of the others I've done, but no one else used the two-fabric scheme.  Before we bought fabric, I didn't know to hunt for the dress online and see what other sewers were doing.  However, Sarah's dress turned out well and I'm pleased with it. I did something funny at the armhole seams because it was the first time I made my own bias tape. It looks ok, just odd since there's no matching tape around the neck.  Another great thing about this dress is that the facings are held in place by the armholes so although they are still present, they don't flop.

 Sorry about that one being sideways...


I did realise that I have no idea how to do invisible zippers.  My zippers were terrible, especially where they cross the midline, since I couldn't quite get my seams to match up.  This seems to be a skill I need to practice!  

Yet again, my dress is a bit of a fail - not something I'm too keen to wear to work so it's being passed on.  I might consider doing this dress again in a single fabric but not any time soon.  It's quite comfortable...the lesson on this one is the subtle one about picking the right stuff to match the design, I guess.