Showing posts with label orange lingerie. Show all posts

Wednesday, 12 May 2021

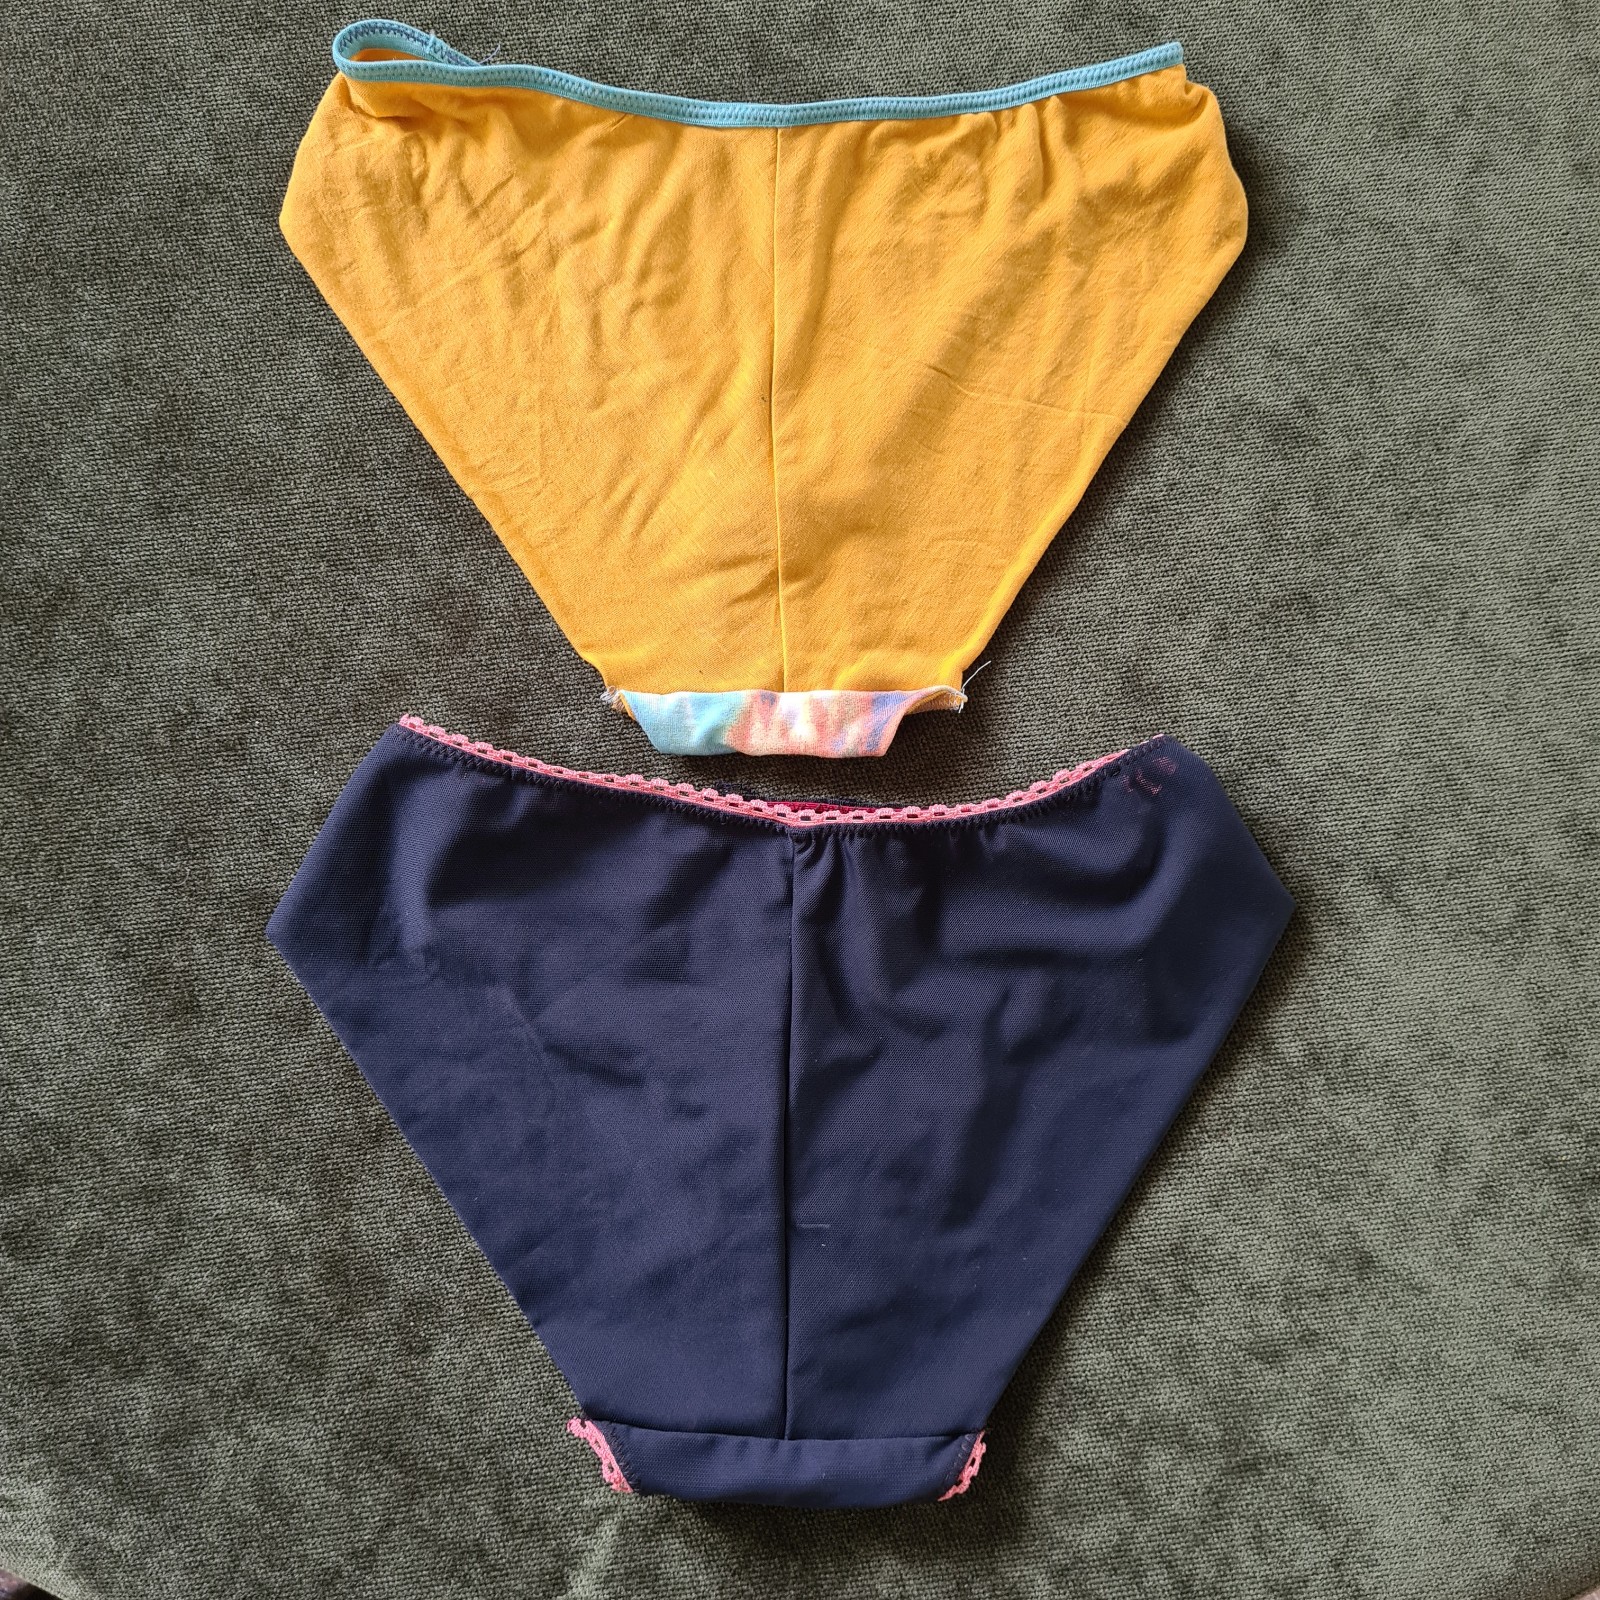
some new knickers: Orange lingerie Montgomery briefs

 These are very pretty. 


The question was, of course, whether they would adequately translate from a pattern made out of plastic (that's YOU stretch lace and power mesh) into a pattern made from my cotton fabric scraps (the goal).  

I started by following the instructions (is it funny that this is rare, unusual, and requires comment?)  I made size S. I used some navy power mesh from my stash, matching lace, and some pink picot elastic.  The instructions are fine. The problems are technical.  Four layers coming together on the back of the crotch.  A weird edge where that all meets up.  Other than that, the fit was fine.  

I cut out two pairs of mixed rayon and silk jersey.  In retrospect I should have gone for the beefier interlock I had sitting around, at least for the front.  One pair got entirely scuppered as I decided to change things up a bit and sewed the edges of the crotch pieces together with right sides facing, then flipped the crotch out to avoid putting elastic along the crotch piece. However, the result was that the front and the front crotch didn't match up.  It was not a salvageable mistake.  

Take 2 I did the same thing but I *also* did that to the front, which I doubled.  So I avoided any picot elastic, which for me is a good thing as all the stuff does is shred all over everything in the wash and then fall apart.  I did a clever thing where I put the crotch into the front and sewed them together inside out, so I got a nice finish there too.  Of course I was still stuck with four layers at the back.  This pair of underwear is wearable, but very loose.  I won't avoid panty lines - because the back won't really fit under tight pants!  Haha I will wear them to bed anyway.  I'll try out the plastic ones too and see what I think.  I have a lot of power mesh and it would be nice to have a way to get rid of it.  I don't really have much lace, because I dislike sewing it and I dislike wearing it...


This was a fun experiment but it seemed to conclude in: 

Acacia panties are best. 

Watsons are just a bit narrower so they cut my butt cheeks in half.

Between these two patterns I can happily upcycle tshirts into underwear for me and all of my friends basically forever...except when we don't want pantylines. 

Barry briefs are for when I figure out the coverstitch binding attachment. 

And Esme panties by Evie La Luve are the epic wonder for avoiding pantylines and looking fancy.  I think it just won't get any better than those.  (Which just led me down a wormhole of panty patterns so expect me to be trying out two more in the next few weeks....oooopssss.)

Monday, 11 September 2017

Orange Lingerie purple lace Marlborough bra

This bra is the story of thinking you know what you are doing and forgetting all the details.

I made this beautiful bra awhile ago.  Too bad that it seems 32 C really does not fit me these days.  So my solution was to cut a 30B, to decrease both the clearly too big cup size and the clearly loose band.  That was a bad move.  Next, I went on to cut my pattern out in lace using glue, that honestly isn't my fault is the absolute worst sewing glue on the entire planet. Pick your spray glue wisely!!  If I had taken a picture of the glue I'd post it but I didn't, sorry.  Madalynne recommends Odif's 505 (here) and I would go with that next time as I reckon she is the lingerie guru these days

Then buoyed up by all that tension and anger from dealing with the glue, I popped all these tiny pieces of lace into my sewing machine, where the feed dogs had a lot of fun.  This bra looked too small to me - the cups just seemed small.  And my drive to actually produce a nice bra hit zero really fast.  Which shows.


The cups are not even because I couldn't see my snip marks and didn't try very hard.  Other than that it looks ok.  It is too small, both in the cup and in the band.  I think a 32 B might have given me the best result.

The lace and notions are from Tailor Made Shop.   I generally like everything I get from there, but this was actually a kit to make a Madalynne bra, and as kits go I think it doesn't match very well - it looks good when the pieces are just lying out but as a bra it has too many jarring elements - why are the straps so dark?  Nude closure?  It would be better with a dark coloured underlining instead of the pale white.  I also didn't underline the top panel of the bra, and I think that would lead to it being very flimsy and falling apart faster. 

And I have finally been on the verge of a bramaking breakthrough: I do not wear lace bras.  Why do I keep trying to make them?  It may be time to get over my anxiety of foam and make a foam bra - ironically the very first bra I made was foam and then I reread a bunch of blogs and thought I should be not using foam, so I stopped and never tried it again.  However, the duck billed shape of the Marlborough is even more apparent in this smaller size, and so I think it is also time to start making different patterns - I have in mind the Harriet to try, plus one of Madalynne x Simplicity 8229,  but I believe that Anne from Clothing Engineer had a lot of advice that I might read up on prior to my next foray into bras.

Friday, 10 February 2017

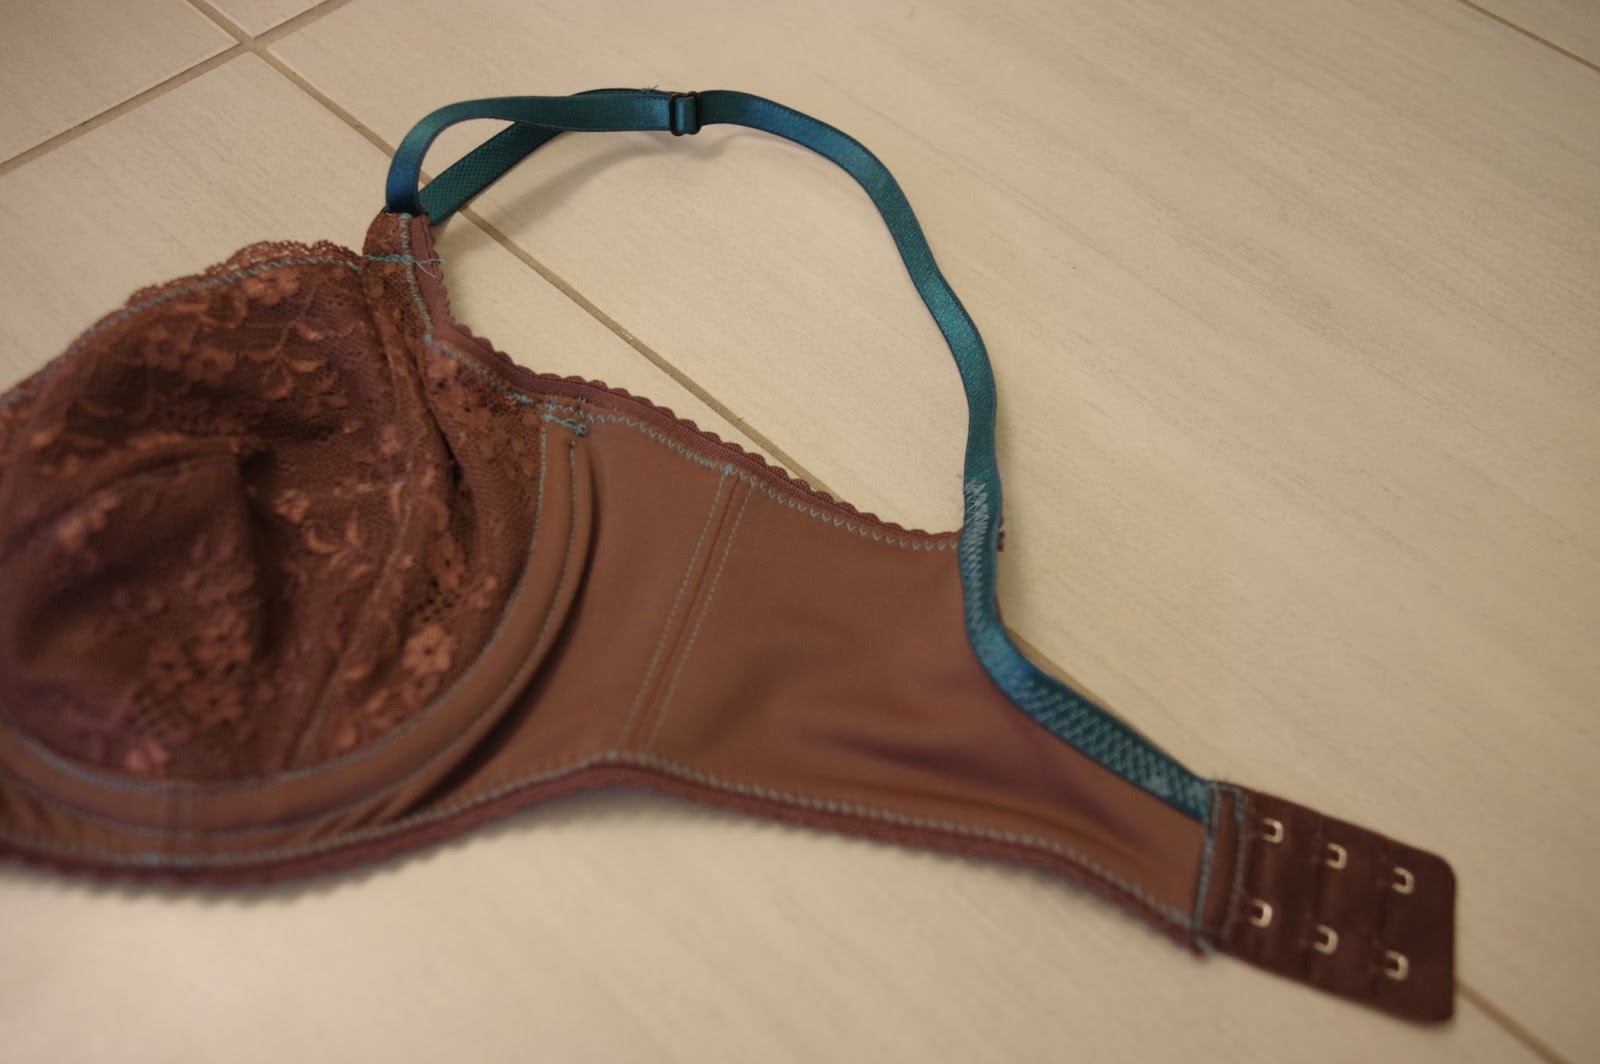
Orange Lingerie Marlborough bra in brown


Once upon a time, I proclaimed that I had no UFOs.  Well, this is like, the ultimate in UFO-action: I cut it out in Switzerland and then carried it around for 1.5 years and now here we are.  So, I'm guessing by this bra that I made a 32C, and I hope that I made these changes which I have documented as necessary:

-tighten underarm elastic (I remembered, and did this)
-lower height of center bridge (it looks a tiny bit lower, maybe)
-sew the bottom elastic on a bit higher (done)

I thought I had wanted to remove a bit of fabric off the outer side of the powerbar, to make it not come up so high in the front of the armpit, but I guess I left that, in the hopes that tighter elastic would fit better.

However in all the excitement I lost my brown bra strapping, so in order to make it less muddy I went ahead and ordered teal- all my recent bra supplies have been from tailormadeshop, who I am in love with for their cute supplies and quick shipping.  I used teal thread too, which I knew was risky because when you can see everything, you can see the messes...

The bra came together pretty fast, and unlike in my first bra experience here, I underlined the lace cups with powernet.  This makes it feel like a real bra, it's substantial!  I didn't have any issues putting it together.


However, I made my own bridge (as previously) following the book Demystifying Bra Making, by Norma Loehr.  My bridge is narrow compared to average, and so I discovered that the wires overlapped.  I'm debating whether I could shorten the height of the bridge to use shorter wires, or whether I need that medial support.  I don't have much tissue on the top half of my breasts, so mainly I need the lateral support, and some of my RTW bras don't have high cups in the middle - something to consider for next time.
There is a lot of wrinkling in the upper cup - I could pinch out a centimeter of fabric - best seen in this view.


The sad end of this story is that a bra prepared two years ago doesn't fit today... It's comfortable but the cups are a little bit too big and I think the lace is scratchy.  I've probably lost just a bit of weight since then and of course my boobs are the first thing to shrink. I'm not totally sad, I know I'll fluctuate and fit this bra again, but I'll measure myself again before making my next attempt. 

Wednesday, 1 July 2015

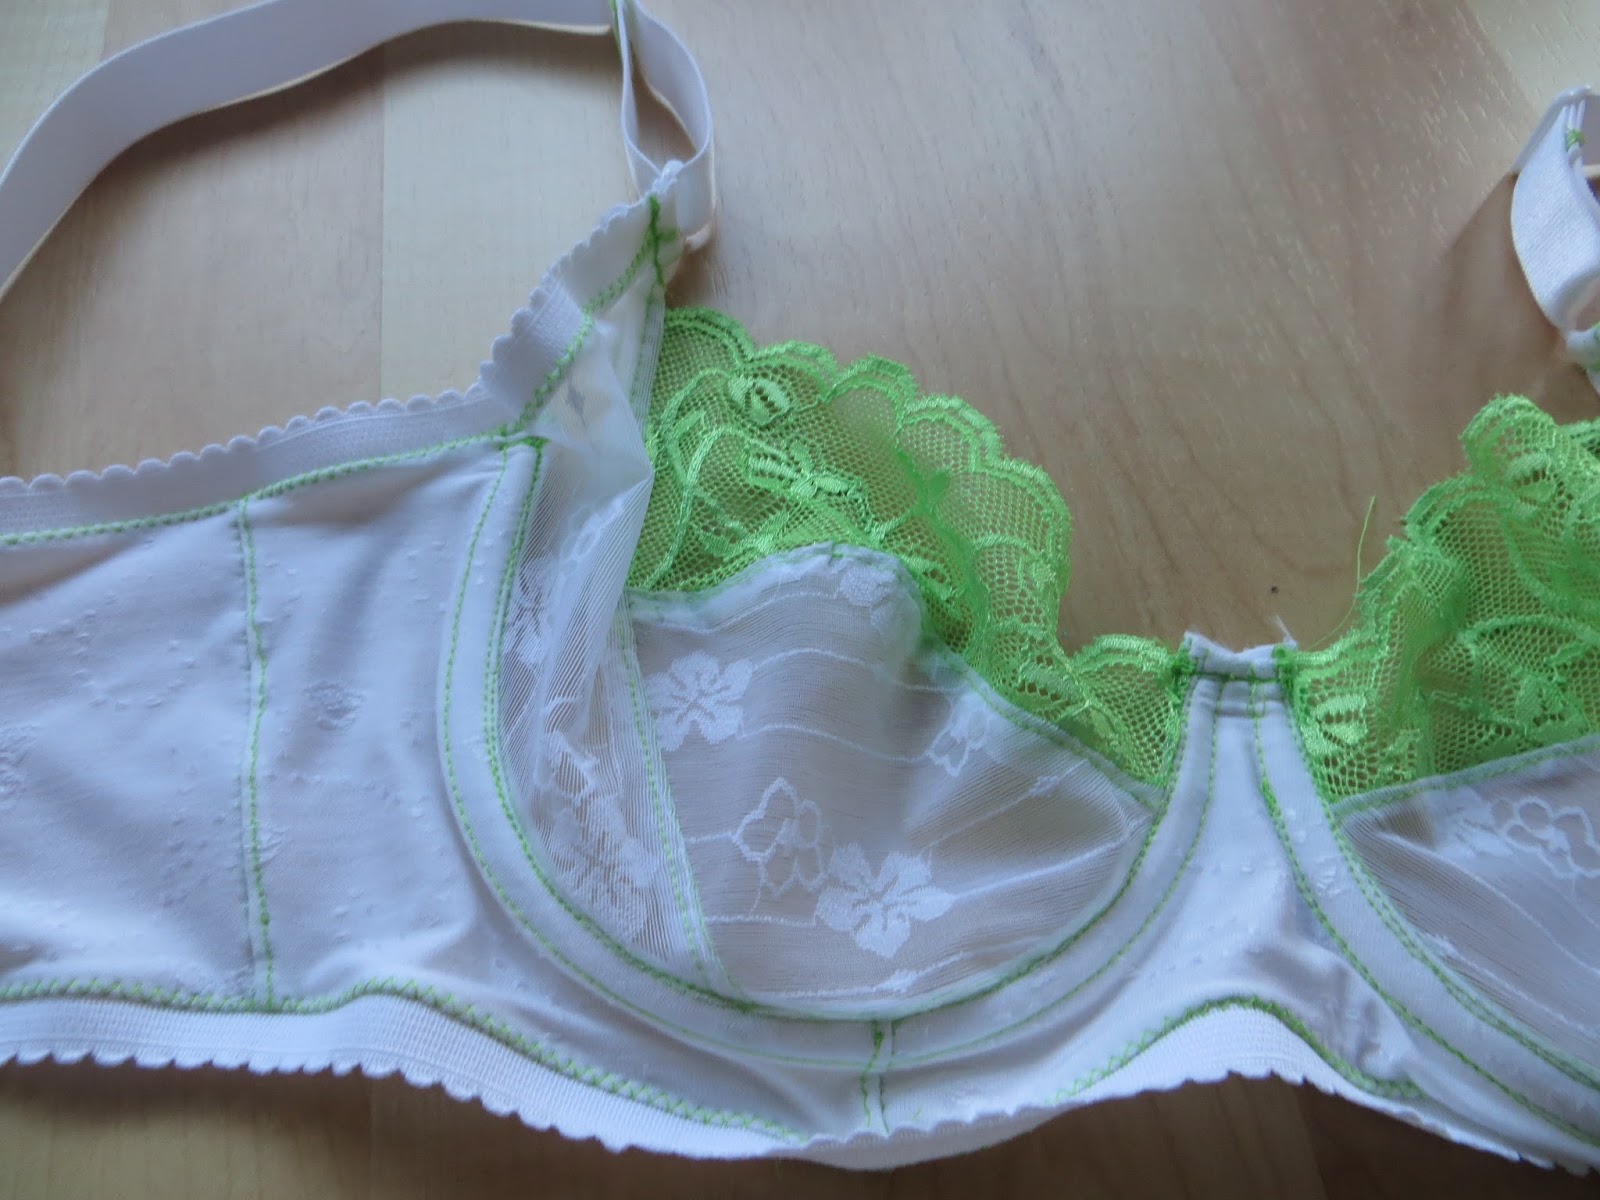
Marlborough Bra for real!

I made a prototype in January when I got on the bra bandwagon.  Things were going great, and then I got started sewing the Real Bra...I didn't know that lace requires some special sewing techniques, and I was still very nervous with the new sewing machine.  I sewed the first cup together, and then on the second one the feed dogs ate the lace and then got indigestion.  I had to take apart the innards of the machine and call the shop panicking...of course it was all fine after a rethreading!  But that really threw this bra into the corner for awhile.


It was with some surprise that I pulled the bra pieces out of their bag and saw that, despite my whining, I had actually finished sewing all the lace bits!  It still took me awhile to get up the nerve to finish it.  Despite bra making being easy in some ways, it's fiddly and I have to refer to the directions at every step.  Once I finally went for it, I finished this in a single sewing stint.  I have been following Anne and paid a lot of attention to her fit issues with this bra because I thought I had a similar shape to her, so I was pretty curious how a non-foam version would fit (and I reckoned I would try some of her recommended bra patterns if the Marlborough wasn't a go for me.)

Regarding the pattern, I read Demystifying Bra Making, by Norma Loehr, prior to making my foam tester bra, and that gave me what felt like a solid foundation.  The book has you make your own center bridge, and I have done that. Coming back to the theme after six months, a few of the terms were hazy but overall not difficult to understand.  I continue to find that my Pfaff with its IDT is terrible to make bras.  It doesn't go well over small, fiddly bits and my stitching is pretty horrendous.  It didn't eat anything else, at least.  And, shock of shocks, the bra fits! I did not use elastic over the green lace top, because on store-bought bras I find that anything tight on that edge creates double boob.  I don't know if it will end up becoming too loose too quickly without that support, but for now it fits very well.  I also didn't pull on the underarm elastic and it gapes a lot.  My kit came with wide shoulder straps and plastic bits, which I don't like so much. 


The changes I will make are to tighten the underarm elastic, to remove some of the height of the center bridge, and to sew on the bottom elastic with a bit more fabric, because it actually wrinkles a lot- I sewed it on with the tiniest of seam allowances but I think I don't need much bottom band more than the elastic itself.  The fit of the bra seems correct.  It doesn't give me a lot of lift or volume, but it is comparable to some of my store bought bras.  I think that when I tighten the arm elastic, it will pull toward the center a bit more which I would prefer.

I also find it strange that the back piece is not the correct height for the hook and eye pieces.  You have to cut it down quite a lot and the instructions don't mention this anywhere.  Even with my hook and eye being big, I still had to snip a new curve to the back.  

My bra kits are from Spitzenparadies.  I got this one and this one.  It took me quite awhile to find everything on the site because of how I still don't have much German sewing vocabulary.  The green kit is quite see through, but has huge amounts of the flowered stretchy fabric.  The brown kit is more like mud brown...oh well. I also bought a huge variety of wires, most of which weren't the right size.  I think two sets are pretty decent and another one or two are maybe ok.  I tried to compare by measuring current bras but that didn't produce great results.  I will wear the two good ones around and see if they are good enough to buy more of.

Saturday, 21 February 2015

Marlborough Bra by Orange Lingerie

I'm on the lingerie bandwagon.  I don't wear normal clothes at work (ugh, white scrubs!) and it's a bit depressing to give away nearly everything I sew lately.  My sewing projects have been things I thought up ages ago, or things I'm making for other people.  I'm finally at the crossroads when I'm starting to plan new interesting things that are more relevant, and the underlayers are a nice part of that!

I read Demystifying Bra Fitting & Construction and bought a few kits to make this less confusing.  I referred to nearly every one of Anne's posts.  She is so detailed and helpful.  Seeing her bras improve over the past few months has made them feel achievable.

I did as required by the book, and made my own bridge - the center piece between the cups.  I wonder if I overdid it and made it too small.  I wasn't sure what size to go by.  My usual bras are 32C, occasionally 32D.  Instructions say to measure the difference between your high bust and your bust and go by the difference.  My high bust is about 2 inches bigger than my bust.  Nobody says what to do in this case.  It's due to muscles, I guess, but it seems mystifying that no patterns ever mention it.  I decided to do a 32C and see what would happen.  I used a makebra kit, because Anne recommended them and recommended the foam.  I hate foam bras but I thought it was still helpful since I had no clue which fabric was best where. I was also amazed how well the foam compresses when you sew the seam allowances down.  (It didn't make me like the foam.)  

It comes together very fast.  I used wires from spitzenparadies webshop. I got two of their bra kits as well. I bought one set of every underwire that had similar measurements to my current bra wires.  I ended up with a huge variety, many of which clearly are wrong.  Presumably once you find the right wire you can get a bunch of the same size.


Stitching the seam allowances down made a big difference in the appearance of the cups

You can see on the left seam how nicely the foam compresses


This bra was completely a muslin because I couldn't assess whether the size was right.  You really can't tell until you put the wires in and that's the last step.  It fits!  Next step is to make one that I will wear and see how it feels.  I'm not going to use foam, that's for sure.  I'm curious how different it will be.