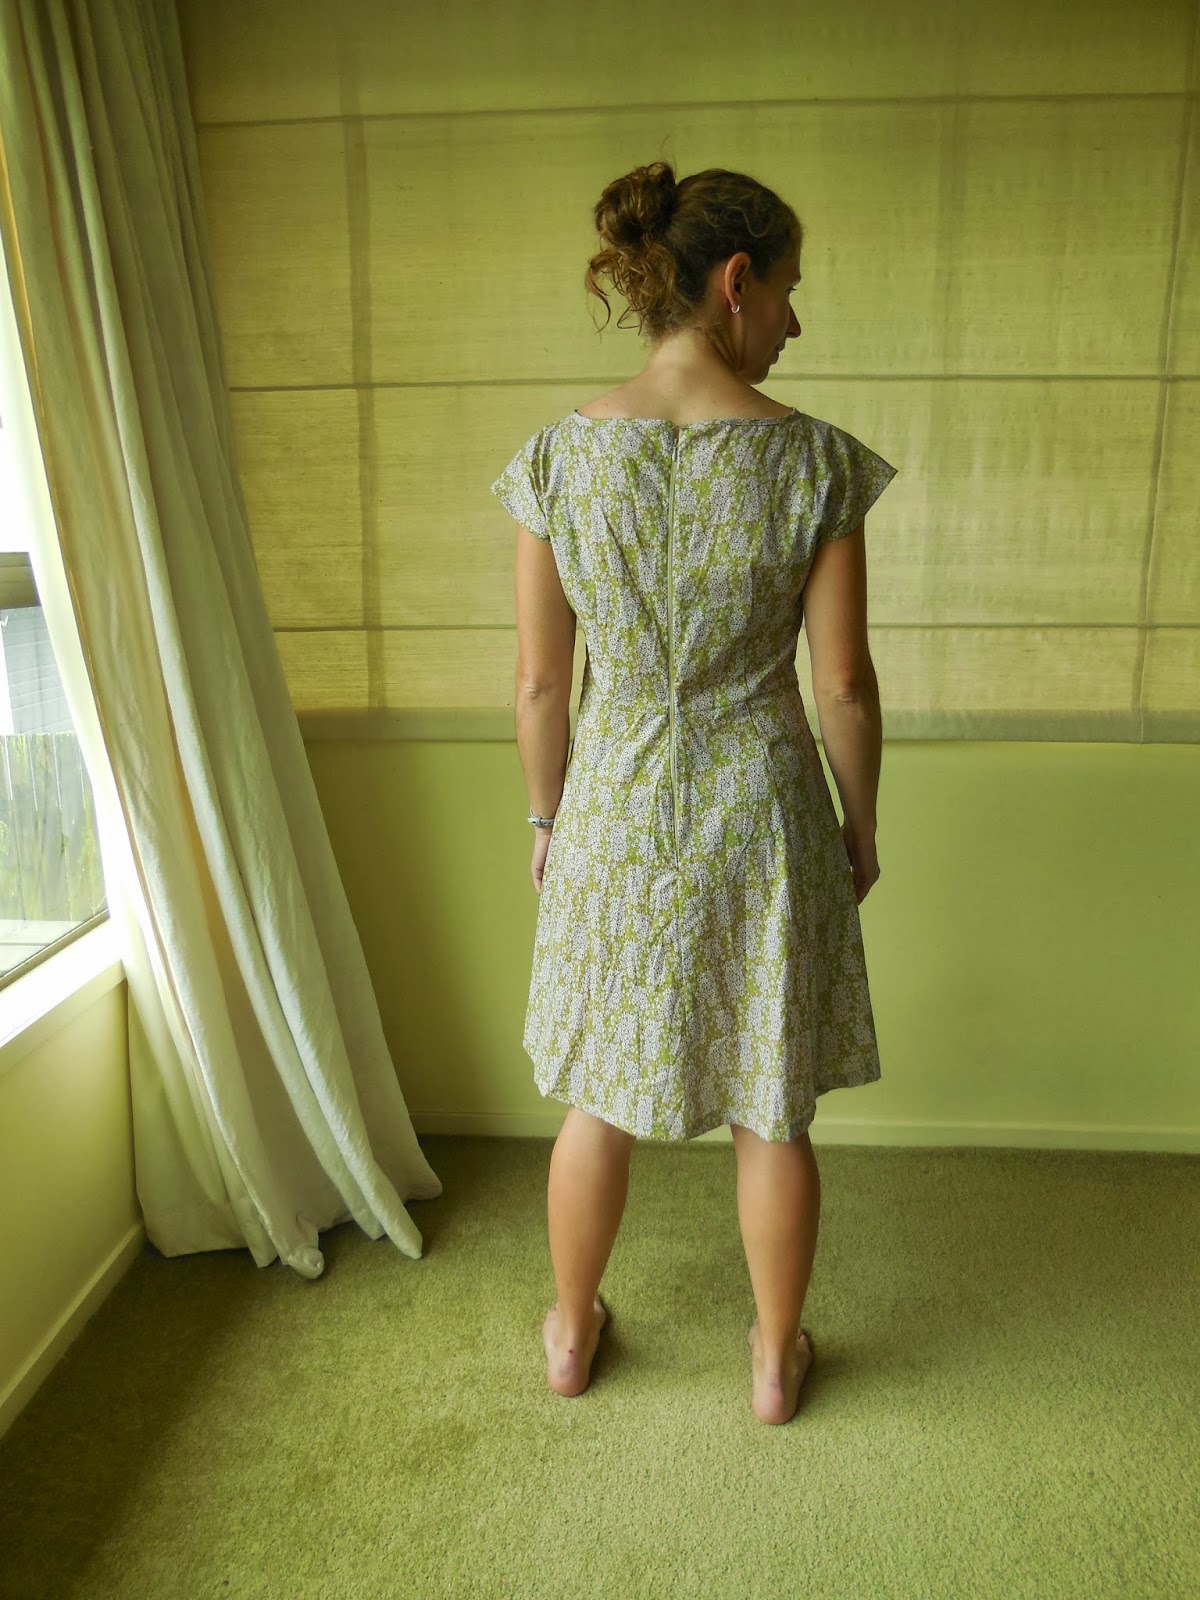
This is my second Belladone - quite awhile after the first one. Luckily I have a good memory for all the things that went wrong the first time around and was determined to make this version as near to perfect as possible.
Size 38 again, in beautiful green batik cotton from www.emmaonesock.com. It became important to note that it's really hard to tell which is the right side of this fabric!
On the darts: I shortened the bottom bust darts about 3/4" and lowered the upper bust darts by about 1/2". I did this after assessing how my first Belladone fit.
I could actually have lengthened the torso on this pattern - probably the only pattern on the planet that is short for a short-waisted person! But it's not a big problem, and I didn't really notice it until it was too late.
I made sure this time to improve on my bias binding. In fact, I decided to do all invisible bias binding, to see how it changed the fit. My bias tape was weird double fold, so the results are that everything bound lost about 3/4" - I cut off the extra layer when I folded it to the inside but it still was slightly wider than usual bias tape. I was concerned this would take away too much fabric but it seems to be ok. I can attest, however, that invisibly bias binding armholes is no fun. All the bias-goodness of bias tape isn't enough to make that tape want to go around a tight corner. I had to stop often, cut my curves, and iron as I went in order to get it not to bunch up. Interestingly, on the first version where I left the bias tape bound on the outsides, I did not have the bunching up in the back that others have complained of. On this version, I did, but only a tiny bit.
As before, I bound all my loose seams on the inside. It took forever, but was worth it. I still don't know how to bind the seams of the zipper though. I thought I could add some seam tape after I put the zip in, but when I tried it I had no success. I will probably zigzag it eventually as it's the only open seam.
The only change I made to the pattern was that I lined the skirt. I used bemberg in teal green that matched my invisible bias tape. Now the insides are secretly gorgeous! This is the first time that I've made a lining for something that didn't have one - isn't that crazy? So I was actually nervous to get the pattern pieces right. The back is the same as the main fabric but for the front I taped the pocket to the front pattern piece, and then cut that whole thing out, avoiding the seam allowance from the pocket. I also didn't know how to deal with the zipper. I treated the two layers as one when I installed the zip, but below it I had to separate them and seam them independently. It is a little messy but is hidden between the layers.
My close attention to detail meant that this dress - which could easily be done in an evening, actually took forever...in my parlance that means more than a week. And one reason was because of that little problem with the fabric right and wrong sides. I accidentally made the back skirt darts on the same side, so I didn't have two symmetrical backs. I noticed it after I had sewn one side on, and already cut the seam down...then I realised the other panel needed to go on that side, because the sewn on one was definitely wrong-side out. So I undid it and had to do a lot of shenanigans to figure out how to match up my uncut with cut seams. Then I redid the one offending inside-out dart. This ate up my sewing time and I had to leave for a weekend trip with the dress unfinished, grrrr.


Finally it's done, a testament to a great dress after aeons of effort. I know it's good because I wore it to work, and had multiple patients pause while complaining about how sick they are to say, "Um Doc, maybe this is inappropriate but that's a beautiful dress!" It seems like you can make a lot of easy dresses in less than a day, but if you want to finish a dress beautifully, a simple dress can take weeks. A lesson to reflect on, as lately I'm getting stressed by how much sewing I plan into my life, and I'm not always sure I want to be doing all of it.
Size 38 again, in beautiful green batik cotton from www.emmaonesock.com. It became important to note that it's really hard to tell which is the right side of this fabric!
On the darts: I shortened the bottom bust darts about 3/4" and lowered the upper bust darts by about 1/2". I did this after assessing how my first Belladone fit.
I could actually have lengthened the torso on this pattern - probably the only pattern on the planet that is short for a short-waisted person! But it's not a big problem, and I didn't really notice it until it was too late.
I made sure this time to improve on my bias binding. In fact, I decided to do all invisible bias binding, to see how it changed the fit. My bias tape was weird double fold, so the results are that everything bound lost about 3/4" - I cut off the extra layer when I folded it to the inside but it still was slightly wider than usual bias tape. I was concerned this would take away too much fabric but it seems to be ok. I can attest, however, that invisibly bias binding armholes is no fun. All the bias-goodness of bias tape isn't enough to make that tape want to go around a tight corner. I had to stop often, cut my curves, and iron as I went in order to get it not to bunch up. Interestingly, on the first version where I left the bias tape bound on the outsides, I did not have the bunching up in the back that others have complained of. On this version, I did, but only a tiny bit.
As before, I bound all my loose seams on the inside. It took forever, but was worth it. I still don't know how to bind the seams of the zipper though. I thought I could add some seam tape after I put the zip in, but when I tried it I had no success. I will probably zigzag it eventually as it's the only open seam.
The only change I made to the pattern was that I lined the skirt. I used bemberg in teal green that matched my invisible bias tape. Now the insides are secretly gorgeous! This is the first time that I've made a lining for something that didn't have one - isn't that crazy? So I was actually nervous to get the pattern pieces right. The back is the same as the main fabric but for the front I taped the pocket to the front pattern piece, and then cut that whole thing out, avoiding the seam allowance from the pocket. I also didn't know how to deal with the zipper. I treated the two layers as one when I installed the zip, but below it I had to separate them and seam them independently. It is a little messy but is hidden between the layers.
My close attention to detail meant that this dress - which could easily be done in an evening, actually took forever...in my parlance that means more than a week. And one reason was because of that little problem with the fabric right and wrong sides. I accidentally made the back skirt darts on the same side, so I didn't have two symmetrical backs. I noticed it after I had sewn one side on, and already cut the seam down...then I realised the other panel needed to go on that side, because the sewn on one was definitely wrong-side out. So I undid it and had to do a lot of shenanigans to figure out how to match up my uncut with cut seams. Then I redid the one offending inside-out dart. This ate up my sewing time and I had to leave for a weekend trip with the dress unfinished, grrrr.
Finally it's done, a testament to a great dress after aeons of effort. I know it's good because I wore it to work, and had multiple patients pause while complaining about how sick they are to say, "Um Doc, maybe this is inappropriate but that's a beautiful dress!" It seems like you can make a lot of easy dresses in less than a day, but if you want to finish a dress beautifully, a simple dress can take weeks. A lesson to reflect on, as lately I'm getting stressed by how much sewing I plan into my life, and I'm not always sure I want to be doing all of it.