Friday, 22 August 2014

Deer & Doe Plantains: birds and stripes

I was excited about this top ages ago and was even thinking of making it in Switzerland, but the onerous task of printing and cutting and taping held me back (although it wasn't terrible in the end).  When I finally made the first one, it was for a friend but whetted my appetite...so since it's my birthday and I can do whatever I want, I made two!
BIRDS!! Charley Harper birds!!!  What could be more amazing?


My coworker Alexx wanted some attention too!

Thanks to Chris the xray tech who took these nice photos. 

This is a super easy pattern to make.  It depends basically on your bust measure and is free flowing from there.  I cut a 38, which is the same as my Belladone.  (I'm 34.5, 27, 37)  I made the vireos up in a day in between working on two other projects, and did the stripes later the same week in between 13-hr shifts at work and surfing for my birthday! 

Westport, WA.  My local surf beach, and my birthday!  Best combination : )

The pattern is four pieces and comes together like basically all simple knit tee shirts: front, back, sleeves, neckline.  The amazingness of it is in the cut - dips a bit low in the front, and with this fabulous flare at the waist.  My evil Necchi did fine with the very stable knit vireos.  I sewed it up with a straight stitch and a ballpoint needle, and zigzagged to finish each seam. 

I used the recommended mid-length sleeves for the vireos, and so I lengthened it a bit on the stripes because that fell at an awkward spot for me.  I skipped the elbow patches because I don't care for them.  I made a single effort at stripe matching but cutting the stripes with the underarm at the same spot.  You can see that it just about worked.  I was disappointed in the striped version - it's so me that it feels a little too much like me circa 1996.  In fact, when I pair it with navy jeans, I think I had just about the same outfit in 1996...


I can see making this up in a sweater knit...hm...in fact...I have an idea!  You may see another Plantain soon. 

Saturday, 16 August 2014

Style Arc Lorie jacket

This is the first pattern by Style Arc that I have done.  I knew ahead of time that the instructions are sparse but sufficient.  Many people don't like that you only get one size with Style Arc, so the first few patterns are needed to test out fit.  I have heard that the sizing is consistent, so once you do settle on a size, it generally fits well.  I used my measurements to order a size 8.

I expected this jacket to be quite an involved process.  It isn't a full Chanel style jacket with interlining or any hand stitching, but it does involve block fusing the pieces (which I learned is when you interface every single piece of the jacket except the sleeves!) and topstitching.  I also mitred my first corner - when you make a 90 degree turn while sewing two pieces together.  It went quite well, but does require a bit of preparation because you have to cut the corner right after you turn it, so that the second side will go smoothly.

Because the instructions are very sparse, it's important to cut every notch very well.  I had trouble adding the hem band to the jacket because no matter which way I flipped up, the notches didn't match.  I was concerned because it's supposed to be fitted at the waist with some flare, and I thought if I got it upside down, it might not have the desired shape.  Other than that, I did find the instructions sufficient.  The only other place that I had trouble was the final step - attaching the sleeves inside out.  I recalled from my Minoru that this can be tricky but I sewed them up with no problem...only after I tried to turn the jacket right side out it had become a Mobius strip...

I learned something about fusing in general during this process.  I had block fused my pieces following the instructions.  I was using a very stable double knit cotton twill, and the fusing is probably most important if the main jacket fabric is loosely woven, Chanel style.  My lining, however, was a very light silk-cotton.  I thought it was probably too light to be a lining, and so I used bemberg for the sleeves to make sure they could take the stress.  In retrospect, I would have done better to not fuse every piece of the jacket, and to fuse the silk-cotton pieces instead. 

The main stopping point was waiting for my special order lavender 19" zipper to arrive....what a pain! It still wasn't perfect but I was so sick of looking for zippers that I finally decided to go with it and see how the jacket would turn out.  I was considering this a muslin project and when trying it on without the lining I was suspicious of the fit - it seemed very boxy and not at all as fitted or shaped as I expected.  I didn't get to see the final fit until after I turned the jacket right side out with the lining in place.  It was better than before, but I found a few major fit issues that make me totally not interested in ever wearing it.  I guess this is where a muslin might have been a good idea, but without the lining I couldn't perceive how it would fit.

the lightweight lining actually is not an issue once it's in place


mitred corners!


Looks like it needs those shoulder pads!


...yet I have no shoulder room to move at all!


much nicer on Pam!


she's happy - she just got a new jacket!


Major issues:

-extremely narrow through shoulders. I expected my shoulders to fit in the shoulder pad space.  But you see that is vertical space above the shoulders, which looks stupid. My shoulders fit in the sleeves and so I feel like I'm in a straitjacket.  For this to fit, I would have needed about a 1.5" shoulder widening.  Now I truly believe that Style Arc makes narrow patterns through the shoulders.  My lesson associated with this is more general - I think I need to watch what happens with sleeves on me.  I suspect I need some kind of sleeve adjustment but I haven't learned enough about them to know.  Almost any woven that I sew with sleeves has something funny in the sleeve area - enough that those are generally finished projects I pass on to friends. 

-second to the wide shoulder issue, total bust minimizing.  I thought this jacket would be shaping but it's totally shapeless.  My bust is hidden and there's no nice narrowing at the waist (which I expected from the pictures.)  This is improved on a person with narrower shoulders like Pam, and actually was a useful lesson to me about the shoulder widening.  I don't need FBAs, because a shoulder adjustment will add the room for my large upper chest (as I recently discovered, instead of having a high bust measurement that is less than my bust, I have a high bust measurement that is about 1.5" larger than my bust.  I haven't taken the next step of figuring out how much of this is frontal and how much is on the backside.)

-Length is ok, I could for once have preferred it a touch longer.  I'm very short waisted so this is unusual.

As you can see, I found a grateful recipient of this purple jacket at work.  Pam is happy!  She is slightly taller than me, with a larger bust and narrower shoulders.  She loves the jacket!

Monday, 4 August 2014

Batik Belladone

This is my second Belladone - quite awhile after the first one.  Luckily I have a good memory for all the things that went wrong the first time around and was determined to make this version as near to perfect as possible.

Size 38 again, in beautiful green batik cotton from www.emmaonesock.com.  It became important to note that it's really hard to tell which is the right side of this fabric!

On the darts: I shortened the bottom bust darts about 3/4" and lowered the upper bust darts by about 1/2".  I did this after assessing how my first Belladone fit. 

I could actually have lengthened the torso on this pattern - probably the only pattern on the planet that is short for a short-waisted person!  But it's not a big problem, and I didn't really notice it until it was too late. 

I made sure this time to improve on my bias binding.  In fact, I decided to do all invisible bias binding, to see how it changed the fit.  My bias tape was weird double fold, so the results are that everything bound lost about 3/4" - I cut off the extra layer when I folded it to the inside but it still was slightly wider than usual bias tape.  I was concerned this would take away too much fabric but it seems to be ok.  I can attest, however, that invisibly bias binding armholes is no fun.  All the bias-goodness of bias tape isn't enough to make that tape want to go around a tight corner.  I had to stop often, cut my curves, and iron as I went in order to get it not to bunch up.  Interestingly, on the first version where I left the bias tape bound on the outsides, I did not have the bunching up in the back that others have complained of.  On this version, I did, but only a tiny bit.

As before, I bound all my loose seams on the inside.  It took forever, but was worth it.  I still don't know how to bind the seams of the zipper though. I thought I could add some seam tape after I put the zip in, but when I tried it I had no success.  I will probably zigzag it eventually as it's the only open seam.

The only change I made to the pattern was that I lined the skirt.  I used bemberg in teal green that matched my invisible bias tape.  Now the insides are secretly gorgeous!  This is the first time that I've made a lining for something that didn't have one - isn't that crazy?  So I was actually nervous to get the pattern pieces right.  The back is the same as the main fabric but for the front I taped the pocket to the front pattern piece, and then cut that whole thing out, avoiding the seam allowance from the pocket.  I also didn't know how to deal with the zipper.  I treated the two layers as one when I installed the zip, but below it I had to separate them and seam them independently.  It is a little messy but is hidden between the layers. 

My close attention to detail meant that this dress - which could easily be done in an evening, actually took forever...in my parlance that means more than a week.  And one reason was because of that little problem with the fabric right and wrong sides.  I accidentally made the back skirt darts on the same side, so I didn't have two symmetrical backs.  I noticed it after I had sewn one side on, and already cut the seam down...then I realised the other panel needed to go on that side, because the sewn on one was definitely wrong-side out.  So I undid it and had to do a lot of shenanigans to figure out how to match up my uncut with cut seams.  Then I redid the one offending inside-out dart.  This ate up my sewing time and I had to leave for a weekend trip with the dress unfinished, grrrr.


Finally it's done, a testament to a great dress after aeons of effort.  I know it's good because I wore it to work, and had multiple patients pause while complaining about how sick they are to say, "Um Doc, maybe this is inappropriate but that's a beautiful dress!"  It seems like you can make a lot of easy dresses in less than a day, but if you want to finish a dress beautifully, a simple dress can take weeks.  A lesson to reflect on, as lately I'm getting stressed by how much sewing I plan into my life, and I'm not always sure I want to be doing all of it.  

Sunday, 3 August 2014

Lisette 1878: diplomat dress in wool

I know I need to retire this pattern, and after doing it one last time, I'm sure of that.  But the "one last time" was the leftover piece of luxurious Marc Jacobs pink herringbone wool that I used for my Peter & the Wolf pants.

I did a 1" shoulder widening.  Otherwise I cut out a size 8 without any adjustments.  I initially cut the little collar V smaller, and was considering not doing it at all, but at the last minute I (unfortunately) caved in.  I sewed the dress without any problems until I got to that.  I got the facings on and then attacked the underneath of the facings and dissected them so thoroughly...that when I turned out the top points of the V, I had totally cut it open at the bottom and it was full of fraying ends.  Ugh.  Also it seems I've forgotten how to put in a non-invisible zip, and that took a few tries.  I was reading through some of Fiona's recent posts and she commented on sewing the zipper from the same direction on both sides instead of sewing up one side and down the other.  I am not sure I knew that, and it definitely helped! 

But once I got the dress on, it fits so amazingly that I knew I had to salvage that stupid little neckline problem.  So I stabilised the loose fabric on the underside with iron on stuff (like Stitch-witchery, but Swiss!), and then I passed the project on to my mother to do some thinking.  A lot of her ideas involved lacing, frills, or 1970's style details, which I nixed.  But the points of that dumb V were sticking out a lot.  I gave it to her to think about while I was in Arizona for a month and this is what she came up with.


I'm still not totally convinced and I did realise I could just cut that entire V shape more and make a new facing to fix it.  I'll probably wear this a few times and if I still love it, I'll do that.  The centerpiece is ok but it's just off center enough to drive me crazy.  This is now version 3 and I think I'm confident that there won't be any more in my near future. 

Sunday, 13 July 2014

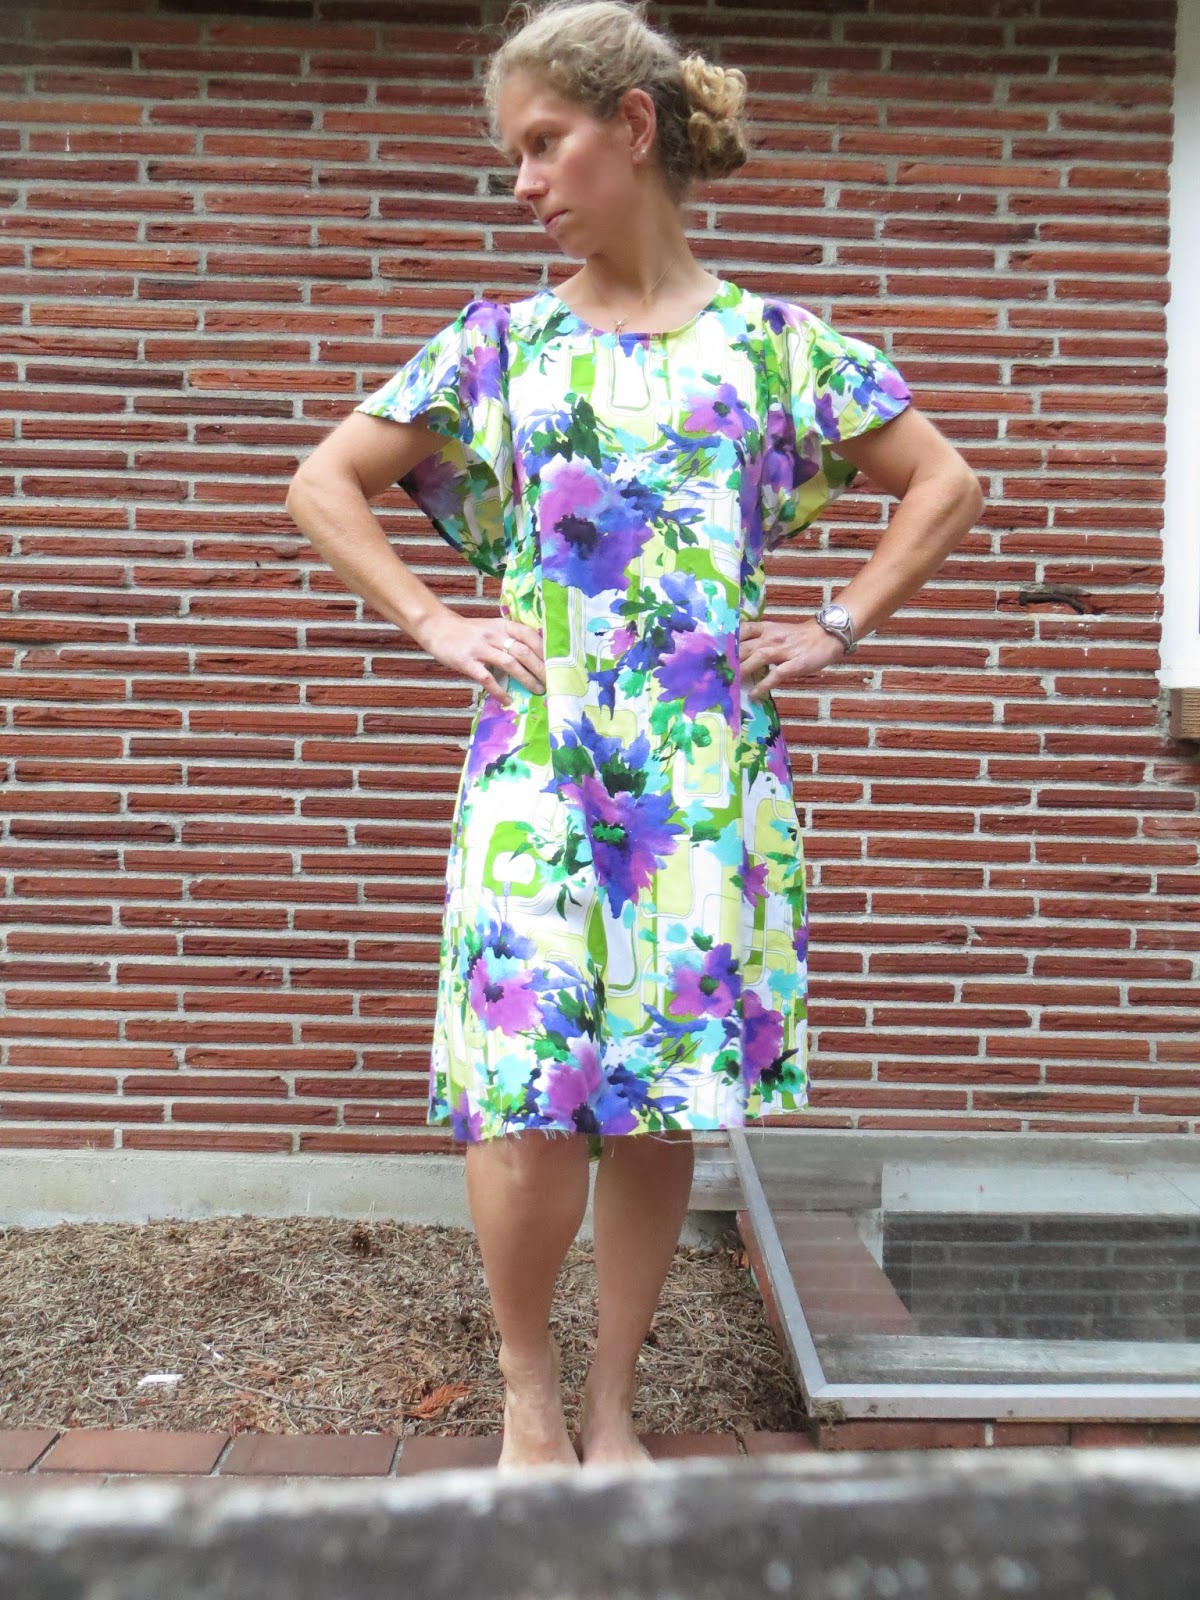
April Rhodes Date Night Dress (aka muumuu)

I planned to ease myself back into sewing when I returned from Arizona.  I thought this dress would be the way to do it.  It's listed as easy, for beginners, and only has three pieces (front, back, sleeve) and no darts.  Initially I bought the pattern together with this amazing 1970's flowered rayon at Pacific Fabrics, intending to use the fabric to make the slip that comes with the pattern.  I had eyed the dress online, and read through some of the reviews. 

When I realised the slip is extremely basic, I changed my mind and thought I'd just make the dress itself.  I didn't recall anything particular from the reviews, although if I had I might have shortened the dress a bit - most people rave about it! 

The rayon is a wonderful, no-stretch woven with a great drape, and was actually a bit difficult to cut - my floor is sometimes quite slippery and it makes cutting slippery fabrics twice as hard as it would be on a table.  (And yes, I am cutting everything on the floor these days...love the impromptu setup...not...but at least I get loads of natural light that way.)  Since I had planned to make the slip, I had just barely enough fabric for the dress, which obviously uses quite a lot more with its huge, long shapeless skirt.  I cut a S based on my bust measurement and should have cut an XS. I had measured the length and double checked the pattern, which says finished length is 27", but I didn't realise that was a front measure instead of a back measure.  I could have saved some fabric if I had noticed that as the pattern piece itself was really long, and in fact the finished dress came halfway down my calves prior to hemming. 

The pattern was hard to get used to.  As a "super-beginner" pattern, it has color pictures denoting what to do and walks you through every step of a french seam...on each seam.  And that didn't help me at all, too much information?  I still did one sleeve inside out, and the side seams inside out, and didn't notice!  I will blame being sick - recovered from a feverish laryngitis and clearly still pretty dizzy, which is why it took nearly a week to get this baby put together. 

So seams notwithstanding, when I finally tried it on I realised my worry about the pattern (it seemed huge) was spot on - it was a huge shapeless muumuu.  I don't wear belts so I had zero interest in belting it.  I love the fabric and didn't want to waste all those french seams...I knew I had seen a shirt version somewhere - here it is: Jenna's shirt version, and I knew right away that was the way to salvage this.  So I went ahead and redid my entire sleeve the right way, and then experimented with narrowing the sleeves, but that didn't work and I took it out.  I ended up cutting the dress to make a shirt, just guessing about where I wanted it, and then I took a pie shaped piece out of each side seam (total 2" out at the bottom, I'd guess.)


I know everyone has liked this pattern.  Most people also seem to agree that it truly is beginner friendly.  My issues, other than the drawn-out detail on french seams, was that every hem is rolled.  The sleeves have a rolled hem.  The hem itself should be rolled.  And the technique for doing this is one that has consistently failed me - to fold at 1/2" and iron, then fold that in again and iron the smaller fold, then tuck them together, before you pin and sew.  I might just be bad at rolling hems of all types, but it seemed like a crappy technique to call "beginner."

This dress is a bit out of my comfort range, because of the flowy sleeves and the generally flowy dress.  I can see on other people that it is not inherently totally shapeless like it was on me, but my first try with it doesn't convince me to make it again.  I do, however, quite like the top that I ended up with.

Monday, 7 July 2014

Papercut Anima lounge pants

I made it about 4 weeks in Arizona without sewing.  I planned endlessly.  But I did not sew.  Then I caved in, of course.  I wanted something that would reliably arrive on time and so I settled on the Anima pants since they were a pdf and I knew any knit would work.  I was curious about them.  And Mood even ships to the middle of nowhere in about 48 hours (amazing!  But the hospital hid my package from me for a further four days...)  However when I was buying supplies in Flagstaff I was "not in the mood" to buy the elastic.  I can't harp too much on how stupid of a decision this was.  Everything would have gone smoothly if I had taken the extra 15 seconds to walk that box of elastic over to the checkout counter...

My fabric from Mood is a boring-appearing double faced cotton jersey.  One side is almost terry cloth like (I put that on the outside) and the other layer is ultra soft cotton.  The ultra soft side is prettier but I was going for ultimate lounge-potential.  (As you can see in my pictures, I will not win any style awards if I walk around in public in these.)

I cut a size XS, which is my usual in Papercut.  In this pattern your waist measurement can be modified when you cut the elastic, and I cut it a bit longer than the recommended 27.5 inches because it was so stiff.  I remembered what Sonja had written in her review and I shortened these by about 3 inches (the height of one of those advertising postcards in magazines...I didn't have a measuring tape.)  I am 5'4" and the fabric was too thick for me to desire a bunch of folds at the ankles.  In fact I think an XXS would have been reasonable because they are pretty roomy, and the extra fabric created by the pockets adds a lot of bulk in my thicker fabric.

I sewed these up on a friend's Kenmore sewing machine.  It was amazing.  The machine looked similar to my Janome but with lots more options.  If I had time to read the manual I might have been tempted to try some of the faux-overlocking stitches.  I cut these pants out at lunchtime, and I sewed them before dinner.  Total time was about 2.5 hours.  That was up to the point of installing the elastic, of course.  I was very sad not to get to finish them (I wanted to take exotic pictures on the mesa...) but I had to wait til I got back to Seattle and got some elastic.

I'm not sure if it's the only kind of 2" elastic but the stuff I have always found is disgusting.  It's very rough, hard to stretch, and I would never want it against my skin.  It is better in the Minoru but not very pleasant in a pair of lounge pants.  I have seen softer elastic in other sizes.  Is elastic best sourced online?

Anyway so I finally settled in to do the waistband and it seemed very very wrong to me that the elastic is supposed to be sewn to the edge of the band - when it's flipped that will be a rough edge on the bottom inside of the waistband.  I distrustfully left a 1cm band of fabric at the edge.  When I flipped the elastic over I thought I could tuck that underneath.  I was quickly disabused of this notion.  The work of pulling that monster elastic straight, while keeping my poor 20$ Necchi sewing, was itself too much.  Not to mention that it was no longer topstitching or stitching in the ditch at all.   I left the extra fabric loose and followed the instructions.  (Maybe I should have done this from the beginning?)  Now my waistband was a little narrower and I was topstitching straight on the elastic.  I added the two decorative layers as well.  The instructions say to make sure you dont stitch on the elastic in this step, but for me it didn't matter since I did not want the drawstring or the buttonholes and had skipped them.


In fact, these are rather high waisted on me.  So when I flip over the waistband it is very comfortable and has this nice frill...

These are so ugly on me that I'm not immediately convinced to make more, but in a slightly lighter weight fabric, and with an XXS they might be less bulky and unflattering.  Also that waistband really doesn't match the fabric - it's almost painfully stiff, and the fabric is sooo soft.  It would be a lot of work to take out, but I may consider doing that anyway and putting in a 1.5 inch soft elastic instead, which would also lower the waistband a bit (it's too high for lounge pants.)   Despite the gripes, they are comfortable.  


Friday, 4 July 2014

Papercut La Sylphide Dress in raw silk

This is one of the projects that came all the way from New Zealand.  I cut out the XS before I left, with no changes to the pattern.  Since returning from Switzerland I've been on a sewing bender.  I have to say that I miss the peace of sewing the Georgia and taking a month to do it.  On one hand I really want to get all these languishing projects completed, but on the other hand, I don't have a burning desire to own all these dresses...I am starting to appreciate taking more time with each project, instead of rushing through them, as well as actually picking projects that I really want to wear for a specific purpose.  That has definitely been my goal and my mindset for this year.

Unfortunately, a lot of projects from New Zealand have come with me and they predate my new mindset.  So I still want to get them done, preferably now now now!  (Not known for having patience.)  It seems best to finish them and learn from them before I move on to some more difficult, and slower, challenges. 

I liked the fit of the La Sylphide shirt, but I hated the bow.  So I cut it off.  I wasn't sure how that would work for a neckline.  The raw silk that I got is from a seller on etsy and is hand-dyed with organic materials.  This does mean that there is some colour variation and that ironing it can leach the colour a bit.  It is amazing to work with - it irons easily, behaves exactly as you want, and has a lovely drape.  In fact as I came around to that neckline...I thought that bow might have been less annoying in this fabric.  Oops. 


I paid extra care to the little space between the top of the placket and the neckpiece, and manage to get everything topstitched without a gap - I had a lot of trouble with that gap in the first version and I know other people did too and just camoflaged it with the bow.  This time around I also finished all my seams by zig-zagging the seam allowance together.  For some reason I hadn't thought to do that in the past except on knits, and it created a great finish.  I french seamed the skirt and the shoulders, but the silk is really too thick for that to work anywhere else. The buttonholes were a bit of stress as the last time I tried to buttonhole on the Necchi it created a thread-birdsnest. I practiced a bit first and they actually went really smoothly.  Unfortunately I ignored the button placement instructions and I think that mine don't look well placed- I left irregular spaces and I think I'll put a tiny snap at the widest part of the bust to make sure it stays together.  I'm not too concerned about that though, I'm happy with how this came out. 

I knew the fit was spot on from making the shirt, and in the end this has turned out a really fabulous dress!