Tuesday, 25 August 2015

Panty party part 2: Rose crossover panties & Watson bikini

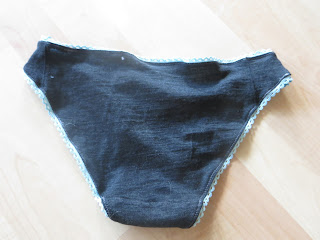
Made another Watson bikini:
Recycled fabric from an old ibex tshirt that had holes.  Panty lining is from the arm of a tshirt I cut off. I made the XS this time, keeping in mind my old stretchy wool fabric.  What can I say, this pattern really works!  It's cute and fits and feels just like something store bought.  I made this before breakfast...


...and a second Rose crossover bikini:
Made this after breakfast : )  I cut the XS. Followed the instructions (the elastic looks really good!) And then I tried it on.  And this is a total fail - I didn't bother putting on the waist elastic.  It would fit me around the waist this time, barely, but the butt feels like wearing a diaper - there is a huge amount of pooling of fabric in the butt.  Because overall the woven doesn't stretch, getting the waist fit right means I can barely pull the panty on. That is when I understood why the pattern model is sewn with a fully lace back.  I think this pattern needs to be done with something either knit, or stretchy.  For now I have had enough of trying it.  According to the size chart, I am an M, but it looks like an XS is the right fit.  I might revisit this when I want some really sexy lingerie and I am willing to work with stretch silk or lace.  Maybe folding an inch out of the butt would help too. 


The other issue with this is that the instructions say to pull a bit of tension as you are sewing the leg hole elastic on.  I would adjust this to say: pull a f*-load of tension on it because you need it to really gather the fabric.  Nothing wrong with this pattern (the rebel in me always wants to point out the bad in patterns to counteract the blogosphere's freaky perky happiness with all indie patterns...) but I would definitely need to spend more time to make it fit my bottom...

Friday, 21 August 2015

Silk Emmeline & Silk Scout

Oh my gawwwd I am such an addict.  I am in my usual pre-departure phase which means I suddenly and unhelpfully want to buy clothing as a psychological support for my upcoming months of homelessness.

And that extends to fabric, ah, sillllkkksssss!  In Italy!!  We went to Como one day because it was a Swiss national holiday and thus, what could be more thrilling than the not-closed Italian grocery store full of wine, cheese, pasta, fresh tomatoes, etc? Um, and the not closed shops in the center of Como full of nice cheap clothing?  Or the FABRIC STORE in Como full of not cheap, Italian silks? Especially as I was just recently reminded I wanted to do Emmeline in silk...And the shop was full of silks!  I couldn't possibly resist an artistic Italian panel, or some wild paisleys...so now my pile of projects for the next month has stopped shrinking!  Help!!

To gird myself for this and also for an upcoming evil chiffon project, I got out the tools. On the Scout I tried out the spray glue. So, spray glue.  Really.  Doesn't help a whole lot.  Instead of just lying your pattern piece on the fabric you have to apply it really carefully and I think this took up enough time to make it a waste of time. Your fabric and pattern piece are nicely attached to cut out, but then you have to rip the pattern piece off the fabric (would NEVER work on anything fragile) and then you have sticky pattern pieces. Which gum up your iron.  haha!

Sorry head, we don't need you after all...


More on the Scout: I cut a size 2 with a 1" wide shoulder adjustment and a bit of shaping at the bottom, otherwise no changes.  I continue to be incapable of doing whatever I am supposed to on the Scout with bias taping, so I went for another, um, creative couture finish. (This is very narrow bias tape! I can't fold it over into 1/4s!) This is a good fitting Scout and I am so happy with it. It still pulls a bit across the back but overall the fit is much better.  After the glue experiment, I gelatined the rest of the fabric before cutting out the sleeve.  Gelatin here is a bit tricky as it comes in sheets.  I ignored the instructions and plopped it in warm water, which made a gooey mess, and then I just popped the fabric in that...it got some bits of gelatin on the edges but was delightfully firm to cut and sew.  I love gelatin.  One is supposed to dissolve it in cold water and then add it to a warm water bath.  That way you avoid the gummy gelatin ball.


Annoying unfinishable triangle at the armpit.


As a reminder of how great gelatin is, I cut out the blue Emmeline without anything.  It sucked.  I also didn't pay attention on the front which is why it has a design feature of being half matte and half shiny.  I am great at adding design features ; )  I lengthened the Emmeline using the bottom of the By Hand London Polly top pattern. I french seamed, and had the same problem as before that there is no real seam allowance difference at the sleeve, and so it creates a triangle-fabric-mess.  I can't think of a way to avoid that. I then used my micro rolly hem foot on everything.  This was totally experimental but it came out amazing, even though the shirt is actually quite, ermmm, not symmetrical...it looks great on!  Way better than expected! and NO BIAS TAPE!!  My life has been so improved by learning the use of this hem foot. 


Tuesday, 18 August 2015

Terra Cotta Sewaholic Thurlow linen trousers

I am in some kind of crazy groove.  Everything is coming out amazing lately.  I am preparing to move and although I am so so happy to see all these great projects, I wouldn't mind a few things that need to be donated to friends!  Haha not the usual thing to complain about.

On these Thurlows I changed three things.
1. fly on left side.
2. flat felled the outside legs (note: don't do this...)
3. back pockets are from the Grainline Maritime.

I cut out a size 0.  The first time I made these was also my first time making fly-pants, after reading a bunch of books and measuring crotch seams, and I cut a size 4 and used high stretch jean fabric, and I made a bunch of weird modifications to the crotch because I thought I knew a lot.  So, don't do that!  You will endure a lot of pins in the crotch trying to fix massive pants!  For some reason, I guess because Sewaholic is for pears, if you are not a pear, size down a LOT in these pants.  I sized down 2 sizes!

So, the fly switching can be a bit puzzling for the brain but I did it correctly, even the interfacing was cut properly the first time, hurrah!!  I made this basically in one afternoon.  And it was going sooo well that I thought I would flat fell the outside legs, as in, why have I never done this before?  The reason is because you have to change the order if you want to flat fell, so that you have one side open...I flat felled AFTER sewing the inner leg.  It was kind of harrowing and it involved a flat-fell learning curve.  One side looks a bit bad  The other side looks ok.  But anyway I am so impressed with my flat felling that I don't care.

Photo credits: Senka Stojanovic, in the King's Gardens in Copenhagen.  She took such nice pictures that I posted them all!  On their first day of fresh air these pants got a lot of bike time, beer drinking time and other assorted fun, and they held up amazingly.  As an aside - to show off to Senka how much I've made, I had a fully self-made wardrobe in Copenhagen.  I don't wear a big variety of clothing so this was a chance for things to shine that I think I haven't worn more than a few times in two years!


Let's just pretend they're even, ok?

Learning curve.


I lined these with leftover fabric from my Vogue star dress, and for the waistband - I am always confused by waistbands.  They are too long, too short, they don't overlap properly, who knows. Anyway so I didn't sew the lining together in the back, I folded each side down separately.  And I think the tab in the front is too short because the two buttons almost touch.

For once I don't mind the messy touches.  I really like these pants!

Monday, 17 August 2015

New Look 6352 Maxidress in silk charmeuse

This really is a one hour project, but it was held up for exactly a year.  Go figure!
The fabric is from emmaonesock and is a luscious silk charmeuse.
The pattern is from ebay. 
I decided to make this when I was testing maxidresses in August of last year.  I had been given fabric for my birthday and wanted to make a perfect maxidress.  I thought if the 'perfect' pattern (the Named Ama) didn't work out, I had this as a backup.  I also thought a maxidress would be the perfect way to showcase the pattern on this dramatic silk charmeuse.

The first hold up is that I sewed the shoulders together...and then my sewing machine broke.  I was just about to leave the States and I couldn't deal, so this got shoved in a corner, and then entered the Black Hole of Luggage Hell.  It's components were reunited in December, at which point it seemed like I might as well wait for my new sewing machine.  It arrived in February. The pattern calls for facings, but I saw no need for that -- naturally I planned to bias bind it with more matching silk. Luckily I have learned not to try narrow curved hems in silk anymore, but ugh, making bias tape?  Add another month just from ennui. And lots of other things to do.

Eventually I got tired of having unfinished things sitting around. Enough!  It's now my 1 month window before leaving Switzerland and I know from experience that I don't have much concentrated sewing time left.  After that I can expect challenging projects to be beyond my mindset, and fixing old things becomes completely out of the question.

Also a silk maxidress is something I might wear right now, which definitely amped my interest factor. I had expected a lot of shaping would be necessary.  I raised the shoulders about an inch and bound the neck...and realised it doesn't need any shaping actually.  I mean, it is supposed to be a pretty shapeless maxidress...so I got my groove on and finished up those french seams.  The main trouble is that after being dragged around the world the silk had shredded at any cut edge and some had to be trimmed down, but I cut about 1cm off the armholes to make them a touch deeper anyway.


In the end it is a kind of shapeless maxi dress.  Seems like a shame it took so long to get this way.  I am not sure how I feel about it.  I mean, as shapeless maxi dresses go it's great, but maybe it's just too shapeless?

Thursday, 13 August 2015

Starry Vogue 1395 dress

So I had this dress on my list for ages but I kept changing my mind about the fabric.  I read enough reviews to know I would have to raise the shoulders, and changes to patterns always make me nervous...so the silk went back into the corner for this one.  Instead I used this amazing star print cotton from Paris.  I covet pretty star prints!  I love this one!  So I took forever on the small details.


In real life it doesn't make me look boobless.


I cut a size 10.  Vogue seems reliable that way and especially on the designers it seems wise not to size down.  I was hoping that by elevating the shoulders, I would be functionally shortening the waist as well and it would fit better, and I was right! It still blouses quite a bit but that is because the overlayer is longer and it is sewn into the middle of the waist seam.  I think I need to make that seam a bit neater. 

Patterns like this kind of irritate me.  By which I mean, patterns which have a lot of very small, only sort-of-controllable details like meeting a seam where on one side you apply bias binding, and on the other side, you roll a micro hem.  Or putting a v in the center front with a seam and topstitching.  A lot of stuff comes together in one place and provides many opportunities for sloppiness and that unfortunate handmade look.  It makes me think I would not make this dress again.  Also, while I think every single blogger has raised the shoulder seam, nobody mentions that it isn't that straightforward, because it's a curved and eased seam and has to match at the center.

So, this is what I did in detail: I first seamed the 5/8.  Then I tried it on and marked how much higher I wanted it.  I sewed that (it happened to be exactly one inch more.)  Then I cut at the 5/8 mark, so I now had exactly a 1" seam, and I undid all the stitching, realigned everything, and finally sewed my final seam.  I had to ease the front into the back a little bit.  This is the opportunity to realign the shoulders- some people noted that the dress fell backwards during use, and you could compensate for the heavier back fabric by cutting slightly more off the front.

After that I wanted it done!  I used my amazing new skill of the micro hem foot on the front ties, and I cut about 5'' off the bottom when I hemmed it.  I skipped the elastic and the skirt lining.  I am still on the fence about those.  The elastic might make the skirt gathers more regular, but I hate skirt elastic...and the skirt lining would make it not stick to tights but the dress is nice as it is and I don't want to mess it up!  However it leaves me with this unfinished feel.  I also completely don't understand how to insert a skirt elastic into a seam allowance and I can't find any online help, so I suspect trying to add elastic would just ruin the dress.  Any thoughts?

Tuesday, 4 August 2015

Pfaff Creative Expression 2.0 Review

Oh, this has been a long time coming, this review.  My relationship with this machine is developing, but it isn't easy.  Unlike most people, I didn't go into a shop, try six machines, and fall in love with one.  I determined ahead of time that I wanted a Pfaff for the IDT. I went to three Pfaff stores in Switzerland, and was always overcome by ennui at the idea of trying the machines in the store.  They clearly all...sew.  So, what is there to try out?

I was debating small machines like the Passport 2.0, and the Ambition 2.0.  I was swayed toward this machine because:

-The Pfaff store in Chur (my nearest) could have ordered the above machines, but didn't recommend them, and was pedantic and difficult to talk to.

-The Pfaff lady in Zürich was too busy to answer most of my questions, but finally recommended a mechanical model, and gave me some prices.  I would have probably otherwise gone for that because the Ambition was 1099 CHF without extra feet, and she considered it a worse machine.  She didn't recommend the passport, and at 899 CHF it wouldn't have been a bargain either.

-The Pfaff dude in Bern was passionate and took time to talk to me.  He also determined my price range, my interests, and offered me what was technically the best machine, with the best perks (I wangled a free invisible zipper foot!) for the best price.  Bern was a long way to carry a sewing machine on the train though.  I liked the fact that I was getting a used machine, since I had so much luck with my used Janome.  But I had no sudden spiritual bonding with this Pfaff.

I still miss my Janome My Style 20.  I really lucked out buying something used on local ebay.  Nothing I have used since has functioned as well and efficiently as that.  I include this Pfaff in 'everything.'  Yes, I had to buy a walking foot.  But the stitches were reliable and the machine was simple. Tshirts that I have made using a non-stretch straight stitch on that machine still look great, and it's been almost 2 years!

So, the Expression.

Pros: It sews.

Cons: Everything else.  I still sort of hate this machine after eight months.

1. Automatic threader.
This seems like laziness.  Instead of making a machine where you have some space behind the needle and good visibility to thread it, ignore ergonomic engineering and add more equipment? I'm not with this logic.  Other machines have enough room that you have a good clear view of your needle. Again, lazy design.
(Admission: I still don't know how to use it.)

2. WORST BOBBIN WINDER EVER.
The Pfaff bobbins are small, narrow, with sharp edges.  They are uncomfortable to hold. I have callused fingertips, which makes it worse, as these tend to spin out of my fingers when I hold them.  The bobbin winder is the worst I have ever used and I mean this without exaggeration. You have to thread around a flat round disk on the machine, which is difficult because if you thread it securely, the bobbin doesn't wind, but if you thread it loosely, then it comes off the disk. On the bobbin side you actually let go of the thread and it winds itself into the bobbin.  Seems like a recipe for it to snag on the inside eventually because you don't have a way to secure the loose thread.  About 1/10 bobbins is threaded so badly that it causes problems at some point while sewing, and one was so bad that I actually had to throw it away.  I am not sure whether it is to do with the bobbins but the machine always makes a small snag nest on the bobbin side when backstitching.

3. Feet run away!
The feet attach with a broken, instead of a solid bar.  And they just press on instead of requiring anything more.  Result? Any time you are on thick fabric the foot falls off!  Also the normal zip foot is very narrow, it has two little legs that come forward, they aren't thick enough, and they don't hold the fabric well - I haven't looked into whether there is a better replacement.

4. IDT vs power?
This machine really hesitates any time it needs to go over more than two layers. I expected it to have quite a lot of oomph but it does not. It eventually sews things but you need to pull from behind and it doesn't sew with a regular stitch length due to clogging behind anything high.  I expected it to be less finicky about fabric.  The IDT also is irritating because you have to start 1 cm into your fabric, and it does not like to backstitch. The IDT itself does hold the fabric together nicely.  However this is a disadvantage for elasticky knits.  It holds them so tightly that it stretches the knit, and for some reason knits always shear away off to the left.  I have to put in extra effort to maintain a correct seam allowance when I sew with knits. 

5. It doesn't like to backstitch.
Yeah basically FORGET backstitching actually at the end of anything.  At the start of a piece of fabric, you need to begin 1cm in or the IDT will eat the fabric or will push it away, causing you to sew a curved line.  At the end of a piece of fabric it just eats it and makes a bubble.  The only way to backstitch is to do so a cm before the end of the fabric.(This seems kind of not helpful.)

So...it works.  I have sewn a lot of things with it since January.  I don't remember what it's like not to have an IDT.  I even sew a lot of silk without crying too much.  But I don't really like this sewing machine.  I expected a high quality machine to provide a clean finish to my sewing, and this one provides me with little nests every time I backstitch, huge messes every time a bobbin runs out, and chews up the ends of sensitive fabric.  I am moving again, naturally, and I am on the fence as to whether I put this guy into storage or sell it, and my goal buying such an advanced machine was to want to keep it forever...


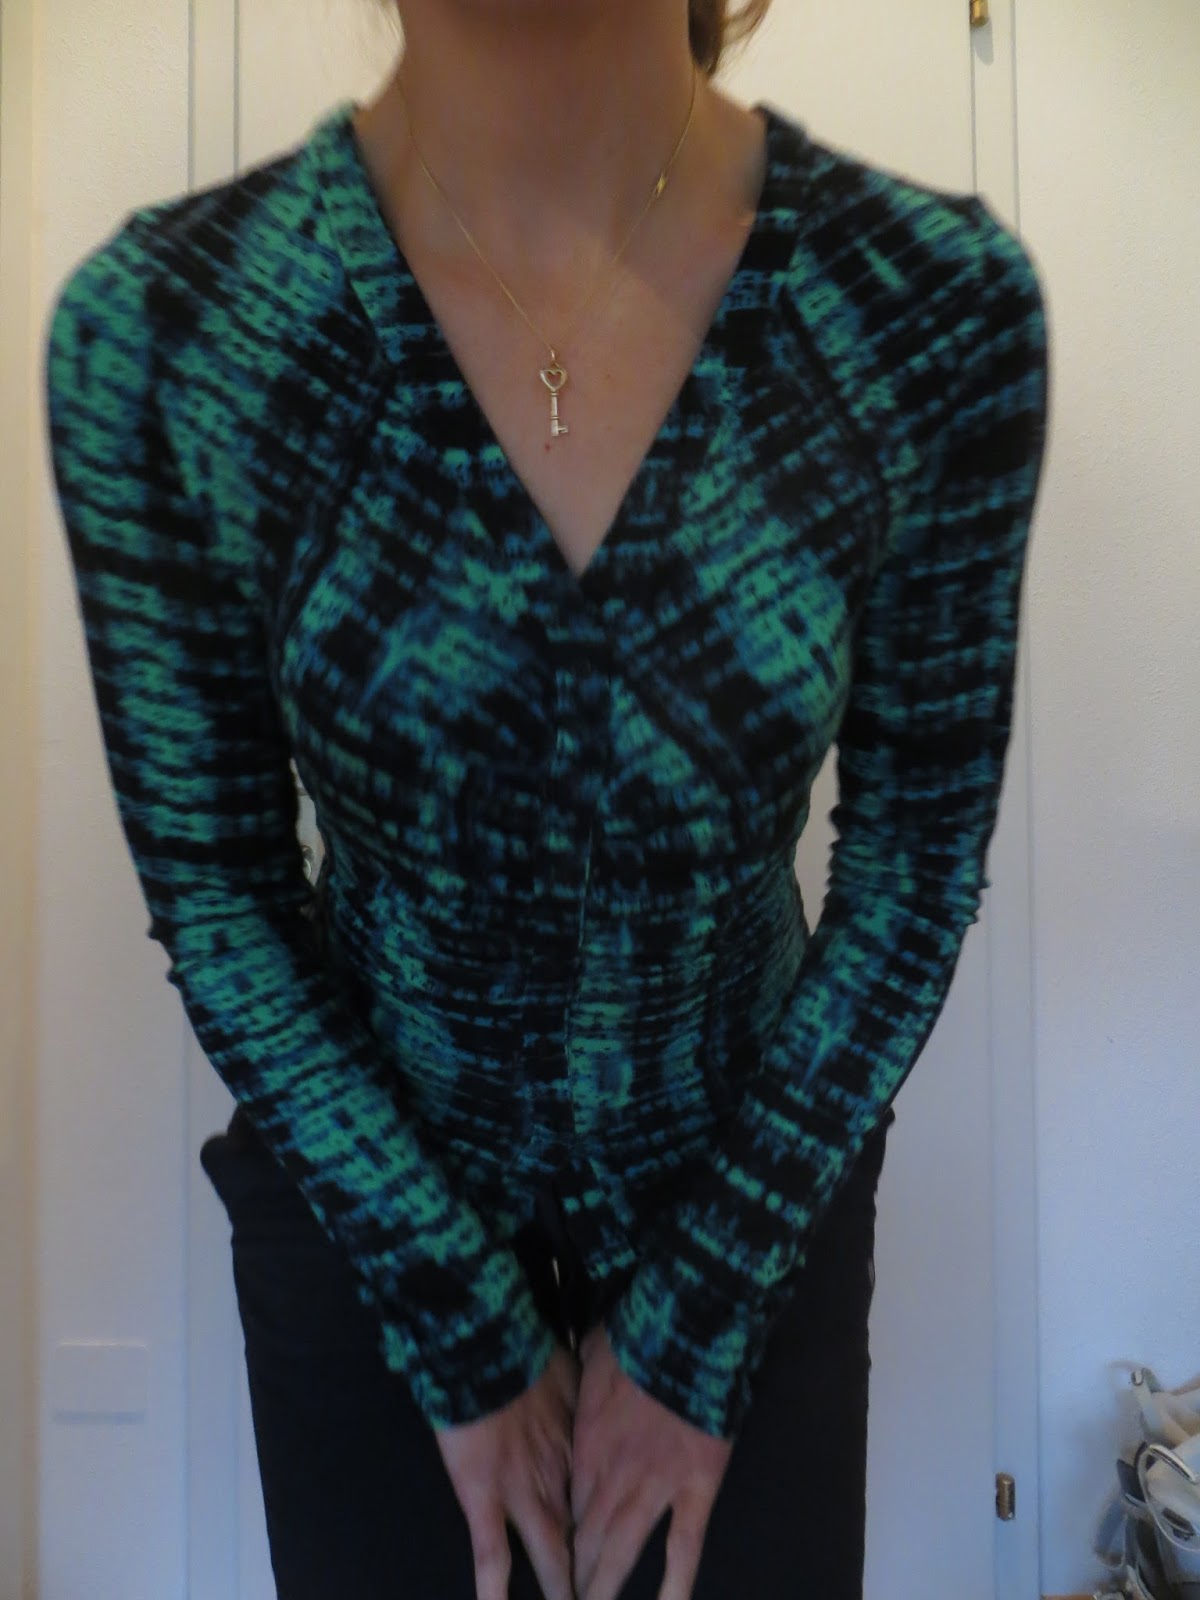
Burda 03/2013 #107, aka the Most Amazing pschedelic cardigan EVER!

I have had this pattern since last summer.  I think I originally wanted to use some Missoni fabric for it.  Thank god I came to my senses and made a Plaintain instead.  (That was hard enough!) After that I never found fabric I liked - something stretchy but fine knit.

Until a few weeks ago, that is.  I had been musing on cardigans as in the summer a small cardigan is perfect to carry around and throw over your tank top when it gets cool out.  This cardi pattern, chilling in my pattern bag under everything else (is it ghetto that I have one of those big shopping bags as my pattern collection?) was itching to be made *and* while I was in Bern it was the perfect time to splurge at my favourite fabric store, VeroStoffe.  The shop is privately owned and has a well-curated selection.  Unfortunately, not cheap.  I doubt anything is less than 30 franks per meter.

So this amazing cool drapey rayon jersey, at 32 franks a meter, seemed like a steal.  I was in love and didn't hesitate, and I took it home and made up this cardigan in like 2 days flat, brushing aside all the half done projects in the way.  I cut a 38 although I debated a 36 because the material was so stretchy, but the 38 was fine (there is quite a bit of fabric under the arms but not in a bothersome way.)


It is amazing!  I was terrified because of hating gathers but I survived them and although they hang a bit low, it's the pattern - the gathers are not to hold your boobs up, they are more to hide the stuff under your boobs.  I think this is actually a super fabulous pattern.

Ok then I did the stupid thing.  The denoument was waiting to happen, right?  I have this snap maker, and I have all these pretty snaps, and even dark blue ones!  So I spent an hour educating myself on plastic snaps and then filled up my great cardigan with snaps.  Which was perfect!  Until I had to take it off after trying it on!  The snaps are so much stronger than the fabric, even in two layers, which I did NOT ever think of interfacing, that they rip straight out of the fabric.

ooohhhh I hate learning by experience!  So I debated...cutting 20 little squares, interfacing them and zig zagging them on and then re-snapping.  And I put this in a corner to sulk.  And then I thought that is too much work and I am sooo lazy.  So if I just cut one long strip for front and back, interface then and zig zag them on and then re-apply all the snaps, it will be like a band feature.  What do you think?

In the end and with the help of some patternreview comments, I realised I was making things too complicated!!  I zigzagged the band shut, and sewed buttons over the holes (I just pulled out all the snaps.)  So I love my new shirt, even though it no longer opens up the front, it doesn't really need to.  I will interface the front band on my next version and I will use actual buttons.

Here are the after pictures.