Sunday, 7 August 2022

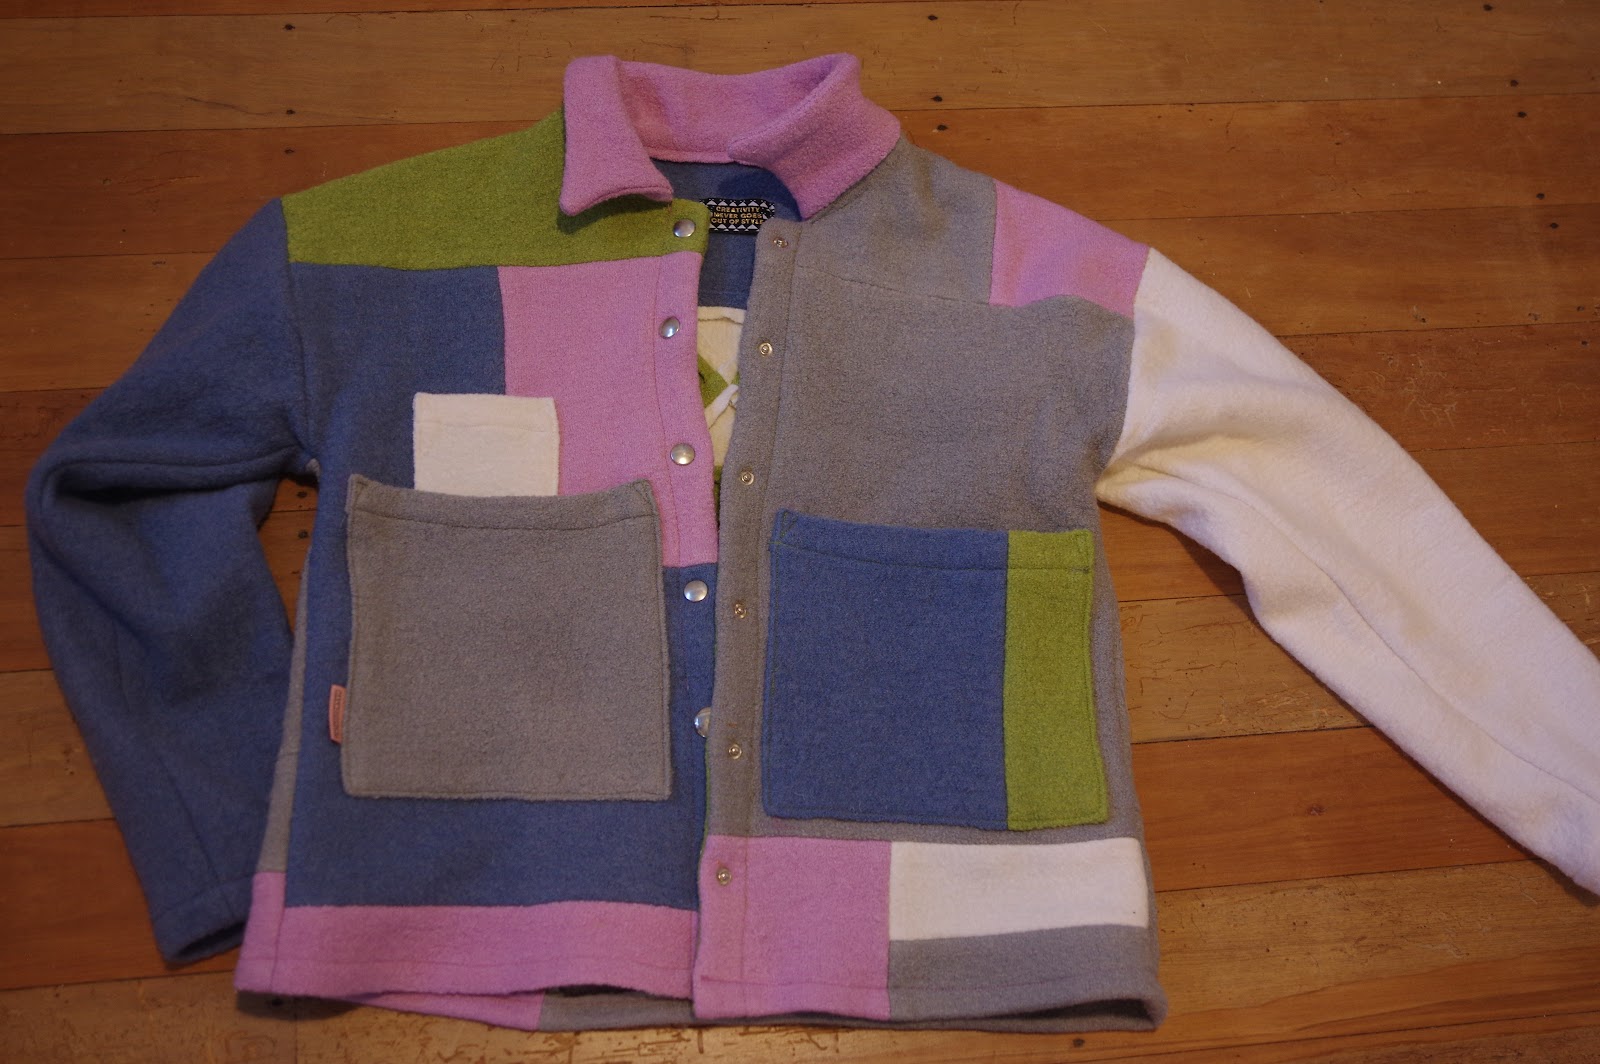
Lysimaque nenuphar jacket review: a patchwork piece of art


 I saw this pattern and I was so completely in love with the back.  I had an irritating meter of boiled wool and so immediately I thought it would be amazing to use a bunch of colours of boiled wool for this jacket.  I went on a hunt for all the colors.  It took awhile to accumulate, because all the nice ones were in Germany and wouldn't ship to New Zealand.  I finally had them all, and I had the pattern pieces ready to go, and then realised I needed *one more color*.  Ugh.  I ended up moving, with this in a kind of mess as one of those projects I really wanted to do before I moved, but just didn't manage.  

Blue boiled wool was from Miss Maude

White boiled wool was from The Fabric Box 

The other 3 colours were from Mood Fabrics, an order that I justified specifically because of this project.   

I made size 36 for a 84 cm chest, as my chest measurement is about 83 cm but I am happy to overestimate a touch due to my wide back, rather than sizing down, especially for a jacket.

So, other people have mentioned there are two options for the button placket.  Maybe the original, non-pieced pattern has two button placket options.  But the pieced pattern only has one - you have to sew on a separate button facing on both fronts, so you end up with double thickness and seams everywhere.  I would have liked the other option to decrease bulk.  I tried to use a different fabric but it was a catastrophe so I went back to double thickness boiled wool, which at least does respond to a hot damp iron.

I knew going into this that the instructions would be sparse, and they were. They don't provide you much help if you are a beginning sewist and need some hand holding.  I took it slowly and thought hard about management of the insides, since all the seams were visible.  I found that the instructions mirror imaged reality, ie when it said right front, it's actually the side on my left when I'm wearing it.  But they were consistent so it didn't matter.  All the pieces lined up and the order of attaching them made sense.  The pockets are just low enough that I can snake my hands into them.  I did not even consider folding in a seam allowance on the inner collar, since the wool won't ever fray, I just sewed it down as is.  I then added some extra stitching to keep the collar hem from rolling out.  This worked ok, I think I would wear it with the collar kind of up, but it will go down too. 


I got to the end, not sure if I was making something just so cool, or a clown jacket.  And I made the fatal error.  Those two layers of boiled wool would NEVER receive buttonholes from my sewing machine, and while I do have a backup workhorse Bernina, I instead committed to snaps.  I think I'm gonna retire my Prym snap set now.  While the snaps do sometimes work, on any complex fabric they are almost worse than buttons.  I needed to hand sew snaps on.  Hand sewn snaps are GREAT.  I realised my error after I made lots of snap holes and was committed to snaps and then snaps started falling out.  I went down a wormhole of snap repair etc which involved glue and one fake snap where things just got too terrible.  At the end of this, while pleased with the back of the jacket, I don't really want to own it.  A friend has raised her hand for it and I'm kind of relieved to pass it on.  I do like it, but I kind of FEEL like a clown in it, and the snaps have been the nail in that coffin. 


But I still really LOVE the back.  I might come back around to this idea someday, just using the patchwork star or something.

Waffle Patterns Pinda pants in stretch corduroy

 Finally picking up my sewing pace a bit!  I have been really keen to make these pants because it's winter and I want long pants that cover my legs all the way.  The flappy elastic-waist ankle length items of summer just are not doing it.  I also love Waffle Patterns and after making the Azuki work pants I realised I had missed just how cool the Pinda might be.  

So, fabric is stretch corduroy from Nick's Fabric in Auckland again shaming me as I bought it for these pants a year ago.  

Size 38 since that seems to be the wisest fit.  Alas, I didn't necessarily think about how stretchy my fabric was and that 38 is kind of loose on me.  I should have sized down for these.  If you make them do take the stretch into account - 38 would have actually been a great fit in ZERO stretch, but you need the pants to have some negative ease when they are so stretchy and that's not happening here. 

The sewing took a few days but not as long as things were going a few months ago.  Hopefully I'm gearing back into sewing mode.  I made the cute double pleat back pockets...um, beware as they will kind of pleat open and make your bum look big.  I find the pocket placement to be too low as well.  

I did the patch front pockets. The instructions don't have you create a separate pocket if you use the zip so what I did was: add a little pocket facing to the zip area, like making a welt so it would be neat and reinforced.  Once my zip was installed to that, I created a back layer to the zipper pocket from some quilting cotton (see bats!)  I then treated the two units as one and finished the main pocket that way.  Thus the zip pocket is in front of the real pocket where you put your hand.  I'm definitely going to do this again.  I love these patch pockets more than I think I love jeans pockets, because they actually have room to fit stuff whereas jeans pockets are full of my hipbones. 

Anyway the waistband was fine, everything else was fine. The fly installation I do not love.  It looks totally fine and was ok while doing it though you are using a folded seam allowance as your guide instead of basting the fly shut to start, but my zip is actually angled a bit sideways at the top as though somewhere the zipper tape wasn't completely sewn down flat well enough.  I think I actually prefer the method where you baste the fly shut, even though I have said in the past I hate that method.  Changed my mind! 


 By the way, no, we are not going to talk about nap direction.  I am really amazed by how many times *in a row* I can forget something so basic...  please, don't be like me.  Corduroy is directional.  Thanks.

Alas upon trying these on they are very large and are now seeking new owners.  Very large like a solid 4" so no, I'm not going to try taking that out.  I'm also not happy with how much excess fabric there is everywhere.  I could probably have sized all the way down to 34 in this stretchy fabric.  I'm happy with my experiment though and luckily I have lots of pants so even if these ones didn't work out for me, I'm still clothed.  I might think harder about places I can put these nice patch pockets.  Even my little pocket zip was very exciting and I want to do it somewhere else.  


Tuesday, 2 August 2022

Twig and Tale Rainhaven pants in (very orange) Gore-tex

 I planned to make some new rain pants sometime last year.  In a fit of preparation I bought some outdoor fabrics from Ripstop by the Roll.  Sadly my colour scheme was bright green and bright orange.  Luckily the future ski bibs are dark sedate olive green.  Whew.  

This project was on the back burner because I needed it.  Yes, indeed, the minute I actually need to sew something I'm running away screaming, in this case with damp socks and a wet butt because my two pairs of gore-tex rain pants are so leaky.

 But OH past Sonia, why orange?

So I had just made a pair of pants, it had taken me days, it had been fun, but they were too big.  I had a few hours before bedtime.  I was *finally* back in the sewing Zone.  And so I thought nothing to lose, I'll just quickly whip up these gore-tex pants!  (I had the pattern as at some inspired point I had a few patterns printed.  Months ago.)  I needed something that would feel like a Success and of course, cross something off the list.  Cue the threatening music right here. 

I made size 38, no mods, I didn't use any pockets.  I used a teflon sewing foot and after a few attempts, I ended up using a jeans needle because nothing else would penetrate the fabric.  Sewing Gore-tex is one of those tragic life events that you try to block out with a strong alcoholic fog immediately afterwards.  I seam sealed every single seam with tape, also from Ripstop by the Roll, which was the very definition of overkill - dyneema seam tape.  Dyneema, for those who aren't rock climbers etc, has the tensile strength of steel.  The tape was a bit wide so some of my seams did get little wrinkles in them, hopefully not in a way that will let water in.  I then underlined the pants with that horrible green lining fabric.  This was kind of a bad idea - it's really soft and kind of sticky, so while it's comfortable, it's hard to get the pants on and off because they don't slide.  The exterior (orange, so very orange) is a super lightweight gore-tex type membrane.  I suspect it's not official gore-tex because of the rules in how things are named.  Once I had the two layers together they were easier to work with, so the waistband was kind of ok (the elastic got stuck in the layers but eventually pulled through).  For the hems, I made little velcro bands that I can shut the hem with, so the water will drip off my shoes and nothing will get caught on my bike.  


I had envisioned every step of this project long ago, so in a way, it was autopilot.  I knew what I wanted to do.  It did, however, take about 6 hours and I did the entire thing in one go without stopping.  I knew the minute I stepped away from this mess, I would hesitate to get back into it.  


I'm glad it's done!!  I have new, non-leaky rain pants!  And no one is going to run me over!


Tuesday, 26 July 2022

StyleArc Logan shacket review & a peek at the Blomma tank

I was trawling the webs for shacket patterns about November.  I had some specific features in mind but the fabrics I wanted were from the States so I had to rein in my excitement. My absolute favourite fabric also only had a small yardage available.  I ended up buying two different plaid flannels (both are Robert Kaufman mammoth) and the benefit of this pattern is the low required yardage.  Naturally once I finally got around to sewing my plans changed and this is the larger piece - I have a new scheme in mind for the smaller one. 

The other pattern I want to try is the Trish Newbery Carter Shirt Jacket (a new to me company!) but I've decided not to use flannel for it, rather to use a double faced coating I've had sitting around so it will be really more on the jackety side of shacket.  It has features I think are more shacket appropriate, like pocket flaps, button cuffs and a nice shaped hem and I am hoping it will work out nicely in my heavier fabric.

I used a size 8 in this pattern and am happy with how the size fit.  Generally I find Style Arc true to size even if I don't think every pattern is a winner.  This is the first thing I've made by them that I have loved and that fit me just as I wanted. 

I would call this the lazy shacket pattern.  The yoke is not doubled.  There are no sleeve plackets. The hem is a small hem and you can't make it larger because it won't go around the curves (I tried).  If you want to sew the side seam pockets down to the front so they don't flap (just a personal preference for me) beware because they overlap the front chest pockets.  

As always Style Arc provide only the most skimpy of instructions.  They were totally sufficient for this project.  I used french seams wherever I felt like (shoulders, sleeves) but not on the side seams as I still haven't conquered french seaming in side seam pockets.  I first heard of this being done by Carolyn but there is a tutorial here.


The tank is a Blomma tank, free pattern by Paradise patterns.  I experimented with various methods of sewing the bands using my coverstitch machine, not entirely successfully.  I love the grey one and then made another in rib which feels quite heavy: 


The Blomma is an excellent addition to one's stable of free tank top patterns, I suspect when summer comes around I will do more experiments. 

While I was sewing this shacket it seemed too flimsy because of all that single layering.  I didn't think too highly of it.  I made a feeble attempt to pattern match, as usual lining up something irrelevant and therefore missing the big show of the side seams matching up, but it's close enough and I'm not too bothered.  I was therefore pretty surprised in the end when I put it on and discovered it's a substantial feeling overlayer that meets all of my desires to wear old-man chic.  In the end I'm really happy with this shacket though I'm keen to make a heavier one too.  It's not a pattern I would make hundreds of times, but I'm happy. 

Monday, 25 July 2022

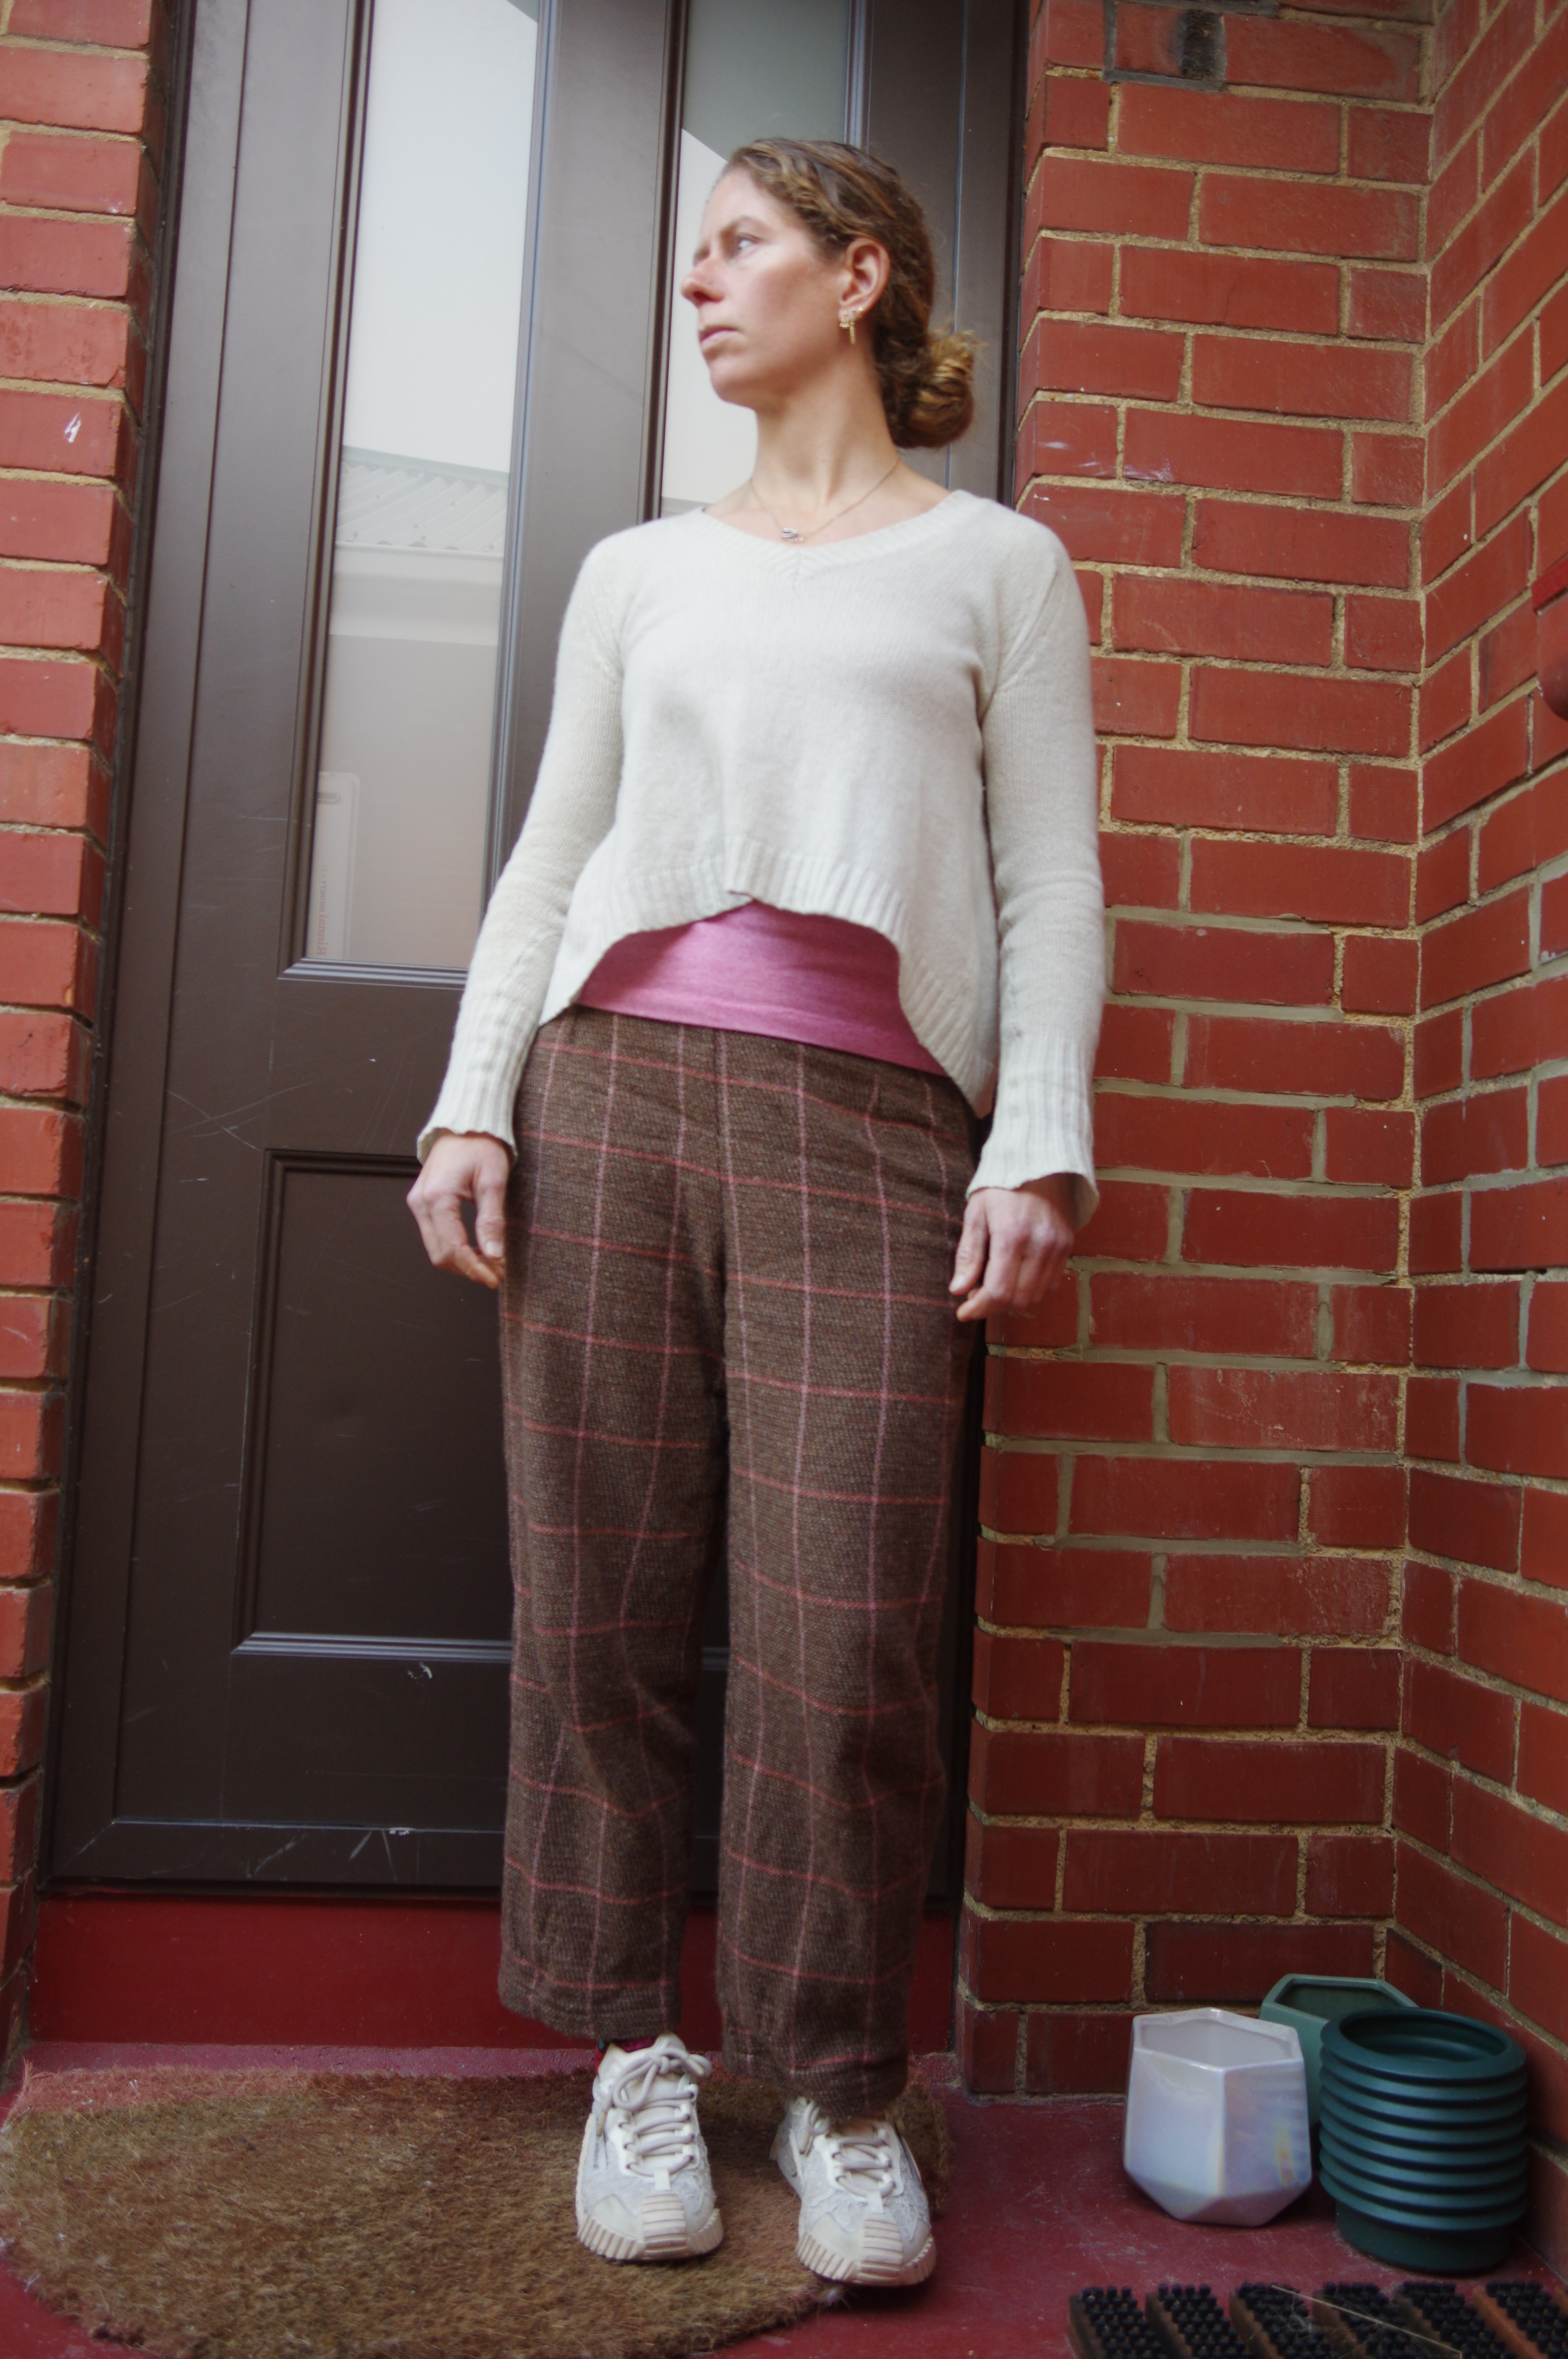
Merchant and Mills Eve trousers, an experimental foray

 I've been really slow at starting to sew again after moving.  My sewing room feels cramped and my best friend has just taken up knitting, inspiring me to binge knit to finish projects as fast as she now does.  It's been frustrating as my sewing queue literally is full of projects I thought up a year ago and every time I look in shops I see things that I want to sew and have been planning to sew and could already be wearing if I had sewn them.  Ah, time.  

Because of that when I started these it took something like 1-2 weeks to sew them as I kept stepping away from the sewing room and not going back in.  I was really scared of the flap zipper for some reason.  

 The fabric is a hemp-wool blend from one of my binge purchases online.  It is possibly from Ansje Handmade, but I can't be sure.  I've had it around for awhile but I only got a small piece so it wasn't going to be a big jacket, the plan was always some kind of pants.  The fabric is a relatively loose weave but totally opaque, and has a rather scratchy feel and not much drape.  As winter has crept up the idea of these pants landed in my head.  I made a size 10 I think.  

No problems overall.  I find the instructions of Merchant and Mills to sometimes be a bit funny, while also clear.  Like you can't look ahead too much or you get confused, but when you are there all is good.  I expected the zip to be very hidden so I absolutely forged ahead with a bright yellow invisible zip and...it peeks out.  The flap behind the zip is a nice idea and overall I do like the closure.  I opted for a sewn on hook and eye instead of a button.  The waistband is a bit narrower than I anticipated, and it lands at my high waist and is snug there, but not actually too tight.


As you can see the footwear struggle is real.

Overall these are sort of shapeless baggy pants with a comfortable fit.  The waist is at my real waist, there is room, they aren't tight, and the crotch is a bit dropped but not so badly that I can't ride my bike.  The pants themselves are a touch cropped, making it hard to know what footwear to wear with them in winter - and as scratchy wool pants they are definitely winter wear!  I think it's really stupid that patterns give you a back pocket but no front, however I decided to wear these for some reason before putting on the front pockets, always a bad idea, so the front pockets are indeed Not On Yet.  And I miss them!  

They are going on soon - wanted to do them on the cross grain but it ends up I only have a tiny piece of fabric left so they will be on grain.