Wednesday, 12 May 2021

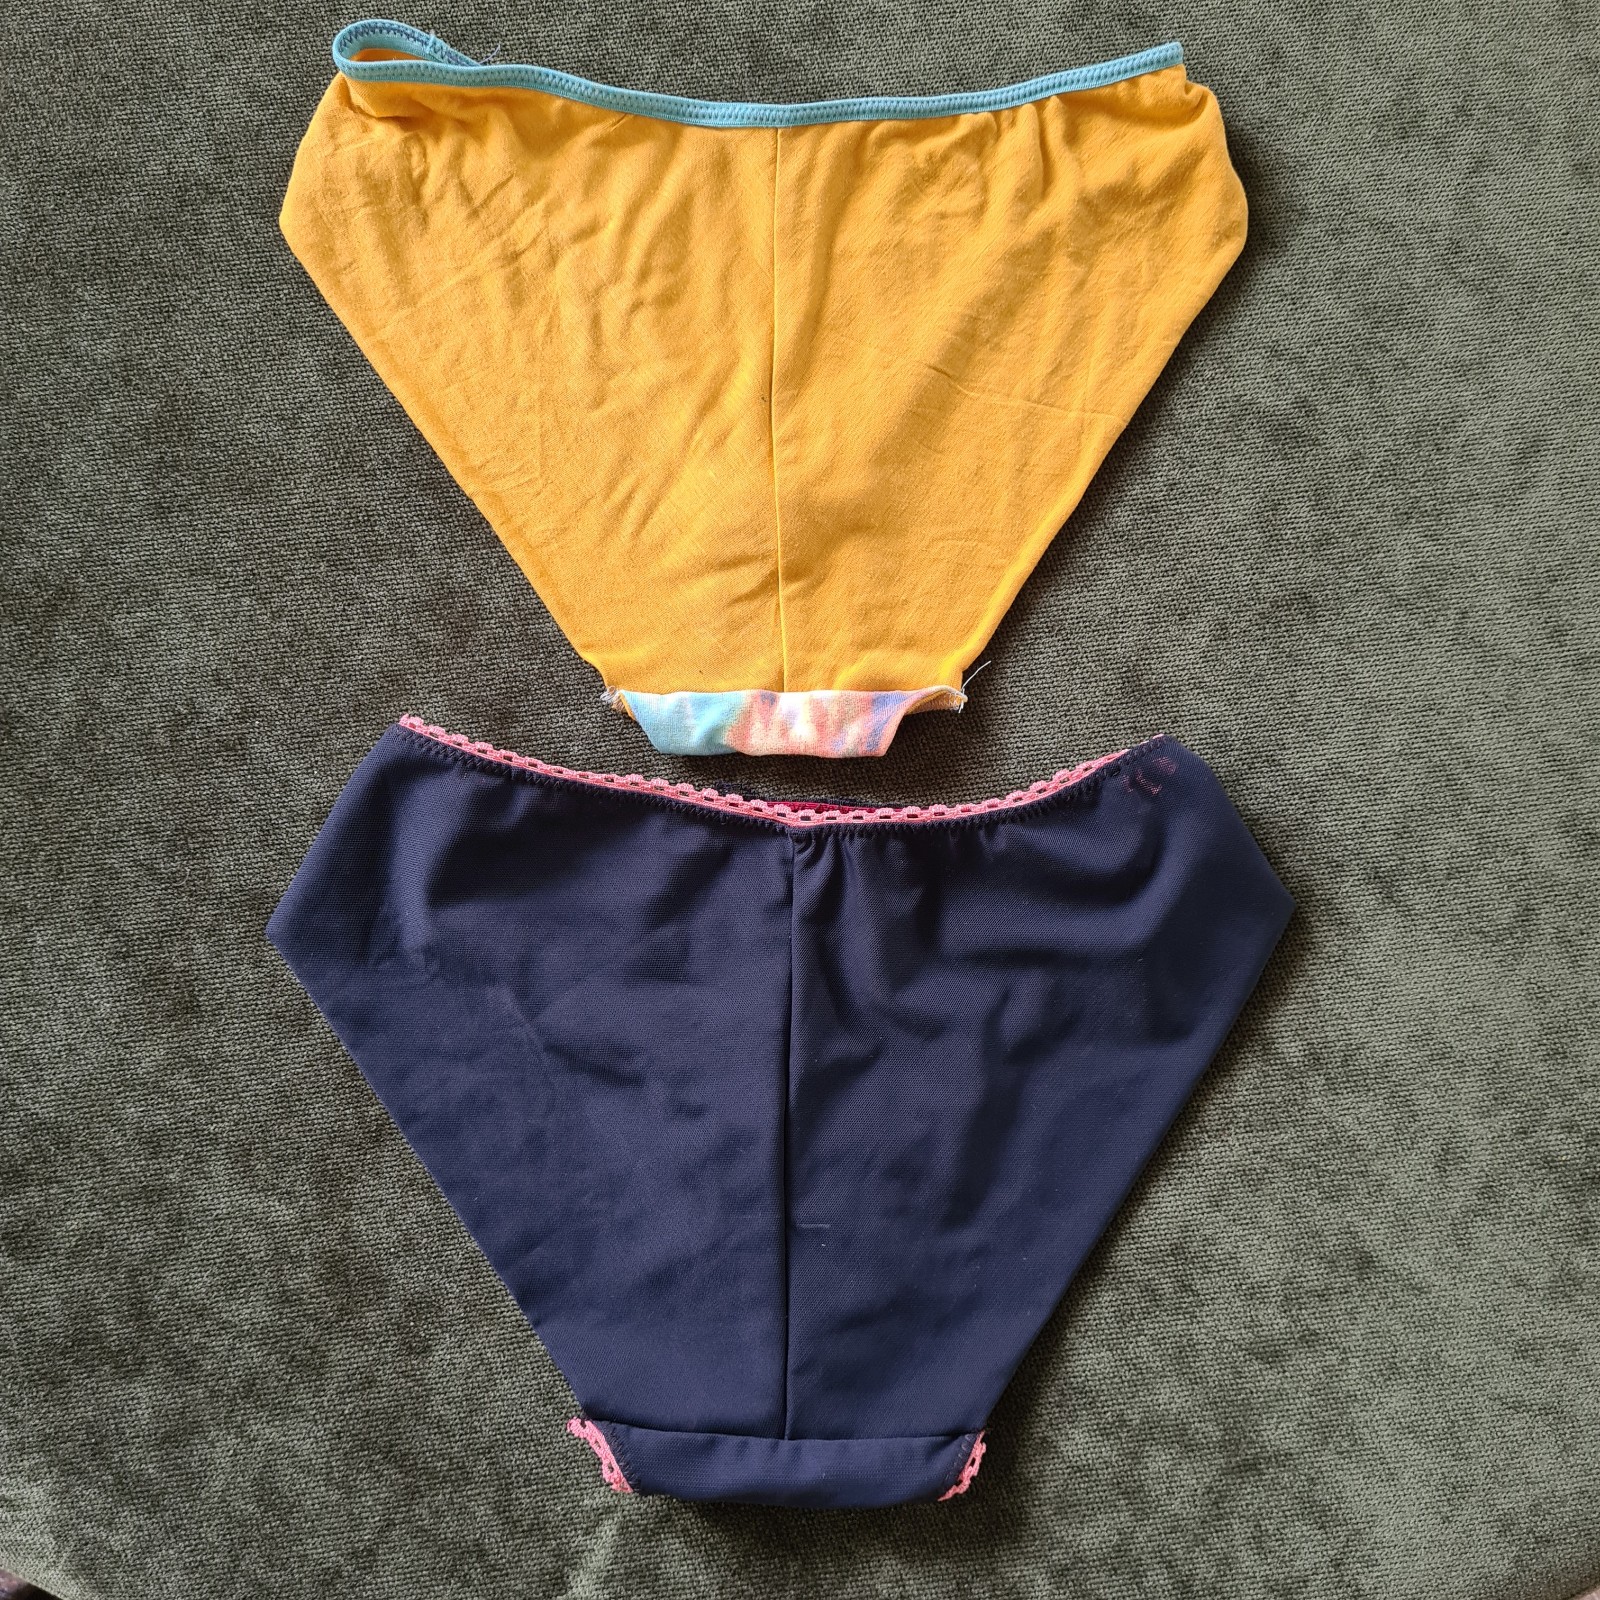
some new knickers: Orange lingerie Montgomery briefs

 These are very pretty. 


The question was, of course, whether they would adequately translate from a pattern made out of plastic (that's YOU stretch lace and power mesh) into a pattern made from my cotton fabric scraps (the goal).  

I started by following the instructions (is it funny that this is rare, unusual, and requires comment?)  I made size S. I used some navy power mesh from my stash, matching lace, and some pink picot elastic.  The instructions are fine. The problems are technical.  Four layers coming together on the back of the crotch.  A weird edge where that all meets up.  Other than that, the fit was fine.  

I cut out two pairs of mixed rayon and silk jersey.  In retrospect I should have gone for the beefier interlock I had sitting around, at least for the front.  One pair got entirely scuppered as I decided to change things up a bit and sewed the edges of the crotch pieces together with right sides facing, then flipped the crotch out to avoid putting elastic along the crotch piece. However, the result was that the front and the front crotch didn't match up.  It was not a salvageable mistake.  

Take 2 I did the same thing but I *also* did that to the front, which I doubled.  So I avoided any picot elastic, which for me is a good thing as all the stuff does is shred all over everything in the wash and then fall apart.  I did a clever thing where I put the crotch into the front and sewed them together inside out, so I got a nice finish there too.  Of course I was still stuck with four layers at the back.  This pair of underwear is wearable, but very loose.  I won't avoid panty lines - because the back won't really fit under tight pants!  Haha I will wear them to bed anyway.  I'll try out the plastic ones too and see what I think.  I have a lot of power mesh and it would be nice to have a way to get rid of it.  I don't really have much lace, because I dislike sewing it and I dislike wearing it...


This was a fun experiment but it seemed to conclude in: 

Acacia panties are best. 

Watsons are just a bit narrower so they cut my butt cheeks in half.

Between these two patterns I can happily upcycle tshirts into underwear for me and all of my friends basically forever...except when we don't want pantylines. 

Barry briefs are for when I figure out the coverstitch binding attachment. 

And Esme panties by Evie La Luve are the epic wonder for avoiding pantylines and looking fancy.  I think it just won't get any better than those.  (Which just led me down a wormhole of panty patterns so expect me to be trying out two more in the next few weeks....oooopssss.)

Saturday, 8 May 2021

Papercut Soma swimsuit review plus a guest visit from the Cottesloe

I had always planned to make another Soma Swimsuit (available here).  My first run through was in 2017 and it appears, shockingly, that I forgot to blog about it.  Gosh so much potential whinging, wasted!!  Also it seems lately that Papercut are taking many of their older patterns out of print as they no longer have this on their website.  It seems to be available by some stockists.

I made a size XS, and the fit was good. 

The idea on a remake: I wanted to make another suit and from that, measure the gaps and redraft pieces to basically replace all the fold over elastic and bra strapping (I'm not sure why I had to make another one to do this, but that was the idea.)  I bought this fabric something like 2 years ago with this pattern in mind, but couldn't quite settle on a background colour.  I wear my other version of this suit quite a bit because it has a back clasp and I need to take my suits off in a carpark with cold fingers, and so I finally gathered the bits and committed. 


While it does come together relatively quickly, this is not a fun sew.  The bottom chest FOE struggles to reach over the layers (I managed to use extra wide stuff on my first suit, but on this one I had to really stretch it to cover.)  There are spots on the sides where you have five relatively shifty layers that you have to sew, and my machine behaved accordingly (thread nests and broken needles.)  I made it worse by sewing the pants outer layer together inside out and I had to give up and just cut a new one, I couldn't break the overlocking and salvage the pieces.  (Luckily I have a huge piece of this star fabric!)  I didn't follow the instructions for the bottoms this time around - you are meant to use swimsuit elastic and fold over twice.  I overlocked everything together cleanly then added a waistband instead. 

This suit also uses a bunch of bra strapping.  I never have much bra strapping, and definitely not all in one practical colour, so in both of these suits, half of my bra strapping is, er, bra channelling, of which I have a strange, massive stash. 

I recall feeling the same way about my first version: if you don't look too carefully at the insides, it's totally serviceable!  Since I know it will go into high rotation in my surfing wardrobe, I'm happy.  But the idea of spending more time with this pattern, even to redraft away the annoying bits, is becoming less interesting as I have discovered the Cottesloe swimsuit pattern, which takes an hour to make including cutting, is totally adorable, and honestly I would prefer to just make a simple suit these days than faff around creating something crazy.  I have made 2 Cottesloes and I plan to retrofit them with swimsuit clasps.  I will also probably make 2 more because I have way too much swimsuit fabric. 

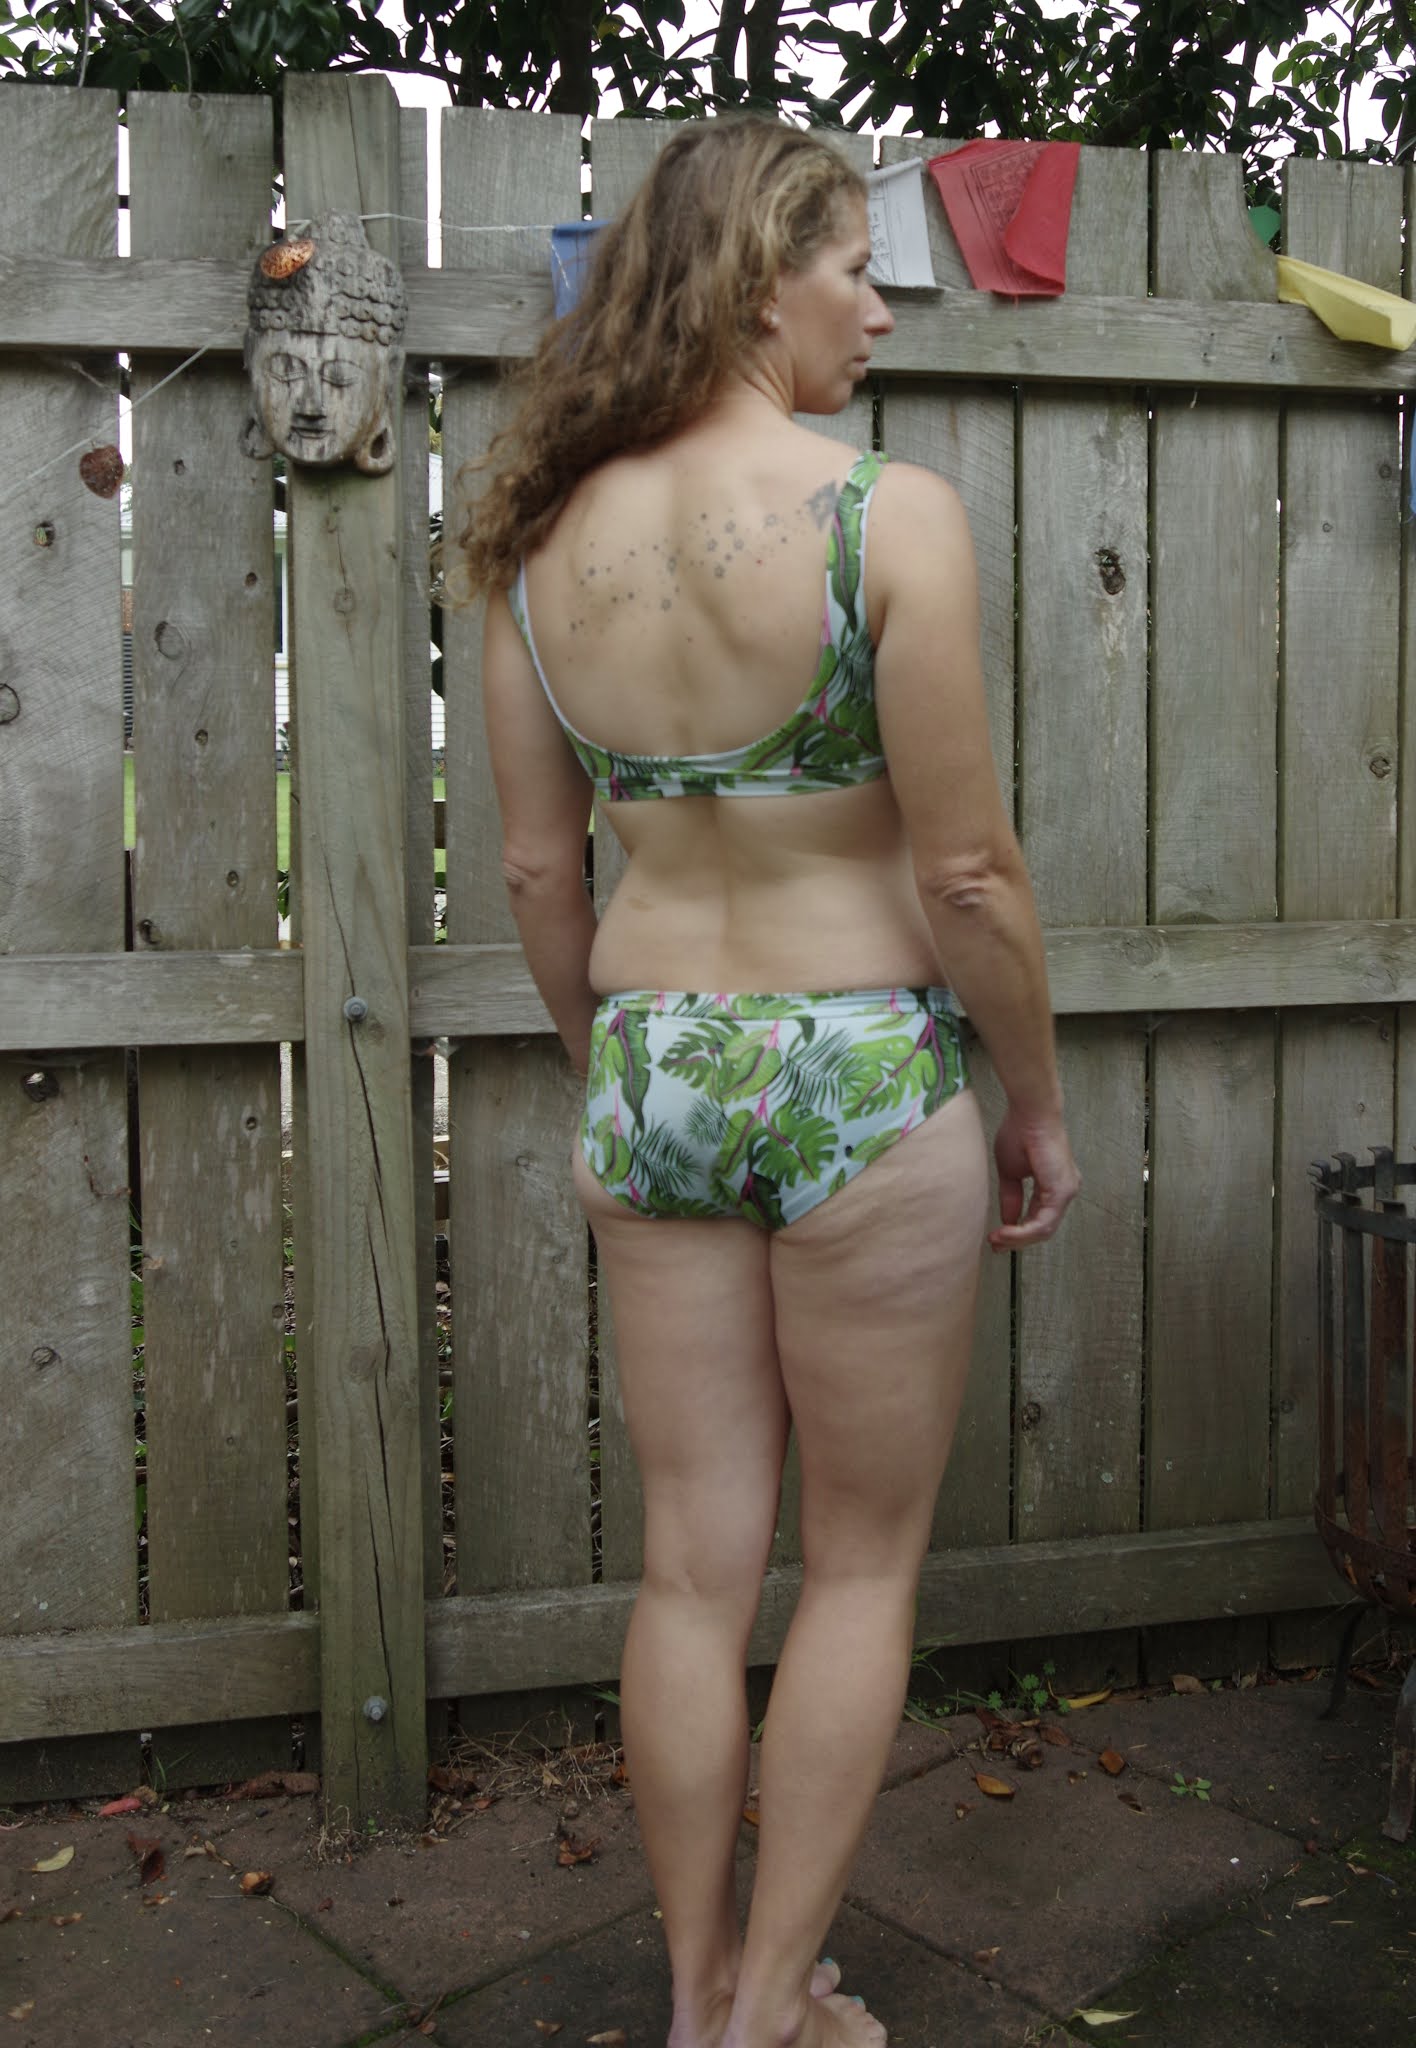
After seeing that there are nearly no reviews of this swimsuit in rotation, I sighed a great sigh of sadness as I really didn't plan in life to be a swimsuit model, and committed to some IRL photos.  I'm going to swallow up all the defensive things here and just say you can tell which suit I feel the best in:


The first (black) version was thrifted from some polyester top, with heavyweight black swimsuit lining.  It's held up pretty well in the 4 years since I made it, but really it's only gotten into heavy wardrobe rotation in the past year.  


The bra strapping can occasionally be annoying on the sides as it comes around to the back clasp, and on the front side where it reaches into my armpit a bit.  The crossover front is a feature I quite like despite the narrow FOE holding it together.  It also hides ok under clothes which is good as sometimes I spend a lot of time checking for surf and then give up and go grocery shopping instead. 

The dart on the front does create a pointy boob shape, and as you can see, my white bottoms with the added on waistband are tighter than using elastic. 


Since the Cottesloe has snuck in here:  I cut a size 4 in the Cottesloe, and I only used my overlocker - cut a lining exactly the same and sewed them together, flipped right side out then added the bands - for both top and bottom (learn from me and DON'T forget to burrito the top!!)  I care not at all that my lining slips out just a tiny bit - I used actual lining fabric on the jungle print because I had it handy, and I think using swimsuit material makes it a bit firmer and probably wouldn't do that. 


Go forth and make your own swimwear, and strut that stuff unapologetically!

Friday, 7 May 2021

Cool stitches Eva top review

I saw this top on Instagram and was intrigued.  I've never done an exposed stitching top, and on the designer it looked pretty neat.  So I went for it! 

You do actually pay money for this top, and there are ACTUALLY no instructions.  In fact, I had to text the designer to find out if there are seam allowances and then stalk her instagram to find out they are 3/8".

Good news is that the pattern layout in A0 is really neat and clean. No wasted paper here.

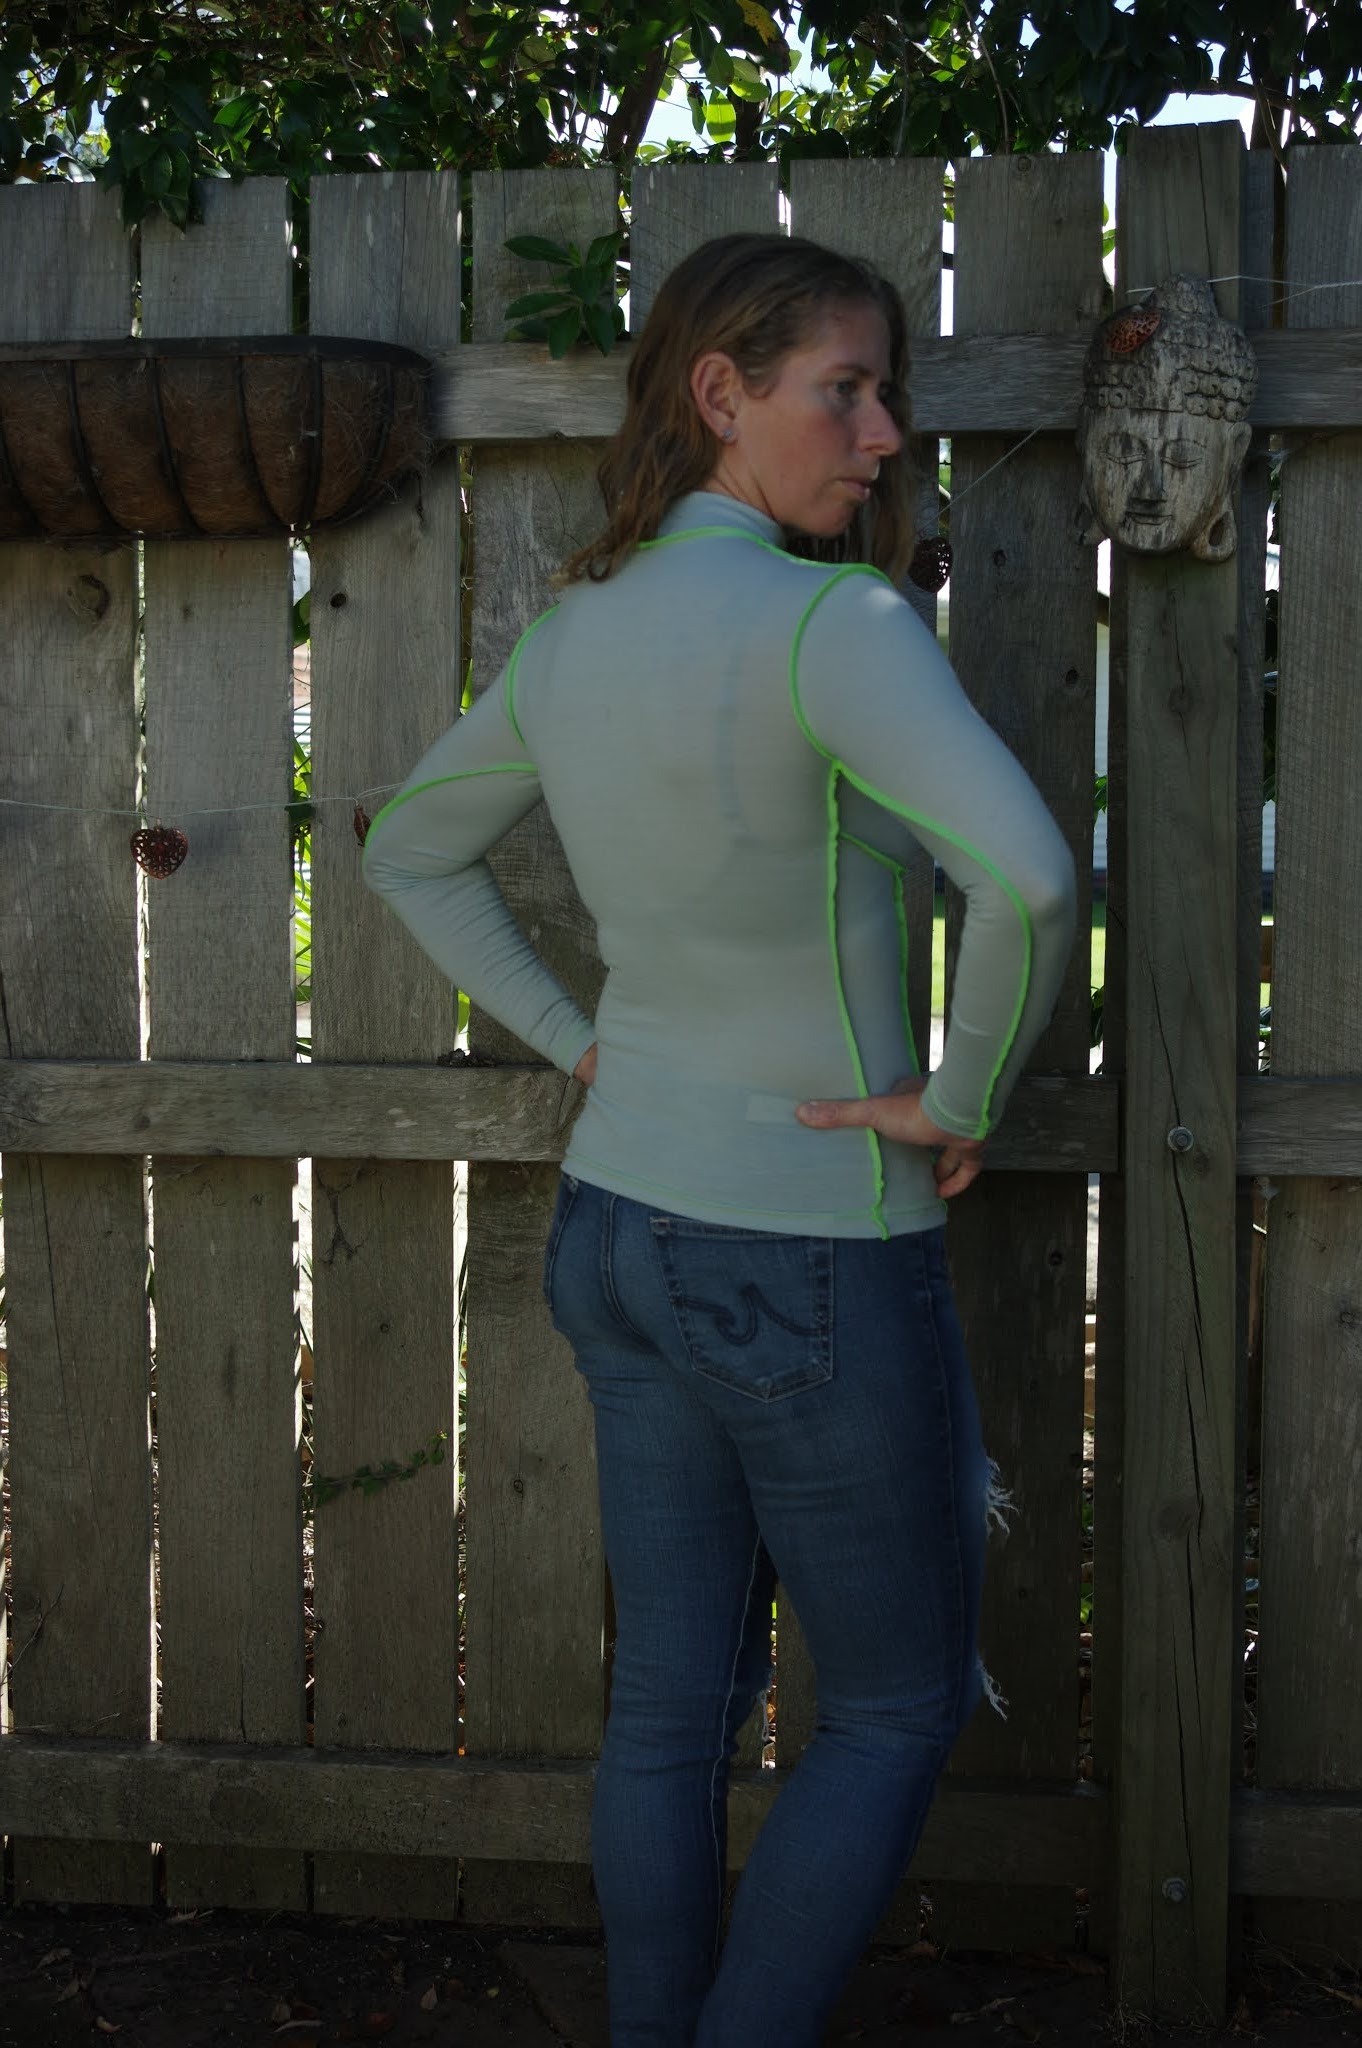
I had to go through a few iterations to get this to fit at all, and it remains pretty unflattering.  I think I did not realise that you should make this top out of a ribbing knit, not out of standard knits.  I do plan to do another one - maybe a tank or tee version with a normal neck, because really I don't like turtlenecks.  

Version one, size XS which is my size on the chart (which is on the pattern print out.) Pretty horrible! 


Sized up to S, and gosh, it's too big and still horrible. I know the stripes are bad - this was 100% a muslin.  I realised that what I needed to do was lengthen the top rather than make it bigger. 


Version 3 is XS and is my final iteration in merino.  I would wear this for outdoor activities when I plan to be cold - maybe as a snowboarding baselayer.  I don't think I would wear it as a fashion item.  


So maybe another version as lately I'm swimming in rib knits. But the initial enthusiasm has really faded. I don't think the booby outline thing suits my shape since I have so many ab muscles my torso is quite thick, and I think overall a pattern that isn't free should come with at least basic instructions.  On the other hand, I wonder if a very stretchy fabric would make this pattern shine - and I am totally delaying trying to flat overlap the pattern pieces and coverstitch them instead of overlocking, but I feel like that needs to be attempted.  So we shall see. 


Thursday, 6 May 2021

Closet Core patterns Poufs x 4 (and more!)

For some reason I have talked myself into making a quilt. It's because my best friend Tessa made the most gorgeous quilt known to man and I must have one for myself.

These poufs were all about getting rid of scraps and having a nicer place to lounge about on my floor.  I also wanted to see how bad I am at sewing things together when I only have 1/4" SA and it Matters.

At the end of all this I thought I should be a bit more prepared for precision piecework.  The 1/4" foot arrived (it was delayed for about 3 months due to lockdown).

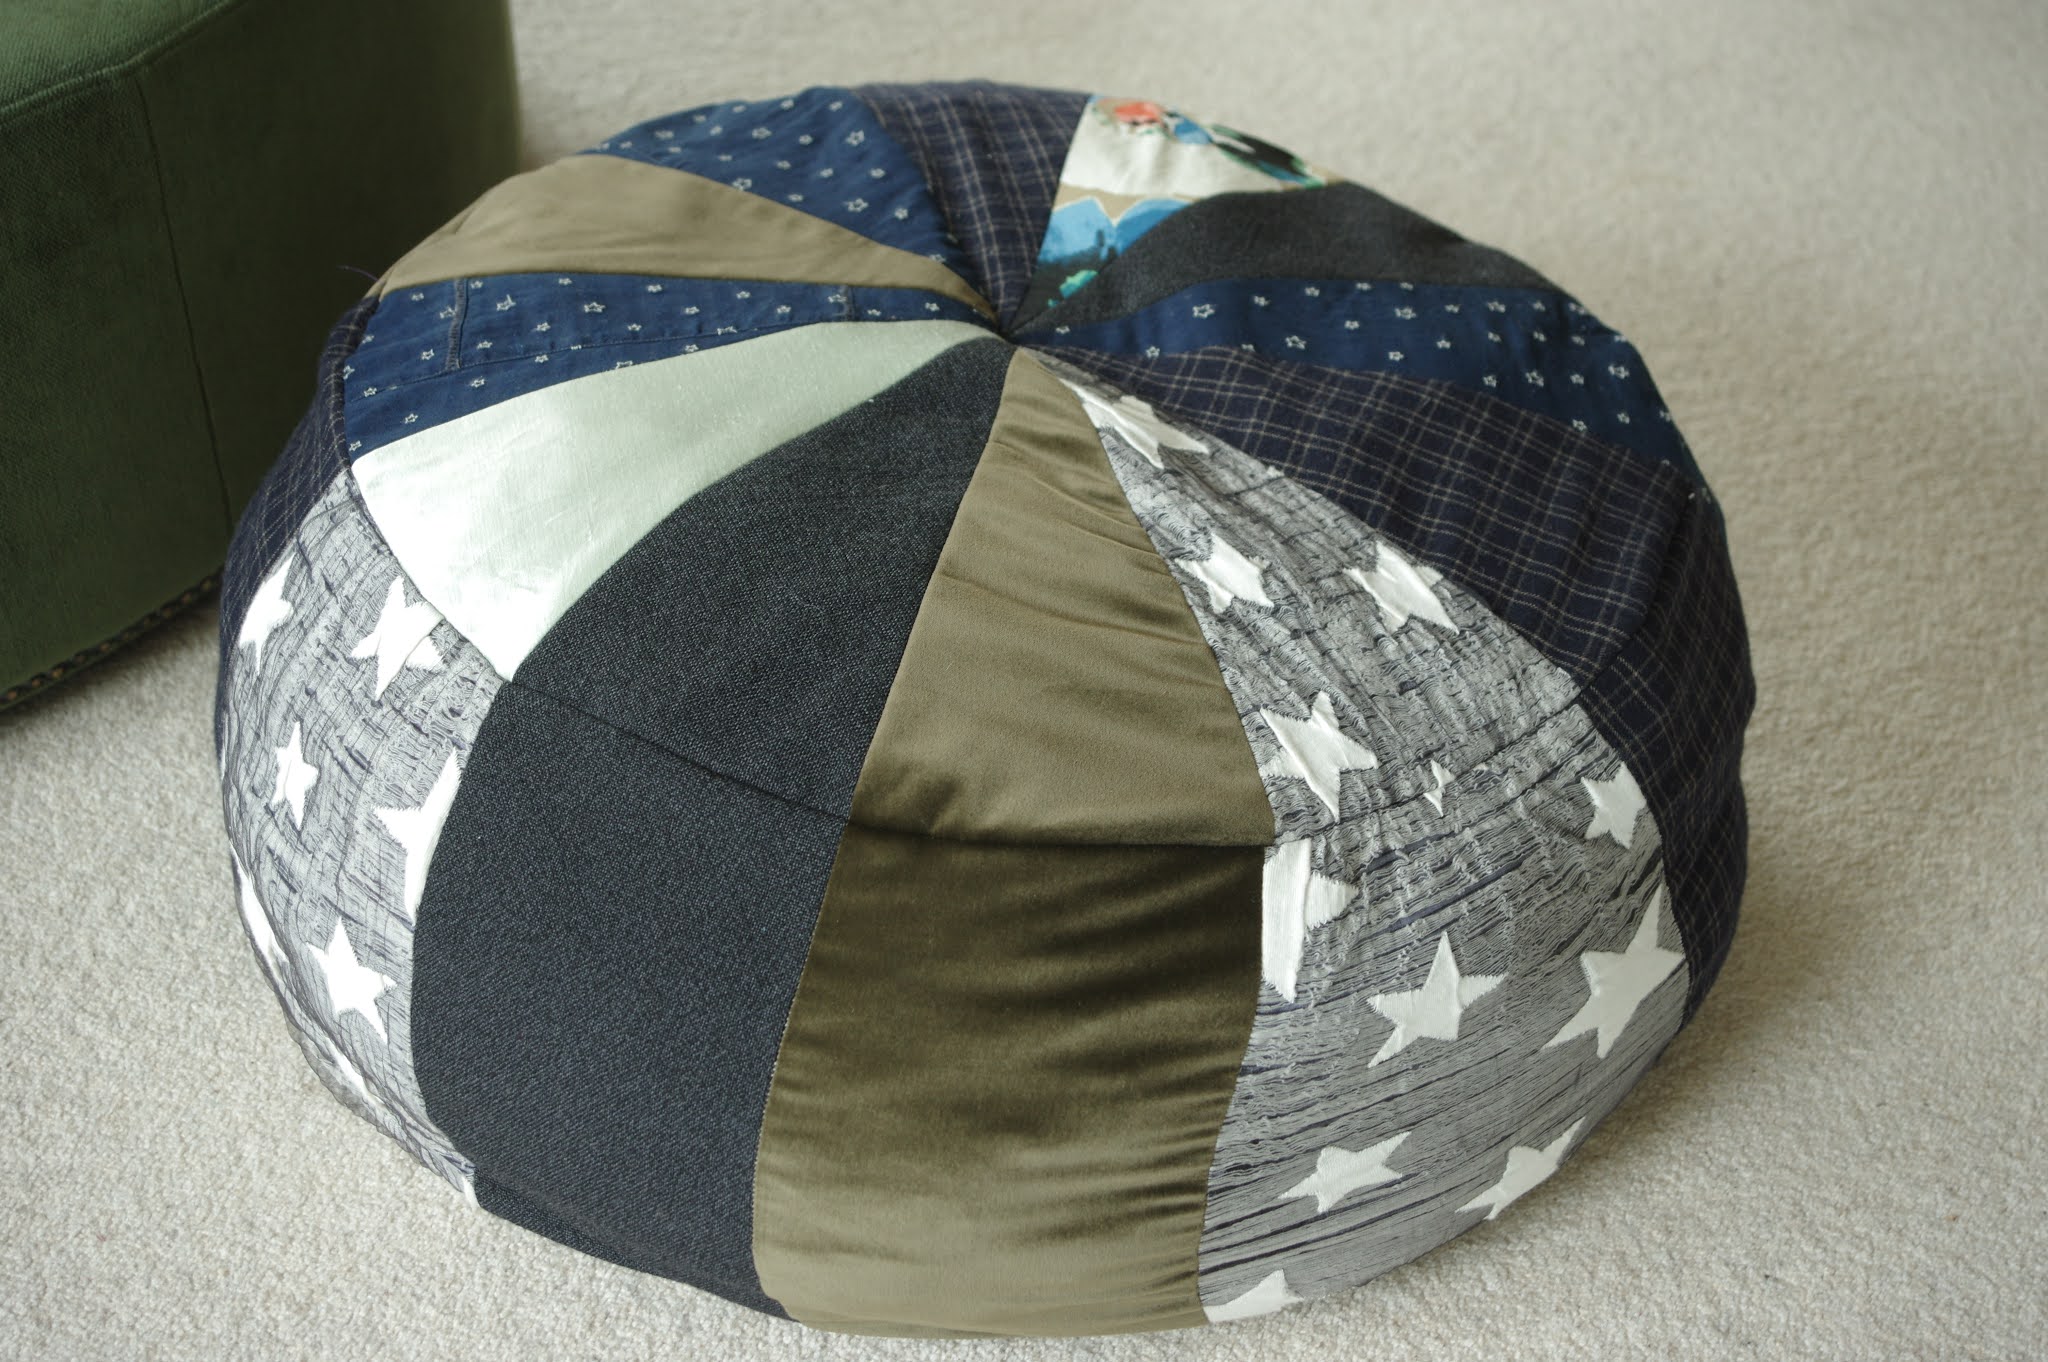
I went totally crazy cutting.  I ended up cutting out 4 poufs worth.

Pouf number 1.


Pouf number 2, which is for me.


Filled with all my hoarded scraps and it's not near full.


top number 3, I think this was the best one


Top number 4.

I did gain some accuracy as I went along, and learned a few tricks, but overall it is difficult to sew together fabrics that have different stretch characteristics and even my fourth pouf top is far far from perfect.  I completed 2 poufs and then I ran out of interfacing, plus I wanted to try using piping on the final two and I didn't really have any. (Then I changed my mind because I wanted fat piping and I couldn't find any.)  I was pretty relieved to get these done by the end of it, nothing like a project that sits on the floor for months.


Also I had been hoarding all my scraps since December to put in my two poufs (the other two are for friends) and I could not believe how much space was still empty in that first pouf in April!  It was barely full when I put all available scraps in, and took another few months of scraps to fill.  The second pouf is currently storage for clothing. (It's good at that!)

I was a little sad that it's hard to make these perfect but my pouf has been on the floor and is in really active use and even though it's sometimes been a bit squashed, as somehow I can't get the stiffness others seem to manage - the imprecision in the different pieces lining up doesn't really matter.

For precision - use upholstery fabric and use all one type, without a loose weave.  Use heavy interfacing, the stuff that feels like paper. And don't overlock anything.  When I overlocked edges my pieces ended up quite different sizes!  But anyway, this is meant to be a unique statement, and my poufs certainly are.   I didn't realise quite how much until I moved house and it ends up that these poufs are basically the best ever pieces of mobile furniture...so I made two more half poufs (and with piping)!  Stopping here!  Also, the piping does look good but whoa it was such a pain, and just like the bigger poufs, I cut and then delayed because I didn't find these very much fun to make.  Lately it seems that the more I want the finished item, the less I like the process.  (I'm looking at you, Quilt.)

Thursday, 29 April 2021

Pattern Emporium Pleats to meet you pants

 My friend Tessa recommended these to me as I wanted to try out some new lounge pants. It took me ages to find the right fabric as in my mind it needed to be very drapey, and the pleats/darts mean it does take up more than a scant meter of yardage.  

Finally found a winner - viscose from The Fabric Box in Auckland.  It's a metre of fabric but just barely wide enough.  Well.  I shortened the legs 1" at the thigh lines in order to have enough space to cut out the waistband.  I figured I'm short, I might as well shorten them.  I've never shortened at the thigh lines before, that I can think of, but knees are always in the wrong place on RTW so it seemed sensible enough.  

Tessa assured me to choose my size by the measurements, so I cut a size 10.  There is a lot of info about final measurements which I did not really pay attention to so it's hard for me to tell whether I could have been forewarned about just how much ease is present.


Thank god I did shorten them!  They are a fine length now, though I could shorten a bit more if I wanted.  They are very drapey and, well...VERY drapey.  My first instinct with this pattern was to use a drapey woven and I still think that might be better.  I don't think the fabric has to stretch anywhere at all.  It feels a bit precariously loose on as I don't like droopy crotches in pants I'm going to wear out, but I see it looks pretty great in the pictures.

I was very grumpy while I was making these, which means I had little patience for annoying quirks.  The most annoying of those quirks was: not sewing down the pleats at all, you just sew across the top.  Really everyone: sew down your pleats 2-3 cm.  It will make your life easier and the pleats will look neater.  

The other most annoying feature of this pattern was the layout of the instructions.  Luckily other than a quick glance to check the direction of pleat folding, there's not much instruction needed.  Which is good because the instructions are *IMPOSSIBLE* to read.  They are laid out 2 pages across on a pdf, so you have to enlarge to 200%, scan across, at which point the page gets lost.  I really cannot state how important it is for instructions to be written on single pages in a vertical, not landscape orientation.  Maybe other people use tablets or something to read their instructions??  I would hesitate to buy a pattern from this company that required closely following instructions because my memory of being annoyed is pretty strong.  

Despite that, and despite the careful work needed to maintain 1/4" SA (which I kind of disagree with because I think it takes away an element of safety that a SA of 3/8" provides) - these are lovely pants which exactly match the pictures.  The pockets are just barely deep enough, the pleats create nice shape, the back darts are fantastic.  It took maybe 2 hours to make these.  I'm glad I waited for just the right fabric.