Sunday, 5 July 2020

Elizabeth Suzann Florence pants

As she is winding down her business Elizabeth Suzann has decided to make the patterns of her products available for free. (Fuck Capitalism!) This is with the help of @minimalistmachinist, @mombasics and @thestoryclubpdx. You can get the patterns via a link on the @minimalistmachinist instagram page.  An accompanying request is to make a donation to an indigenous rights or black rights group. 

The patterns are being made into pdfs and at present are available as 36" wide which you can print as A4 tiles by selecting the "poster" option to print.  I sent them to my printer who turned them sideways on A0 pages.  I know this is all a work in progress and may change, I think A0 will be available too.

Elizabeth Suzann's website is still up with the models wearing all the clothes, so that's how I selected my sizes for everything.

I started with the Florence pants because who can resist this amazing advertisement:

Also I had the perfect fabric: a slightly textured tencel rayon from Miss Maude.  It's available in other colourways here

I cut a size S short.  It fit neatly on 1.5 metre of fabric. The pattern is easy to understand without instructions. Seam allowances are the outer line for each size and the inner line is the sewing line.  My printer used colour to print, and that makes a HUGE difference as they were identifiable by colour.  It might be hard to differentiate all the lines on grey scale. 

I measured the hem: 2.5" so a 1/2" fold up then a 2" hem.
The waistband accommodates a 2" elastic.
I just finished the waistband before folding it over, sewed it down with a back gap and inserted the elastic. 

A very easy sew. 

Results:


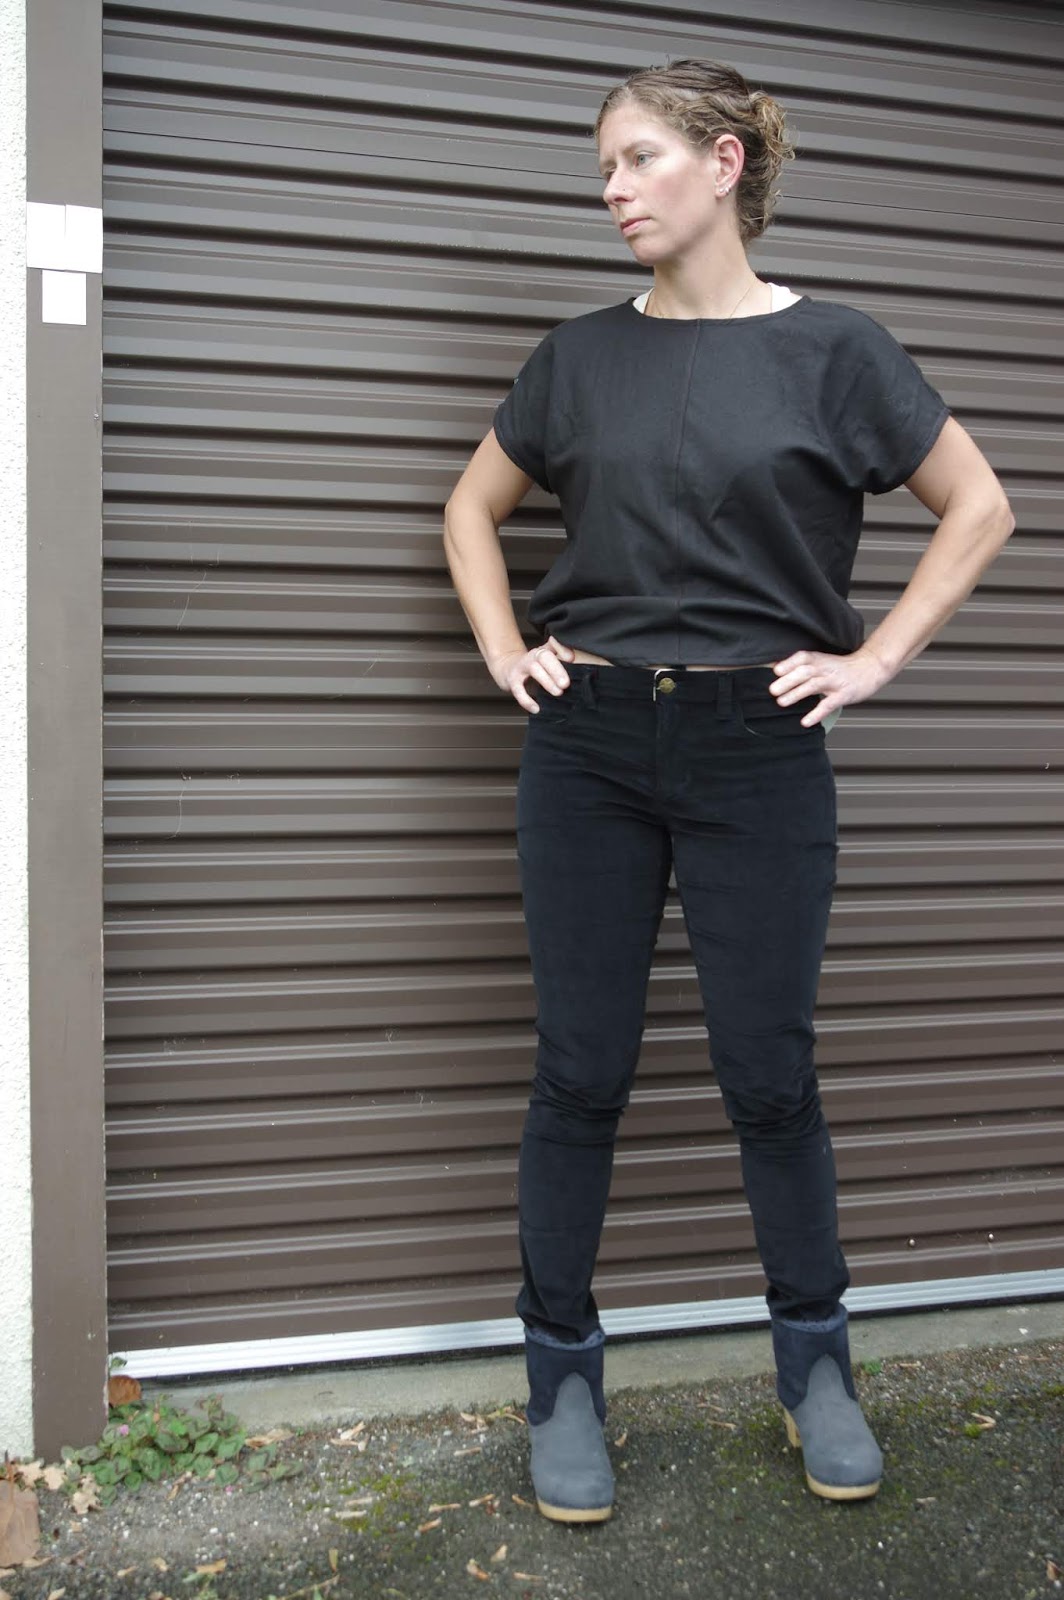
Above my navel though I have so much crotch room I could hitch them to my ribs...


The fit is not as gathered as the model.  Thus I could have sized up to an M for more drapiness.  The crotch is excessively low. I forgot to get a picture with my legs actually in a walking stance, but there are about 3" hanging down in my crotch - fine in the summer for lounging and oddly fetching in my pictures, but a pain when trying to do anything.  I had fixed this before starting on the Free Range Slacks, and in fact the patterns feel very similar in terms of fit.  So I would probably remove about 2" from the rise if I repeat this pattern.  If I hitch the pants up to my ribs the problem is somewhat improved though I suppose I probably need a more curvy crotch curve as well, I don't really have much instinct on that yet. 

Also you know these ARE the short pattern.  But I am apparently shorter even than that.  To get the effect on the model I need to raise them another 2 inches, I think. (Might help to adjust the crotch as they would sit higher.)

These were exciting to make!  I have no idea why getting a pattern from a designer is so exciting, but it is.  Hope my notes help lots more people make swishy and awesome pants.

Tuesday, 9 June 2020

Ginger jeans - midrise - review

How many years have I been planning to make these jeans?
Rhetorical question.
We finally got here. I had the pattern for ages but didn't want to cut it up while I was uncertain about the fit and the high waist, so when the mid-waist version came out I bought the PDF.  I made this mid-waist version, which on me is high waisted.

I debated sizes for a long while.
6 on the chart, 4 if you only go by the waist.
Recommendation is to size down.

I had a play with my corduroy.  It's very stretchy.  So I made the size 2.  I'm not even sure how this made logical sense.  The waist size of the 2 is 25, which is about an inch smaller than my waist, but the hips are 34 and mine are 37.  Spoiler: it worked.  I did a cheater wide calf by just widening the calf pattern on the back piece as I cut, ending up at the hem with the normal width.  I didn't do a knock knee/valgus knee adjustment, which I think I could do in jeans and never bother with.

Corduroy was splendid.  I didn't have to do any visible topstitching and that was my goal.  Before COVID I could have snuck these in as work pants (I'm an ER doctor) but now we have to launder our scrubs at work.  Darn! 

I was irritated by the instructions.  There is one error in the pattern, and I know it's been mentioned - it shows the wrong side up of one of the fly pieces I think.  My irritation is that the words in the instructions were not chosen well and were unclear.  In order to understand this fly method I HAD to use the sewalong.  When you use it, you have all the info and it's clearer.  I thought that a print pattern should have everything you need in the pattern, it shouldn't be a requirement to use a sewalong to get a basic understanding of what the pattern wants you to do. 

I really didn't like these fly instructions.  However, I think in the end the fly looks great on the outside.  I don't love the inside quite as much.  I need to do this type of fly more and see if I start to like it as I get used to it. 


Unlike most people I absolutely *hate* the pocket stay.  I didn't expect that.  My corduroy is possibly more stretchy than jeans fabric and the pocket stay is quilting cotton, so the front of my pants have wrinkles horizontally due to how the fabric wants to stretch and can't. I think the pocket stay totally takes away from the comfort and fit of stretchy pants.  To each their own!  I know lladybird switched hers to normal pockets so I'm hoping I'll be able to figure out how to do that easily enough.  I definitely will switch on my next version.  Those pocket stays made it hard to sew the front, because of how the very stretchy outer wanted to stretch, and the inner couldn't.  So I had to be really cautious as I sewed that I didn't end up with wrinkles. 

I didn't have enough corduroy to use it as the waistband lining and my inner waistband is really really stretchy.  Like, I should have used heavier interfacing.  I don't even remember if I interfaced it.  I should have.  The waistband feels loose and a little floppy to me instead of feeling stable.  Ironically it's a tiny bit too big!  I didn't take it in at all, it's not too bad.


In the end, after some usual buttonhole catastrophe torture, I have a pair of pants that fit amazingly well and I love them.  I think there's a weird extra-fabric thing going on in the front and I'm hopeful it's due to that pocket stay imbalance.  My next pair will be jean fabric and I suspect they will be tighter, so it'll be interesting to compare. 

I thus agree with everyone: Ginger jeans are great. Use the sewalong. And size down. If you are using really stretchy fabric size down even more. 


Monday, 25 May 2020

Stacker jacket by Papercut patterns

Well this has a dumb name and I keep wanting to call it the slacker jacket...that didn't stop me from wanting to make it.

I liked the simplicity. Didn't realise it was lined - I would have happily gone with it unlined but following the directions was easier so I found a nice lining for it which had been in my stash for ages. It's a quilting cotton from Hawaii. I used silk to line the sleeves.

This came together really easily. I knew from the start that I was making it for a friend.  I stopped before putting in the buttonholes because my sewing machine hates buttonholes.  It took me until lockdown to get on with it (also because I had no rush while I couldn't mail things...)

Fabric: beautiful corduroy from Miss Maude. I was a tiny bit sad to give this away, this fabric, I just can't think of what else I want made out of it.

I made this in size 3. That matched the size chart and the fit is exactly right.


I think I might have gone with too big buttons but I pulled them from my button stash and they were the perfect match.  When I finally did the buttonholes things went surprisingly well - two buttonholes were great, one was slightly messed up and the top one, where there's a nearby seam, was a hellish catastrophe.  About as expected.  I have become pretty skilled at using a bar tack to supplement all the bad buttonholes I've made lately. They look terrible but luckily are usually hidden by buttons (you know, as buttonholes are.)

I noticed that there's only like a cm between the buttonhole and the edge of the fabric, so hopefully they will hold up ok.


I keep being surprised by how beautiful this jacket is!

Few thoughts:

The sleeves are slightly dropped which makes them seem droopy to me, but definitely makes them easy to fit, because you don't need to worry much about the armscye fit like it a more closely fitting jacket.
Also, the pockets are similar to other things I've seen lately, for some reason tall skinny pockets are in vogue - they are good for storing objects, but they are bad for hands.  Just so you know.  

Sunday, 24 May 2020

Paper Theory LB top


As I was prepping this pattern, which was totally a late night spur of the moment purchase (I blame everything on night shifts!!)  I berated myself for buying another shapeless, drop shoulder top.  Don't I already have more than one similar pattern? I mean I have the Califaye Rumi top, and the Toaster sweater...I suppose they are all a tiny bit different. Meaningfully different.  Somehow.

Luckily the simplest patterns can hide some magic, and on accident I got this one right. The fabric is a knit jacquard from The Fabric Store, it's a blend with merino, but I'm not sure what else. The combo of this fabric and this pattern is just perfect. Alone I think the pattern might be a bit boring, but the fabric livens it up.  Because it's an airy pattern, it would also be good for those rather heavy warm knits, that will boil you alive if they are too fitted. 

I made size 8, which matched my measurements.

It's a very technically simple top and it didn't take long to make. I was so satisfied that I immediately riffled through my stash for a scrap to make a woven sleeveless version.


The sleeveless version is made of silk noil.  It's great!
It...also looks quite a bit like other tops I've made recently like the Strata top and the Botany top.


Here it is under the Botany top - it's wider and longer, but without the curved hem or the curved underarm of the Strata.


Overall a simple pattern that's surprisingly versatile.

Sunday, 10 May 2020

Halfmoon Atelier Strand dress in cherries

I was a pattern tester for this dress pattern.  I made the size 3, and it was consistent with other patterns by Halfmoon Atelier.  My measurements are 33-27-37. I'm 5'4" and I didn't change the length.

My dress is the first iteration of the pattern. The shoulder straps were adjusted afterwards to be slightly narrower.  The wide fit is fantastic on me.

This pattern has a v-shaped bodice which is in 2 layers, sandwiched between two shoulder straps that work as facings, and then gathers down from there in 2 layers.  

Initially I thought I would stop before the hem ruffle. But in the end I made the full length dress and I love it. The length is not quite full maxidress, which makes it more versatile (I bicycle!)  The bodice straps as facing are supportive for a variety of fabrics and they make a nice clean finish, though they are quite a bit of work.

I keep thinking I would most like to put elastic in the waist, but the tie, loosely done, doesn't bother me and so it has stayed. Usually I don't like a lot of ties around my waist, but I only put the bow on one side instead of having one on each side, and since it's loose, it doesn't need adjusting for me to pull it on.  Having the dress tied at the waist creates a really different silhouette, so it's nice to be able to go from loose to gathered.


I am lucky I got to make this dress in September and wear it for the hottest part of the year before the Making zine came out!  The fabric is rayon from Cotton & Steel, and rayon was a great match for this pattern.

Other notes are that it's important at the front V to baste each side - I did them separately, in order to have the best control.

I really love clean finishes and though you have to work for this one - you fold over the SA on the inside shoulder straps and then topstitch it down - it's really worth it.  I like how this, as a dress, gives you waistband options - it looks quite different to me when it's loose (maxidress!!) and when the waist ties are tied tighter.

The neckline reminds me a bit of the Peppermint magazine free maxidress pattern, though the fit of the dresses is quite different below there.  Here's my version.  I like both patterns - the Peppermint dress is obviously more of a shapeless sack, which can be really nice when it's hot outside. This dress takes a bit more work to make, but I think the result is more refined.